Archive for November, 2011
Tool Review: Homax Popcorn Ceiling Spray Texture
As detailed previously, I recently had the opportunity of patching a umm…vintage popcorn ceiling. I found the Homax Popcorn Ceiling Spray Texture at my local hardware store for about $10 a can. I had huge reservations, but decided to give it a shot.

Technical Details:
| 14 ounces |
| Contains actual polystyrene chips |
| Patches popcorn acoustic ceiling textures |
| Maximum coverage: 6 square feet |
The manufacturer’s product description reads: “An easy-to-use vertical spray texture will patch Popcorn textured ceilings with acoustic chips. The texture is designed to match existing Popcorn ceilings. The special nozzle provides controlled delivery for the textured thickness.”
Here’s what is true in that description: “A vertical spray texture with acoustic chips.” The phrases easy-to-use and controlled delivery are outright lies.
That’s not to say this product can’t be used for patching a popcorn ceiling. Unfortunately the learning curve is steep and the product is expensive.
I was initially interested in the product because I’ve sprayed texture with a hopper before. I made a huge mess and only started to get the hang of it towards the end. With this product – I made a huge mess and only started to get the hang of it towards the end.
This really can’t be stated often enough: the spray goes everywhere. Your eyes, hair, walls, floors, and if you’re lucky, the ceiling. There’s a cute little video on the Homax website of a gentleman holding a small cardboard box with the bottom knocked out, presumably to contain the overspray. This has no chance of working on the planet Earth.
Plan on gloves, multiple pairs of goggles, and sheeting off the work area with plastic curtains and floor covering. Here’s what my setup looked like.

First I primed the patch and let it dry overnight. I cut plastic sheets to go floor to ceiling and thumbtacked those in place. Then I used painters tape on the ceiling edge of the plastic to keep the spray from sliding underneath. More tape down the sides to seal the corners. Plastic tarp on the floor with canvas on top to keep from dragging the plastic around. Goggles (only one pair, don’t make that mistake!), gloves, ladder and cans inside the curtain.
Now the claim is you can get 6 square feet of texture out of one can. Well you may be able to, but I sure didn’t. I had 16 square feet to cover and used 8 cans (one was a dud). If I did it again, I might be able to do it in 4 or 5, which was my initial estimate.
So if you’re with me so far, you’ve bought a can per two square feet of needed coverage, obtained enough plastic to sheet off the area completely, and have a few pairs of goggles and gloves ready. (By the way, if you were with me, you should have volunteered to help me scrape the whole ceiling. Where were you anyway?)
Let’s talk technique. Each can is good for around 10 sprays IF you only use about a second per spray. If you hold down the trigger, it’s going to run out of aerosol instantly. Additionally that first spray is going to splatter (high pressure) and the last will dribble out. This isn’t a normal spray paint button, you get this screw on plastic deal that puts the nozzle between your fingers, like a can of whipped cream.
 I knew everything you’ve read up to this point and thought I could handle it. I crawl into my containment area, don gloves and goggles (and the stupid cardboard box for the first attempt – lets never speak of that again). Next step, shake can vigorously for a couple minutes. Climb ladder, put nozzle 12 inches from the ceiling. Then I mentally prepared to spray short bursts, quickly, to get as much product out before I ran out of aerosol. Pull trigger. Nothing happens. Naturally my instinct is to put the can closer to the target and pull it again. BLAM. Wet goopy stuff dripping from the ceiling. Ugh. But can’t stop, hurry, hurry, hurry. I applied about 1 square foot of thick cottage cheese and it’s just glopped on there (see the top left corner below). And 10 or so ounces of additional spray on my curtain, hands, etc.
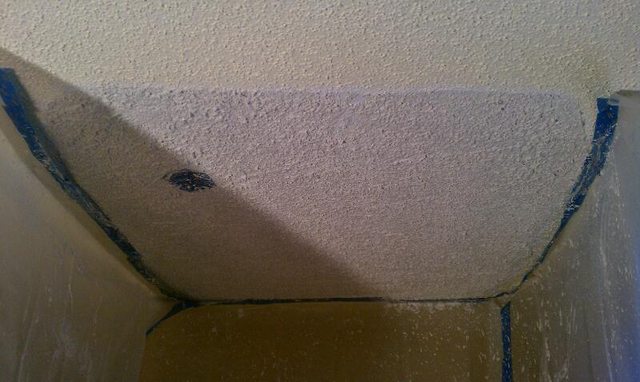
Here’s what worked for me. Hold the can 20 inches from where you’ll spray. Pull the trigger a little harder on that first spray to get it going, but keep your hand back. Keep with the short sprays and you’ll be able to cover a larger area and it won’t look as bad. If it’s too light, hit it again in an hour.
If you’ve taken the proper precautions the clean up is pretty easy. I’d recommend leaving the floor covering for a few hours as the texture takes a while to dry.
This review is pretty negative, but to be fair, this product is trying to do something quite difficult: provide a ready-to-use apparatus that can apply solid material in a vaguely liquid form while still being easy to clean up and relatively harmless. I applaud the attempt.
I’d estimate 15 or so square feet is where this product becomes cost prohibitive. If I had to patch another ceiling of less than 10 feet I would consider using this again. Anything past that – rent the hopper. Prep and cleanup are nearly the same. Considering you can practice with the hopper and not waste $10 worth of material in two seconds makes it a clear winner in my mind.
Apparently Homax also makes a roll on popcorn texture, which I didn’t know existed. Does anyone have any experience with it?
I’m conflicted on where this rating should end up. On the one hand, it’s a pain to use, but it can be used to patch a popcorn ceiling and the alternative method isn’t that great either. So I’ll say this rates one Captain Construction. Poor guy took one for the team while his buddies went off to play with the cool tools.


Talk About a Blog Overflow
I really do love reading blogs. Every morning, first thing after I check my email, I cycle through my blogroll. It’s almost zen; I click through, scroll, open in a new tab to comment or read further, and then on to the next one. I’ll routinely get through 5-6 tabs each day, commenting, reading, linking. I’ve even started sharing posts in our very active DIY Chat when the post is interesting or something that our users could offer insight into.
For a while, I was following something like 50 blogs. I’ve since managed to pare it down to 16, and this is a much more managaeable number. (You’ll see why in a sec.)

Mostly, though, it’s one of my favorite parts of the day, and I figured I should share my favorites with you all. I should note, of course, that my all time favorite blog is, of course, this one. And I’m not biased at all, haha.
So, in no particular order:

Little House Blog — Aubrey and Lindsay (the latter of whom is the author of the blog itself) are a Canadian couple with a wee one who blog about decorating, craft projects, and DIY work they’ve done around the house. Canada, right now, is something of a hotbed of DIY activity, so searching for Canadian bloggers was pretty important to me. Lindsay’s got a great voice, takes fantastic pictures (seriously, every photo is artful) and her entries are short and sweet. The best combination of things!

Bower Power — Katie runs a blog that’s as much about what’s happening in her life as it is about her home improvement projects. Whether it’s painting her dining room or antiquing a window, Katie has a great sense of humor, a really casual writing style, and a kind of tongue-in-cheek honesty that makes me laugh as I read her entries.

Making a House a Home — Joey and Lana (the latter, again, the main proprietor of the blog) are kind of my heroes. They both work full work-weeks and still manage to find the time to DIY. It’s amazing. I’m constantly in awe. Lately, they’ve been rushing to finish their to-do list so that they can (gasp) move across country! I’m loving their kitchen renovation stories, dining room painting stories, and just….I like them. Lana is particularly active on Twitter, and she’s just such a joy to communicate with. So is Joey, lest I forget him! I love that Lana and Joey are honest when they’ve messed up a project (I believe they had to repaint their kitchen cabinets because they used the wrong kind of paint) and about how difficult or easy a project has been. I also love how much they love their power tools.

Manhattan Nest — I will totally cop to loving Manhattan Nest. Aside from having one of the coolest blog headers around, Daniel is awesome. I love his voice in his blog posts. Okay, his blog posts are profanity-filled and irreverent, but I love it. He’s also really easy to “listen” to as he builds bookshelves or reorganizes his kitchen or paints all his doors black. I love his blog posts, and he deserves a bit of a bump.

Young House Love — John and Sherry are a blogging couple (yes, John blogs too!) who have been blogging for, like four years. They’ve detailed their DIY drama and triumphs and even though I’ve only been following along since August, it feels like far longer than that. I’ve enjoyed watching them do everything from potato stamp the inside of a closet to building in a 13-foot desk. The entries are amazing, with pictures and step-by-step explanations (including products used!) as well as a little silliness along the way. Plus, Sherry will personally reply to comments and tweets, it’s amazing. (This is remarkable because entries can rack up as many as 600 comments for a particularly fun entry.) Plus, John and Sherry have been a joy to work with in the past. Great entries — and frequent ones! — along with fantastic content makes YHL possibly one of the best DIY/home reno blogs around.
So, my top five-but-unordered DIY blogs….that aren’t this one. 😀 I kind of love reading them so much. Some are better at updating than others, but all of them have great content and great people behind them. So grab a cup of coffee/tea/hot chocolate, your screenreader of choice, and settle in for some DIY goodness. Happy readings!

Intro Post — No Drills, Please!
When I volunteered for the DIY blog, I mostly did so ’cause, well, I’m easily persuaded? All joking aside, I’ve been a blogger for a long time, and I really like the DIY community, so an occasional contribution from me seemed like the least I could do.
For those who don’t know, I’m a Stack Exchange employee (scroll down and you can see me) that works as part of CHAOS. Mostly, I’m here to help DIY get to a point where it’s 100% self-sustaining.
So far, DIY’s traffic has pretty much looked like this:

Which, awesome! My job is to help get DIY to a kind of critical mass, where traffic explodes and the site becomes self-sustaining. I do this mostly with promotion-work, interfacing with the community, and getting passionate users to act as brand ambassadors.
But what does that critical mass mean, exactly? Honestly, I couldn’t tell you. It’s something we all feel more than know. It’s also the kind of thing that usually isn’t obvious until well after that fact. My gut, though, tells me we’re close – we’re really close! And that, friends, is plain awesomeness.
Aside from that, however, I’m something of an armchair DIYer. I grew up watching This Old House and various shows on HGTV (I know, I know) with my mother all throughout my adolescence. Nowadays, I’ve learned better (thanks, team) and I’ve been able to offer advice to friends who are debating refinishing vs replacing. And suddenly, Craigslist and the Salvation Army are treasure troves of potential! It’s funny, sometimes, how your job can change your perspective that much. It’s nice, though — I see potential everywhere.
For your time:

The Replacements – Swapping out windows in 2 hours or less
So I thought — “hey, you’ve got two replacement windows that need replacing – you should do a blog with a title like ‘The Replacments – Not the movie starring Kenau Reeves (however its spelled)‘”
Then I wrote the title and it looked dumb. Then I tried “The Replacements – Replacing old replacement windows with new replacement windows”… Yuck. “Replacing Replacements With Replacements” didn’t work either.
So I gave up. The title you see is the title you get – boring, isn’t it? Anyway – this is my second window focused article – and this time, it’s double hung!
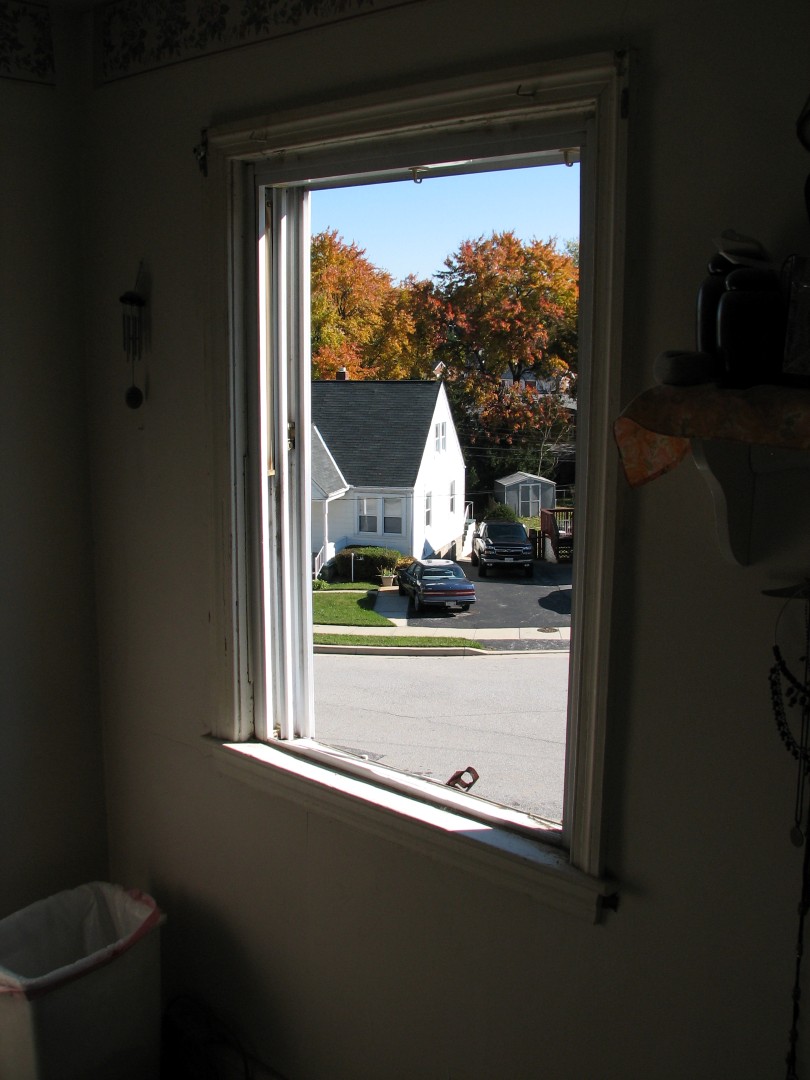
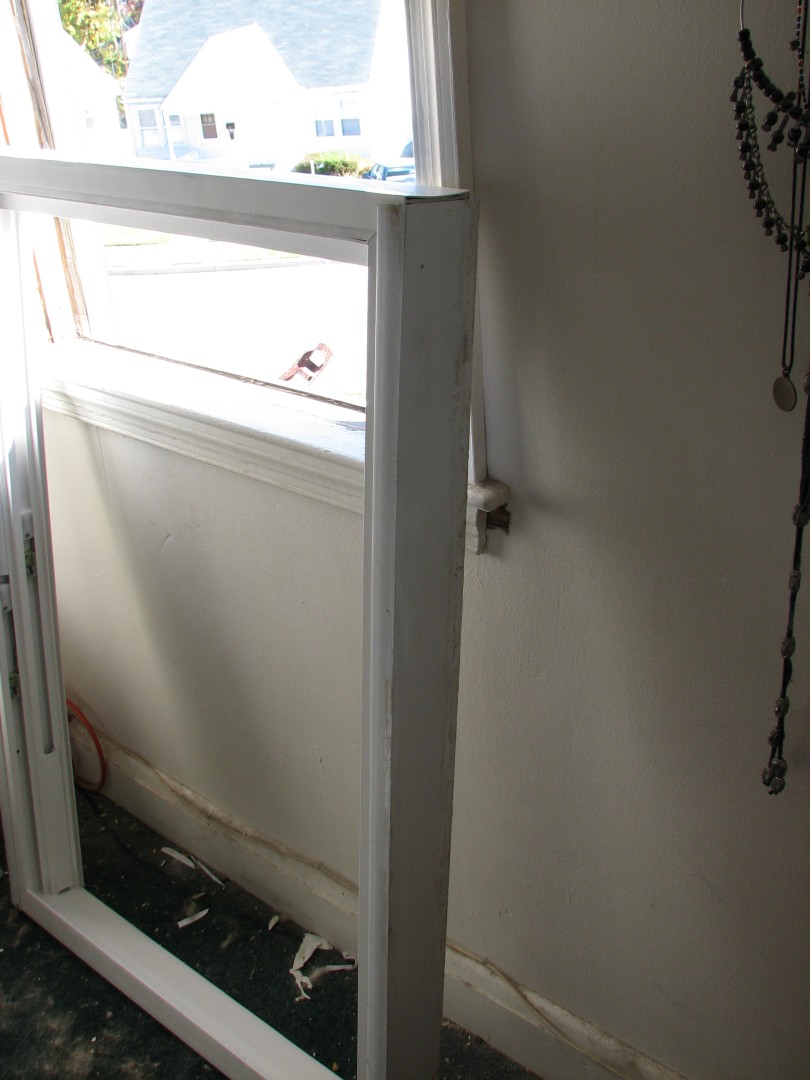
We have a lot of replacement windows in our house that we didn’t install. I don’t know who did – but whoever did should be taken out and flogged. I’d never seen custom made replacement windows that didn’t properly fit their frames, until we moved in here. Several of our windows don’t lock properly, because the windows aren’t quite perfectly sized, so the lock never lines up. This we’ve lived with for some time – but of late, our windows are starting to fail. The clips holding the windows to the tension rods (the spring loaded bars that keep the windows in position) are failing, and when they fail, NOTHING is holding that window closed, except…

Yep – a piece of wood. Isn’t that awesome?
(By the way – this is our office window. Some genius forgot to take good “before” pictures – the bedroom window featured in the near future in this blog was actually worse…)
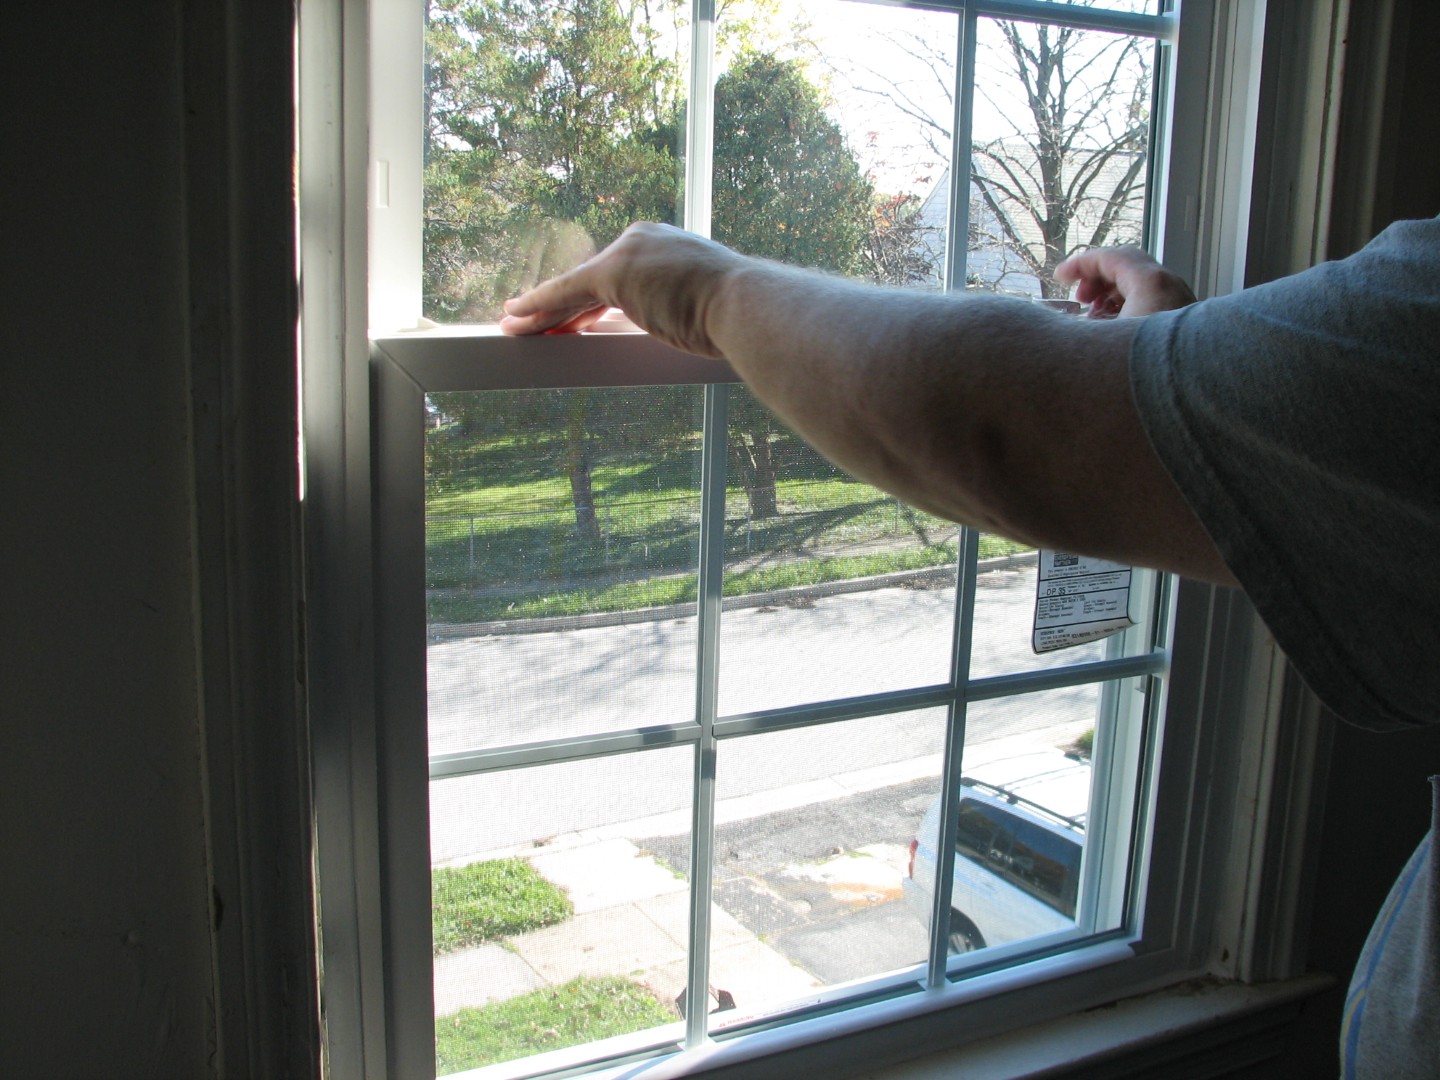
And of course, the window doesn’t exactly sit properly, so the top of the window looks like this:
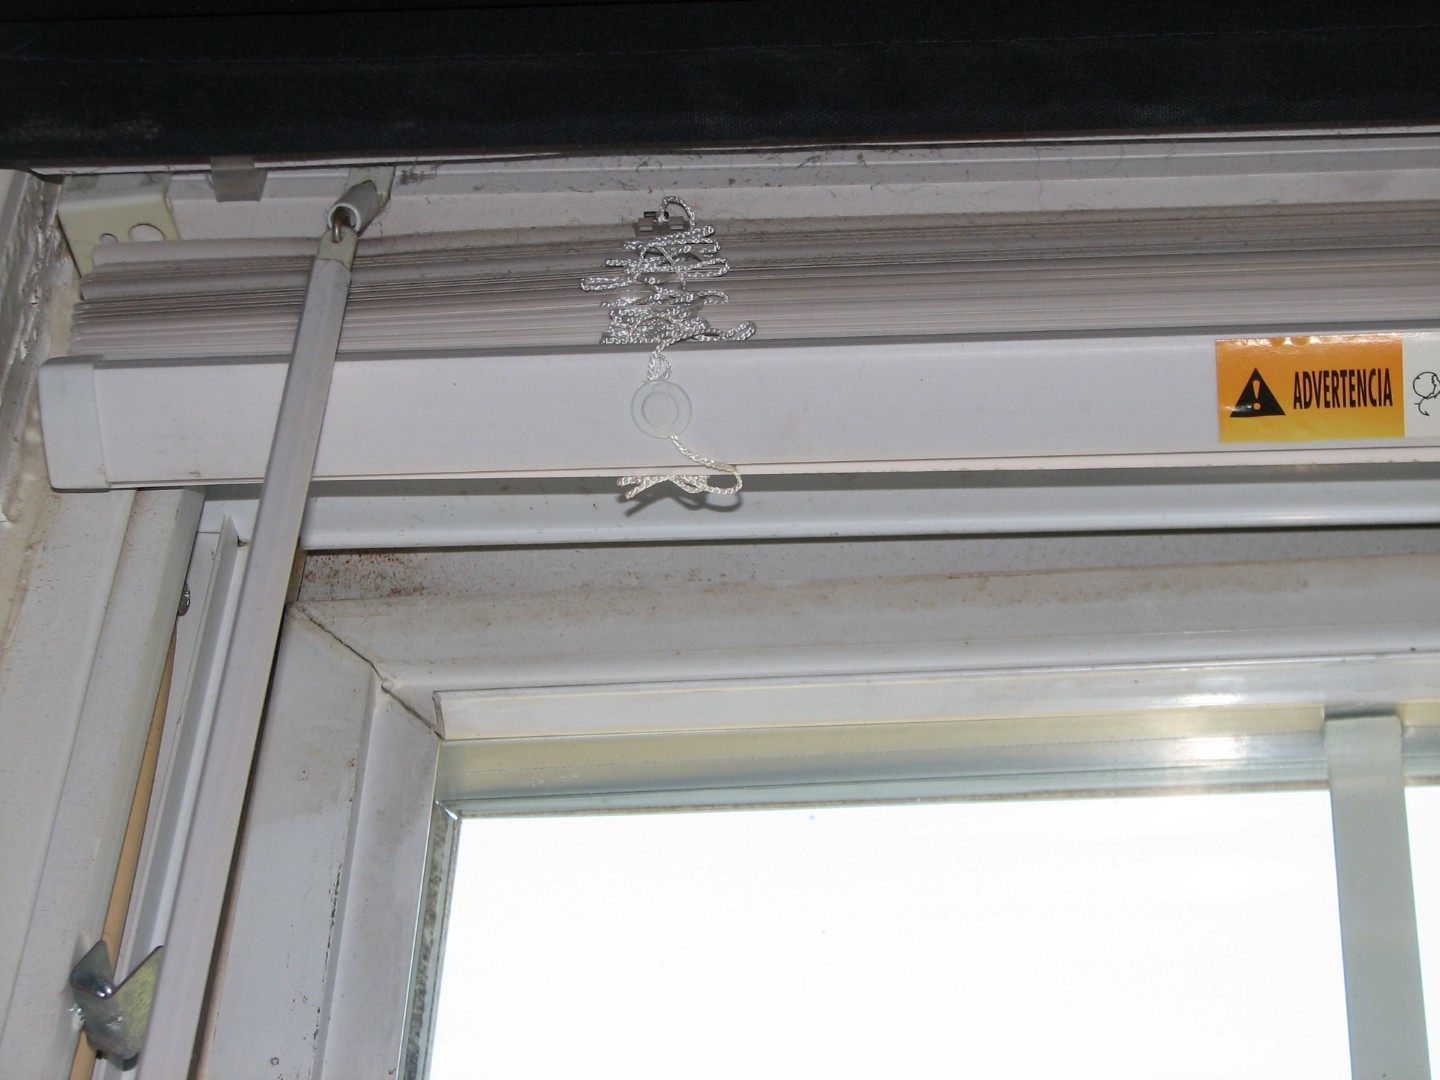
If it isn’t immediately obvious – look below the blinds, and you’ll see the irregular gap between the window pane and the frame. Talk about your heat loss!
Unfortunately, Congress hasn’t approved the “Evil Greebo TARP Bailout” program, so we’ve been limited in how fast we could buy replacement windows, but the GOOD news is, as we are able to bring them in, they go in fast, because we’re replacing replacement windows with new replacement windows.
So – here’s how it went.
First, I had to remove the old window. Our window tension clips have failed, so this was very easy, as all I had to do was remove the supporting wood and the top pane of the window fell to the bottom of the window at the speed of gravity:

By the way – I actually had to stop and go back and re insert the window pane so I could take this picture, because I forgot to start taking pictures right at the beginning of the project. I really wanted to show you just how bad this window was, but I wasn’t about to try and re-hang the dang thing just for a few pictures, so you’ll have to trust me, it was bad.
Ok, so how do you remove those panes, you ask? At the top of the pane are two clips. They look different depending on the model, but they’ll be right here:
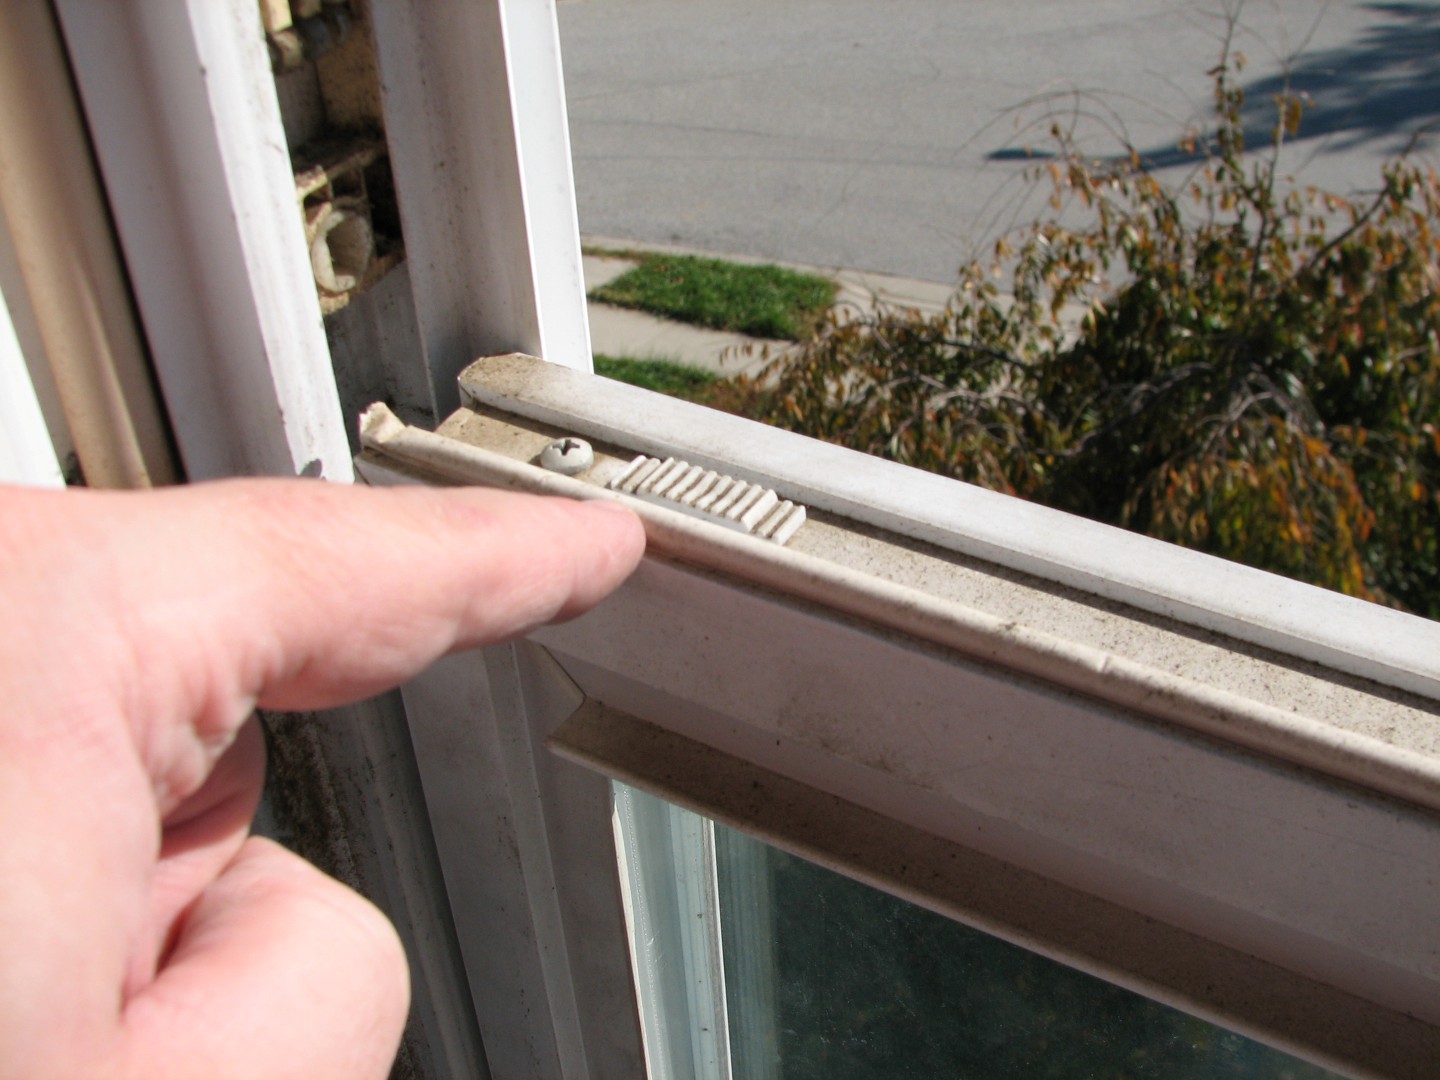
See? Right there by my finger. At the same time, open BOTH clips by sliding them towards the center of the window, and fold the window down towards you like so:

Now, husbands, if you get stuck at this point, ask your wives, because they’ve all done this hundreds of times in order to clean the windows, a task men are incapable of because, well, quite simply, we don’t care if the windows are dirty anyway, too much light blocks out the TV screen.
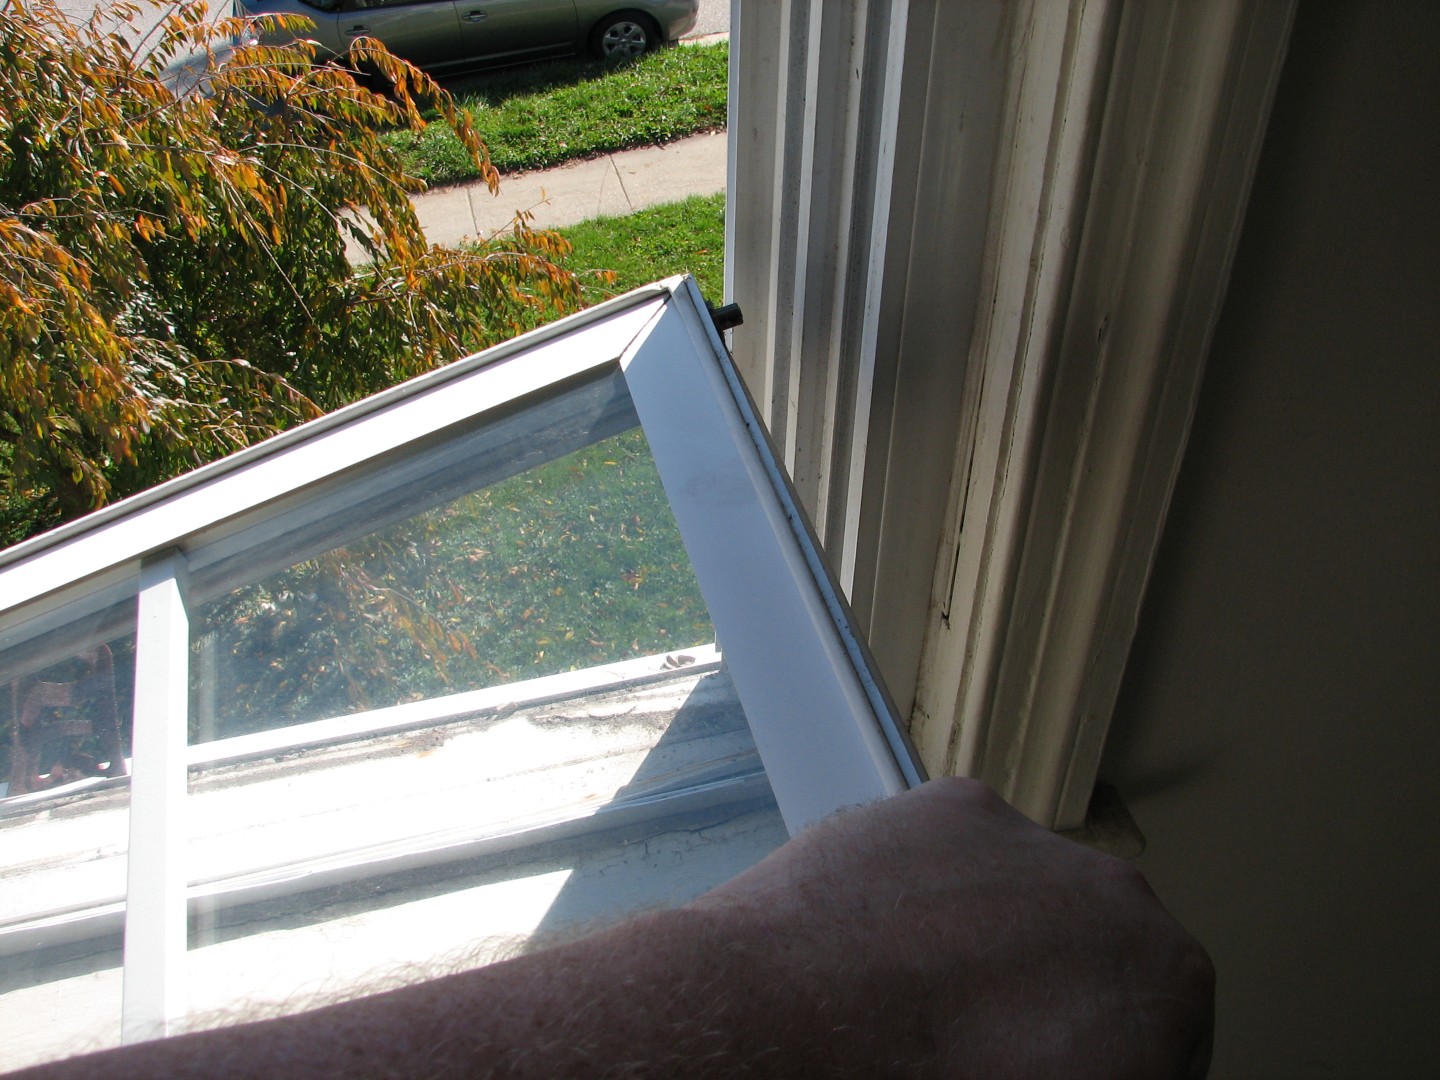
After you fold the window down to a 90 degree angle level with the floor, twist the window so that one corner lifts up and out of it’s clip, and the entire pane should then lift out easily.
A windowless window:
By the way – note how my neighbors windows look so clean and neat? I’m so jealous. On the other hand, I can park properly…
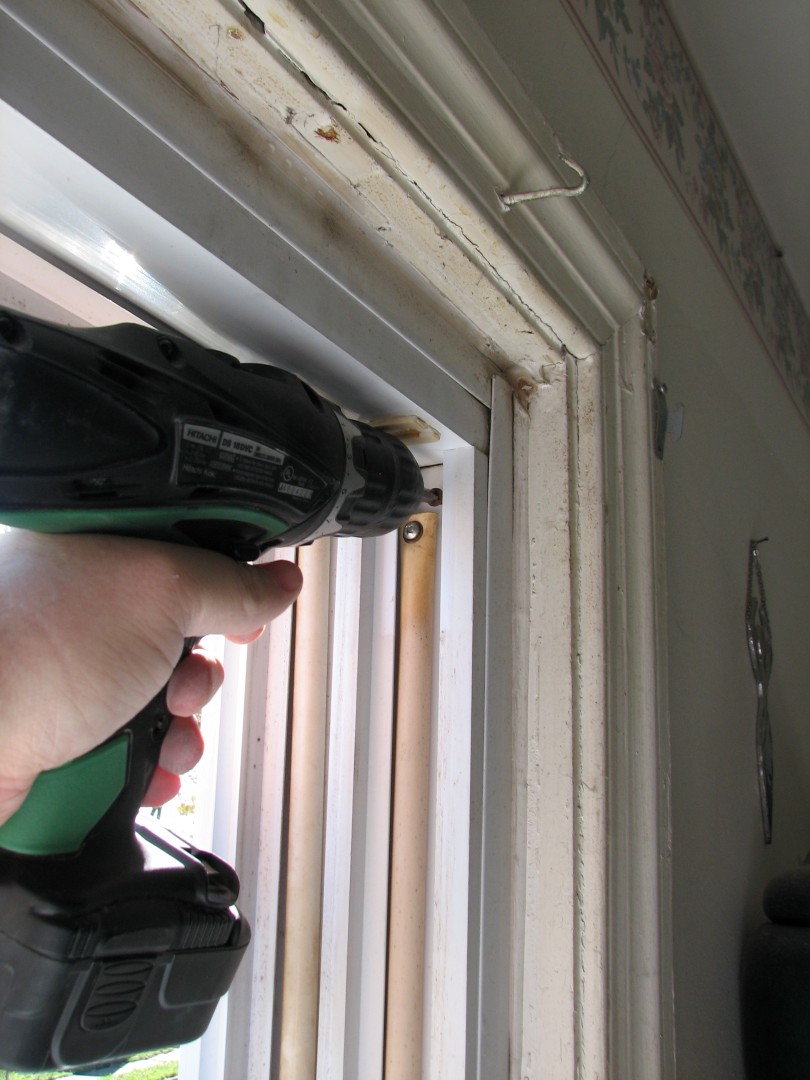
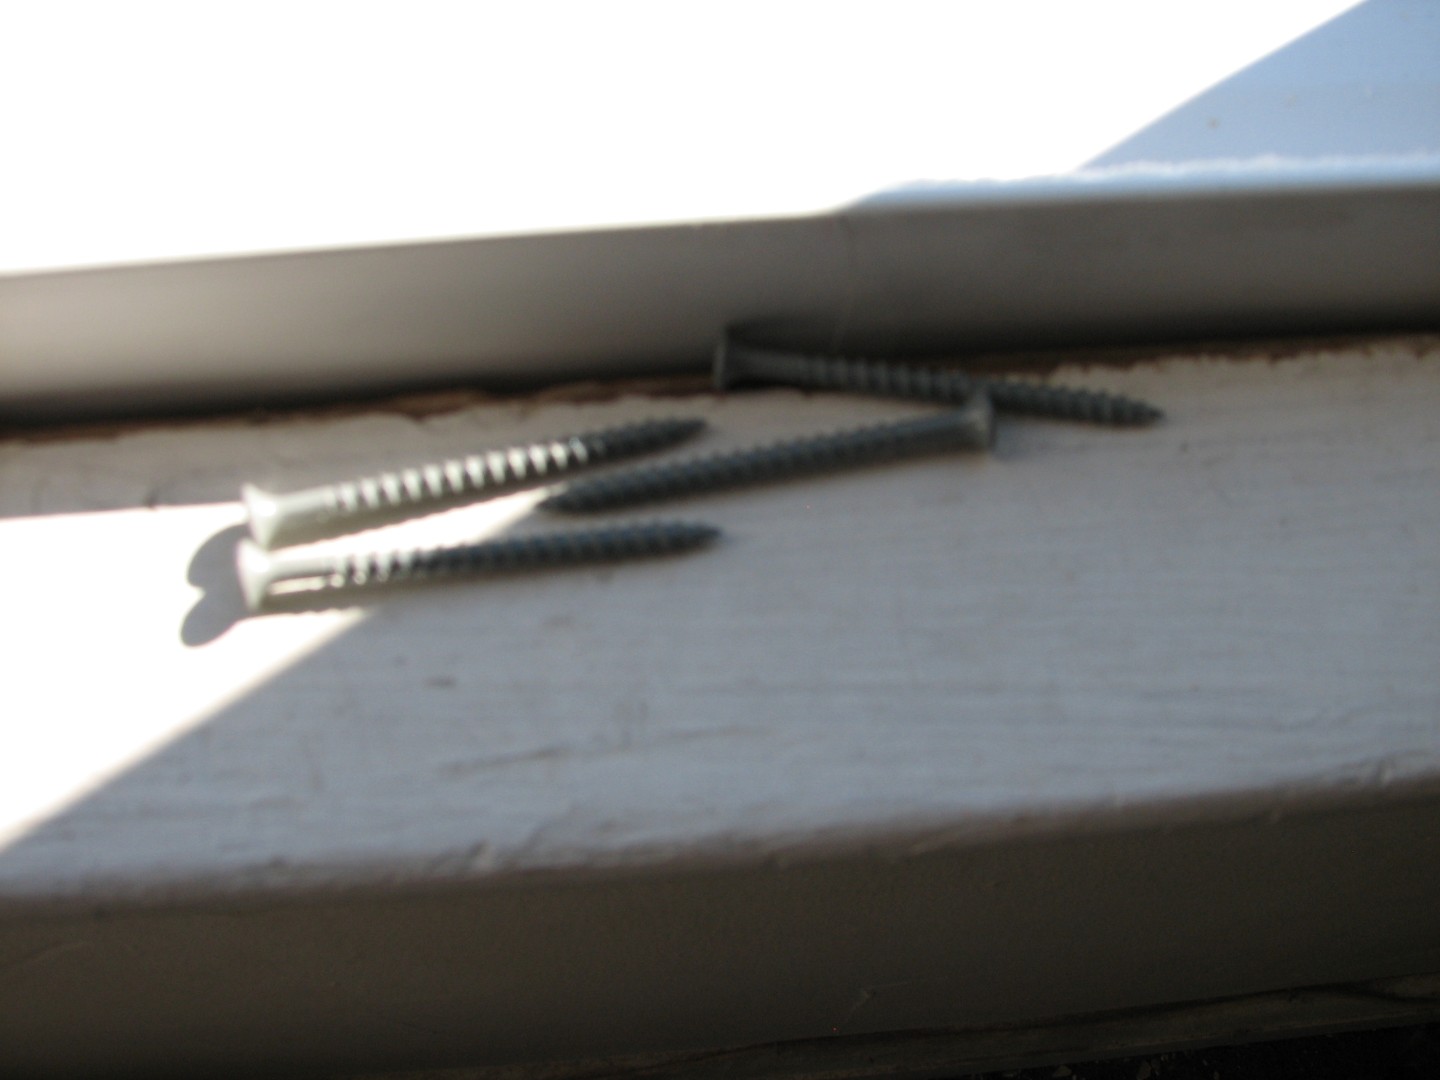
So next up, since I was replacing replacement windows, I needed to remove the old replacement frame. Inside the window tracks themselves, at each of the four corners, are four screws:
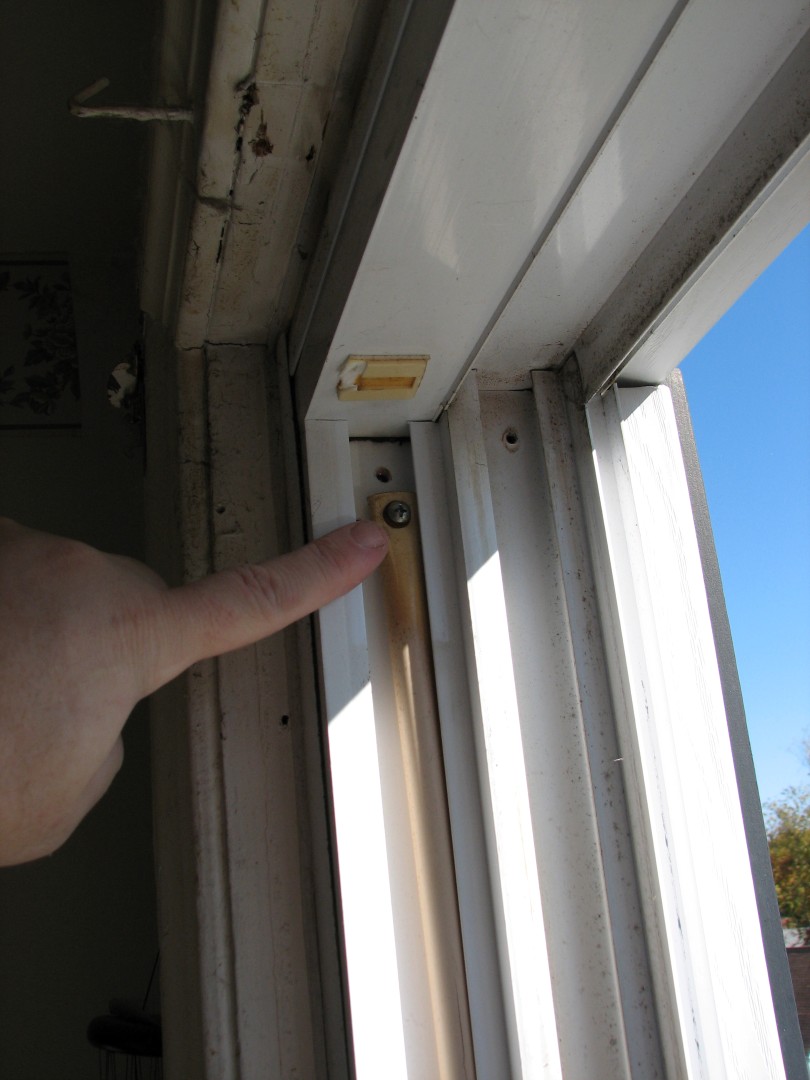
I’m actually pointing at the tension rod in this shot – look at the hole ABOVE my finger – the one with no screw in it but lots of rust stains.
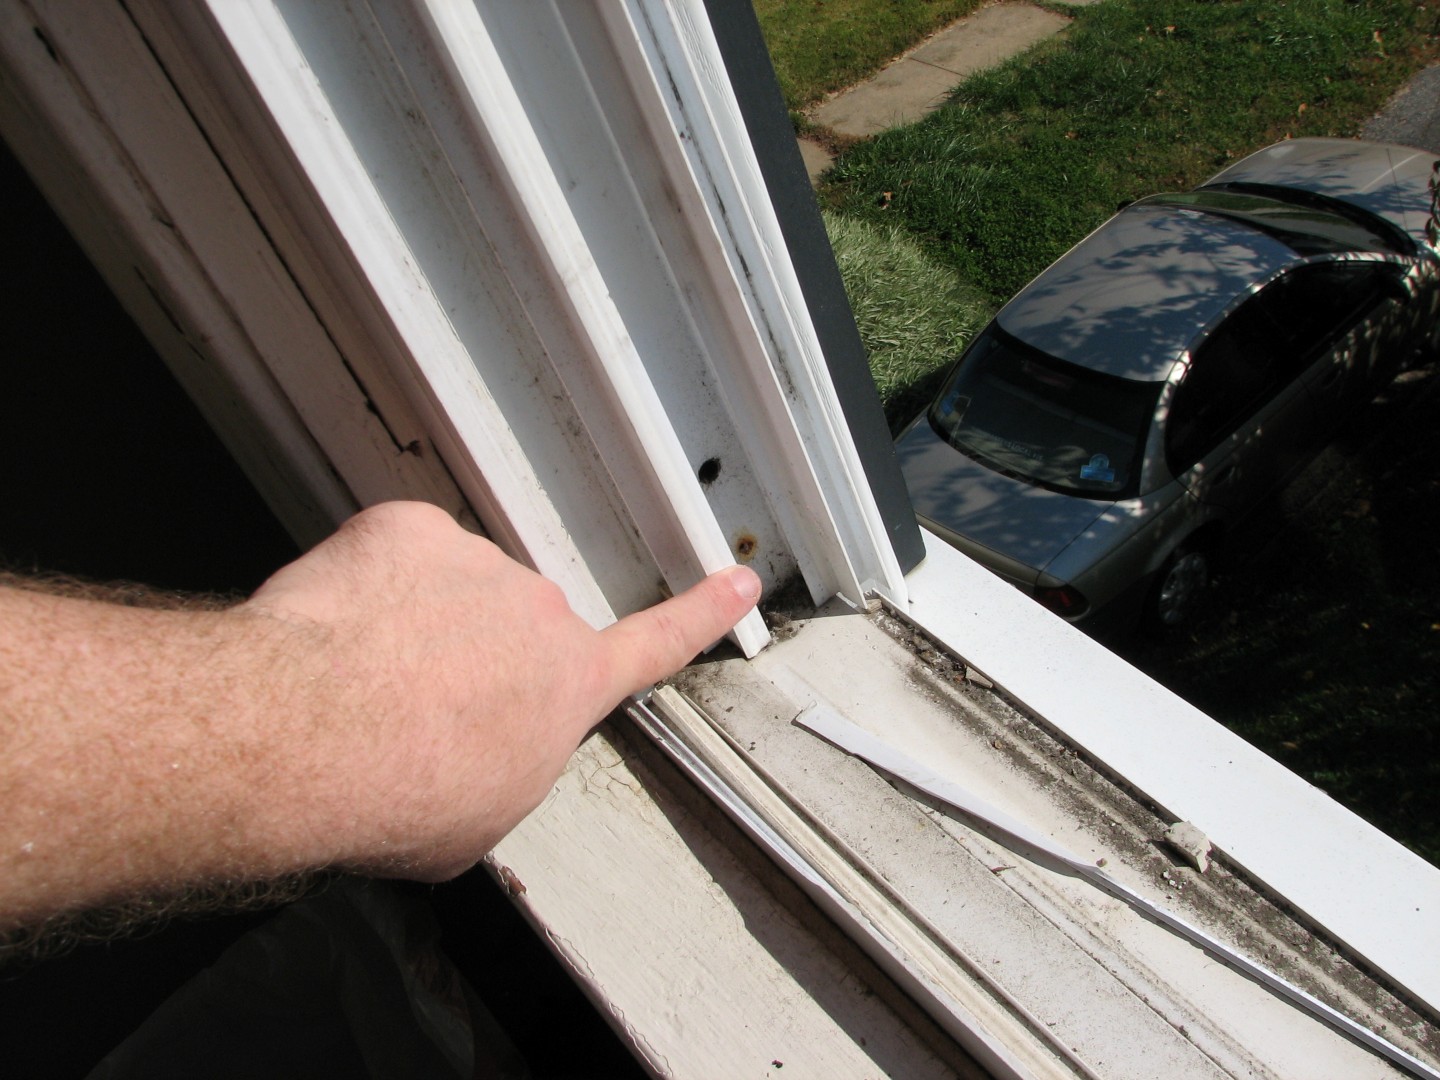
As you can see here, I’ve already removed the rusty screws for your convenience.
Here’s what they look like PRE removal (and by the way, guess at which point in the project I finally said to myself, “Hey, lets take pictures!” – Here’s a hint – this is window #2 of the day…I’m such a genius…)
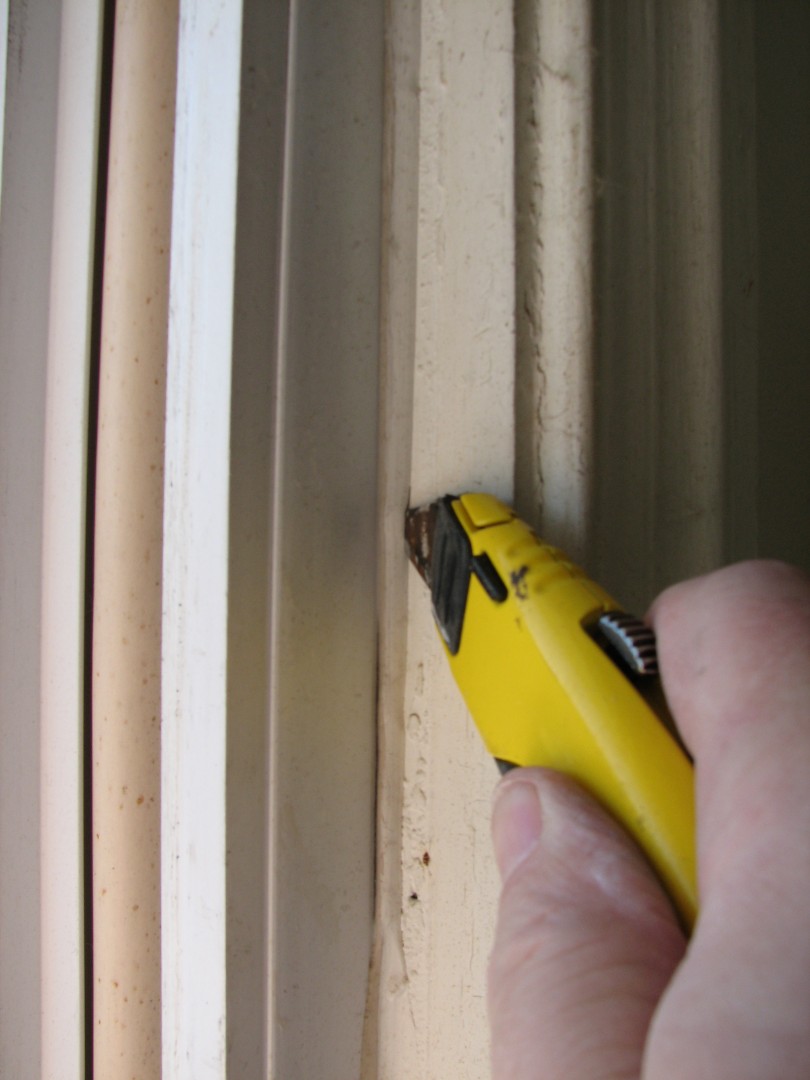
I removed the screws, and then well, see how where the old vinyl frame meets the old wood frame, there’s caulk? Normally that’s good, because it helps support the window and prevents leaks, but NOW its bad because, well, it helps support the window, and you are NOT getting that window out very easily if the caulk is still there. So, using a handy dandy utility knife and 1″ scraper I stripped the caulk or at least cut it to break the seal:
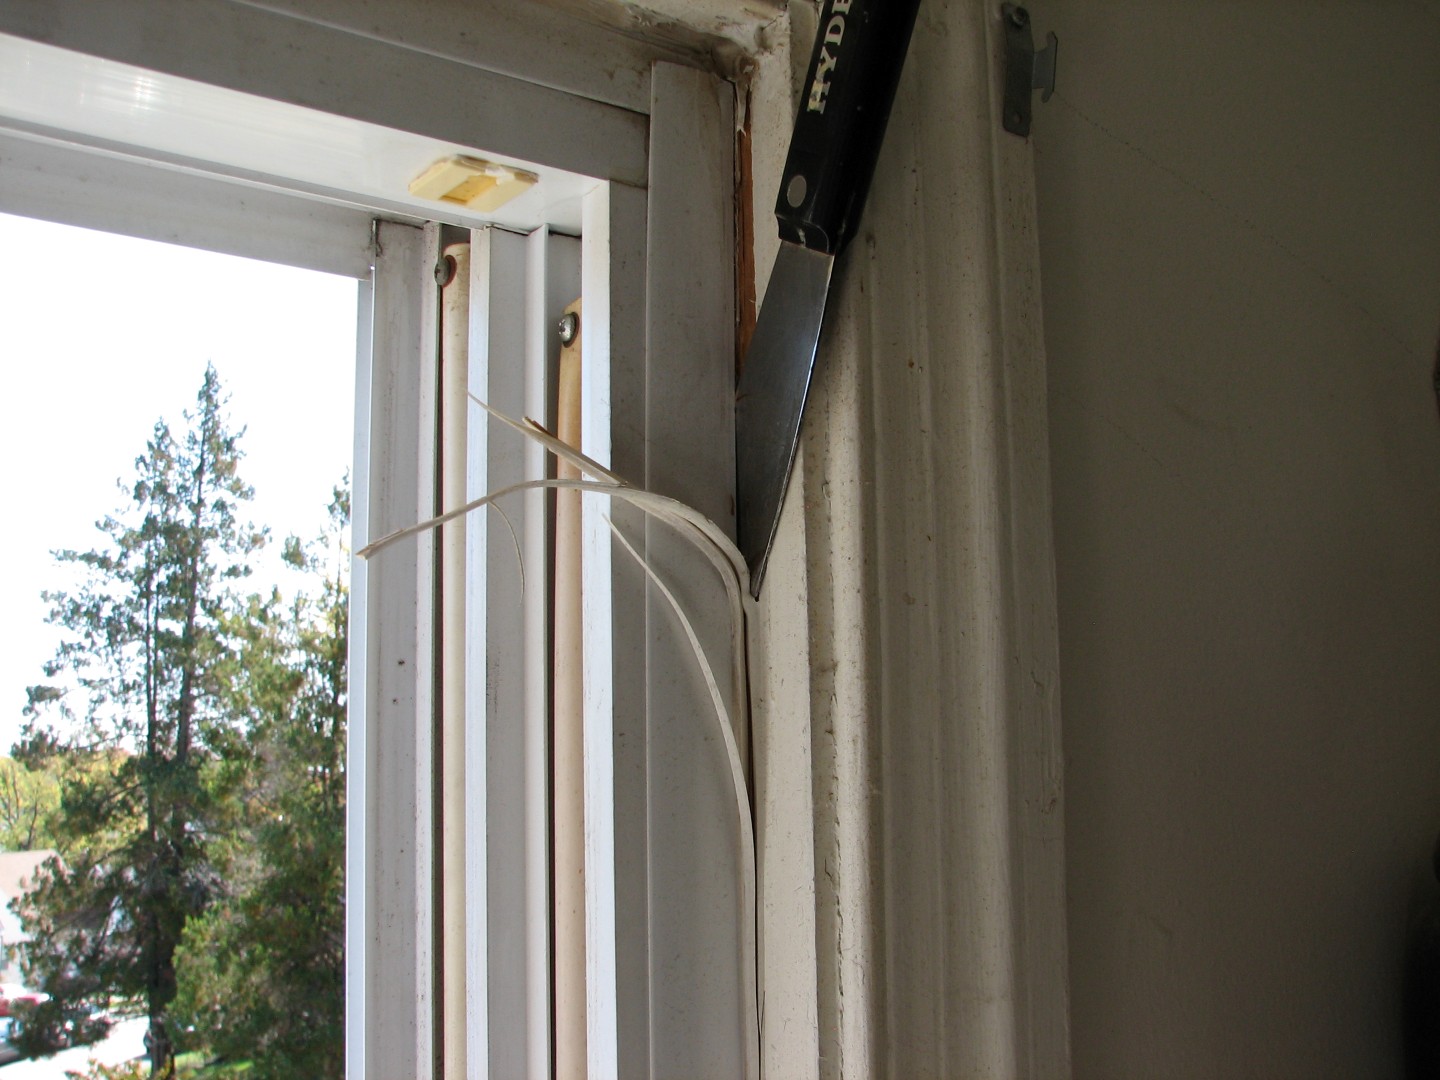
And then gingerly applying brute force, I yanked that old frame out of the wall. Care was necessary though, because I did want to save those vinyl channels the old window was sitting in.
So once the window was out, in this case, I wanted to re-use the vertical side channels because they provided a nice clean look that didn’t require adding a lot of trim, but they were a MESS:
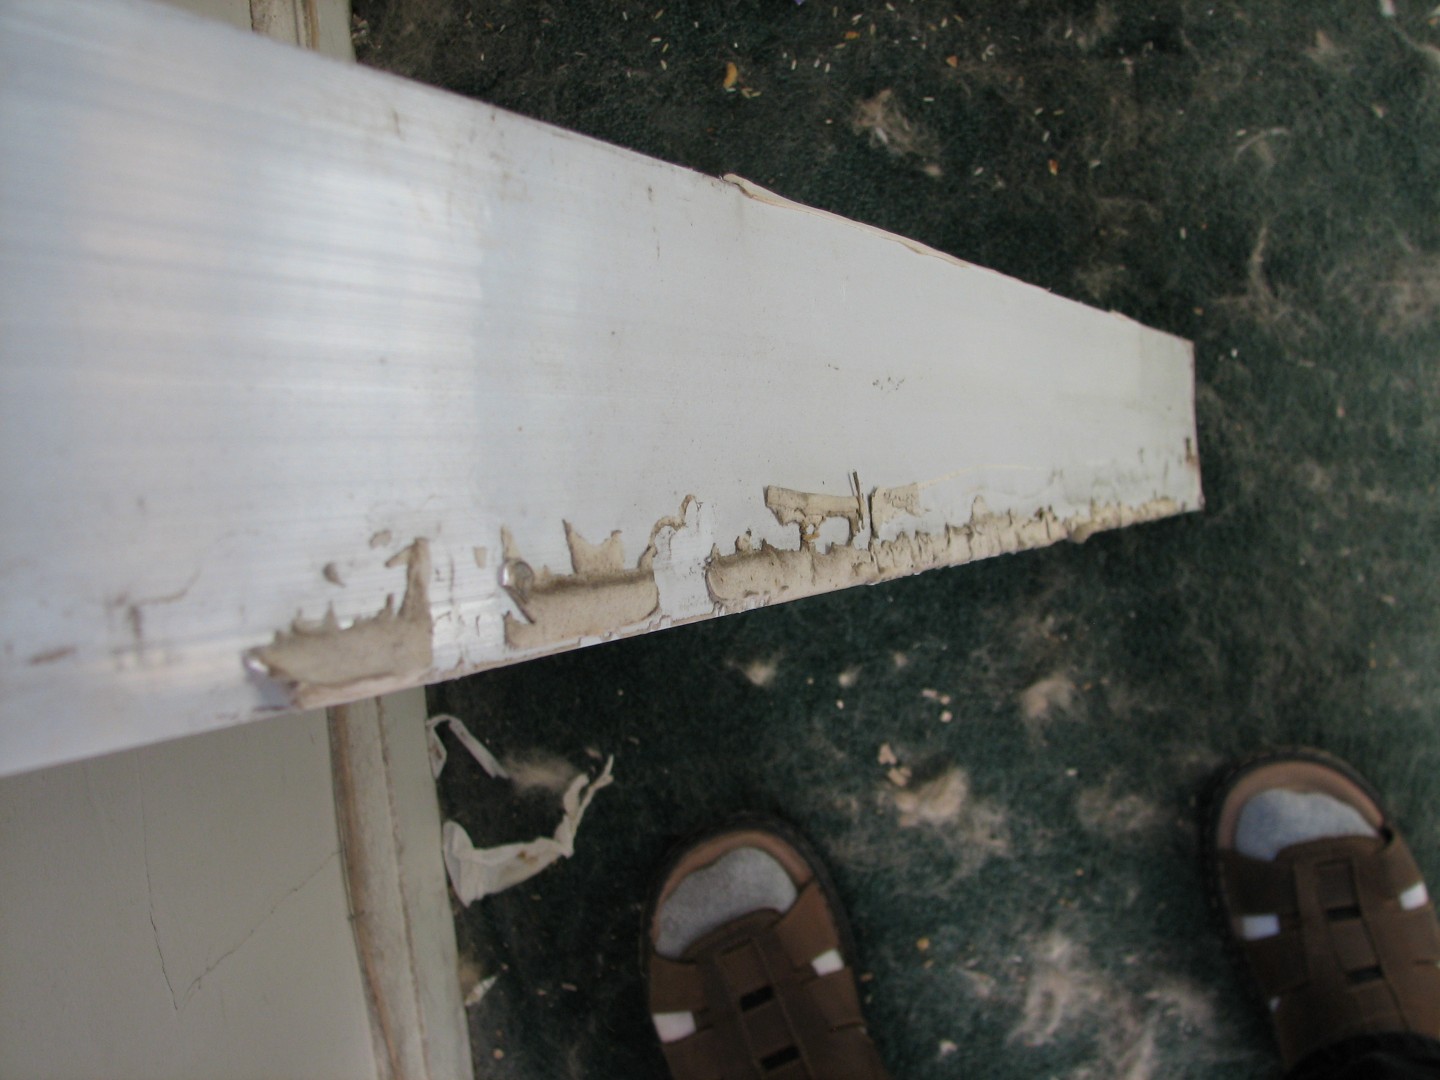
Yes, I wore tube socks with sandals. It was cold, my toes need protecting!
One of my favorite tools, the Bosch multi-tool, was PERFECT for cleaning this up:
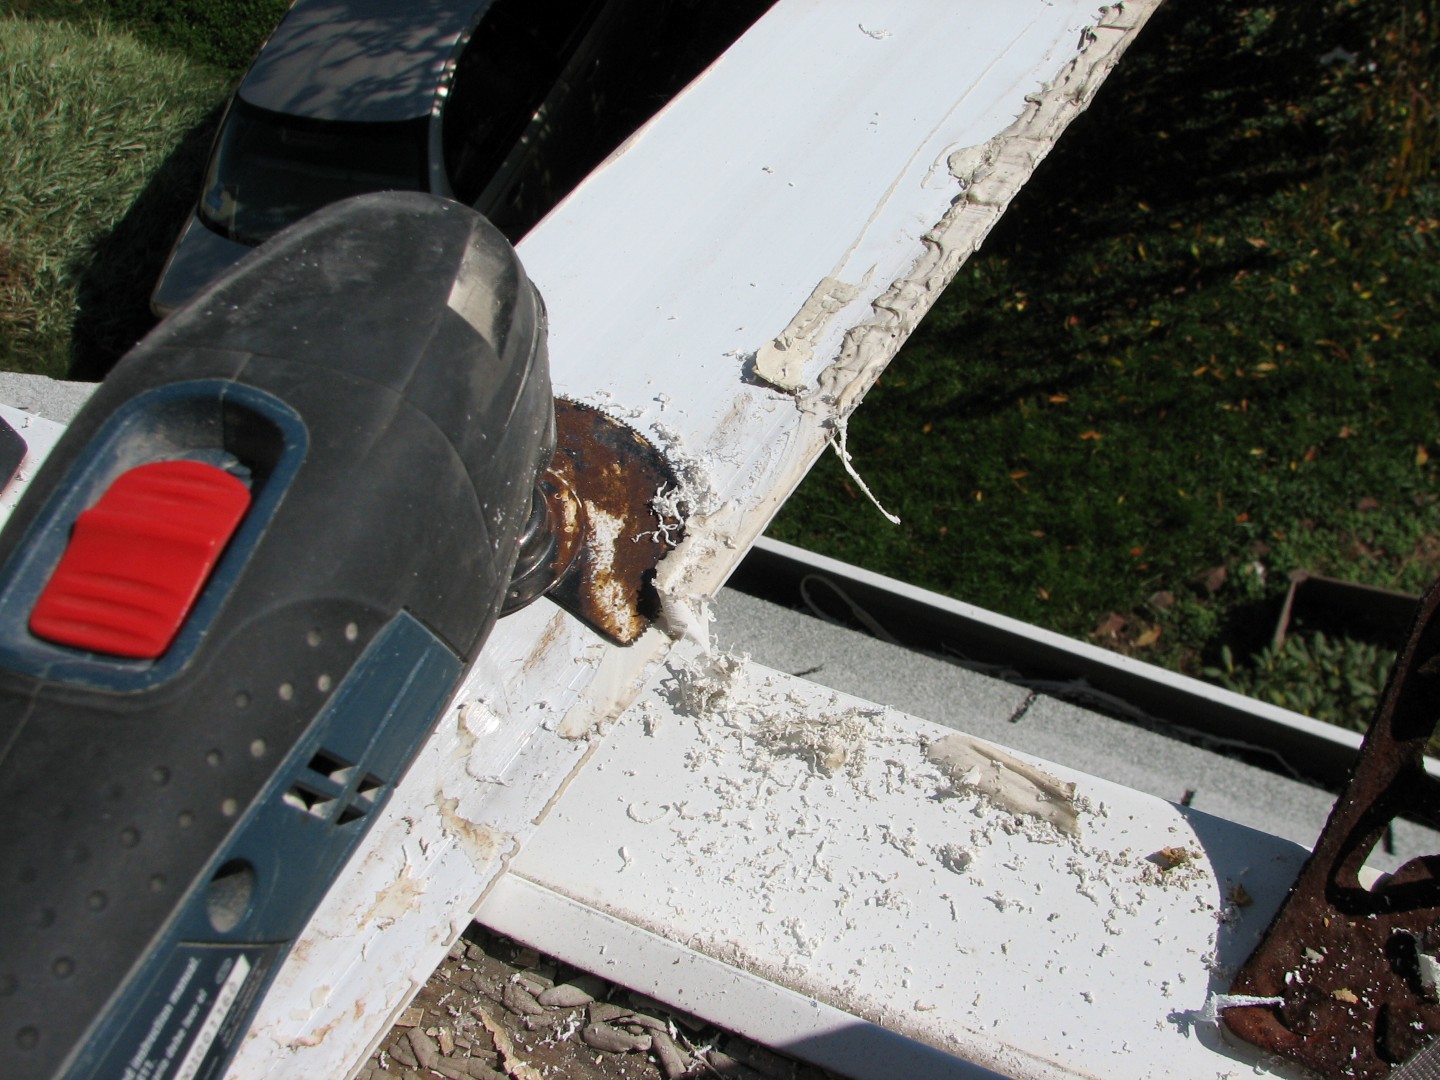
So pretty soon I had a nice clean channel to reuse:

Well, clean enough. 🙂
I’ve learned the hard way about dry fitting. For the uninitiated, this is the step where you put everything in place BEFORE you attach any glue, adhesives, screws, etc. Trust me, nothing sucks worse than getting the adhesive all spread out and then figuring out the piece you were installing doesn’t fit.
Here you can see, I’ve slipped the vertical and horizontal top channels onto the frame. The horizontal channel goes over top of the vertical channels on the outside of the frame, so on the inside, the vertical covers the horizontal. This is done so that if water hits the frame, it’ll run down off the top and onto the side pieces on the outside, rather than get inside the window frame.
And now, a gratuitous shot of one of our dogs, Lacy. She doesn’t like renovation work – the tools scare her.

See how nervous she looks? Or hungry. Probably hungry and nervous that I won’t give her food.
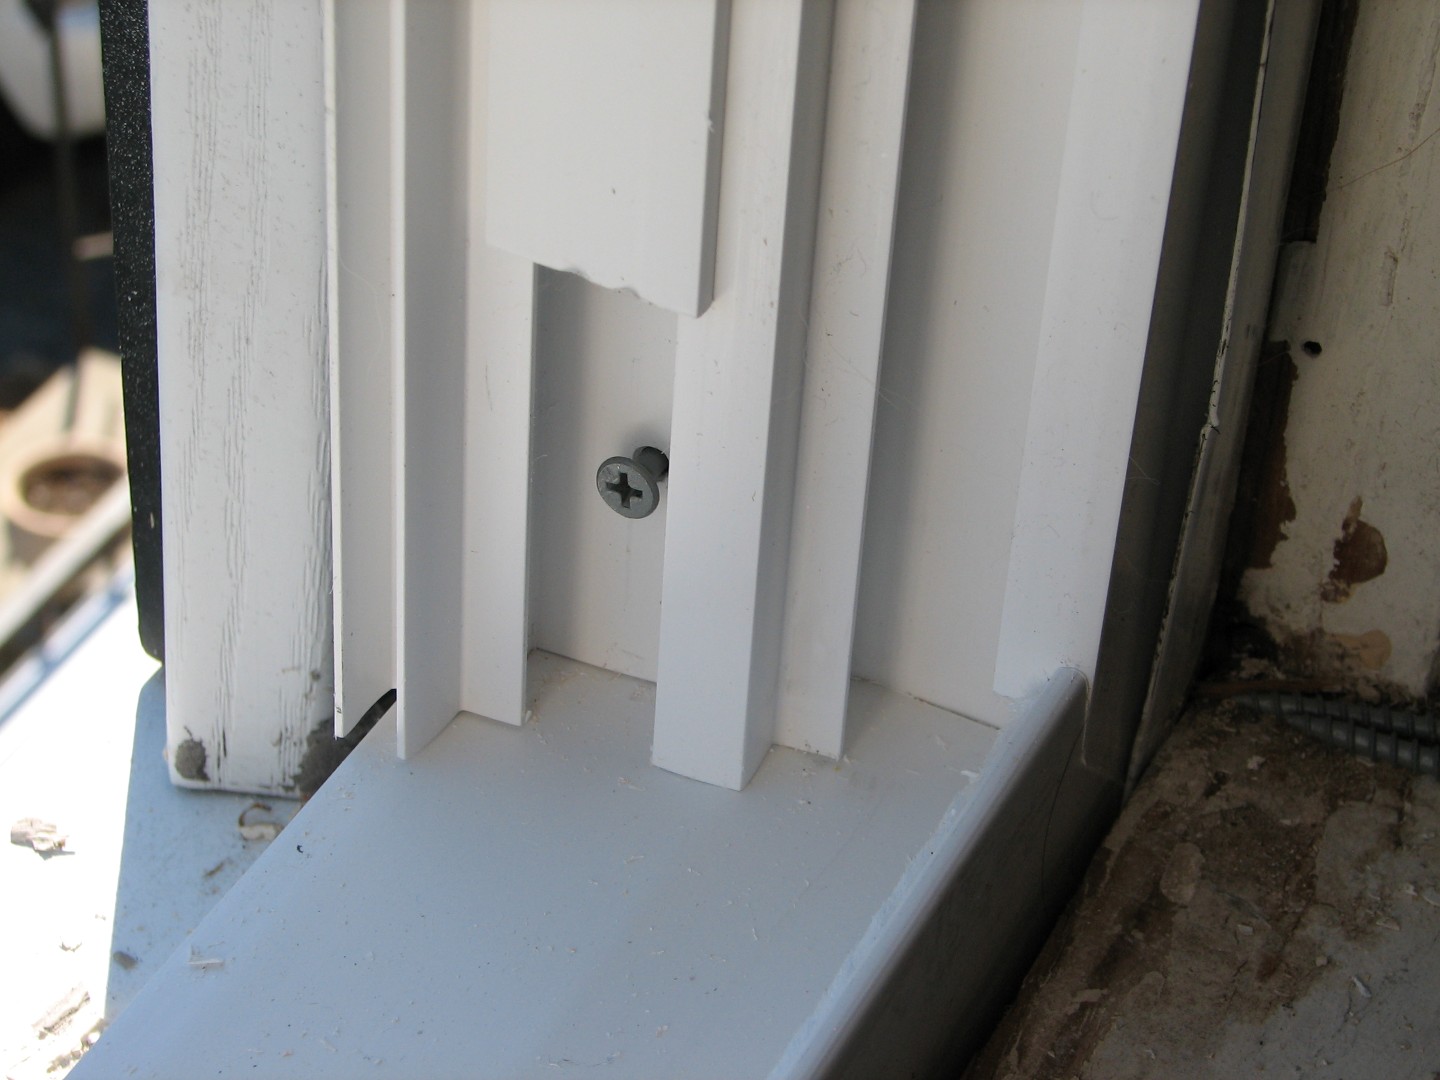
Ok so after test fitting the window, which was a perfect fit, it was time to make a more permanent install. Now you saw the rusty screw holes – shockingly enough, windows get exposed to water, so its smart to use weather proof screws:
These are 2&1/2″ coated sinkers. Since this was a replacement window and I preserved the original sill, I put the frame back in the window and pulled the base forward as much as possible, then anchored one screw in the bottom at each side. If you do this, DON’T tighten the screw much – just get a bite in the frame. You need to be able to adjust the window for square and level and if you tighten them up, you’ll be sorry.
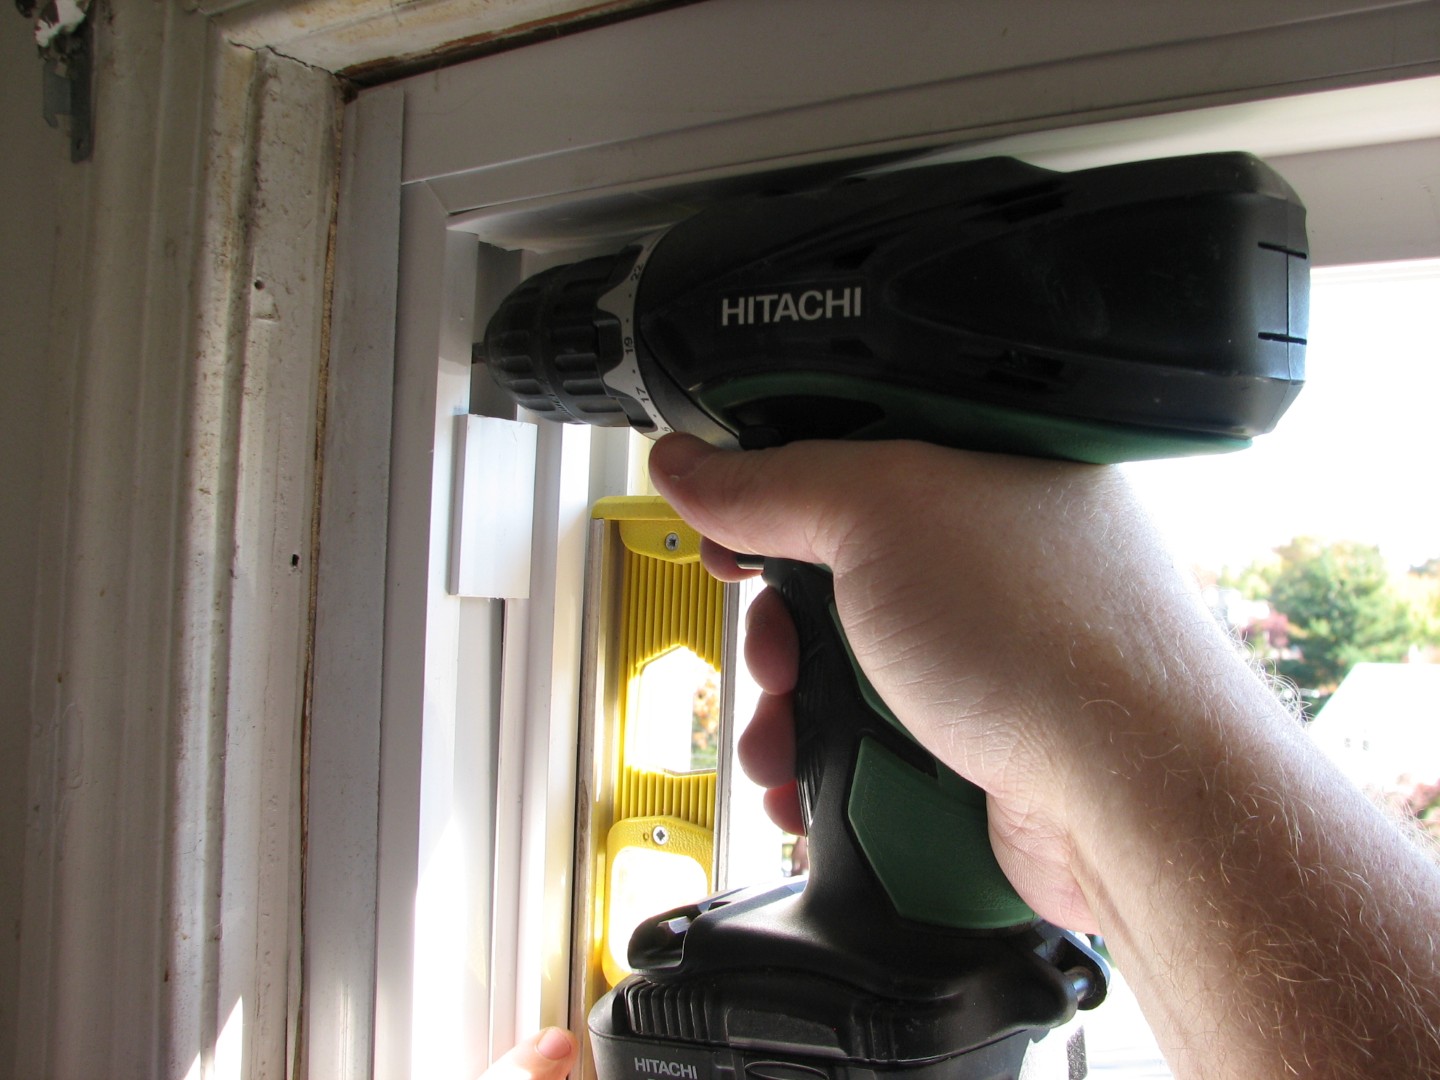
Next was getting the frame plum (ie: vertically straight) :

Once the frame was level it was just a matter of carefully tightening the screws on both sides to get it internally plum and perfectly rectangular.
After that, it was a pretty simple matter of caulking (inside and out – nothing like hanging out the window of a 2nd floor building…)

installing the screen and the two new window panes:

And finally, the blinds:

And viola! Two new replacement windows in the bedroom:

Lacy was exhausted! And so was I, but our new windows make our bedrooom warmer, quieter, and the low-E glass means less heat-loss in winter and the AC doesn’t need to work as hard in the summer! In fact it’s been so warm, we’ve got to crack the windows at night…
I’m sure that’s ironic somehow…
Hammer safely!
G

Learning from Habitat
Back in 2001, I entered the life of home ownership (wow, has it really been that long). While I had helped around the house while growing up, my entire tool set consisted of a small power drill, flashlight, and a tool box with a hammer, some screw drivers, and a few other odds and ends.
Knowing that I was over my head, and that every contractor around would try to overcharge for the simplest things, I figured I’d learn by doing. And rather than doing things to my own place, it seemed a lot easier to learn on someone else’s place, which is how I came to work with my local Habitat for Humanity chapter. I figured I’d learn a bit from them while giving back to the community and then I’d tackle all the projects around my own home, but Habitat quickly turned into a habit.
Since starting with them, I’ve been involved with 45 new homes and one renovation. Of the new homes, 9 were town houses that were almost done when I started, 3 single family, and thee condominium projects resulted in the bulk of the homes. I’ve seen the projects from top to bottom. Planting sod, drilling for earthquake bolts into the foundation, and painting the yellow lines for the fire lanes (apparently the big box stores sell fire lane yellow) would round out the bottom. Installing insulation in the attic and standing on a step ladder that’s on top of 3 stories of scaffolding to put the last piece of siding on the top of the gable would be the highlights of the highs. From beginning to end, I’ve seen the first walls raised to the last bit of touch up paint applied.
The experience has been unbelievably helpful for understanding what I can and can’t do on my own home. It changes how I see the walls from “that’s a nice shade of paint” to “it looks like they bumped this out to run an air return here.” In other words, it’s trained me to see the structure, to understand where the utilities are run, to know what walls are load bearing, and to understand all the layers of an outside wall. And since I’ve been there so many years, it’s also taught me how to pass this knowledge on to others quickly so we can get a fresh set of volunteers productive when they may have never swung a hammer before in their life.
There are, however, some things that this experience hasn’t taught me. We outsource the pouring of the foundation, all of the utility work (electrical, plumbing, hvac, and wiring), and we bring in the pros for the entire roof. A few detail steps are also outsourced, like mudding the drywall and installing carpeting, since they are easy to get wrong and the mistakes are very visible. For safety, we’ve also cut back on having volunteers high up on ladders. We have a professional handling the permits and dealing with the contractors. And finally, there’s a big difference from building a home vs maintaining a home. So despite how much I’ve learned from Habitat, there’s a significant amount that I’ve had to learn elsewhere, especially from Stack Exchange.
For now, I’ll leave you with a quick progression of one of our builds:


Tool Review: Milwaukee M12 Cordless Multi-Tool.
For a long time I’ve avoided purchasing an Oscillating Multi-tool. I thought they were gimmicky, flimsy, and not as useful as advertised. I used a cheap no-name brand multi-tool in the past, and was not impressed by its performance. Turns out the “Multi-tool” market has grown rapidly, and the products have gotten a lot better. I decided it was finally time for me to give this tool a second look, and I am fairly impressed by what I found.
Most every major power tool manufacture now has their own versions, and for the most part the name on the box is a good indication of how well the tool is built. Prices range from about $50.00 – $300.00; I opted for a middle of the road offering, and picked up the Milwaukee M12 Cordless Multi-Tool.
What’s in the box:

(The bag looks much pinker in this picture, it’s actually red).
The package I purchased contained:
- 2426 M12 Cordless LITHIUM-ION Multi-Tool
- Adapter
- Wood Cutting Blade
- Sanding Pad
- (5) Assorted Sanding Sheets
- (2) M12 RED LITHIUM Batteries
- 30-Minute Charger
- Contractor Bag
Technical Details:
| Voltage | 12V |
| Variable speed | 12 Settings |
| OPM (oscillations per minute) | 5,000 – 20,000 |
| Charge Time | 30 Min |
| Length | 10-7/8 in. |
| Weight | 2.1 lbs. |
At $99.00 (Home Depot) it was near the lower-middle end of the price range, but that doesn’t seem to be an indication of quality. The tool feels good in your hand; it has a little beef to it and doesn’t feel flimsy at all. The rubber coating provides a good surface for gripping the tool, so there is no chance the tool will slip from your hand while you work. It has a healthy whir when switched on, and doesn’t bog down at all when loading up. It gets to work cutting or sanding, without any hesitation at all. The included adapter allows it to work with accessories from most other companies, so there shouldn’t be any problems finding bits to extend the tools usefulness. The biggest selling point for me, however, was the lack of a cord.
It has a speed adjustment on the side, which was slightly stiff at first but loosened up after being used a bit. The speed adjustment wheel is not placed well, which makes it slightly awkward to adjust while in use. The On/Off switch is also poorly placed, and is difficult to interact with while holding the tool in a working position. A locking trigger switch near the bottom of the tool would be much more convenient and easier to use. Switching from bit to bit is slightly cumbersome, but this seems to be a poor design aspect of this type of tool. Another design aspect overlooked was a hook or loop, so the tool could be hung from a tool belt. It has a protrusion just above where the battery connects (underside of the tool), to house a screw. It’s too bad they didn’t design some type of metal ring that could connect here allowing the tool to be clipped to a tool belt. The design of the tool could defiantly use some improvements, but it seems to fall in line with most tools of this type.
I found the battery slightly difficult to load/unload, but once it’s in place there is no fear of it accidentally being dislodged. The battery indicator on the side of the tool is useful, letting you see how much use you have left. It also provides various indications that the battery is low, the tool is too hot, or that the tool has shutdown due to overload, binding, or stalling. The tool seems to throttle down when not under load; which I’m guessing is a battery saving mechanism, though I couldn’t find any documentation that described this behavior. It came with 2 batteries and a 30-minute charger (that actually charges that fast), so down time waiting for a charge is limited. The batteries don’t last long, however (15-25 minutes), so expect to make frequent trips to the recharger.
And by now you’re thinking, “That’s all well and good, but HOW WELL DOES IT WORK!”.
I used the tool first for repairing damage in a plaster and lath wall. If you’ve ever had to cut lath, you know what a pain it can be. This handy tool cut the plaster and lath no problem, and did it without damaging any of the surrounding plaster. Cutting the hole for a new gang box in a drywall patch was a breeze, it cut the hole faster and cleaner than a typical jab saw. With that job complete, it was time to search the garage for other things to cut and sand.
Once in the garage my eyes immediately set on a scrap piece of pressure treated 2×4, so I clamped it into the vise and got to work. It took a little bit, but I was able to cut through the 2×4 rather easily. I was really impressed at the quality of the cut, it was fairly smooth and would require little sanding if this was a finish cut. This tool is definitely at home around wood, and would be handy for lots of woodworking projects.
The next item up required a trip to the local hardware store, since the package did not include a blade for cutting metal. Once I acquired a blade, Bosch OSC312F 3-1/2 in. x 7/8 in. BIM Flush cut Wood and Metal Blade ($25.00! @ Home Depot), it was time to cut some steel.

I tried cutting a variety of nails, screws, and bolts; but found that anything thicker than a finish nail took quite a bit of effort to cut. I decided to try cutting out a hole in an aluminum soffit cover, for a receptacle I plan on installing in the future. It took a bit of effort, but once I made the original plunge cut the rest of the cut was fairly easy. Maybe there are better blades available for cutting metal, but with this blade, cutting metal was a chore.
The final challenge was sanding, and as expected it did a good job at it. As advertised, it fit into tight spots and corners fairly well. It may not be the best tool for large sanding jobs, but it is definitely useful for those small hard to reach jobs.
All in all, the Milwaukee Multi-Tool performed rather well in my testing. I couldn’t see it replacing any specialty tools: circular/jig/reciprocating saw, angle grinder, orbital/palm/belt sander. It is quite a handy tool, and would be a good addition to any tool box. It excelled when working with wood and drywall/plaster, but next time I have to cut metal I won’t be reaching for this tool. Despite a few minor design imperfections, it does have sturdy construction, is versatile, and performs fairly well. I’d rate the Milwaukee M12 Cordless Multi-Tool 3.5 Captain Constructions out of 5.


Introduction: Adding on a New Room
I have been writing blogs for about 2 years but mostly the previous blogs I have been involved with are politically related.
I have enjoyed DIY for most of my teenage and adult life. So, when I came back from a 12-month stint in Iraq, I had some extra money that I could use to add on to my home.
Luckily, adding on wouldn’t be that hard since there was a preexisting trussed roof over the screened patio I planned on enclosing. By enclosing the new room, it gave me an additional 170 sq ft. As it turns out, during construction of the new room, my 15 year old air conditioning system also bit the dust. While I am still paying for my new Trane XR15 with heat pump system, it has saved me tons of money on my electric bill every month since being installed – and I now have an air conditioned 170 sq ft addition – which I wasn’t originally planning on doing.
On to the pictures!

Before constructing the new room, I hired an architect and engineer to certify the blue prints. Being a stickler, I obtained a legal permit through my local city for this construction. During the architect and engineering phase, it was determined that a suitable hurricane-proof footer must be poured along the existing foundation. Seeing as this house was built in 1983 – and the hurricane codes were not as up to date as today – this step cost me more money than I had originally intended to spend, but doing things the legal way led to less stress in the end.


When I had hired a masonry contractor to provide me with a quote, one thing he mentioned was that since we were going to use so much fiber-crete concrete that why not just pour a patio slab outside the new room? It made sense because for the amount of money you end up paying the concrete company to come out and deliver concrete to your home, you might as well use it up.
In this construction, you can see several bars. The brownish color bars are rebar and that helps fuse the existing slab to the new slab. The silver bars are two and half foot long all thread rods from Lowes, cut to length. This is where the pressure-treated 2x4s will attach with a nut and two inch washer later on.
You can also see the sliding glass door that will ultimately be removed to make the room flow better.
The fiber-crete concrete was something new introduced to me by my architect. This concrete requires no rebar mesh. It is infused with fiberglass and makes it stronger than any concrete fused with rebar. It is a little more expensive but easier to work with.
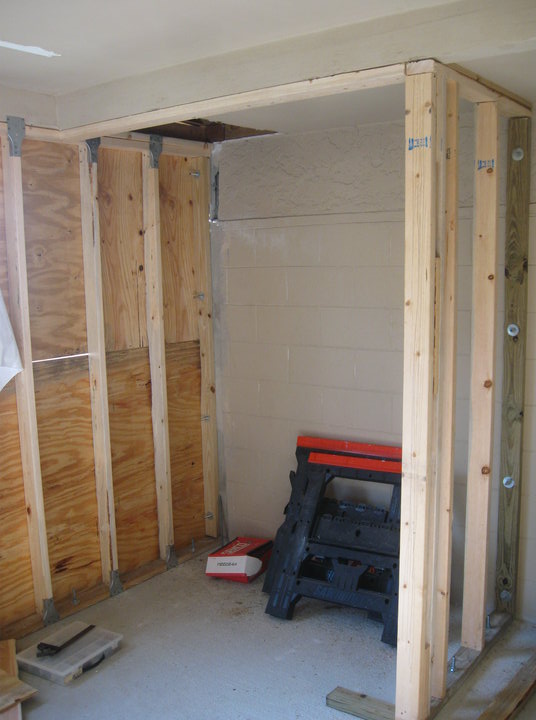
I’m going to skip ahead here a little bit since I didn’t take pictures as much as I would have liked. Here, you can see the pressure treated 2x4s mounted as I said previously. The corners are also attached to the adjacent wall using the same all thread rods cut to length, epoxied and then attached with a nut and two inch washer. The top and bottom plate are attached to the walls by SP1 and SP2 plates that are required by hurricane code. Pressure-treated plywood is used and in the picture above, you are looking at a 4 ft deep by 6 ft long closet. Next to the closet is an alcove we designed to have as a computer area.
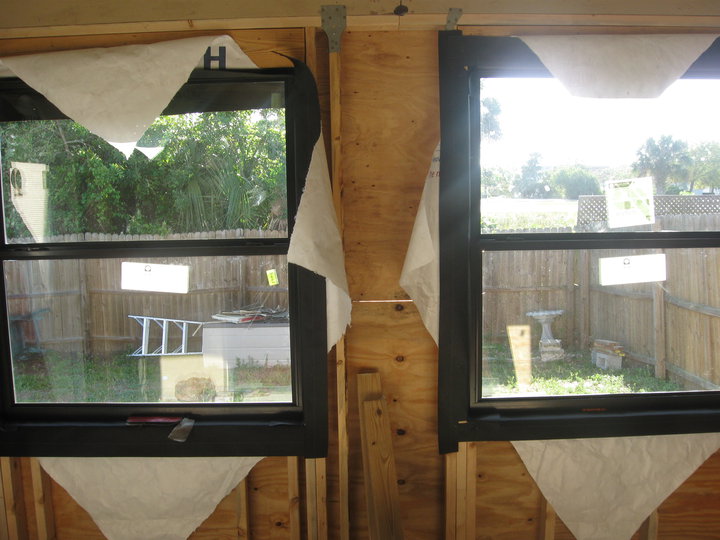
These windows are double-paned, energy efficient windows.
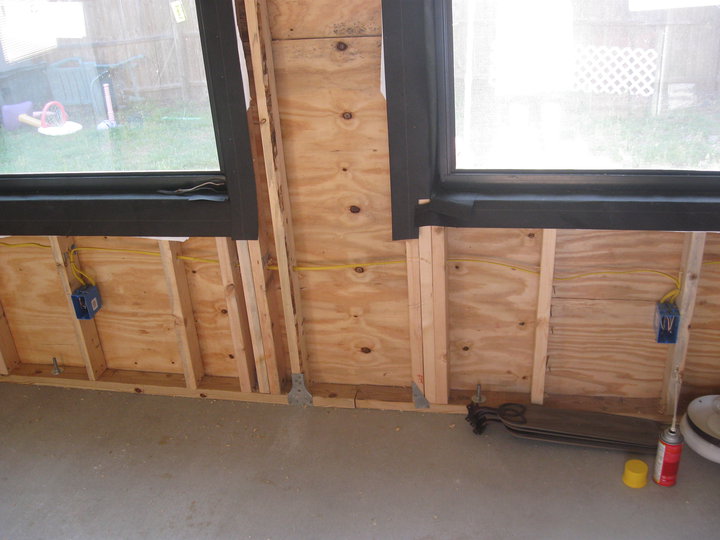
I hired an electrician to do all my electrical work. The only two things I sub’d out were masonry work and electrical work. This was all done to code. Here, you can see the cripples, jack, and king studs with the window. SP1 and SP2 plates are used to help hold everything together. We used Tyvek on top of tar paper to keep everything dry over the years and increase the R value of the room. I would later add insulation in every cavity and foam to close up little holes.


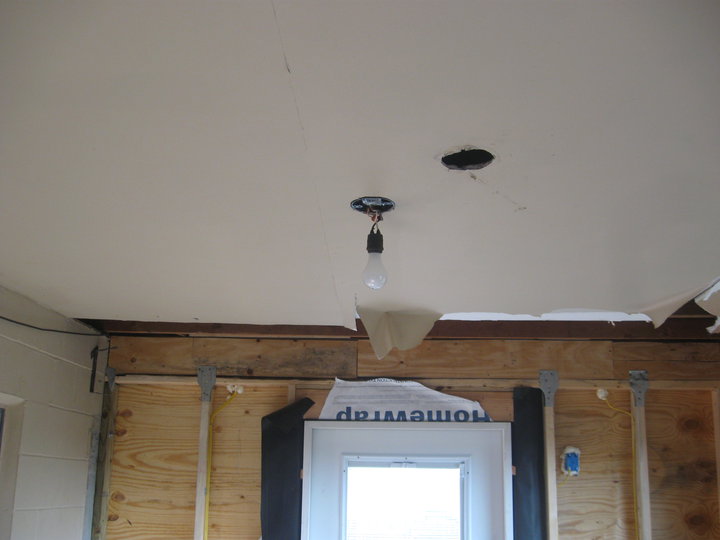
The board at the top of the room would later be replaced and I would install new vinyl soffits later on in the year.
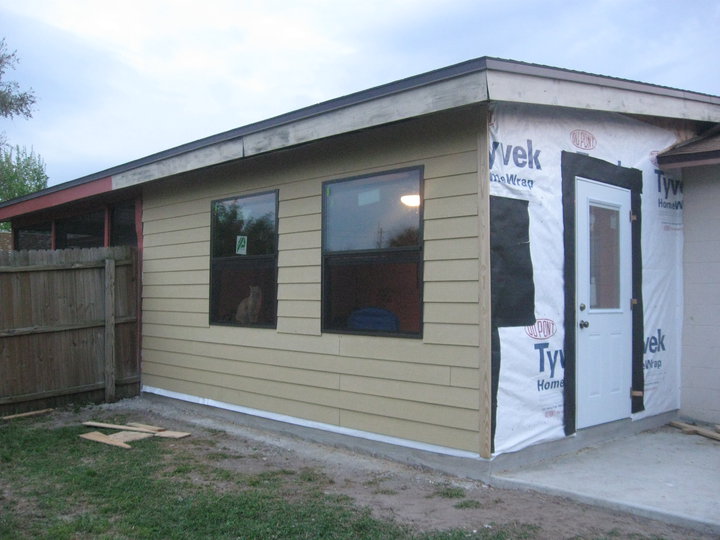
We used HZ-10 Hardiplank board. This was my first experience with it but installation was a snap.

This is about the final end result before the electrician came back and installed my outdoor light. Electrical outlets were installed every 6 feet per code. The brick molding used on the door is vinyl. It is something I found at Lowes and it does not rot. Looks like the real thing. This is the HZ-10 color so I painted it a slightly tan color about 90 days later. Manufacturer recommends you paint it within 90 days. I used two high-security locks from Schlage and had my alarm system extended to the two windows and door. The door has a built-in window with blinds, which really helps with letting light into the home.
The room was also added with an outdoor receptacle that is GFCI certified. This is also required by code.
The new room wasn’t originally insulated in the ceilings so I rented a recycled paper blower from Lowes. This made it really easy to insulate the ceiling area by blowing in recycled newspaper into the ceiling cavity. Lowes was running a deal at the time, where if you purchased $200 in insulation, you were able to rent the machine for free.
The drywall was attached to the concrete by using pressure treated 1x4s fastened using Tapcon masonry screws. They were placed about 16 inches apart all along the wall.
The ceiling was painted using roll-on popcorn ceiling to match the existing ceiling texture of adjoining rooms.
We ended up tiling the floor and using bi-fold doors for the closet. The baseboard molding we used was called “base” and it matched the rest of the home.
In this picture you can see the final footer all the way around the home with the new patio that was poured. We have been talking about now enclosing the new patio slab with a screen to help beat the mosquitoes and the Florida heat.

Blocking the Window – Underappreciated Beauty
Let me just apologize up front because I didn’t do this project with blogging in mind, so the photos are somewhat lacking detail of the progress…
Ok apology out of the way. Now for the meat.
I. Love. Glass. Block. Windows.
I mean – seriously – aside from stained glass, where can you get such interesting designs?

And there are, for the real enthusiasts, plenty of even more ornate, decorative glass block options out there.
I mean – how better to get light AND privacy? And look at what you can do with it!
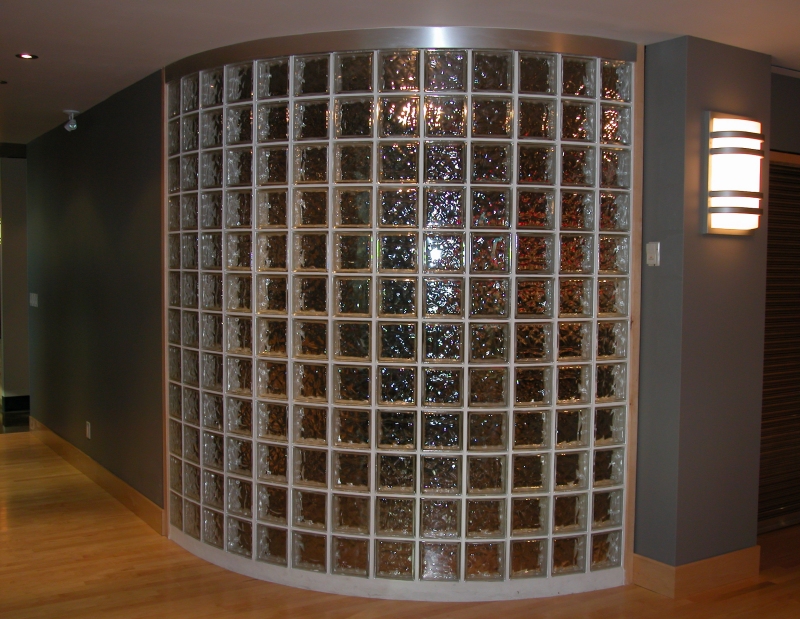
I mean that’s just COOL!
I think glass block is under appreciated today. I base this mainly on anecdotal evidence. It turns out that in the Baltimore metropolitan region, there are only TWO Home Depots that carry glass block and glass block supplies, and both of those are in lower income neighborhoods. How sad is that – that glass block is the “cheap option”? (And seriously at ~$12/sqft JUST for the glass, how that gets to be the “cheap” option is beyond me…) But anyway…
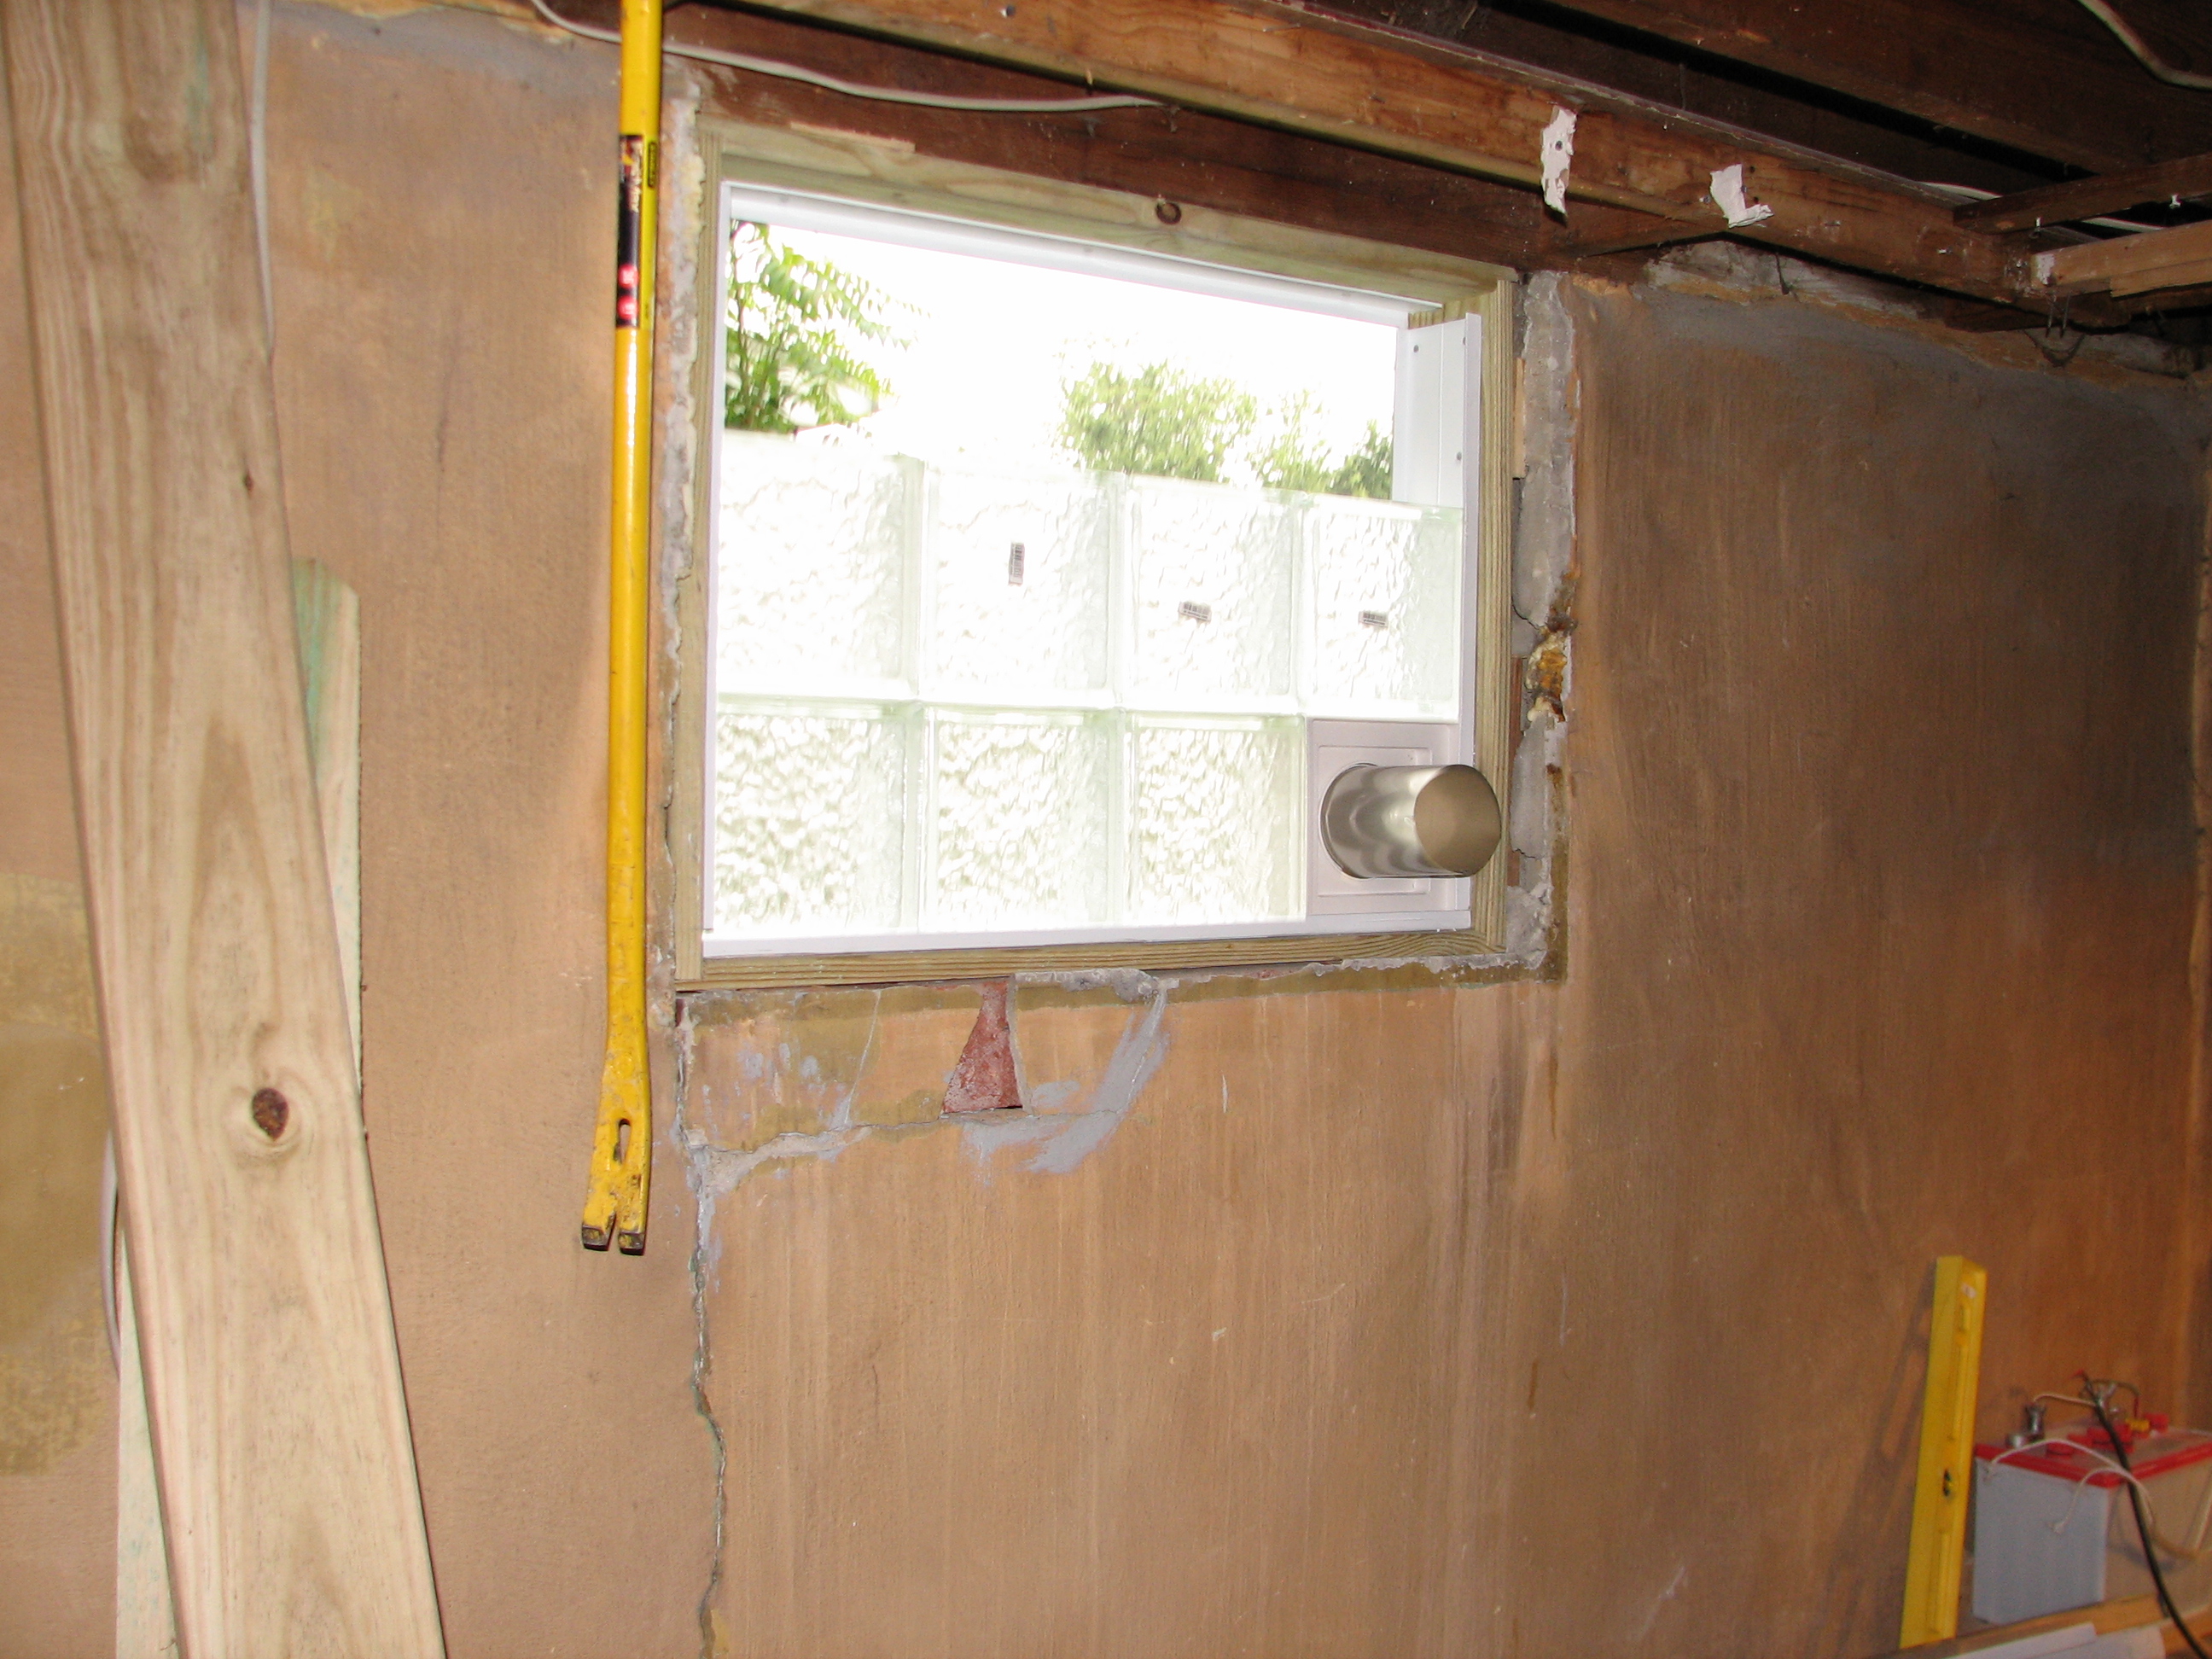
So you may remember our basement:

Specifically, our laundry area:
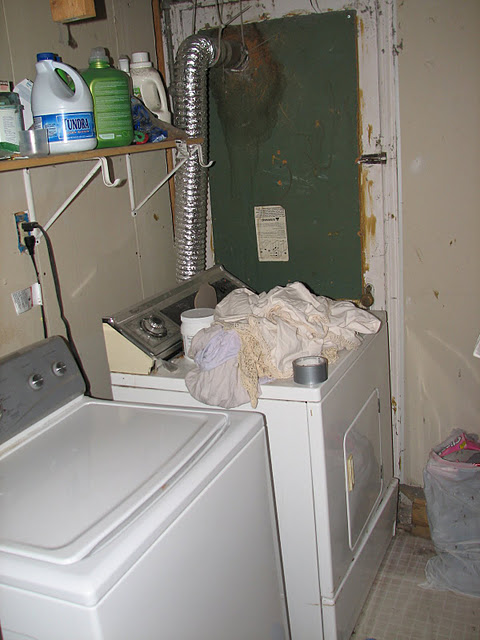
If you haven’t seen this before – what you’re seeing is, indeed, a dryer that is up against and VENTING THROUGH the exterior basement door. Yep, the previous home owners could think of nothing better than to block the secondary exit from the basement up with a dryer and to run hot moist air through it…
So we decided that this has to go. We want to move our laundry facility here:

Which actually, now that demo is mostly done, looks more like this:

The idea being – come down the steps, turn left, open a closet door (double folding doors of course) and there’s the washer and dryer, and while we’re at it, reclaim the basic ability to exit the basement directly to the outside world. You know – in case of, oh, things like a FIRE? (Idiot previous owners…)
So a few weeks ago, I got to work on one of my favorite kind of projects – a brand new glass block window!
Pittsburgh Corning sells a fantastic glass block system called (rather unimaginatively, I’m afraid) Pro-vantage, which consists of vinyl tracks and spacers, like these.
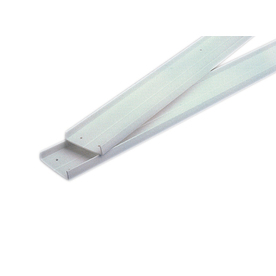
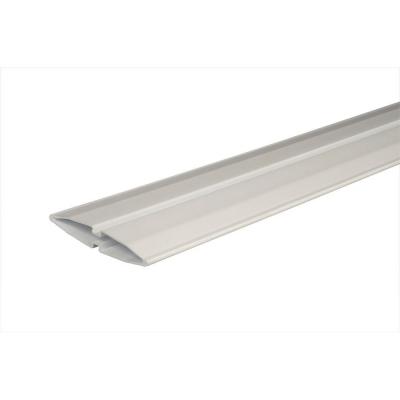
The tracks are set in a window frame around the perimeter, and the spacers go between each block.
I started by measuring the opening about two dozen times, doing a lot of calculations, checking a lot of wood measurements and finally removed the existing window…
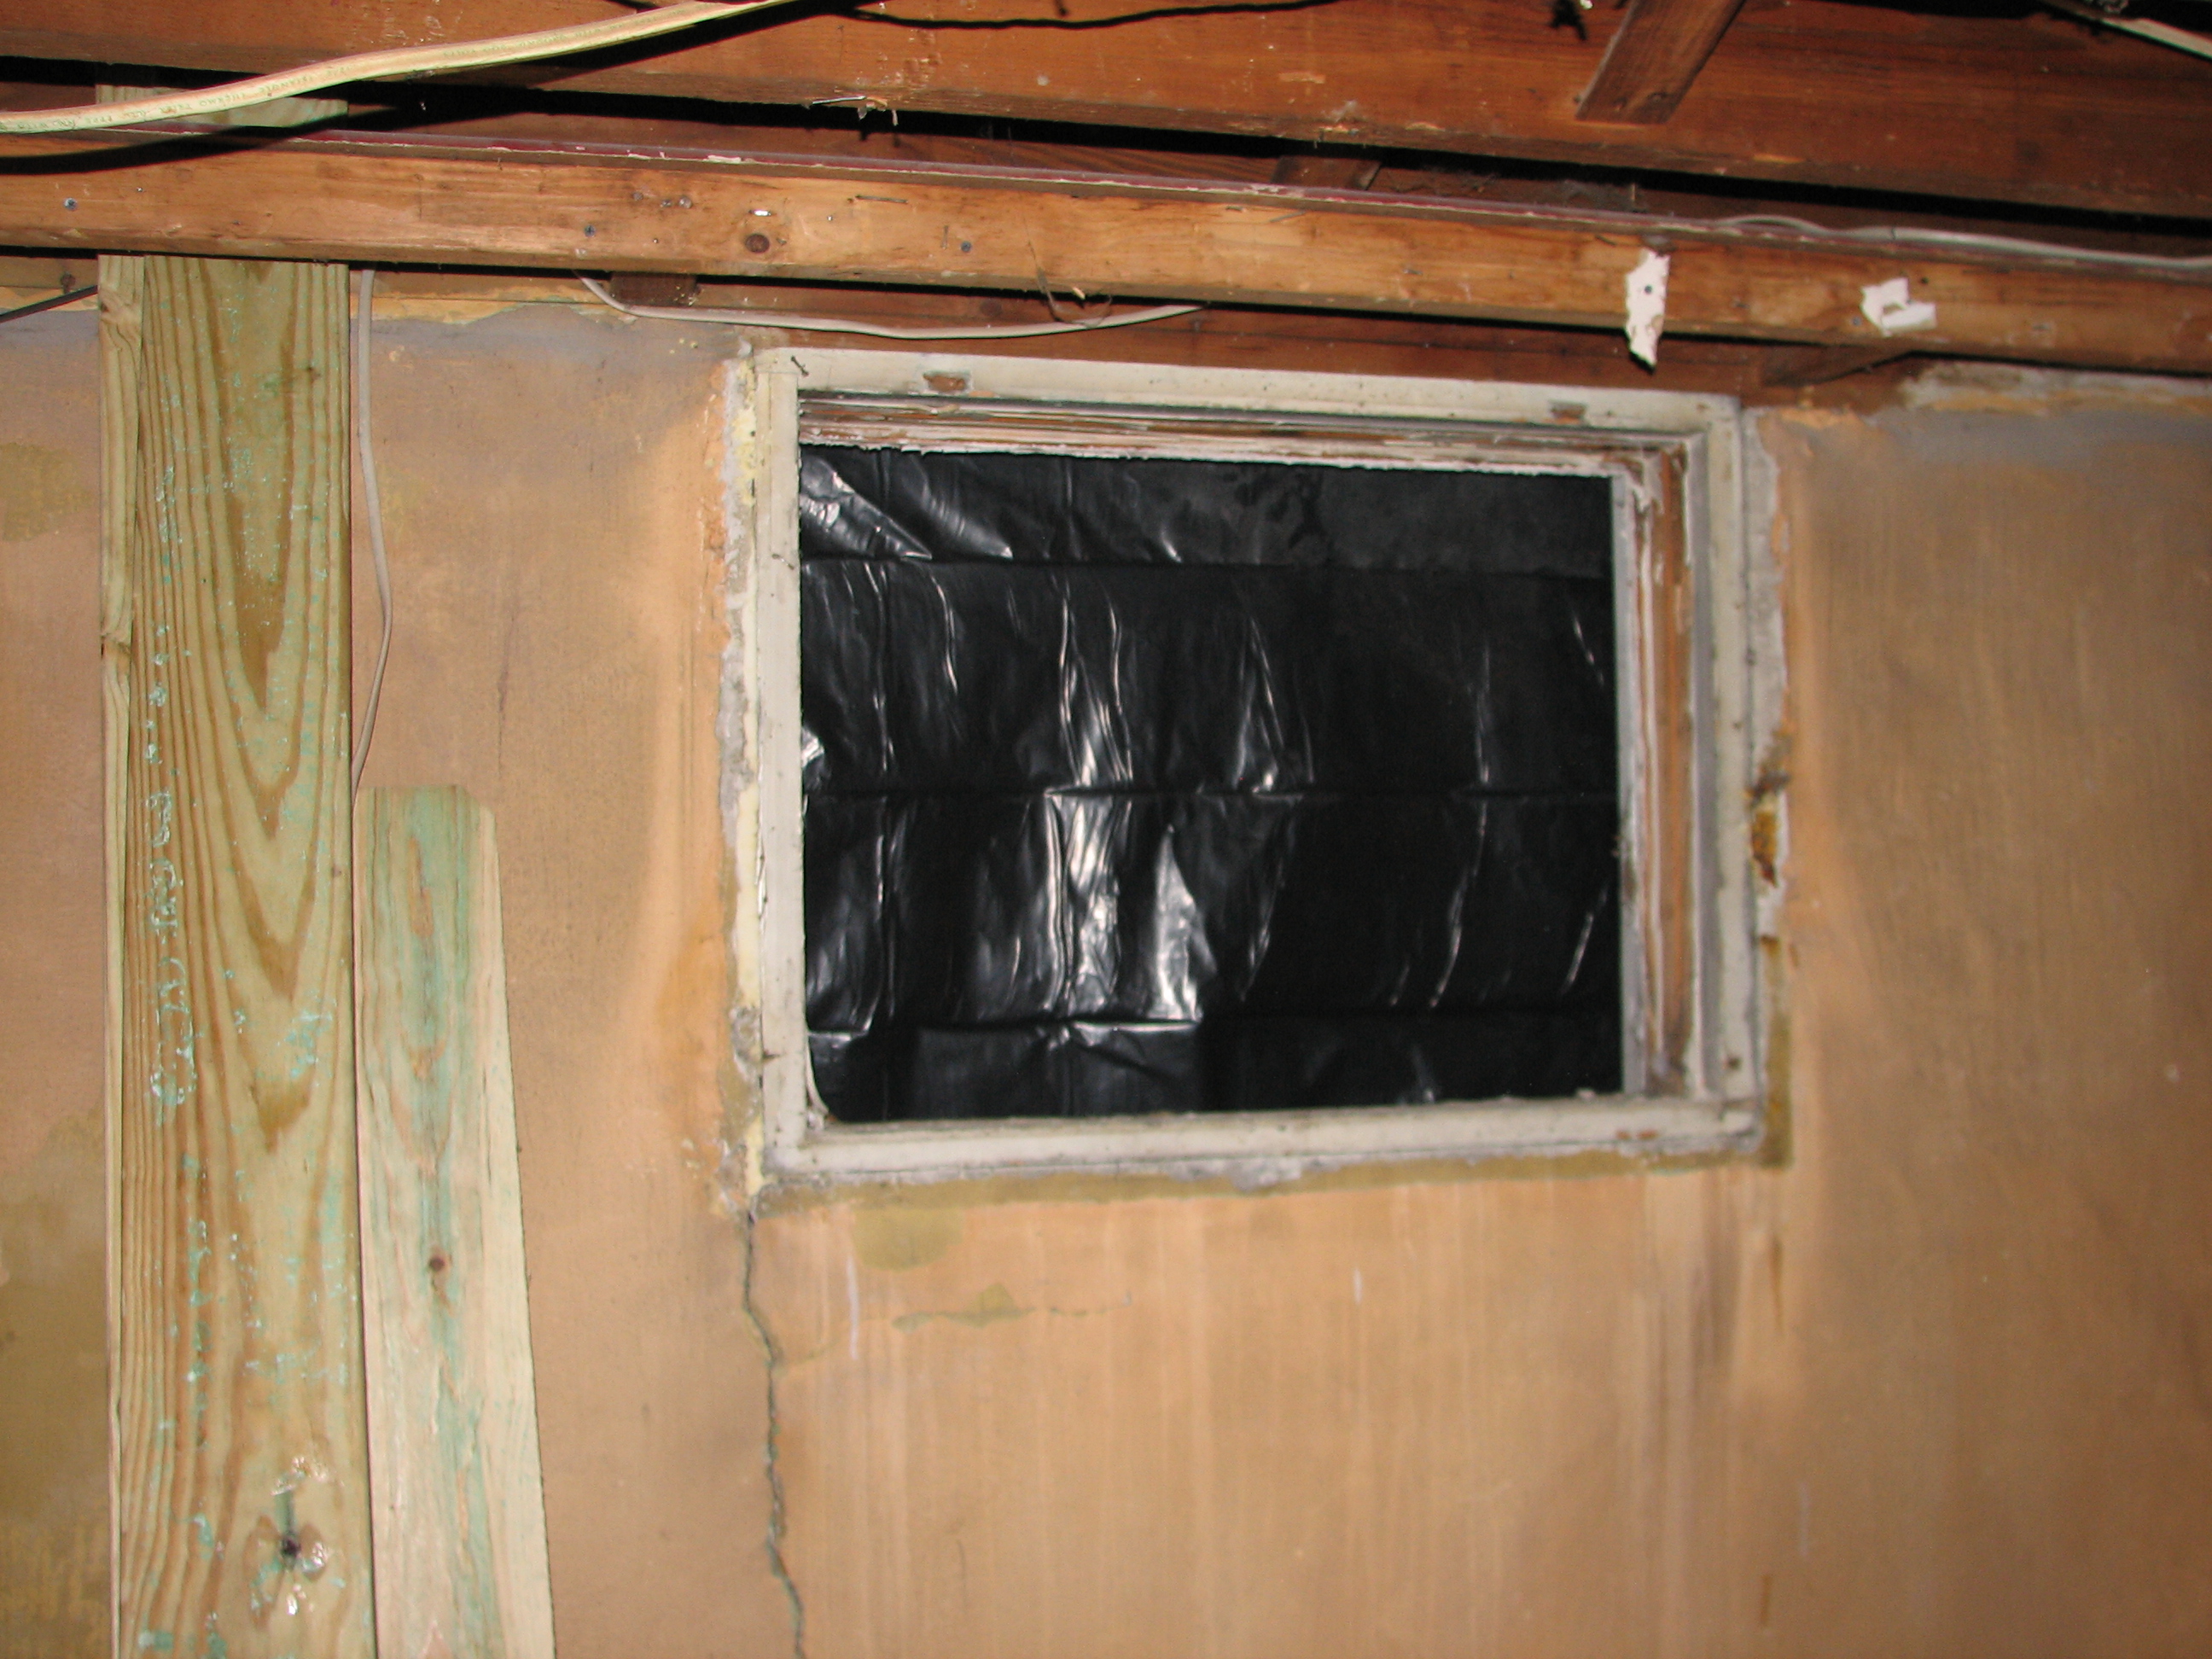
Then I measured it again and again, and I took my outside track and glass block (the icicle pattern) and built the window in a free standing setup on a board on a sawhorse (strapped together to keep it from falling – wish I had pictures of that!) and measured it about a dozen times as well, and ultimately concluded that the frame had to come out.
After a bit more demo, I constructed the new frame, which gave me a chance to use my new dado set. This was the hard part. Building the window itself was SUPER easy.
First you lay the base track in the frame (over a double bead of caulk) and secure it with screws. For windows, I prefer the grey coated screws. Then you caulk the track again on the inside, and put in your first row of blocks, caulking also between each block. Caulk on top of that row and another row and you end up with this:
Click the pic for a full sized shot. You can get a really good look at the new frame, the dado cut, and the general install.
Note how the entire frame is in place except at the top. That’s the secret I didn’t know – you cut the top track in half long ways, put your block in, and then seal the second half in after it’s all done!
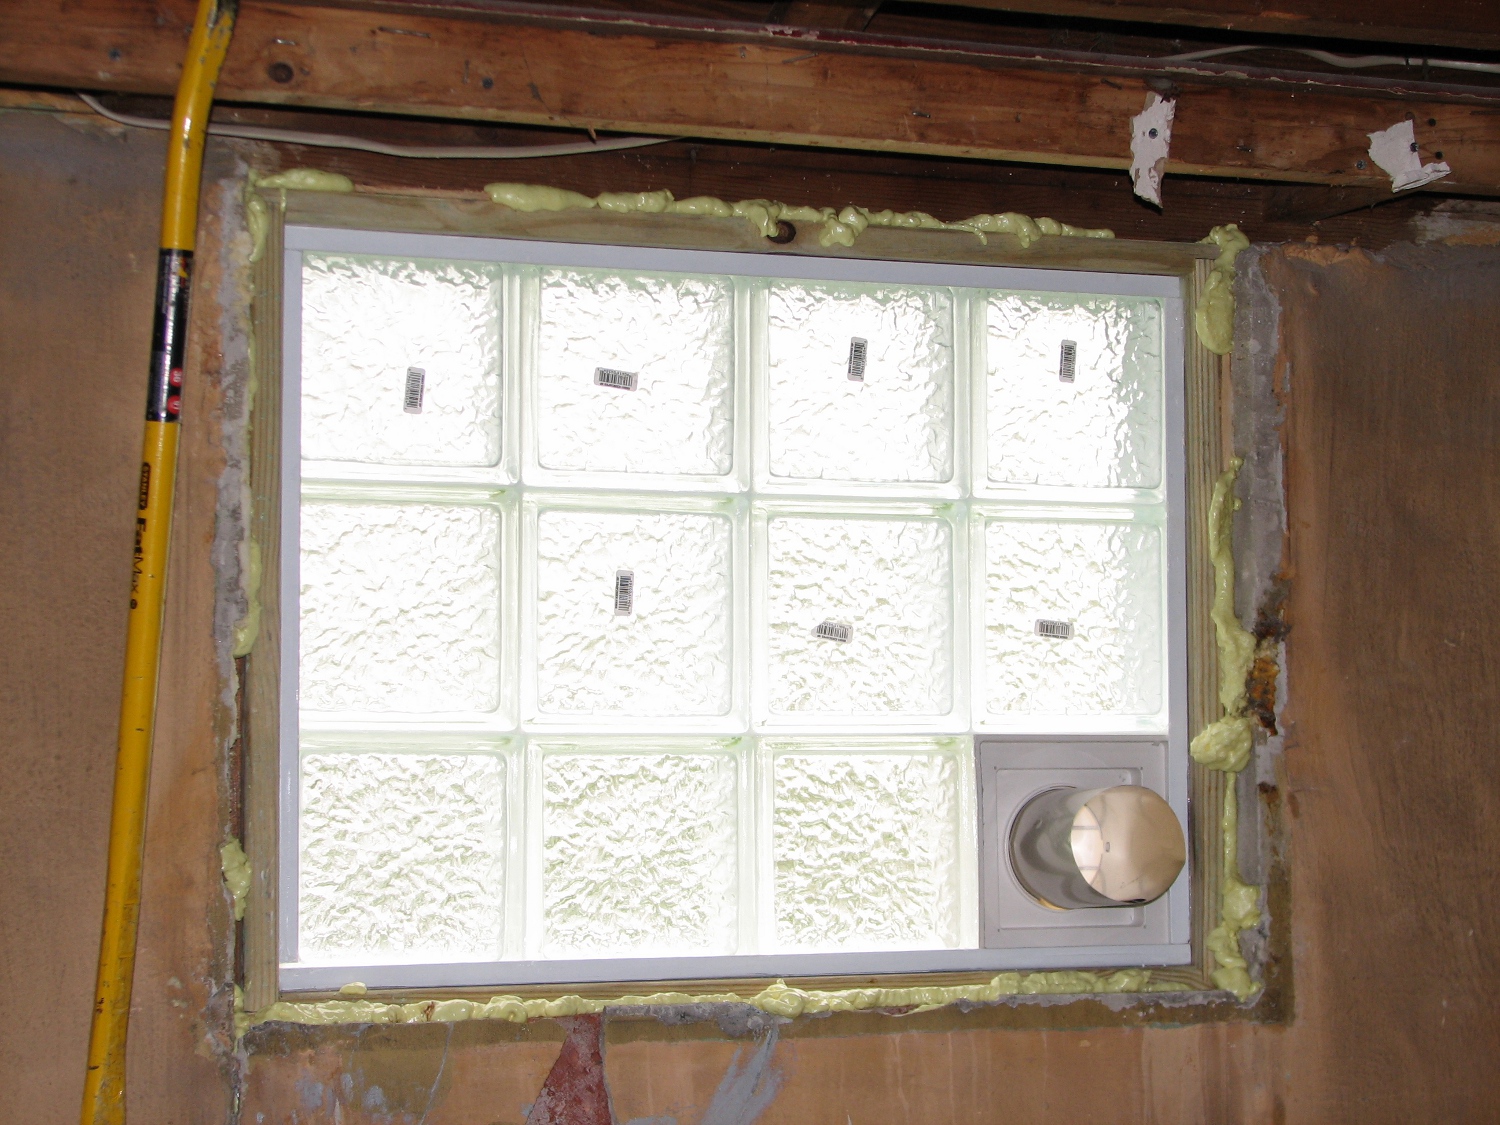
Once in place, you cannot tell that the top row was cut in half.
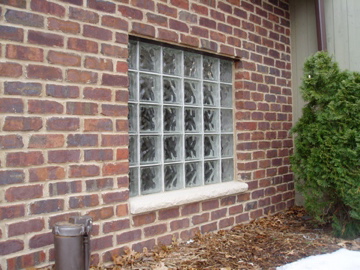
Right now it looks ugly on the inside – but that’s because this is all initial work. From the outside, I think it looks fantastic!

Well, ok, except for my caulking job. I really should have left that for the missus – she’s the better caulker.
Hammer safely!
G
Home Improvement Blog on Google+
Home Improvement Blog on FaceBook
Bloggers Wanted
Latest Articles
Topics
- Electrical (8)
- Introductions (7)
- Plumbing (3)
- Projects (13)
- Repair (4)
- Safety (5)
- Tips and Tricks (5)
- Tool Review (5)
- Tools (6)
- Uncategorized (5)