Plumbing
Replumbing an improper trap.
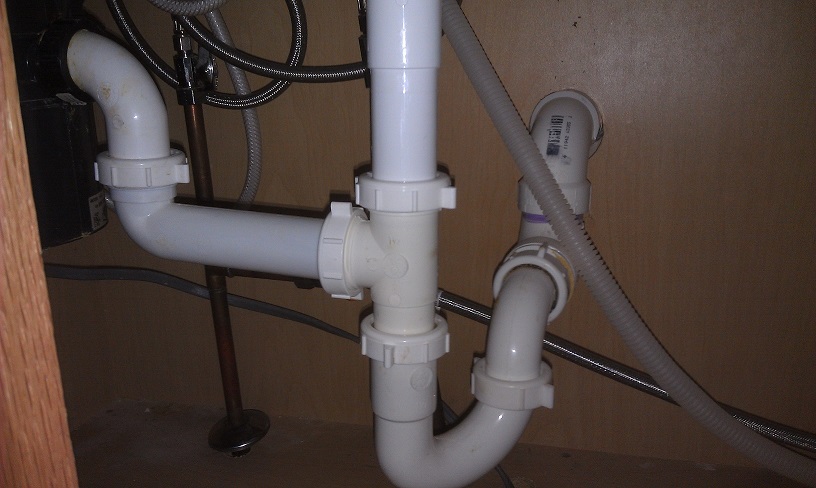
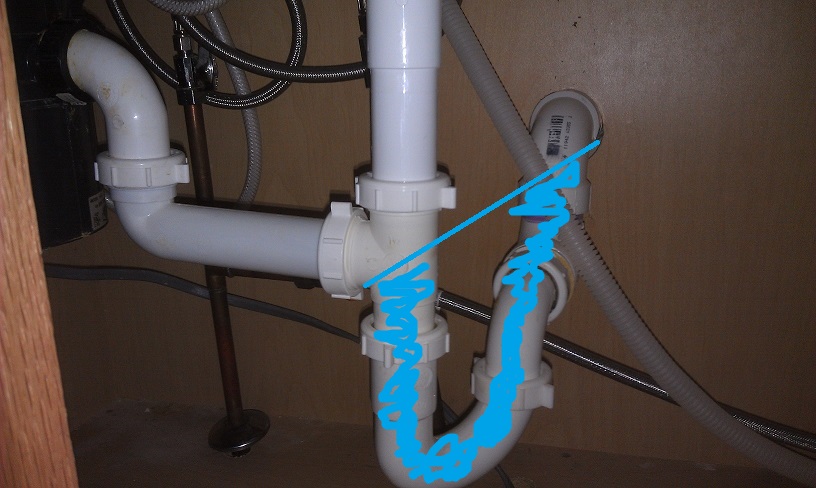
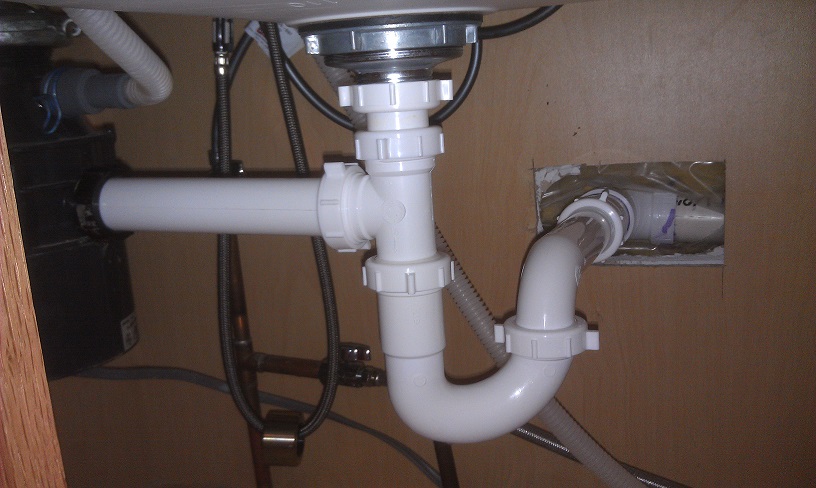
When I was inspecting the home that I recently purchased, I took a look under the kitchen sink and noticed this…
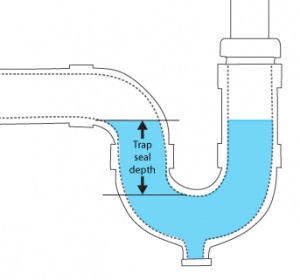
Typically, traps have a trap seal between 2 – 4 inches. This amount of water allows waste water and debris to flow down the drain, while still providing enough force to prevent sewer gases from pushing past. The problem you find with a deeper trap, is that the waste water; and in particular the debris, does not have enough force behind it to escape the trap. This leads to a nasty, dirty, stinkin’, slow flowing trap. Which leads to your wife saying “Dang, this sink stinks!”. If Google Nose BETA worked, I would have saved the smell from when the old trap was removed. Then you’d smell what I’m talking about.
If you take a look back at the first image, you’ll see that the trap seal is simply too large. The entire pipe below the disposal drain line, all the way to the lower dip of the elbow coming out of the wall will be filled with water. Where in a normal situation, only the lower bend of the P-trap will be filled with water.
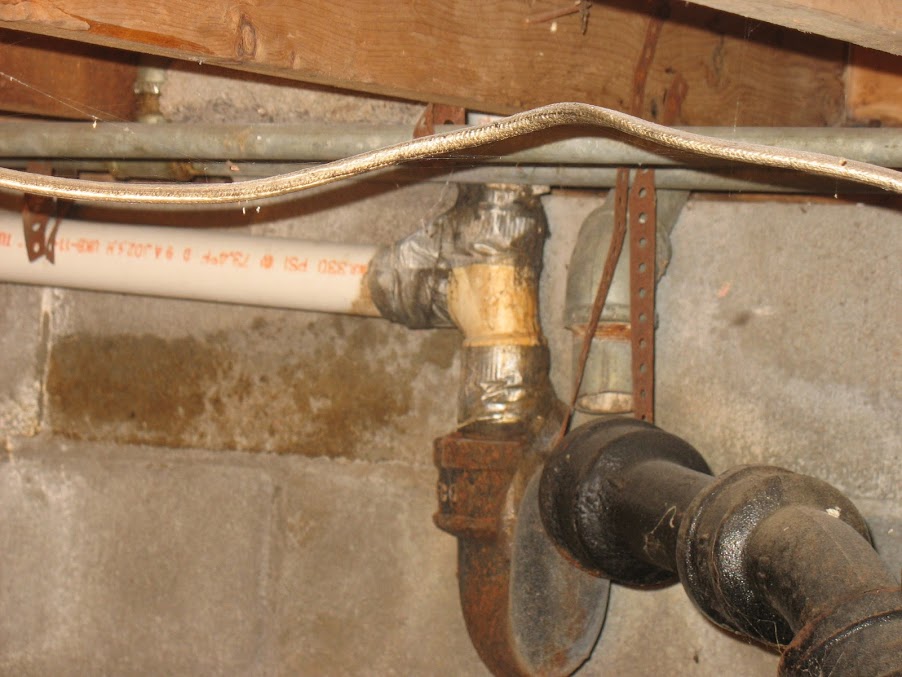
Usually this situation is fixed easily by purchasing the correct fittings, and connecting them in a way that allows proper drainage. In my case, however, some genius glued a downward facing elbow at the outlet connection. As soon as this elbow was glued in place, the fate of this trap was sealed. It would forever be WRONG!
To fix this problem, my only choice was to cut the offending elbow off. Once removed, new pipes could be connected, and a proper trap could be arranged. So I set about cutting the elbow off, as close to the back of the elbow as possible. The idea was to leave enough pipe behind the elbow, to allow me to attach new fittings. Unfortunately; as with most home improvement projects I ran in to problems and, this was not possible.

To leave the maximum amount of pipe, I used a hacksaw blade (removed from the hacksaw) to cut the pipe. If you attempt this, don’t forget to wear a good pair of leather gloves, or to wrap the ends of the blade with duct tape to make makeshift handles.
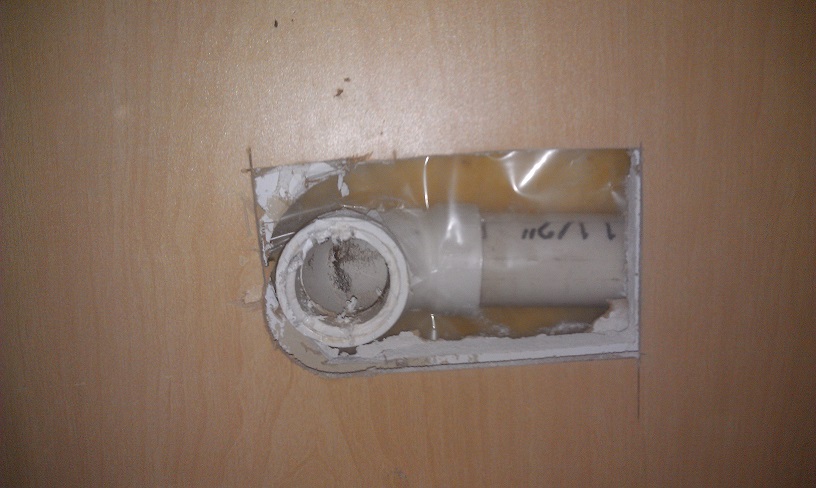
As it turned out the stub was just too short, so there was no way I was going to attach anything to the exposed pipe. My only option was to move back one more fitting, and cut the pipe beyond that. In this situation, this involved opening up the wall a bit. Fortunately I was working under a sink, in a cabinet, so a limited amount of damage was acceptable. I grabbed my trusty Milwaukee multi-tool, and cut a hole in the back of the cabinet and the drywall.
In a lot of instances this fitting will be a tee connecting the sink drain to a drain-waste-vent stack, which may require a bit more damage to the back of the cabinet and wall. In my situation, I was lucky it was a simple elbow.
Using my hacksaw blade. I cut off the tee, glued on a new tee, glued on a short stub, and finally glued on a PVC DWV trap adapter.
Once that was done, it was a simple matter of installing the remaining bits of pipe.
Now my trap is just the right depth, and the waste is flowing as it should.


First-Time DIY: Duct Tape ≠ Plumbing
Hello again everyone! When my wife & I bought our first house, we went right to work remodeling it. We started by refinishing the hardwood floors and updating our shutters to add some curb appeal. After the floor was finished, we moved on to begin remodeling the kitchen. While I don’t have all of my kitchen photos ready for you, I wanted to show you what I found while re-plumbing the kitchen.
Let me just explain that the previous owners turned the laundry room into a laundry/bathroom – adding a shower, sink, and toilet. They decided to have the washing machine and sink share the long drain pipe (left) and that the shower would drain straight down. The only thing holding these pipes together was the duct tape – no primer, no glue – just duct tape.

Long pipe (left) is from washing machine & sink
Corner shower drains straight down
I replaced this incredibly nasty, 3-Way Sanitary Tee (what an oxymoron in this case) with a Flexible 3-Way Sanitary Tee connector. I used silicone sealant on the inside of the connector before tightening it all and on the seams afterwards.
So the lesson here is always use the correct tools for the job … and duct tape doesn’t always fix everything…
What’s the worst “quick fix” you’ve ever run across? Let us know in the comments!

Handling the pressure with expansion tanks
Is an expansion tank required?
Private, older public, and some other water distribution systems may not require an expansion tank to be installed. This is because these systems may be considered “open”, since they lack pressure regulators and/or backflow preventers. Plumbing code changes intended to prevent the contamination of the public water supplies, have made backflow prevention a requirement in most current new builds. While this may be a good change for the water supply, it can be a damaging change to your plumbing system.
IRC2009 P2902.3 Backflow protection. A means of protection against backflow shall be provided in accordance with Sections P2902.3.1 through P2902.3.6. Backflow prevention applications shall conform to Table P2902.3, except as specifically stated in Sections P2902.4 through P2902.5.5.
Before pressure reducing valves and backflow preventers were used, any excess pressure in your system could easily spread back into the water distribution system. This meant any thermal expansion of the water caused by your domestic hot water (DHW) system, could easily be dissipated back through the distribution system. Now that backflow prevention is required, your plumbing system has become a “closed” system, and a new way must be employed to prevent over pressurization.
This is where expansion tanks come in. Expansion tanks are used to absorb any excess pressure created due to thermal expansion, which prevents an over pressurization of the system. In any situation where water in a “closed system” is heated, an expansion tank is required.
IRC 2009 P2903.4 Thermal expansion control. A means for controlling increased pressure caused by thermal expansion shall be installed where required in accordance with Sections P2903.4.1 and P2903.4.2. P2903.4.1 Pressure-reducing valve. For water service system sizes up to and including 2 inches (51 mm), a device for controlling pressure shall be installed where, because of thermal expansion, the pressure on the downstream side of a pressure-reducing valve exceeds the pressure-reducing valve setting. P2903.4.2 Backflow prevention device or check valve. Where a backflow prevention device, check valve or other device is installed on a water supply system using storage water heating equipment such that thermal expansion causes an increase in pressure, a device for controlling pressure shall be installed.
Symptoms of an over pressurized system
High pressure in a plumbing system can damage any fixture connected to the system, including faucets, taps, toilets, washing machines, dish washers, water heaters, etc. It can also lead to leaks, running toilets, difficult to operate faucets and taps, and even burst pipes. A frequent symptom of an over pressurized system, is a sudden surge of water when a faucet is turned on. The surge will quickly dissipate, and won’t return even if you close and reopen the valve.
If the over pressurization is caused by thermal expansion, you may only notice symptoms occasionally and seemingly randomly. This is because the pressure in the system increases when the water heater is heating, and all fixtures are closed. The pressure diminishes when any fixture is opened, or as the water cools. The problem may only be observed when the system pressure is at its highest, which may only be on rare occasions.
What is an expansion tank?
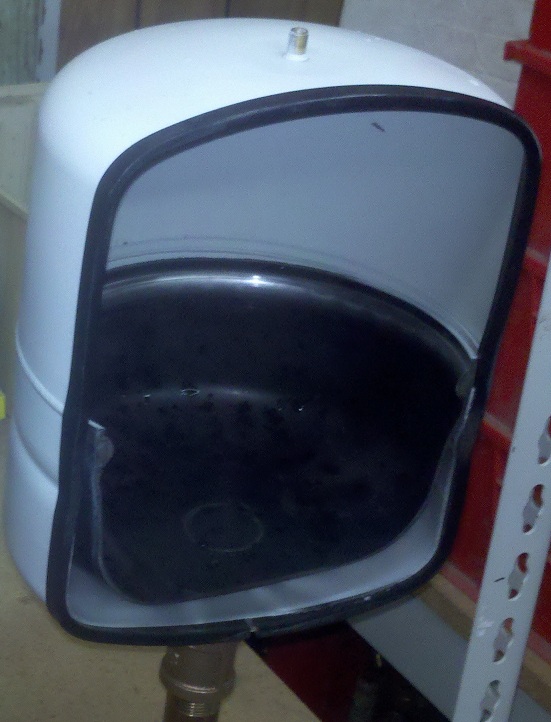
An expansion tank physically resembles a small propane tank.
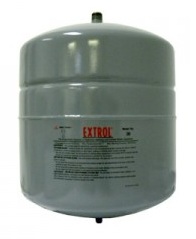
It’s usually installed fairly close to a water heater or boiler, and may be installed in almost any orientation. Internally, there will likely be a flexible (Butyl) diaphragm which divides the tank in two. On the “wet” side, you’ll notice a 3/4” NPTM connection which allows it to be connected to the plumbing system. The “dry” side, often features a Schrader valve which allows the pressure of the tank to be adjusted as needed.
Normally the tank will be completely filled with air, and the diaphragm will be pressing against the water inlet. As the water pressure increases, it compresses the lower pressure air in the tank, and the tank fills with water. When the system water pressure decreases, the air pressure forces the water out of the tank, and back into the pipes.
How do I install an expansion tank?
Expansion tanks are installed on the cold water supply of a domestic hot water tank, or boiler. The installation process is fairly easy, usually only requiring a tee fitting to be added to the water line.
Positioning
The first step in installing an expansion tank, is to decide where you want it. We already know that the tank must be installed between the cold water shut off, and the water heater inlet. So we know where it has to connect to the system, but we still have to decide where the tank itself will sit.
Up, Down, Left, or Right?
Most tanks can be installed in any orientation, though there are advantages to some positions. For example. If you install the tank vertically with the air side up, and the tanks bladder ever fails. The tank may continue to function (though at a reduced capacity), until the air escapes from the tank. Whereas, if the tank was installed with the air side down, and the bladder failed. The air would immediately move to the top of the tank, and the tank would fill completely with water.
Support
While most smaller tanks can be supported by the plumbing itself, it can be a good idea to support the tank by other means. Water weighs about 8.34 lbs/gallon, which means even a properly functioning tank can weigh quite a bit. Lets look at an example tank.
- Tank Capacity: 4.4 gallons.
- Maximum Accept Capacity: 2.5 gallons
- Tank Weight: 8 lbs
Maximum Properly Functioning Weight:
2.5 gallons * 8.35 lbs/gal. + 8 lbs = 28.875 lbs.
Maximum Failure Weight:
4.4 gallons * 8.35 lbs/gal. + 8 lbs = 44.74 lbs.
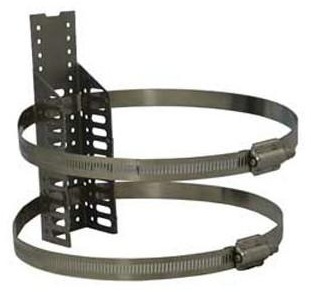
Even when the tank is in working order and fills to maximum capacity, you could end up with almost 29 lbs hanging from your pipes. Because of this, it may be a good idea to attach the tank to a nearby structural member. This can be easily accomplished, using straps and/or brackets designed for this purpose.
Installation
Now that we’ve decided where the tank will connect to the plumbing, and where the tank will spend the rest of its life. It’s time to start the actual installation.
Turn off the water
The first thing you’ll have to do is to figure out how to turn off the water heater/boiler, and then actually turn it off. Next you’ll have to locate the cold water supply shutoff valve, and turn the valve to the closed (off) position. Finally, turn on (open) the lowest hot water tap in the house. This will release any built up pressure, and prevent water from spraying out when you cut the pipe in the next step.
Mark and cut the pipe
Use the tee as a guide, and mark the pipe where you’ll be installing the tee. Cut the pipe at your marks, using a pipe cutter.

If you don’t have to cut the pipe, skip this step.
Install the tee
Solder, snap, or twist the tee into place. Then install any nipples or extension pipes required to reach the tanks final resting place. You’ll want to end the extension with a 3/4” NPTF fitting, so the expansion tank can be screwed into place.
At this point you may want to think about adding some extra fittings that will make required maintenance easier. A ball valve and spigot, will make isolating and draining the tank much more convenient. Installing a combination fitting like this Ball drain valve, can make this task much easier and clean looking (Make sure to check your local codes to insure this type of setup is allowed.).

Check the system pressure
 At this point you’ll want to close the faucet you opened, and open the shutoff valves (make sure you cap the extension pipe, or close the valve on the extension, or you’ll have water everywhere). Turn on all the hot water fixtures in the house until water flows normally (no sputtering), to insure the system is filled and at full pressure. Check for, and repair leaks.
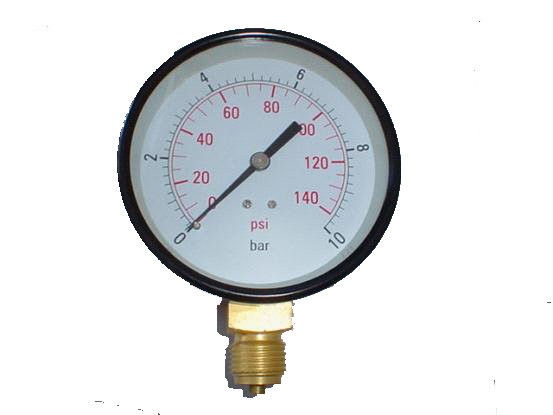
Attach a pressure gauge to any part of your plumbing system. Some gauges contain threads for a garden faucet, or you can attach one to the extension where the expansion tank will be installed. Once the gauge is attached, open the valve to get a reading on the gauge. Note the pressure. If the pressure is not within the normal range of 40 – 80 psi, you’ll have to take steps to correct it (which is not covered in this article).
Pre-pressurize the tank
Most expansion tanks come pressurized to 12 – 40 psi, but before you install the tank you have to match the system pressure. Start by removing the protective cover from the air valve on the tank. Use a tire gauge to check the pressure. Use a bicycle pump, or compressor, to fill the tank to match the system pressure you noted earlier.
Mount the tank
Attach the tank to the plumbing, and mount it using your straps and/or brackets. Turn everything on, and check for/repair any leaks. Stand back and revel in your success.
Maintenance
You can quickly verify the tank is working at any time, with a simple tap. When you tap on the air side of the tank, you should hear a hollow sounding dong. If you hear a solid sounding thud, the tank has failed, and is filled with water. In this case, the tank will have to be replaced.
Check the tank pressure
Once a year (see owners manual for schedule) or so, the air pressure in the tank should be checked. To do this, you’ll have to isolate the tank from the water systems pressure (Once again the extra valve and spigot come in handy). As before, you’ll have to shut off, open, close, or disconnect things until there is no pressure on the water side of the tank. Once you’ve accomplished that, use a tire gauge to check the air pressure. Add/remove air as needed. Repressurize the water system, and you’re good for another year.
Home Improvement Blog on Google+
Home Improvement Blog on FaceBook
Bloggers Wanted
Latest Articles
Topics
- Electrical (8)
- Introductions (7)
- Plumbing (3)
- Projects (13)
- Repair (4)
- Safety (5)
- Tips and Tricks (5)
- Tool Review (5)
- Tools (6)
- Uncategorized (5)