Archive for July, 2012
Hanging Shelves
This is a continuation of my previous blog post.
This blog posting was originally written in 2008 for a friend of mine who was unable to perform simple repair tasks around her house. The original purpose was to assist her in hanging shelves on her wall. It is intended for those people who know that the flat end of the nail is the end you hit with the shoe, and that butter knives make acceptable screwdrivers.
L- Bracket Shelves
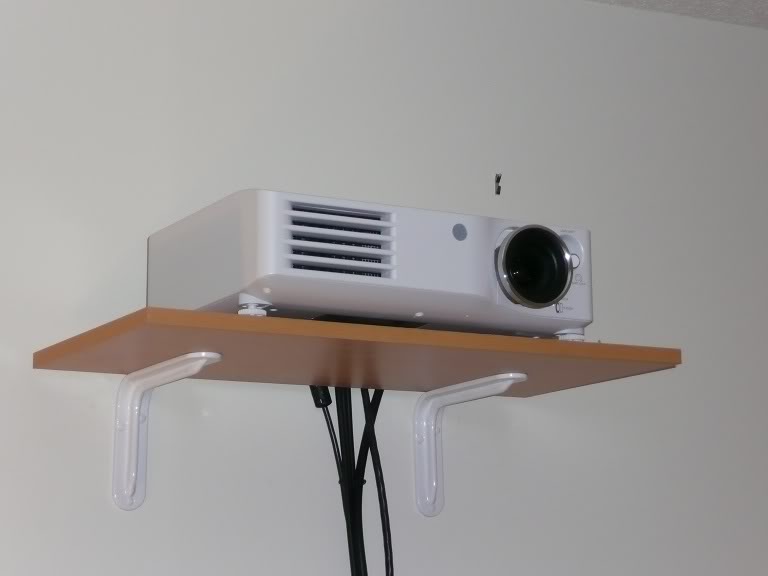
So, let’s look at the simplest type of shelf to put up: Basically, we’re talking about a plank of wood, and two L-brackets. It’s not the prettiest type of shelf, but it is cheap and functional. I actually don’t recommend this type of shelving for all but the most utilitarian installations. BUT, this installation will demonstrate the essential properties of shelviness — The shelf is level, and it is strong enough for most small loads. The techniques used here are also applicable to hanging curtain rods and small bathroom shelves. My general principle is that you can’t possibly measure and pencil out the installation accurately. (See Golden and Silver rules in my previous article.) So we’re going to do this in a way that doesn’t require that.
Materials:
1 shelf 2 brackets 1 pencil 1 carpenter’s square (It’s called a square, but it might be triangular in shape) 8-10 screws – Often these will come with the brackets. You’re probably best off to get some longer wood screws for the wall mounting. Keep in mind that your drywall can be up to 3/4 of an inch thick, and we’ll want at least an inch in the wood. I’d get 2 inch wood screws with a countersunk head. 1 drill drill bits 1 level 1 helper – these can usually be found by offering a beer.
Step 1: Hold the shelf up to the wall where you want it to go. Take a pencil and mark the height about 6 inches in from one end. This is just a rough guide for now. You don’t need to mark the entire length.
Step 2: Find the studs. This can be tricky, but if you’re going to use it for books, then you need to find a stud. Sometimesyou can find them by tapping lightly with a small hammer and listening for a spot where the echo turns into a thud (a doctor’s knee tapper would be ideal). This might work if you have drywall and wood studs, but plaster and lathe seems to make the same sound no matter where you tap it. Borrow an electronic stud finder from a friend. I you can’t get a stud finder, then we have to resort to destructive testing. Find a long skinny nail, such as a two inch finishing nail. Bang it in where you think there might be a stud. Move over an inch and a half an try again. Repeat until you know you’ve hit wood. The problem with this technique is that you will be left with a plaster repair and paint touch up when done, but it is reliable.
Once you’ve found one stud, the other is easy. Studs are usually placed every 16 inches. Just measure over and tap again. Mark the studs with vertical pencil marks (lightly – You’ll want to wash it off later). I like a couple of ticks at the edge, and a longer line down the middle. .|. For shelves, it is imperative that you find a stud. Drywall plugs won’t support the weight of books.
Step 3: Place the board back up, center it on the studs, so there’s an even overhang on each end and mark on the board, ONE side where the stud line meets the board (ideally about 6 inches in from the end). Take the board down, and on the underside using a square (which is usually triangle shaped) mark the perpendicular right across the board.
Step 4: Balance the board on its back on a good solid flat surface so that the edge that will contact the wall is against the floor. Do your best to keep it straight up and down. Put one of the brackets against the board and the floor and press so the flex is taken out of the bracket, and the screw holes are directly over the line. Have your helper mark the screw holes on the board. (That 2 inch finishing nail works great! Stick it in the center of the hole and tap lightly with a hammer).
Step 5: Drill out the screw holes. The diameter of the drill bit should be slightly smaller than the inner diameter of the screw (The solid part inside the threads.) Attach the bracket to the board. NOTE: Your drill will usually tend to “Walk” away from the marked point when you start it up — particularly on hard materials. This is less than ideal. You can take a nail, and bang a dimple over the pencil mark to stop this. The small hole will grab the point of the bit and stop it from walking.
Step 6: Mount the shelf, lining it up with your previous marks, and mark only the upper screw hole where it meets the wall and stud. Drill. You can use a small bit, as you’re going into a 2×4 here. Screw in the upper hole, and lightly put a screw in. You’ll be taking it out in a minute.
At this stage, you’ve got one bracket, tightly secured to the board, and loosely secured to the wall.
Step 7: Level the shelf. This is fairly easy, as you have one fixed end to pivot around. Just move the other end up and down until the level bubble is centered. Mark the stud line on the board and mark the underside of the shelf against the wall (As per Step 3). Take the shelf down, and repeat 3-7 for the other bracket, and finally drive home the actual screws that will hold it up.
Hanging Shelves with Vertical Rails and Brackets
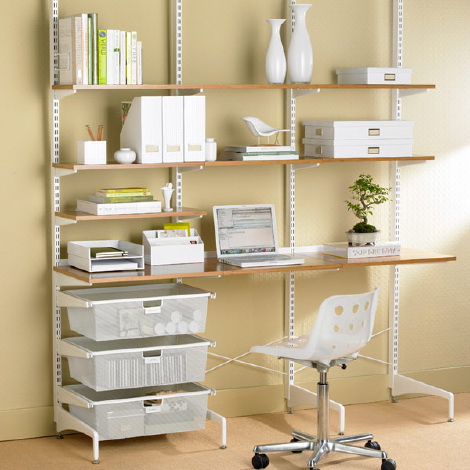
Shelves with vertical rails are a relatively cheap solution. They consist of two or three vertical rails that are screwed directly to the wall. Brackets clip into the rails, and the shelves lay across the brackets.
The IKEA version is functional, but rather pricey for what it is. You can buy the parts at any hardware store and build your own to fit your space. If you go this route, Laminated MDF is a good choice for the actual shelves as it is pretty stiff. However, it can be unattractive. Another choice is to buy some 12 inch pine boards at your local lumber yard. They will cut it to length for you there, so have the measurements ready. You can then stain or paint it yourself.
Canadian Tire has a two shelf 24″ kit for 19.99, (White, melamine laminated MDF) so this would be a cheap starter. You could replace the shelves later.
These instructions are written assuming the DIY route. If you buy a package, then some of the cutting and measuring can be eliminated.
Design and materials.
Typically, 3/4″ lumber storing books can span 36″ without significant sagging (according to the wisdom of the internet). However, studs are 16″ apart, so 32″ is a better choice. A 4 foot shelf can be problematic. The only mounting solution is three rails at 16″ spacing or 2 at 32″, leaving 8 inches of overhang at either end. The danger is that a partially loaded shelf might flip up like a teeter totter if there is too much overhang. I’d feel better with 3.5 foot shelf, which could be mounted on two rails at 32″ spacing and 4.5″ of overhang.
Leave about 6 inches of excess rail above the top shelf and below the bottom. This will help distribute the load nicely over the wall.
You might wish to take a measuring tape and a piece of chalk and actually draw your shelving on the wall before you head out to the store. It really helps to visualize the solution. (hint – find the studs now, as they are where the rails go.)
Materials: 2 or 3 rails. Buy them pre-cut. They typically come in 24, 30 and 60 inch lengths. 2 or 3 brackets for each shelf. Shelves. Screws. Drill, Bits. Driver. Helper. Level. Plumb Bob and chalk line (optional) Chairs or step ladder.
Getting to work:
Step 1: Preliminary Reconnaissance Figure out where you want the shelves to go, and hold up the upper one to the wall. Mark the end points so you know your boundaries. Now you need to find the studs. I’ve discussed that in the L-Bracket shelf instructions, so I’ll leave you to it. However, if you are hanging a 24 inch shelf on 16 inch studs, that leaves 4 inches of overhang at either side. You might have to move your ideal location over a bit so that the shelf is centered on the studs. Once you’ve found the studs, hang a chalk line and mark it. Alternatively, mark it with pencil in several locations and use the edge of a shelf, or even the rail itself to mark the studs.
Step 2: Like before, we’re going to do one side first, and then match the other to it. Figure out where the top of the rail needs to go. Mark the top screw hole, and drill. Again, the drill bit should be smaller than the screw. Lightly screw the rail to the wall using the top hole only. Let the rail hang loosely. Hopefully the rail will hang exactly over the line you drew earlier. If not, you have to decide now which vertical you want (i.e. Your studs aren’t vertical, or the gravity works differently in your house) . The likelyhood is that neither is correct. Check with the level if you need to. Once you are satisfied, mark the remaining screw holes. Tip: You probably won’t be able to get a pencil to touch the wall through the rail. Use a skinny nail, and give it a light tap with a hammer to mark the wall. Draw a circle around the marks so you can find them.
Step 3: Mount the first rail. Take out the single top screw, and take the rail down. Now drill out the holes you just marked. Put the rail back up, and screw the screws in until they are just tight. It’s best to do the top and bottom first, ensuring everything is lined up straight. Then fill in the middle ones.
Step 4: Mark the other rail CRITICAL STEP The first rail was easy, as we didn’t really care too much about the vertical placement. The second rail has to match the first exactly. There is really very little wiggle room here. If the rails are mis-aligned, the shelves will be sloping, which is not one of the properties of shelviness we desire. This can actually be very tricky. The obvious solution would be to measure down from the ceiling. THIS WOULD BE WRONG. Remember, everything in your house is wrong. There are no straight lines and no 90 degree corners in your house, and every time you pull out a tape, you’re introducing error into the equation. One might be tempted to try and line up the second rail by partially assembling the brackets and temporarily mounting a shelf using the brackets and a shelf. In my experience, this is more trouble than it’s worth. It might be a workable idea when you have 3 pairs of hands, but then communications between those hands becomes an issue. Hopefully you’ve bought pre-cut rails, so you can use this technique: Have your helper put a shelf, or other rigid straight body right across the top of the mounted rail. Make sure that it is flush to the wall and the rail. Now, using the level, level the shelf and mark the underside where it meets the other stud line. The person marking should be the person adjusting and watching the level. Now you can mount the second rail with its top just ever so slightly above this pencil line. (Keep in mind that the pencil mark takes a bit of space.) Follow step 2 and 3 for the second rail. It’s a good idea to measure the spacing at the top and bottom to make sure they are parallel. If you’re within an 1/8th of an inch, you’re probably ok.
Step 5: Mount the middle rail (if required) If you need a center rail you can mark the top just by balancing a shelf across the existing rails and matching the rail to it.
Step 6: Tighten screws another half turn. If you over tighten, you’ll damage the wood underneath, and the screw might pull out.
Step 7: Attach the shelves. This is a pretty straightforward task.
We’ve gone through some fairly basic tasks which demonstrate a few principles. The first and foremost being that measurement is rife with errors. What I have attempted to show is that we can do a whole lot of quality work while keeping this error prone task to a minimum. Also notice that we’re screwing directly into the studs here. That is why there are no drywall anchors. While anchors do carry significant weight, they’re not strong enough for shelving that is going to carry anything more than decorative items — and you’ll be wanting nicer shelves for that task.

First Time DIY: How to Attach Wooden Shutters To Brick
Hey all! Here’s a fun project you can do over a weekend or two! I say “or two” in case you’re like me and this is the first time you’ve ever done something like this. HAHA!
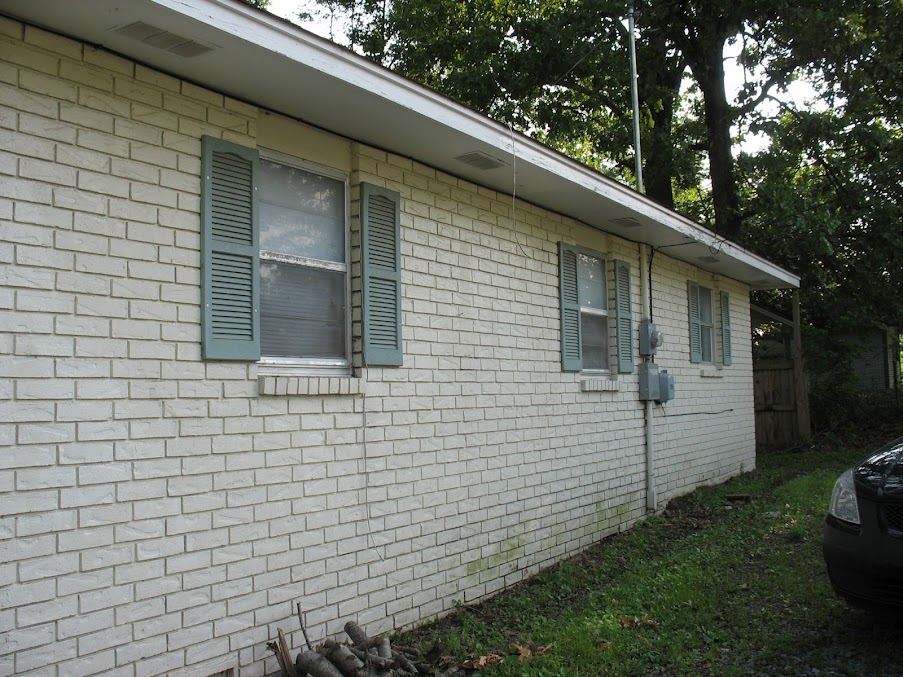
My wife hated the shutters we had on our house… and rightly so…
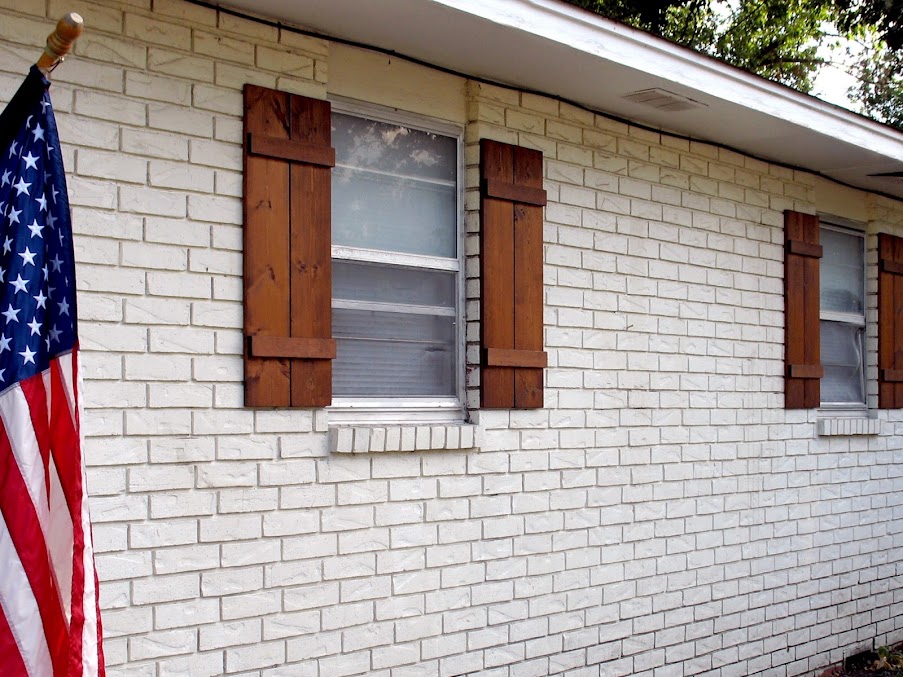
So, we decided to build some board & batten shutters. FUN! Now, if I only knew what board & batten shutters were…
Board & Batten Shutters – “Board & batten” usually refers to vertical siding where wood strips (or battens) hide the seams where other boards are joined. Here’s a site that has a lot of examples of the different styles of board & batten shutters.
After figuring out what they were exactly, I looked up a design and built them. I’m not going to go into detail on how to build them, because frankly, I screwed up too much to properly teach you. But, if you’re interested, here’s a tutorial from Lowes that matched with the style that I built.
Again, I had never done anything like this so, like a good lad, I went to where the experts were: DIY.StackExchange.com! This post is actually based on my question to them. Now, onto the process:
- Measure, level and mark boards, appropriately aligning the future holes with the mortar between bricks.
- Drill pilot holes into the wood shutters, including a 1/4″ countersink to cover the screw heads up with wood filler.
- What I learned: Unlike screwing wood to wood, where you can sink the screws into the wood easily without a countersink, when attaching wood to mortar, if you do not provide the countersink hole already and attempt to perform said action, you will strip the mortar and the screw will just spin and stay loose. Not good.
- Next, re-level shutters and mark the mortar with the masonry drill bit through the pilot holes. I found that only drilling the top two holes worked best for me. I’ll get to why in a minute. An extra set of hands comes in handy here.
- Set the shutter down and drill the top two mortar holes completely.
- What I learned: Be sure to drill into the mortar enough to where the screw tip won’t hit a dead-end (Most recommended a 1/16″ or 1/4″ of extra room beyond the screw tip). If you don’t give a little extra space at the tip, you’ll encounter a great deal of resistance, the screw will not go in all the way and you’ll have to get the masonry bit out again.
- Attach the shutter to the house using the top two holes.
- Now, we’ll finish the bottom two holes: with your masonry bit, drill into the mortar through the board.
- What I learned: I found this process to be the easiest for me, as my pilot holes didn’t always match up completely when I attempted marking then drilling all four at the same time. Less margin of error on my part. But, this is became a personal preference. Decide for yourself.
- Finish attaching the shutter to the mortar at the bottom with your screws.
- Use wood filler to patch the holes, lightly sand filler.
- Paint/stain/seal accordingly.
- What I learned: I had already applied a sealer to the back of the shutters before attaching them. I taped off my house using wide painter’s tape after they were up and it saved me a huge headache of cleaning sealer off my house with mineral spirits.

click to enlarge
Overall, I also learned:
- I marked & drilled all of the pilot holes into the shutters at one time which saved me on having to switch between the masonry & wood drill bits. HINT: If you forget to take out the masonry bit and attempt to drill into wood, you very likely could start a friction fire! Haha!
- Having two drills is a life-saver: I had my hammer drill set up with my masonry bit and my cordless drill had my Phillips bit in it ready for the screws.
- Having a second pair of hands throughout the entire process was also a great deal of help. Thanks, Seymour!
- The DIY.SE community is of great help!
Thanks for your help folks! I hope this walk-through helps someone else, too!

General Tips for Household Repairs.
This blog posting was originally written in 2008 for a friend of mine who was unable to perform simple repair tasks around her house. The original purpose was to assist her in hanging shelves on her wall. I will post the follow-ups soon. It is intended for those people who know that the flat end of the nail is the end you hit with the shoe, and that butter knives make acceptable screwdrivers.
Golden Rule:
Measure twice, cut once.
Silver Rule:
You can’t measure anything accurately. Therefore, Always dry-fit the project and make sure it fits.
or
Reality often has it wrong, so you have to be wrong in the right way to make things work.
If you watch a professional, you’ll see that they’re constantly dry-fitting, adjusting and re-fitting pieces. However, you can reduce the number of measure/cut cycles you go through by reading BMitch’s excellent blog post on tape measures.
General tips:
Do I have Plaster or Drywall?
There are several types of plaster you might run across in homes built in the 1960’s and earlier. The most common type is Plaster and Lath. Lath is thin strips of wood nailed up to the studs in a diagonal pattern. Then Plaster is spread on top to make a smooth finish. In really old houses, the plaster contained horsehair to give it some tensile strength. The only advantage of a plaster wall is that you don’t need to find a stud for light loads — the lathe is everywhere. The major disadvantage of plaster is that it is brittle, and cracks propagate quickly. Put a piece of tape over the plaster before banging in a nail, and you can reduce much of the cracking.
Drywall is factory made gypsum plaster sandwiched between two sheets of thick paper. It comes in sheets (4 x8′ or longer) and is screwed directly to the studs. It is taped together with paper tape and a plaster like compound called Drywall Compound (or MUD) to hide the joins. It’s a lot faster to put up, and relatively easy to repair. However, It doesn’t support much weight at all. Usually light loads will be attached with a plastic drywall plug to spread out the downwards force so that your nail or screw doesn’t pull down the wall, opening a crack like a zipper would.
For houses built in the 50’s and 60’s you may come across a solution that is the worst of both worlds: Gypsum Lathe and plaster. Gypsum lathe is essentially thin sheets of drywall screwed to the studs. Then it was plastered over as if it were wood lathe. The major problem is you still get the brittleness of plaster without the additional support of wood lathe. Furthermore, the gypsum came in large sheets, so that the plaster doesn’t flow in behind and lock like it does with wood lathe. This can lead to de-lamination of the layers, particularly in cases of water damage.
ALWAYS drill before screwing.
ALWAYS! No exceptions. Select a bit so that the shaft of the screw is about the same size as the bits. This will remove the material that you would otherwise have to push aside (with a splitting risk) while still leaving enough material for the threads to grab.
Reject all screws except the Robertson (Square head).
It is the easiest to use, and it’s your patriotic duty as a Canadian to support this superior screwing technology. The only drawback is that you have to use the correct sized driver. Robertson screws save all sorts of heart-ache and pain. The greatest advantage of the Robertson is that the screw will stay on the driver. This means that you don’t need the other hand to hold the screw. This frees up the other hand for duties like holding onto the work of holding onto dear life as the case may be. The Phillips screw was designed so that the drive would twist out of the screw head if it got too tight. This is a perfectly acceptable design decision. However, usually, we don’t want our driver to torque out of the screw. (Exception: Drywall screws)
The job will take twice as long as you anticipate.
ALWAYS! No exceptions. Even when you take this rule into account.
Nothing in your house is built right.
There are no 90 degree corners. Nothing is flat, and parallel walls aren’t. Make no assumptions. Use a level and a plumb bob to determine horizontal and vertical.
Hanging light things on a wall
If you’re hanging something light, like a picture, or a bathroom medicine shelf, you don’t need to find a stud, you can use drywall plugs instead. Usually the package will tell you what drill bit to use (5/8 or 1/4 are pretty standard.)
Nails and screws are not interchangeable.
They each have specific uses. Other than tiny picture hangers and quarter round, you probably shouldn’t be using nails around the home.
Know your screws and what they are for:
These are the common screw types that you’ll see at the local hardware store. There are many more specialty types, but here are the basics.
Wood Screws
 Wood screws are pointy, and may or may not have threads all the way to the head (usually not). Often the head has a conical profile allowing the head to be driven into the material and lay flat (or covered with a plug or wood filler.) When joining two pieces of wood together, you want the unthreaded portion of the screw to be about the same length as the thickness of the top piece of wood. This means that the threads will bite into the lower piece, and everything will pull tight together. If you were to use a drywall screw instead, it is quite likely that the screw will actually end up forcing the pieces apart slightly.
Sheet Metal Screw

Pointy, sometimes there’s a self-tapping notch near the point. Usually the head has a dome profile, but counter sunk does exist. Finer threading than wood screws, and the threads go all the way to the head.
Machine Screw
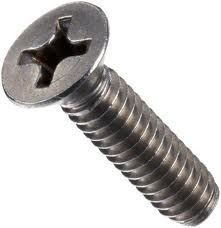
Dome profile. Flat point. Can take a nut or be screwed directly into a tapped hole in metal objects. (This means you have to have a threaded hole to screw into. Absolutely no good for wood)
Lag Bolt
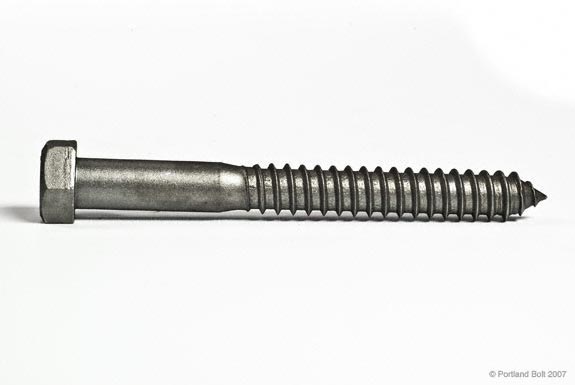
Not actually bolts, as they don’t take a nut. Usually quite large, and rather than taking a screwdriver, they usually have a hex head. Big coarse threads, that don’t go all the way to the head. This is a screw for joining big structural lumber.
Carriage Bolt

Basically a Machine screw, with a nut. Carriage bolts tend to be big, like a lag bolt. Often the name is used interchangeably with a Machine screw. Basically, these are used to join two pieces of metal together, often with washers to allow some motion. Think Meccano, but bigger. The can also be used to join beams together. A hole of appropriate size is drilled through the material, and the bolts are tightened so that the friction between the wood pieces prevent any movement. You can see this use in many pergolas and wooden backyard play sets.
Drywall Screw
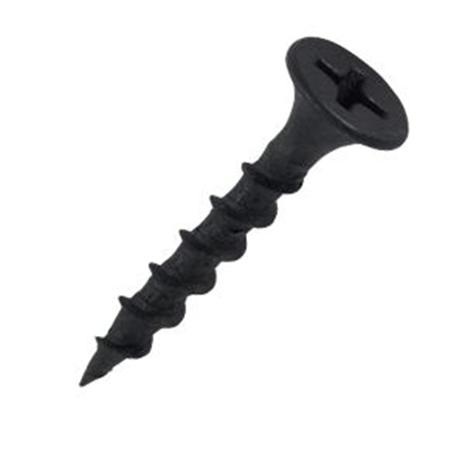
Skinny, sharp, long. Usually black or blue in colour. Use these only for putting up drywall, and nothing else. Usually only available in Phillips heads. People putting up drywall will usually buy a special tip for their drill that takes advantage of the Phillips driver’s tendency to slip out of the screw. This allows them to lightly dimple, but not break, the paper sheath. Drywall is the only application where I would recommend using a Phillips head.
Deck Screws

These look pretty similar to thicker drywall screws except that the are available in Robertson heads. They’re usually green in colour, and are treated to put up with the corrosive nastiness of pressure treated wood. If these are the only screws you have laying around, then it’s probably safe to use them for interior repairs.
Home Improvement Blog on Google+
Home Improvement Blog on FaceBook
Bloggers Wanted
Latest Articles
Topics
- Electrical (8)
- Introductions (7)
- Plumbing (3)
- Projects (13)
- Repair (4)
- Safety (5)
- Tips and Tricks (5)
- Tool Review (5)
- Tools (6)
- Uncategorized (5)