Projects
Introduction: Adding on a New Room
I have been writing blogs for about 2 years but mostly the previous blogs I have been involved with are politically related.
I have enjoyed DIY for most of my teenage and adult life. So, when I came back from a 12-month stint in Iraq, I had some extra money that I could use to add on to my home.
Luckily, adding on wouldn’t be that hard since there was a preexisting trussed roof over the screened patio I planned on enclosing. By enclosing the new room, it gave me an additional 170 sq ft. As it turns out, during construction of the new room, my 15 year old air conditioning system also bit the dust. While I am still paying for my new Trane XR15 with heat pump system, it has saved me tons of money on my electric bill every month since being installed – and I now have an air conditioned 170 sq ft addition – which I wasn’t originally planning on doing.
On to the pictures!

Before constructing the new room, I hired an architect and engineer to certify the blue prints. Being a stickler, I obtained a legal permit through my local city for this construction. During the architect and engineering phase, it was determined that a suitable hurricane-proof footer must be poured along the existing foundation. Seeing as this house was built in 1983 – and the hurricane codes were not as up to date as today – this step cost me more money than I had originally intended to spend, but doing things the legal way led to less stress in the end.

When I had hired a masonry contractor to provide me with a quote, one thing he mentioned was that since we were going to use so much fiber-crete concrete that why not just pour a patio slab outside the new room? It made sense because for the amount of money you end up paying the concrete company to come out and deliver concrete to your home, you might as well use it up.
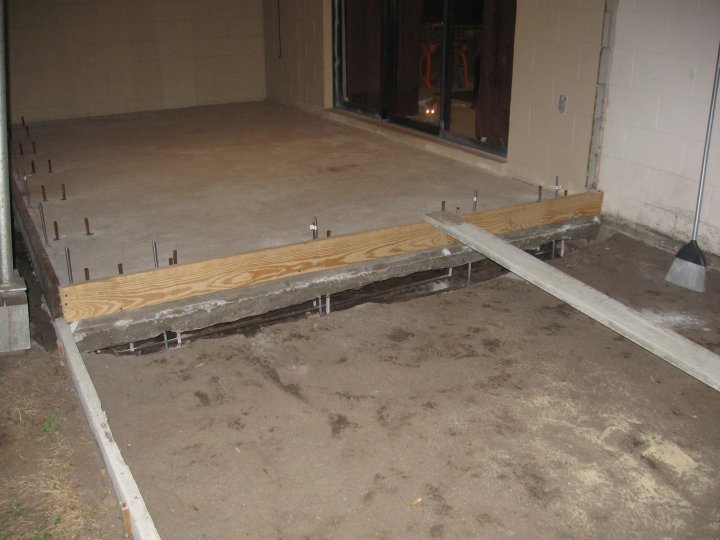
In this construction, you can see several bars. The brownish color bars are rebar and that helps fuse the existing slab to the new slab. The silver bars are two and half foot long all thread rods from Lowes, cut to length. This is where the pressure-treated 2x4s will attach with a nut and two inch washer later on.
You can also see the sliding glass door that will ultimately be removed to make the room flow better.
The fiber-crete concrete was something new introduced to me by my architect. This concrete requires no rebar mesh. It is infused with fiberglass and makes it stronger than any concrete fused with rebar. It is a little more expensive but easier to work with.
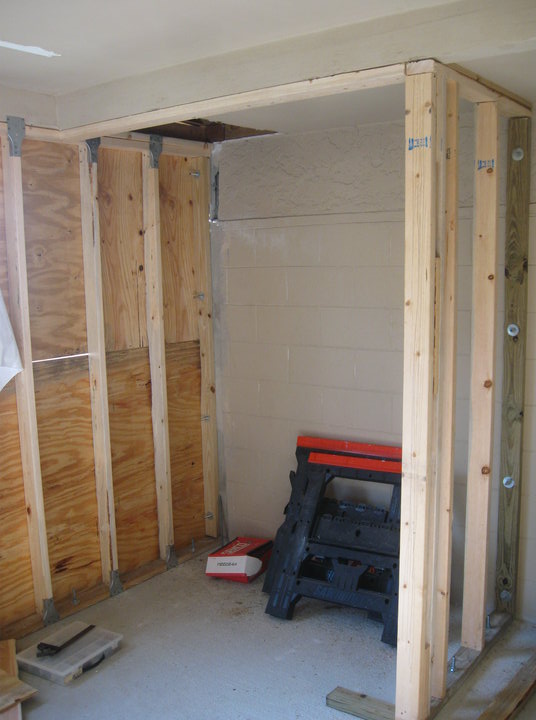
I’m going to skip ahead here a little bit since I didn’t take pictures as much as I would have liked. Here, you can see the pressure treated 2x4s mounted as I said previously. The corners are also attached to the adjacent wall using the same all thread rods cut to length, epoxied and then attached with a nut and two inch washer. The top and bottom plate are attached to the walls by SP1 and SP2 plates that are required by hurricane code. Pressure-treated plywood is used and in the picture above, you are looking at a 4 ft deep by 6 ft long closet. Next to the closet is an alcove we designed to have as a computer area.
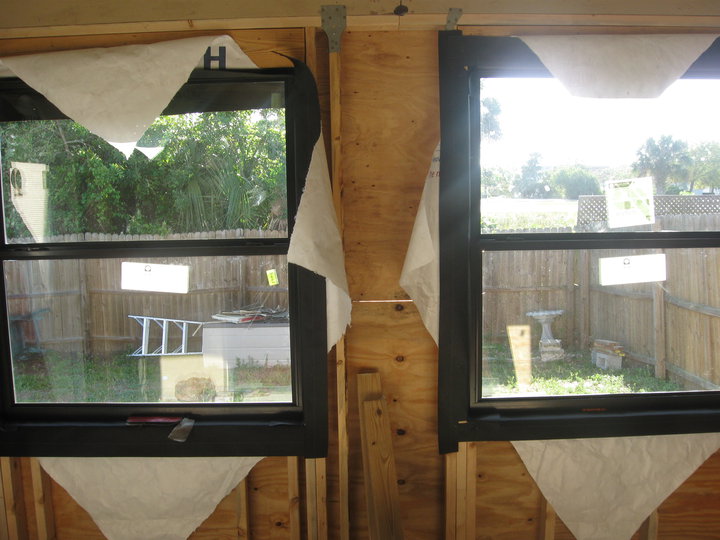
These windows are double-paned, energy efficient windows.
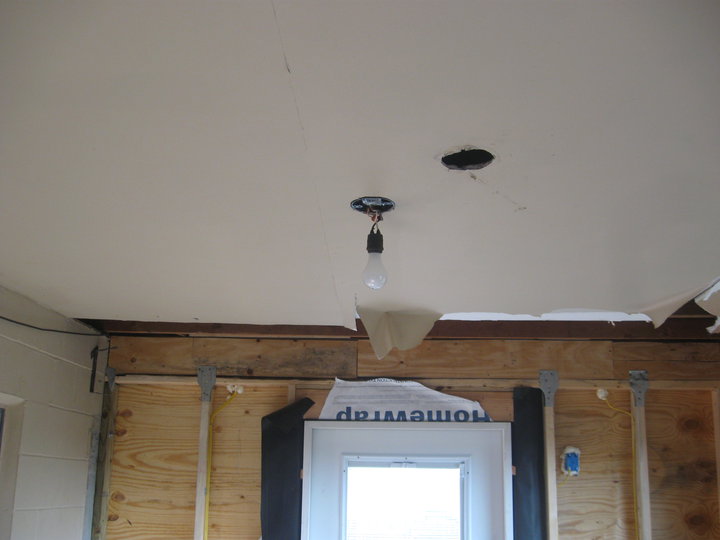
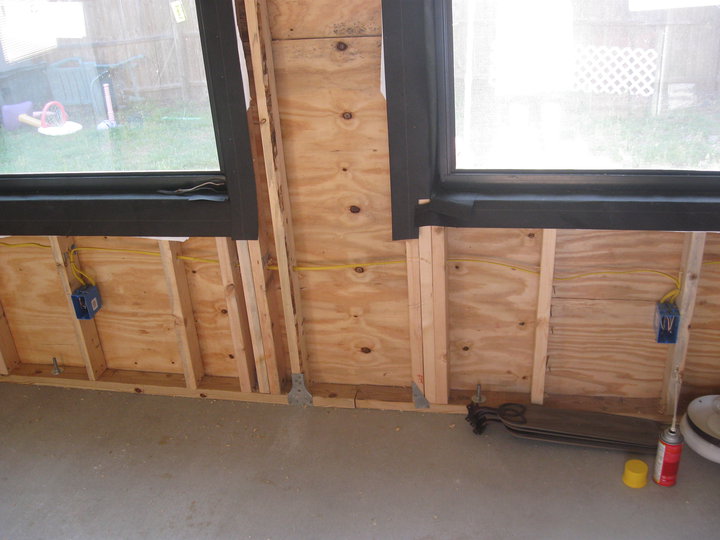
I hired an electrician to do all my electrical work. The only two things I sub’d out were masonry work and electrical work. This was all done to code. Here, you can see the cripples, jack, and king studs with the window. SP1 and SP2 plates are used to help hold everything together. We used Tyvek on top of tar paper to keep everything dry over the years and increase the R value of the room. I would later add insulation in every cavity and foam to close up little holes.
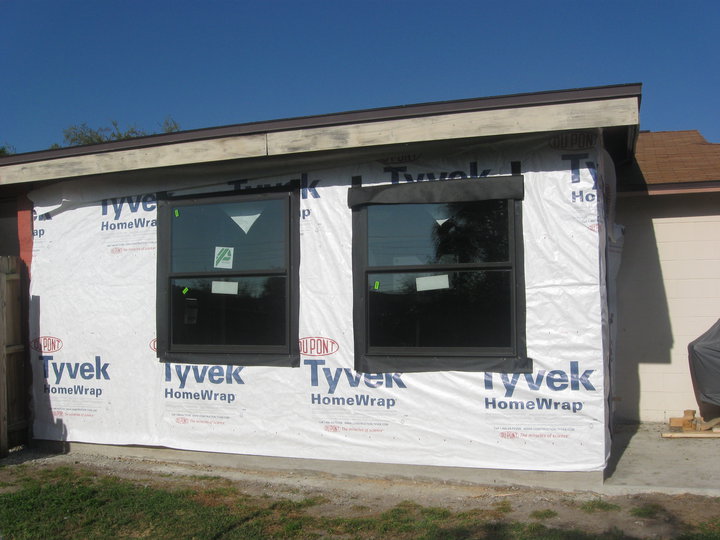
The board at the top of the room would later be replaced and I would install new vinyl soffits later on in the year.
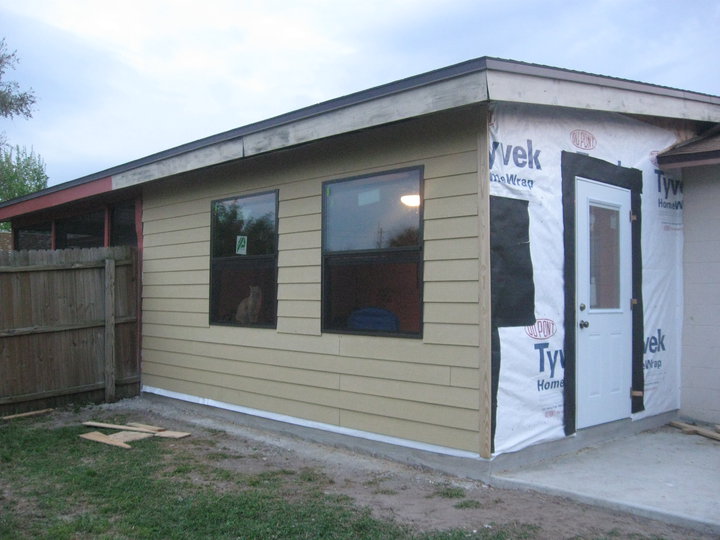
We used HZ-10 Hardiplank board. This was my first experience with it but installation was a snap.
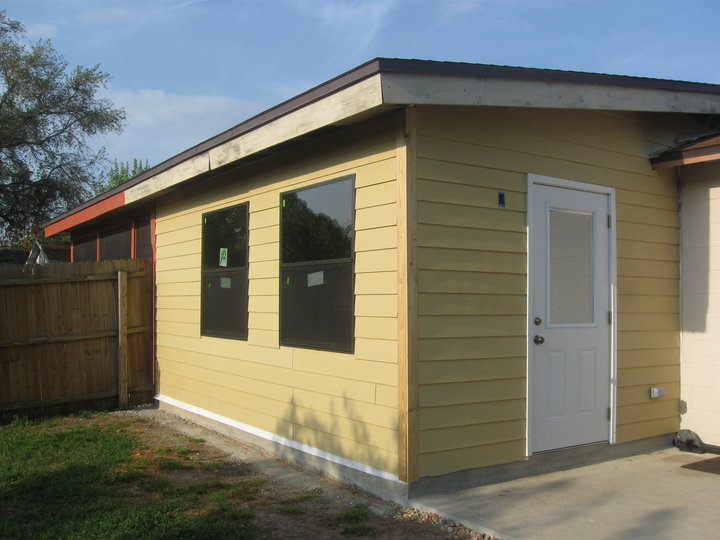
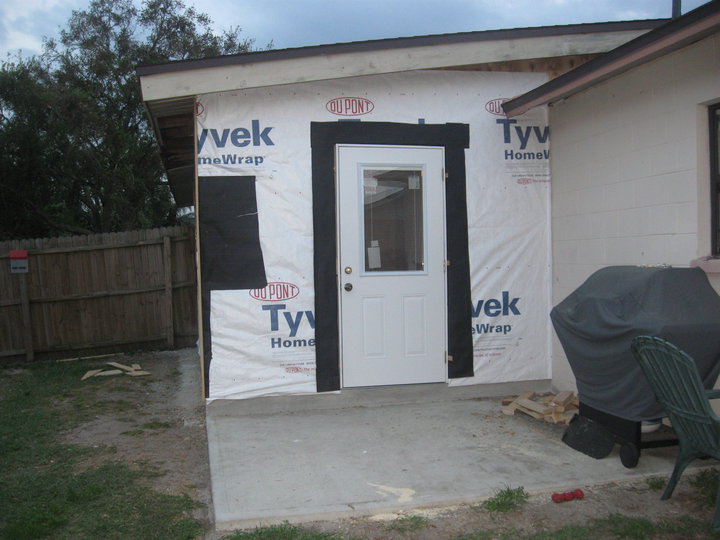
This is about the final end result before the electrician came back and installed my outdoor light. Electrical outlets were installed every 6 feet per code. The brick molding used on the door is vinyl. It is something I found at Lowes and it does not rot. Looks like the real thing. This is the HZ-10 color so I painted it a slightly tan color about 90 days later. Manufacturer recommends you paint it within 90 days. I used two high-security locks from Schlage and had my alarm system extended to the two windows and door. The door has a built-in window with blinds, which really helps with letting light into the home.
The room was also added with an outdoor receptacle that is GFCI certified. This is also required by code.
The new room wasn’t originally insulated in the ceilings so I rented a recycled paper blower from Lowes. This made it really easy to insulate the ceiling area by blowing in recycled newspaper into the ceiling cavity. Lowes was running a deal at the time, where if you purchased $200 in insulation, you were able to rent the machine for free.
The drywall was attached to the concrete by using pressure treated 1x4s fastened using Tapcon masonry screws. They were placed about 16 inches apart all along the wall.
The ceiling was painted using roll-on popcorn ceiling to match the existing ceiling texture of adjoining rooms.
We ended up tiling the floor and using bi-fold doors for the closet. The baseboard molding we used was called “base” and it matched the rest of the home.
In this picture you can see the final footer all the way around the home with the new patio that was poured. We have been talking about now enclosing the new patio slab with a screen to help beat the mosquitoes and the Florida heat.

Blocking the Window – Underappreciated Beauty
Let me just apologize up front because I didn’t do this project with blogging in mind, so the photos are somewhat lacking detail of the progress…
Ok apology out of the way. Now for the meat.
I. Love. Glass. Block. Windows.
I mean – seriously – aside from stained glass, where can you get such interesting designs?
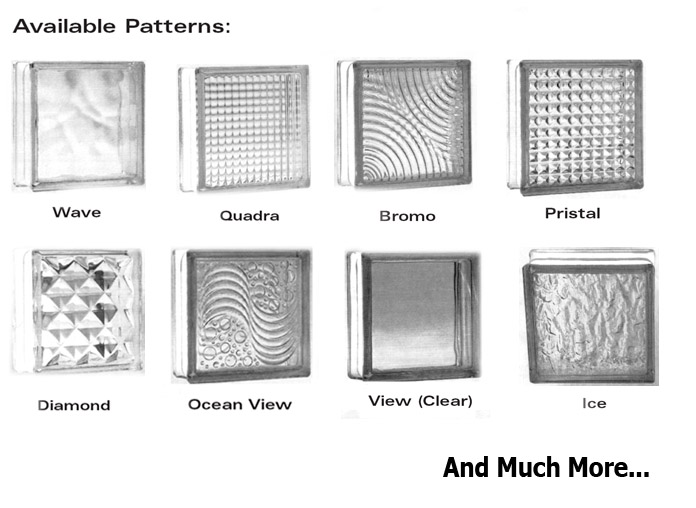
And there are, for the real enthusiasts, plenty of even more ornate, decorative glass block options out there.
I mean – how better to get light AND privacy? And look at what you can do with it!
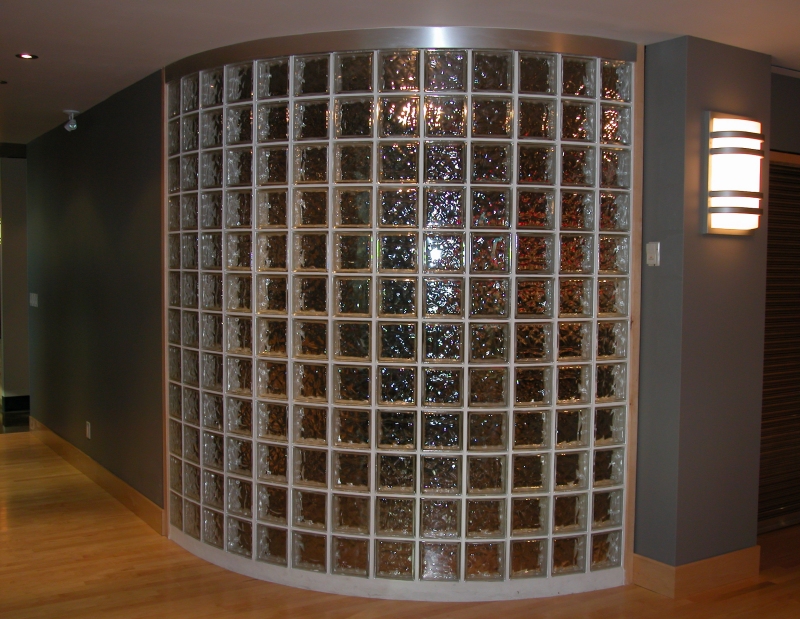
I mean that’s just COOL!
I think glass block is under appreciated today. I base this mainly on anecdotal evidence. It turns out that in the Baltimore metropolitan region, there are only TWO Home Depots that carry glass block and glass block supplies, and both of those are in lower income neighborhoods. How sad is that – that glass block is the “cheap option”? (And seriously at ~$12/sqft JUST for the glass, how that gets to be the “cheap” option is beyond me…) But anyway…
So you may remember our basement:

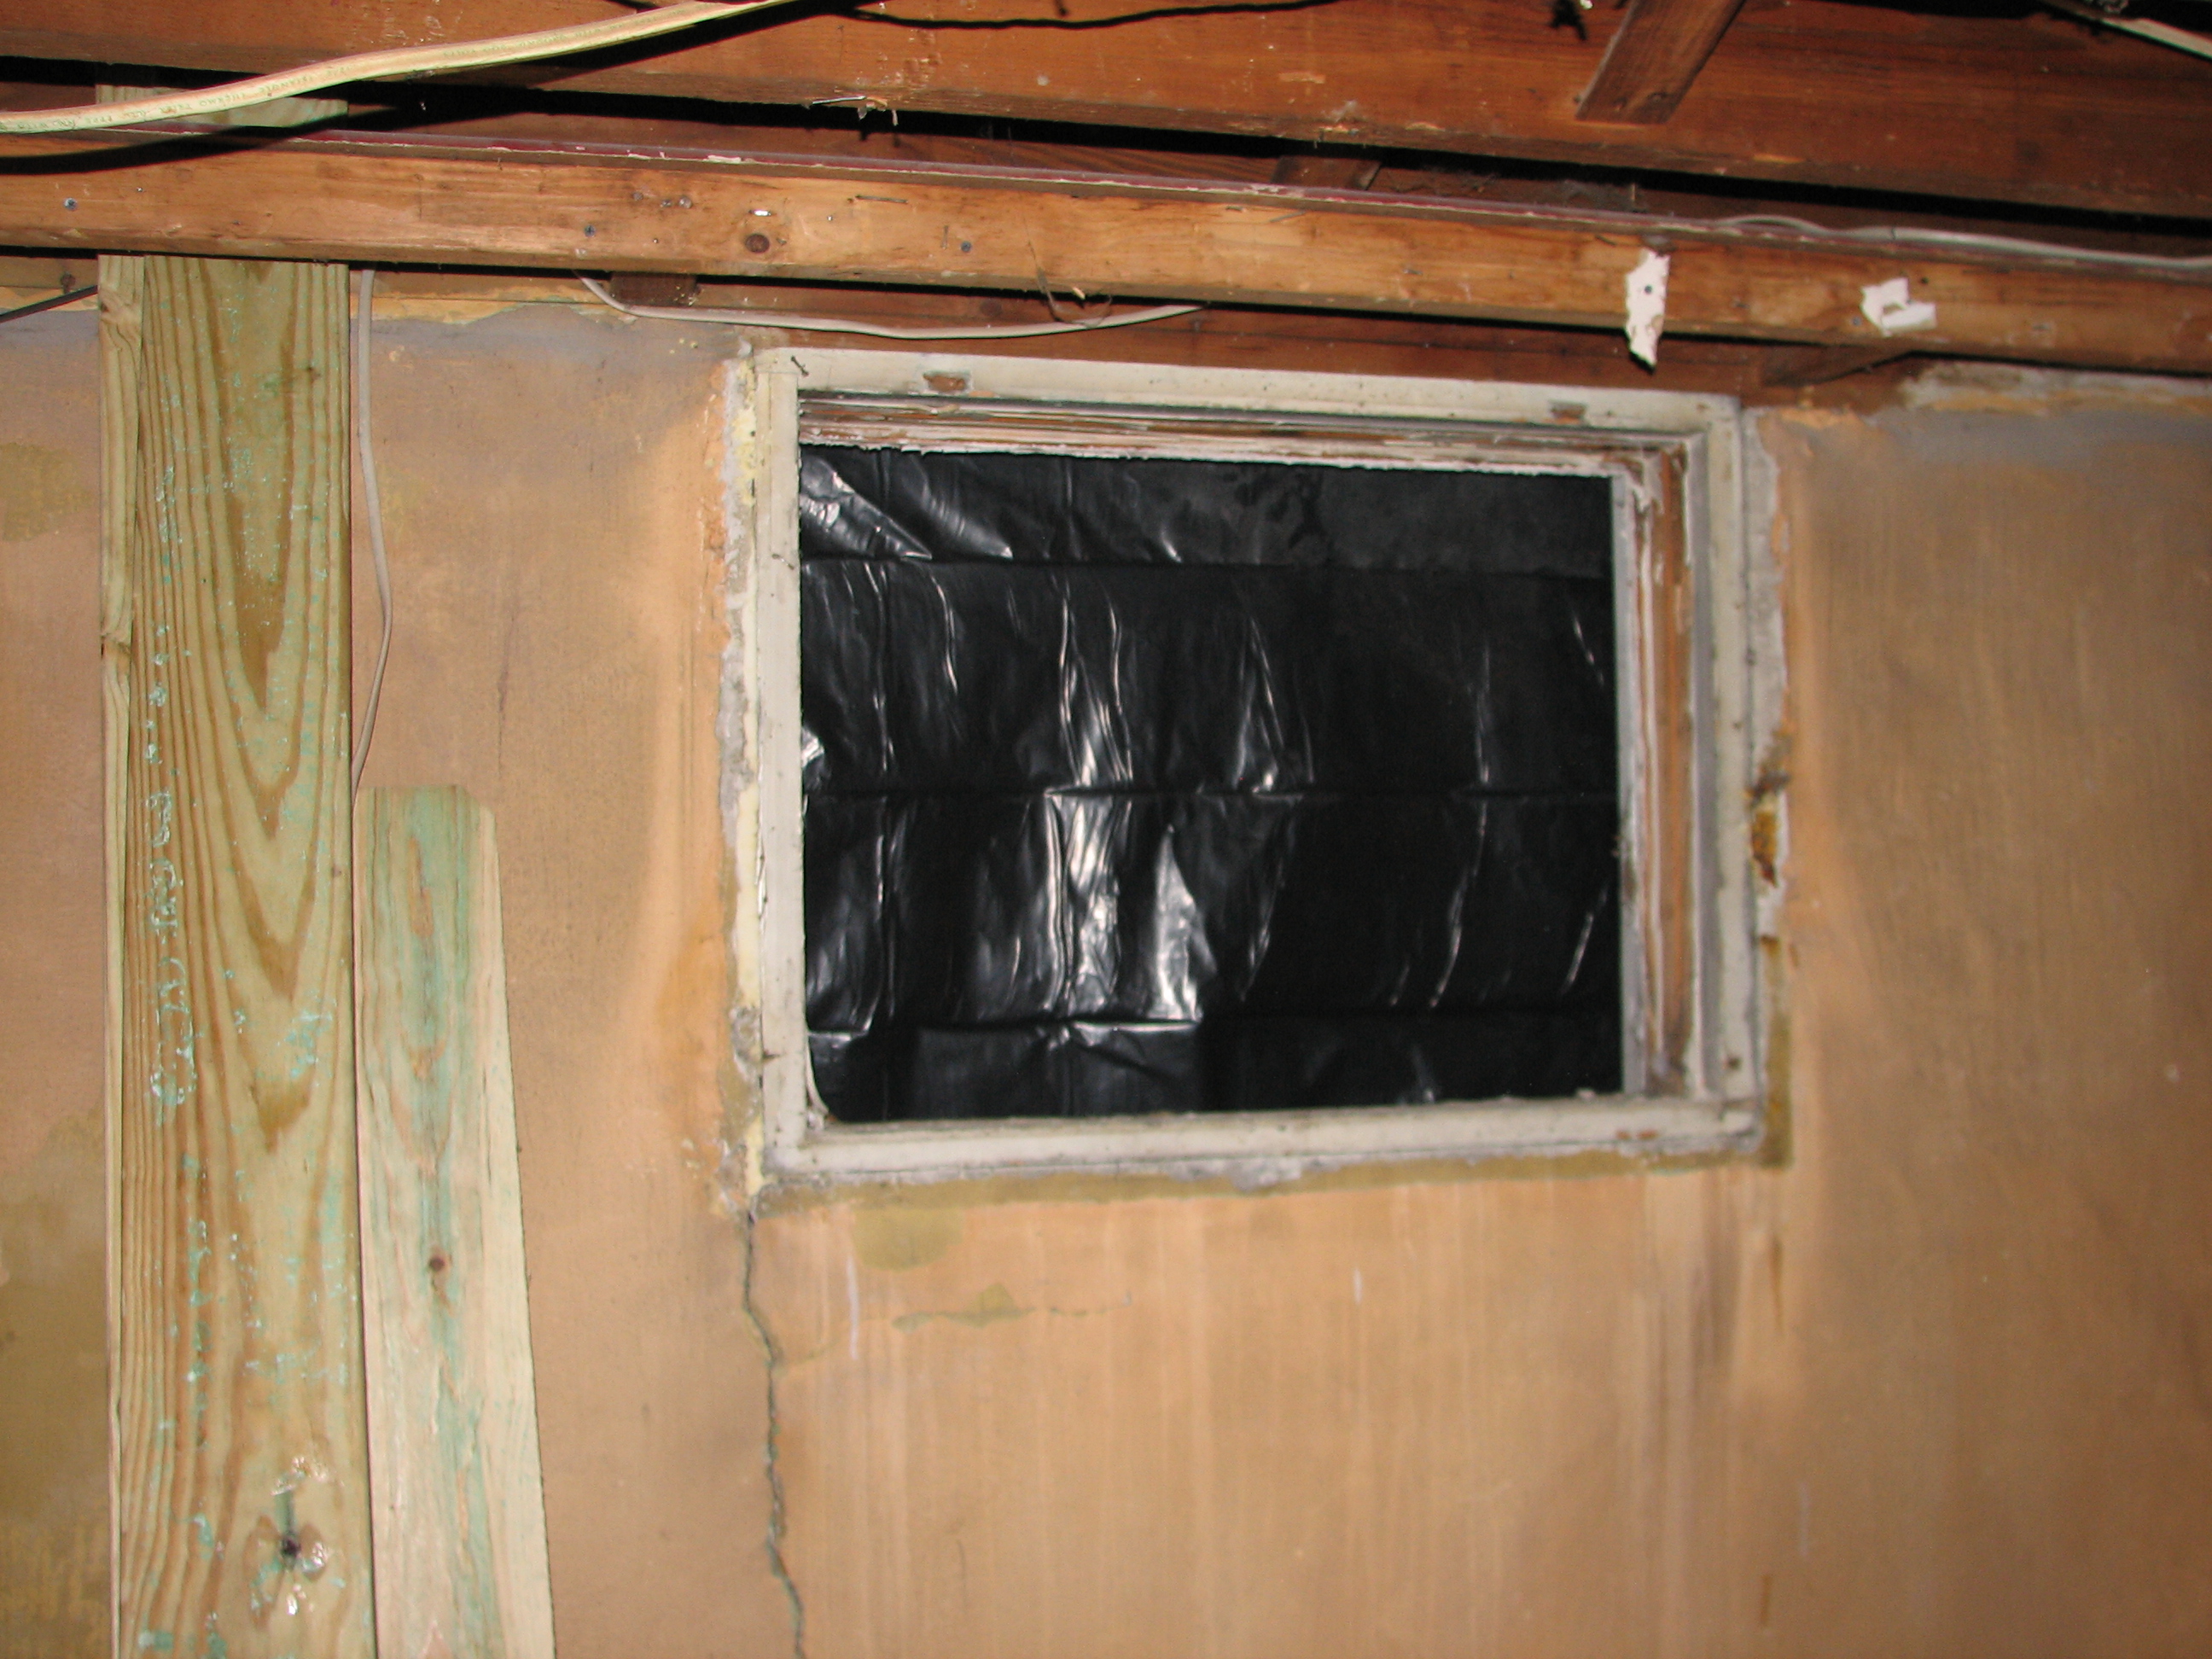
Specifically, our laundry area:
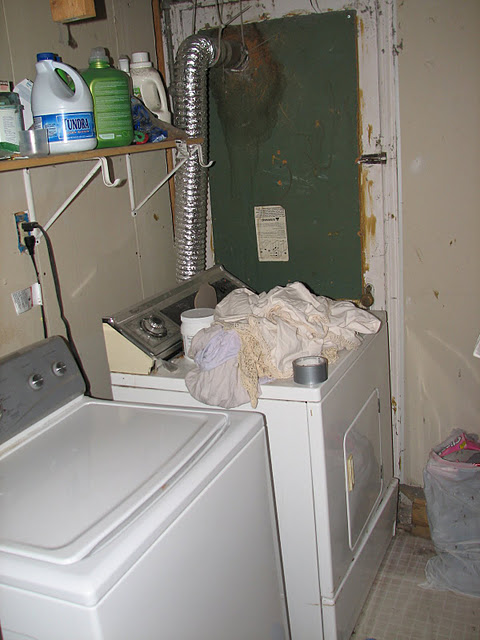
If you haven’t seen this before – what you’re seeing is, indeed, a dryer that is up against and VENTING THROUGH the exterior basement door. Yep, the previous home owners could think of nothing better than to block the secondary exit from the basement up with a dryer and to run hot moist air through it…
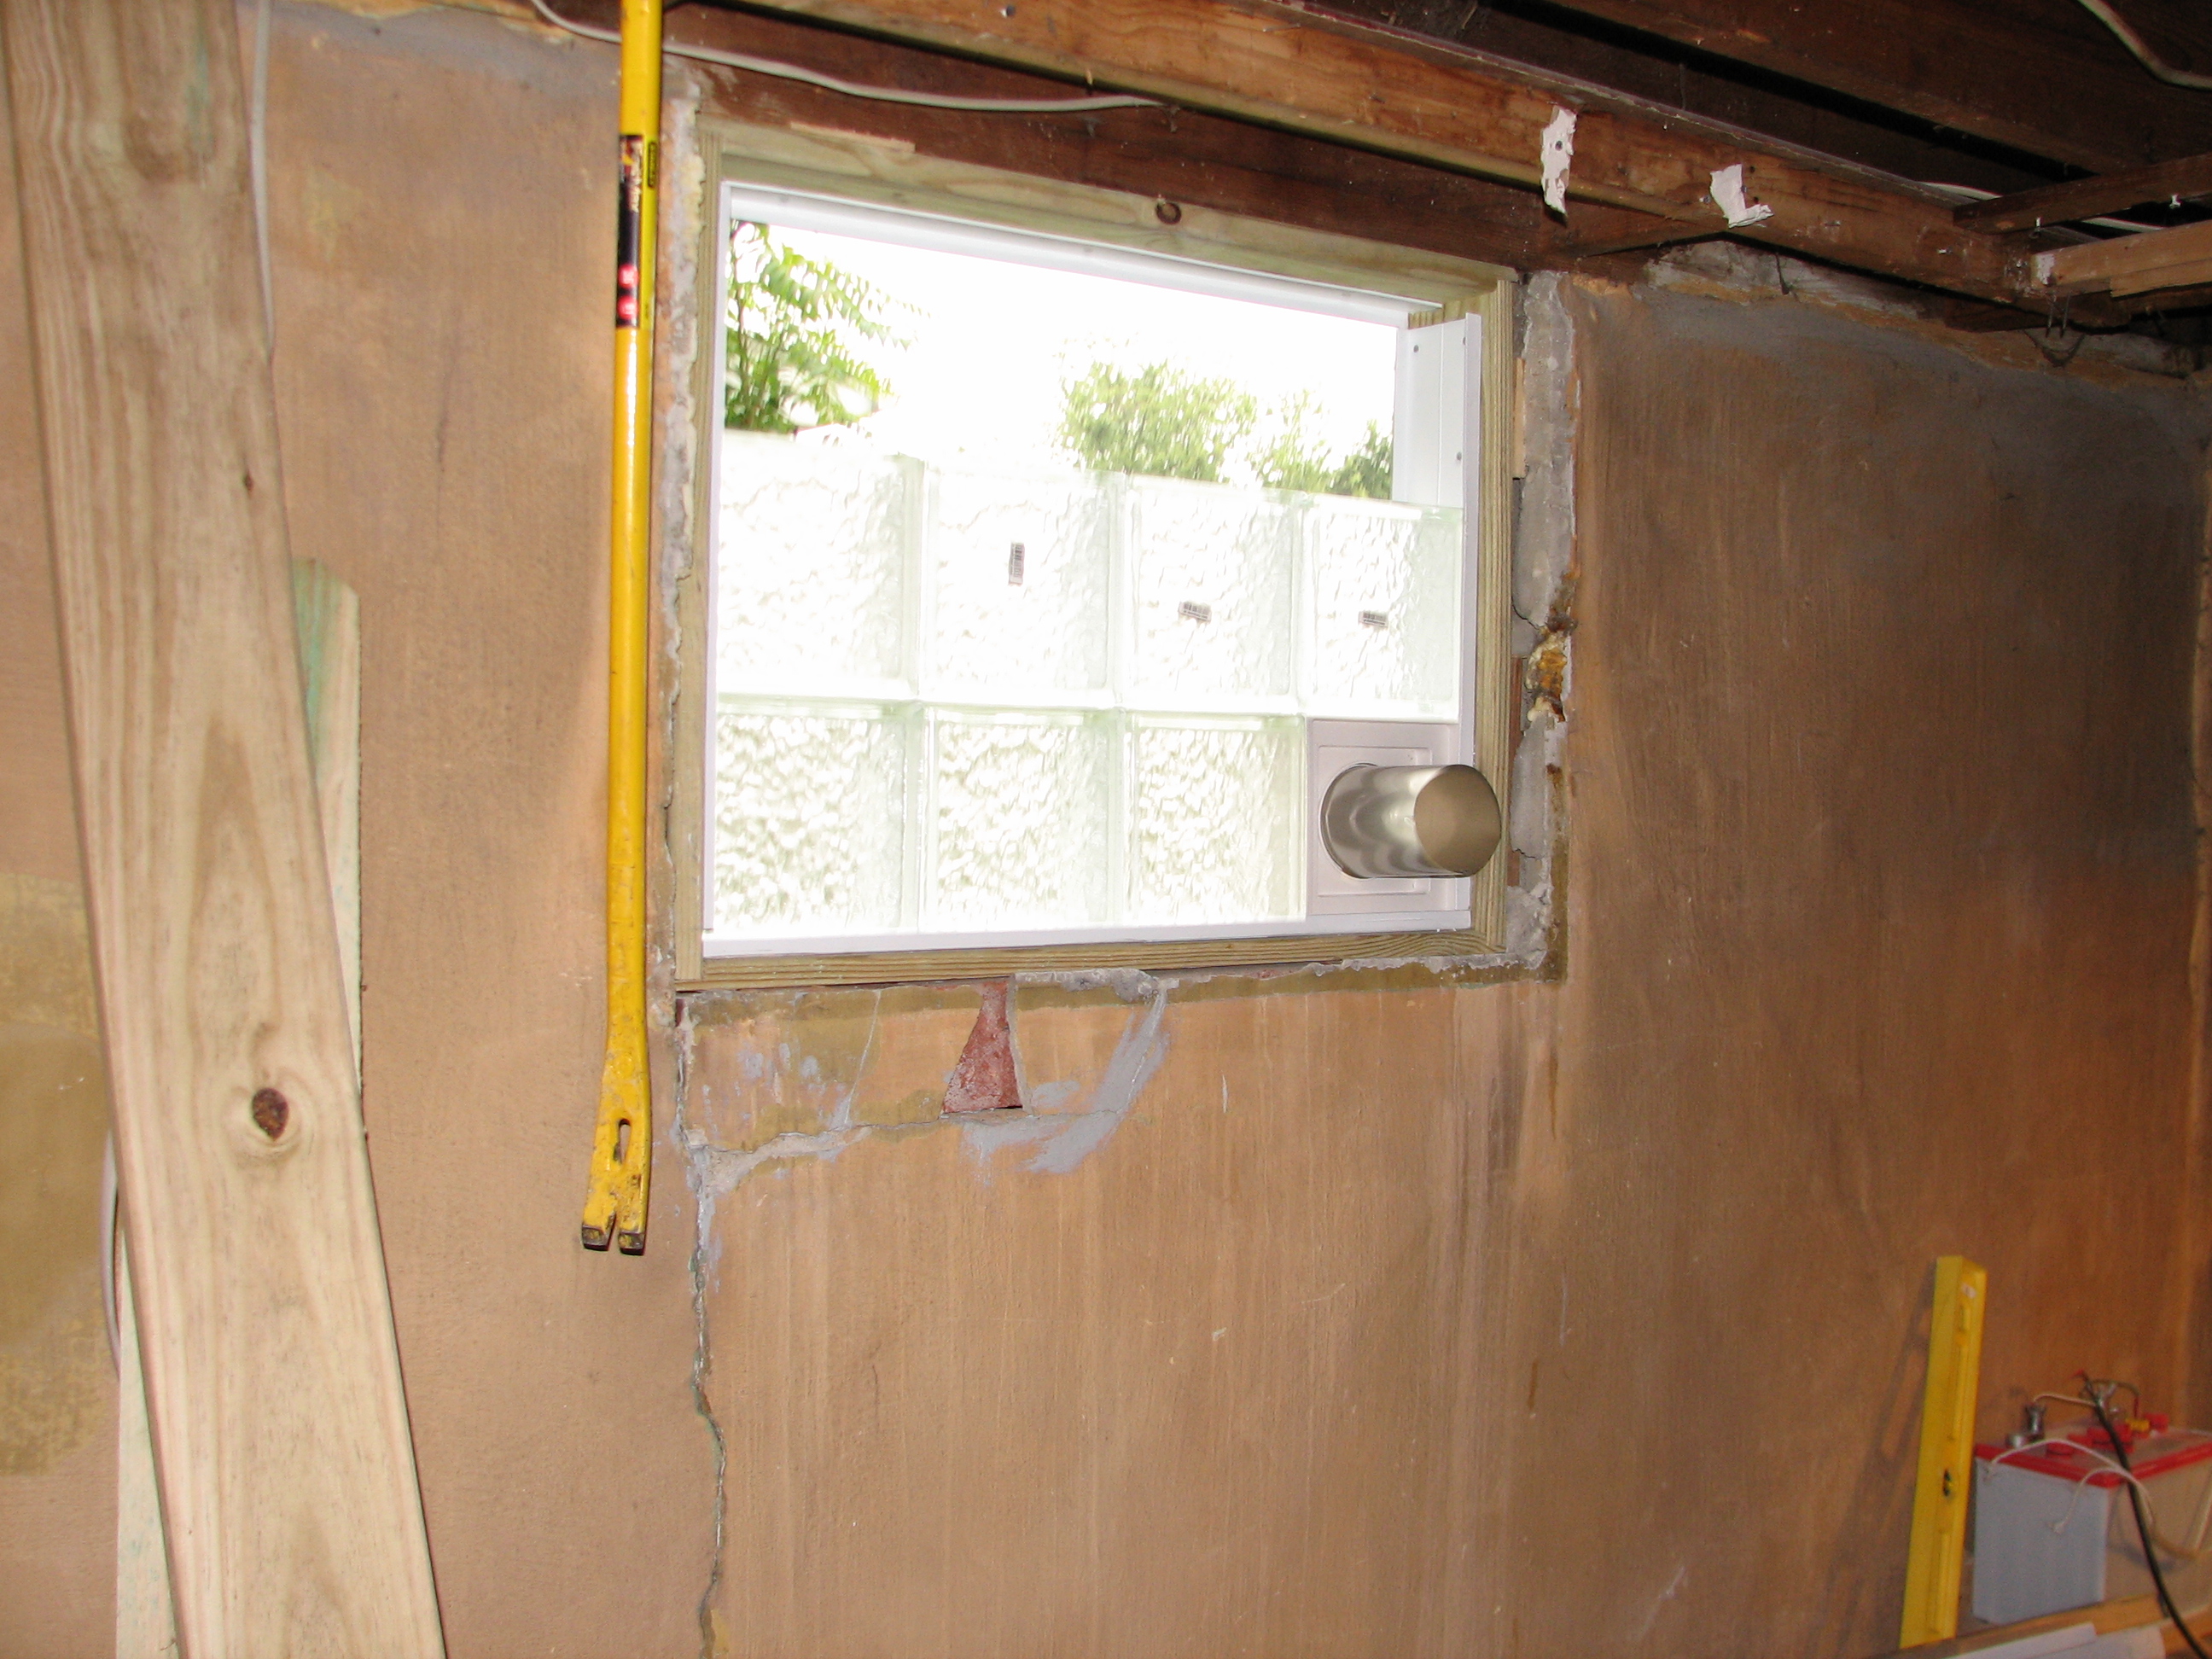
So we decided that this has to go. We want to move our laundry facility here:
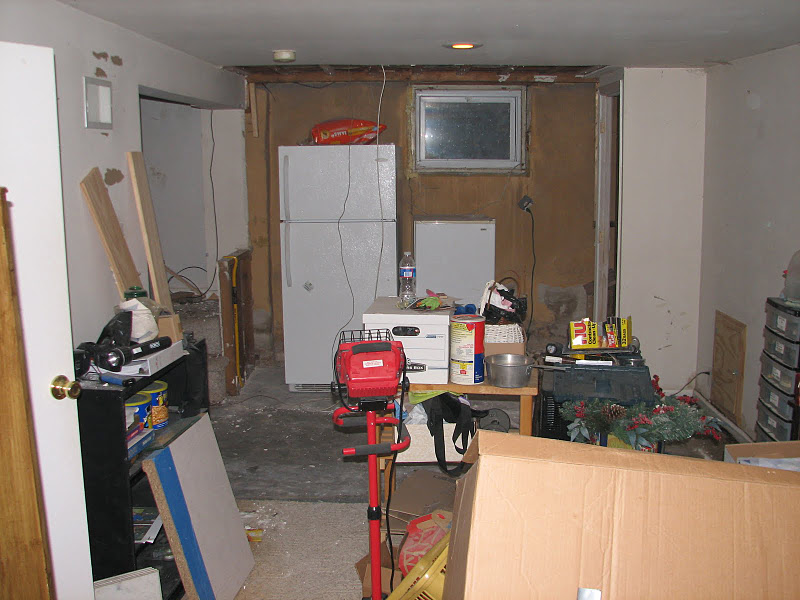
Which actually, now that demo is mostly done, looks more like this:
The idea being – come down the steps, turn left, open a closet door (double folding doors of course) and there’s the washer and dryer, and while we’re at it, reclaim the basic ability to exit the basement directly to the outside world. You know – in case of, oh, things like a FIRE? (Idiot previous owners…)
So a few weeks ago, I got to work on one of my favorite kind of projects – a brand new glass block window!
Pittsburgh Corning sells a fantastic glass block system called (rather unimaginatively, I’m afraid) Pro-vantage, which consists of vinyl tracks and spacers, like these.
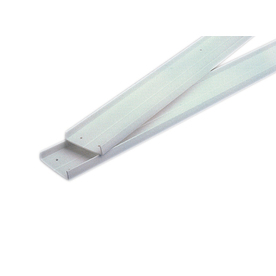
The tracks are set in a window frame around the perimeter, and the spacers go between each block.
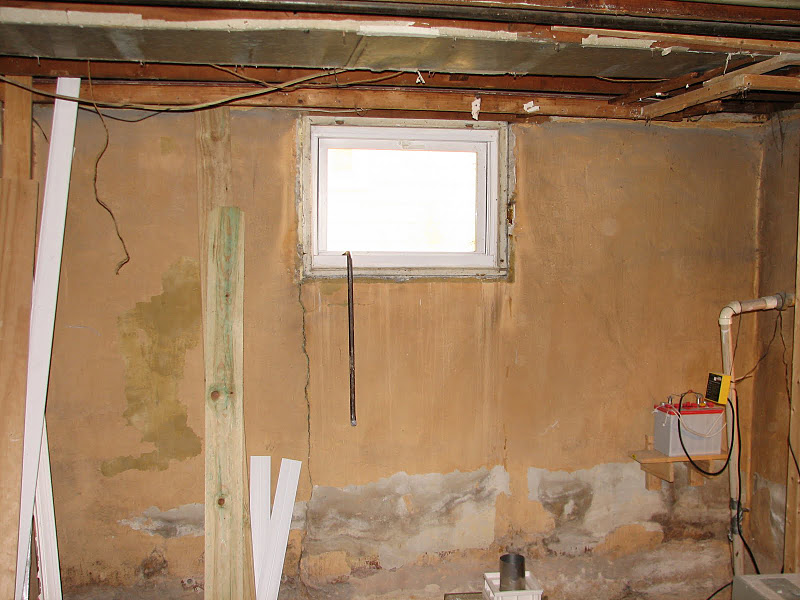
I started by measuring the opening about two dozen times, doing a lot of calculations, checking a lot of wood measurements and finally removed the existing window…
Then I measured it again and again, and I took my outside track and glass block (the icicle pattern) and built the window in a free standing setup on a board on a sawhorse (strapped together to keep it from falling – wish I had pictures of that!) and measured it about a dozen times as well, and ultimately concluded that the frame had to come out.
After a bit more demo, I constructed the new frame, which gave me a chance to use my new dado set. This was the hard part. Building the window itself was SUPER easy.
First you lay the base track in the frame (over a double bead of caulk) and secure it with screws. For windows, I prefer the grey coated screws. Then you caulk the track again on the inside, and put in your first row of blocks, caulking also between each block. Caulk on top of that row and another row and you end up with this:
Click the pic for a full sized shot. You can get a really good look at the new frame, the dado cut, and the general install.
Note how the entire frame is in place except at the top. That’s the secret I didn’t know – you cut the top track in half long ways, put your block in, and then seal the second half in after it’s all done!
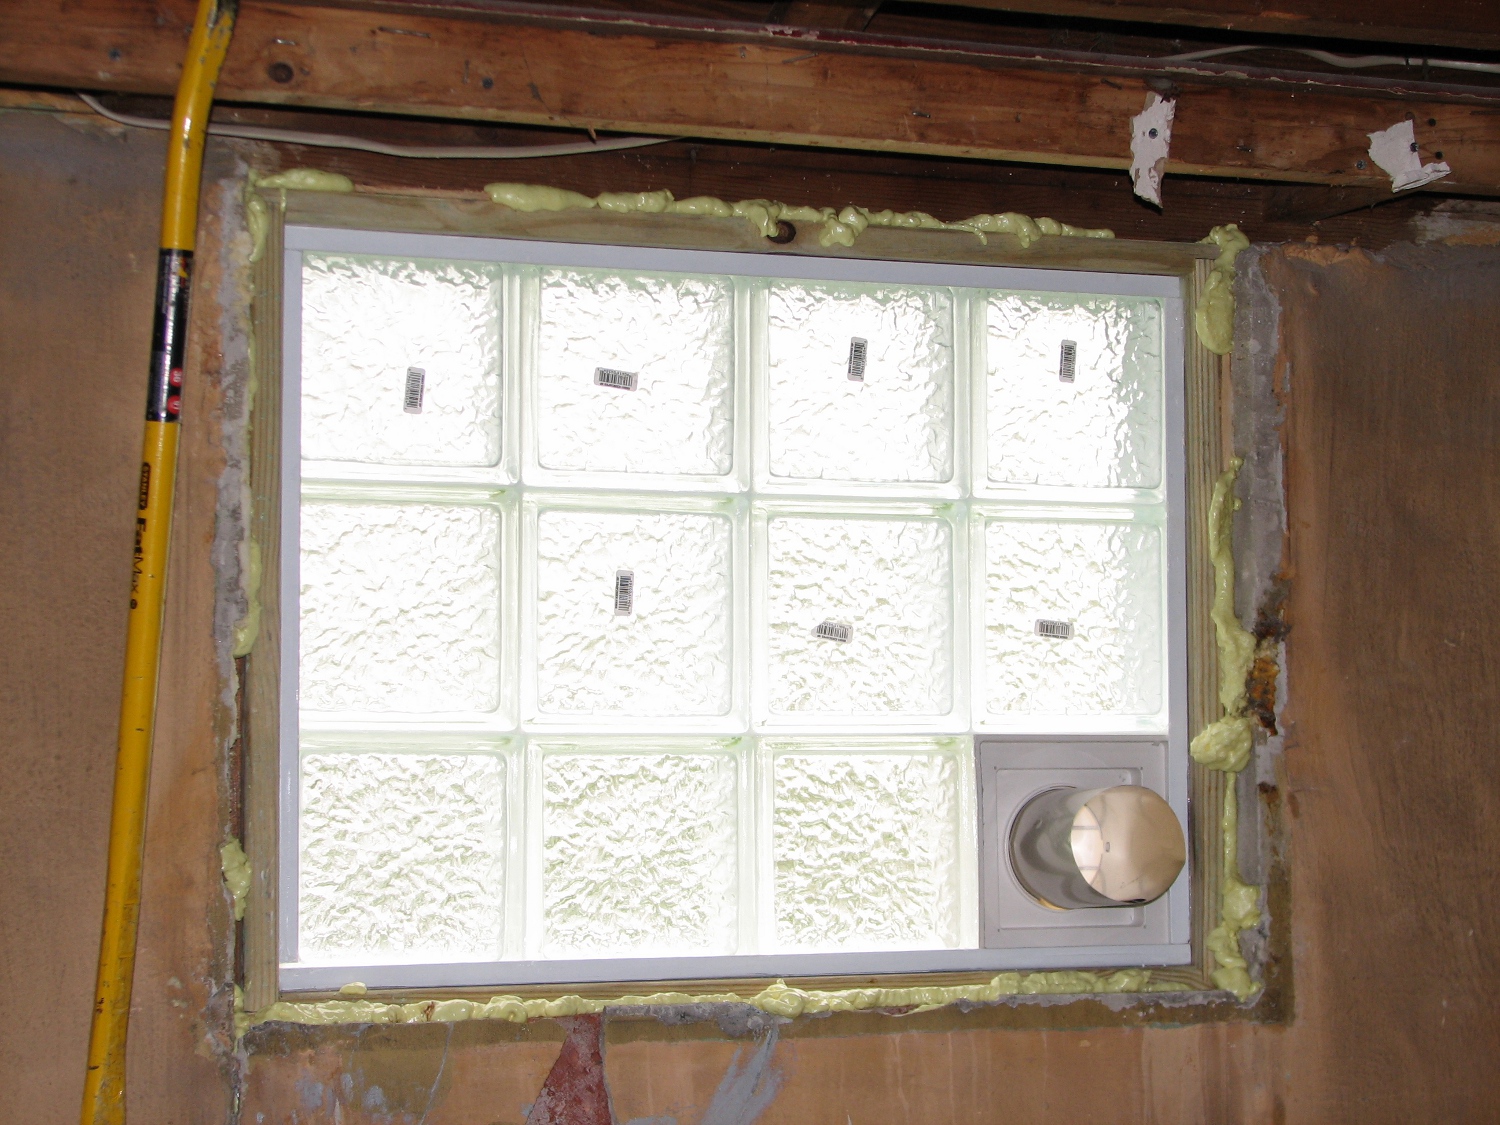
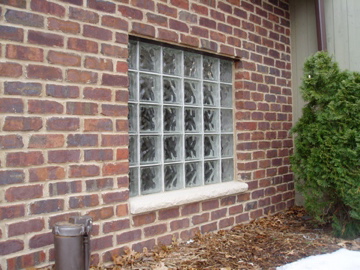
Once in place, you cannot tell that the top row was cut in half.
Right now it looks ugly on the inside – but that’s because this is all initial work. From the outside, I think it looks fantastic!

Well, ok, except for my caulking job. I really should have left that for the missus – she’s the better caulker.
Hammer safely!
G

Romancing the Floor – Saving and Restoring Old Hardwood
Some years ago, after our finished (not by me) basement flooded for the third time, and we decided that the carpet posed too much of a health risk to spend serious time down there until we redid it (a project that’s still not finished, FYI), we decided to convert the 3rd bedroom in our house to an office.
This project involved a lot of learning experiences for me, but one of the best was learning the value of the phrase, “old but good”.
A little history. House was built in 1940. We are the third owners, if I remember correctly – fourth at the most. At one point, the house was converted into two apartments, and so the 3rd bedroom had a history – at one time, it had been a kitchen.
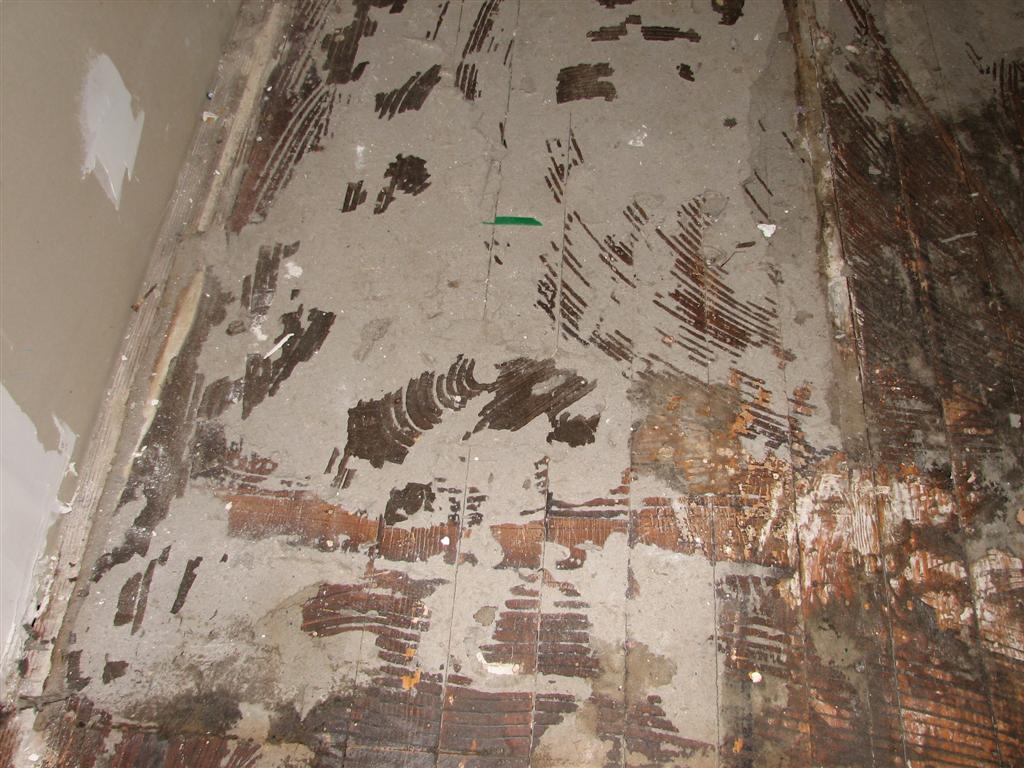
So that probably explains why the flooring we found under the carpet (the same forest green carpet that filled the house when I bought it) looked like this: 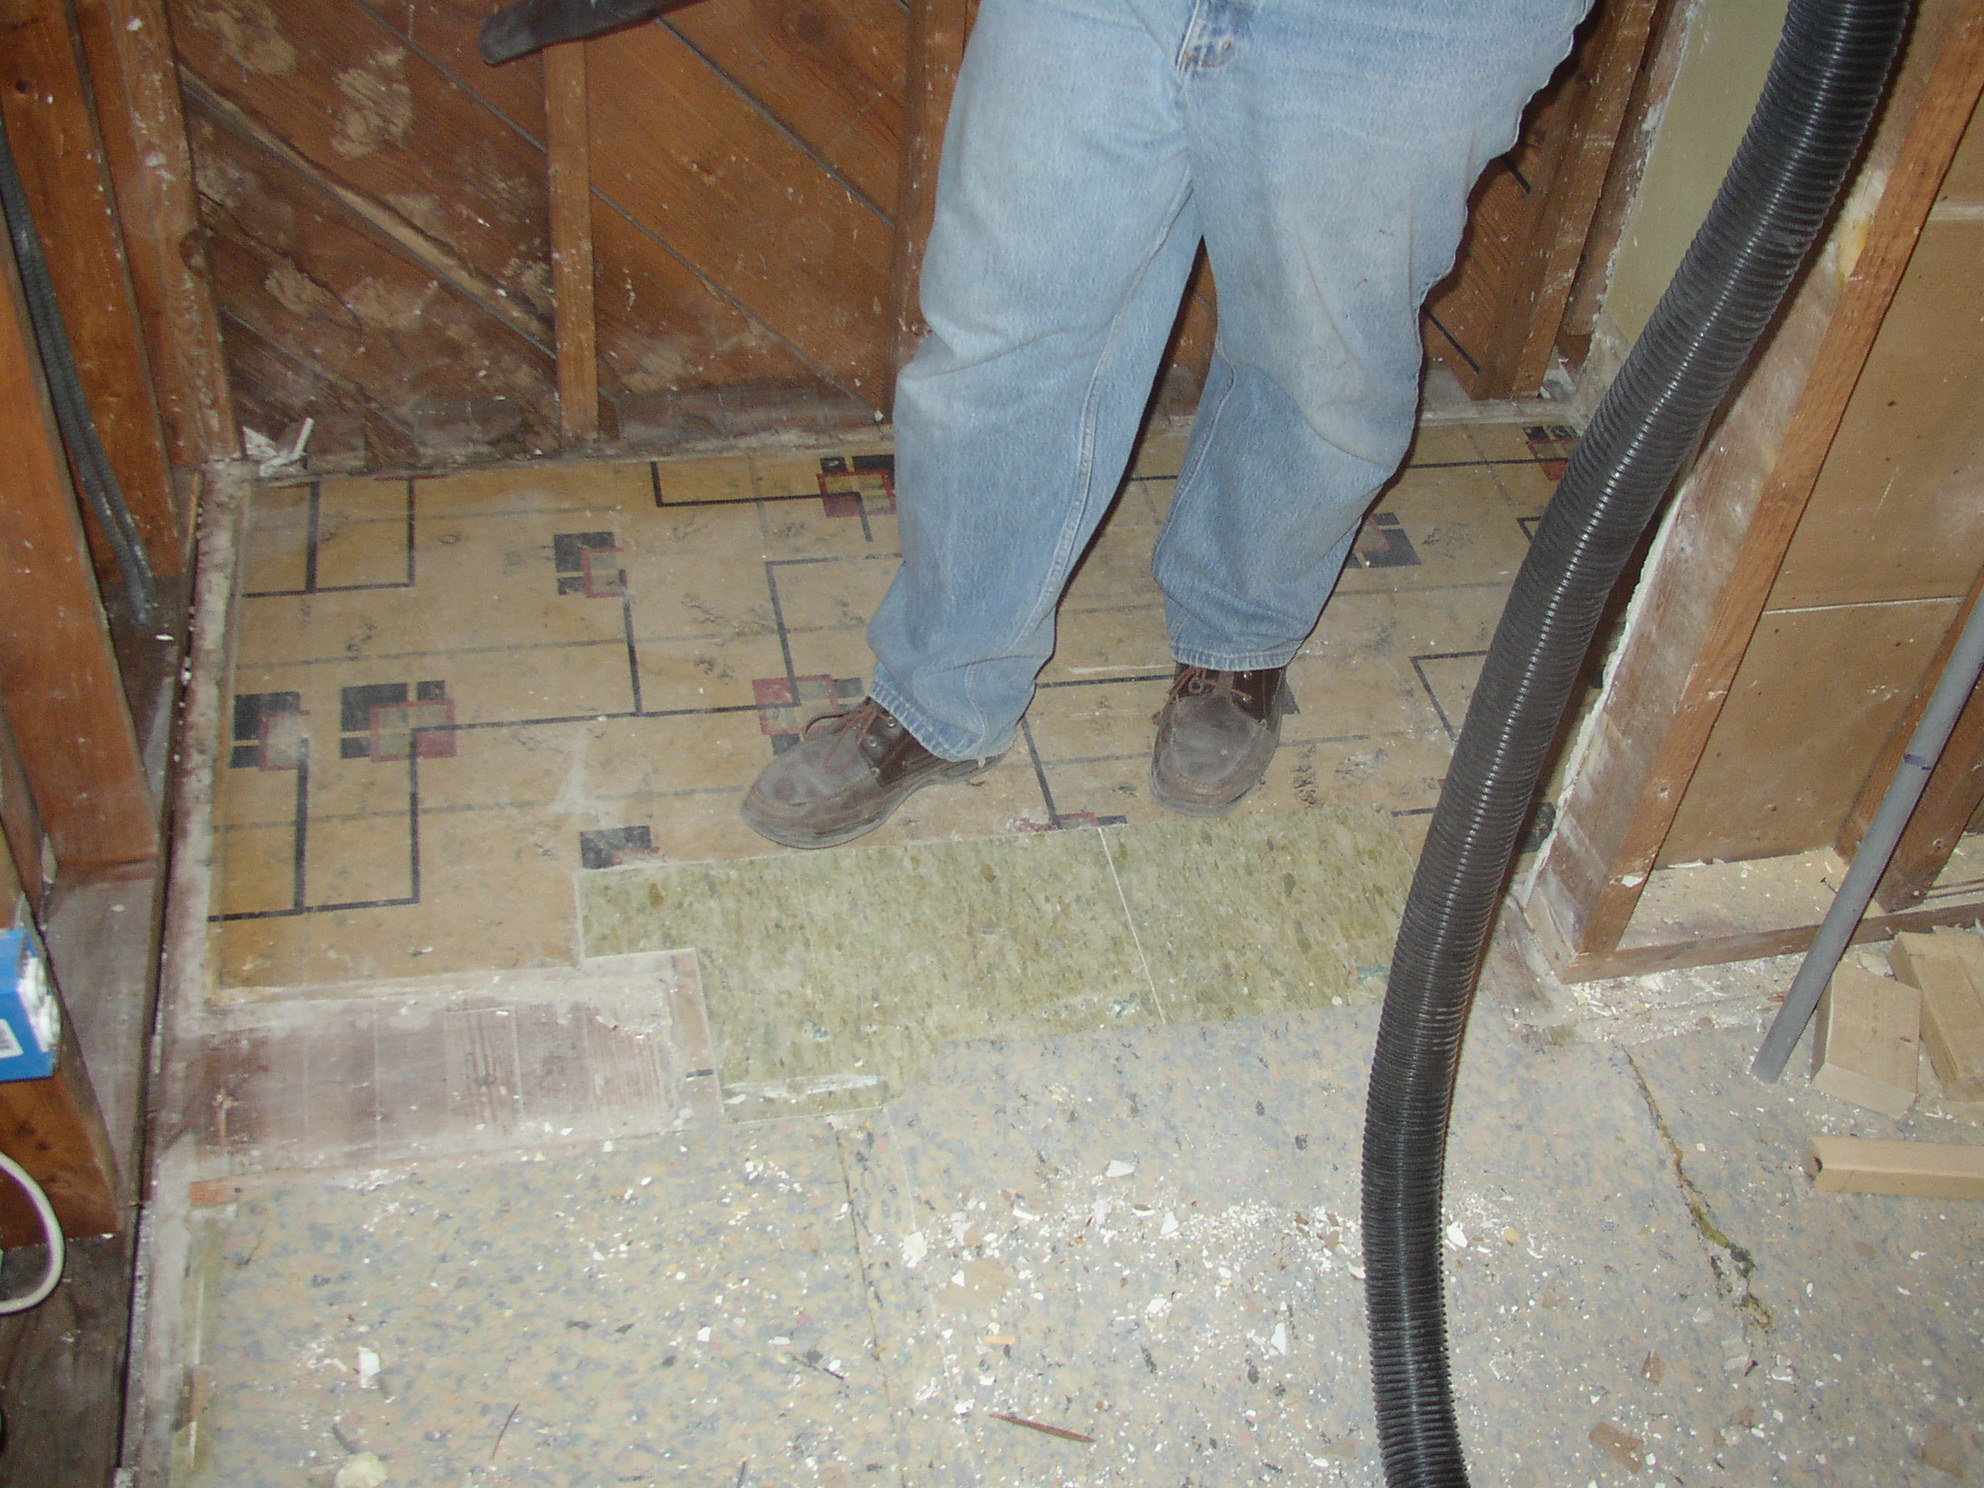
(Stop staring at my sexy legs!)
Well, of course, being the meticulous and conscientious DIYer that I am, and as a big fan of Mike Homes’ “Do It Right!” philosophy, I couldn’t just cover this floor up again. So, the work began:
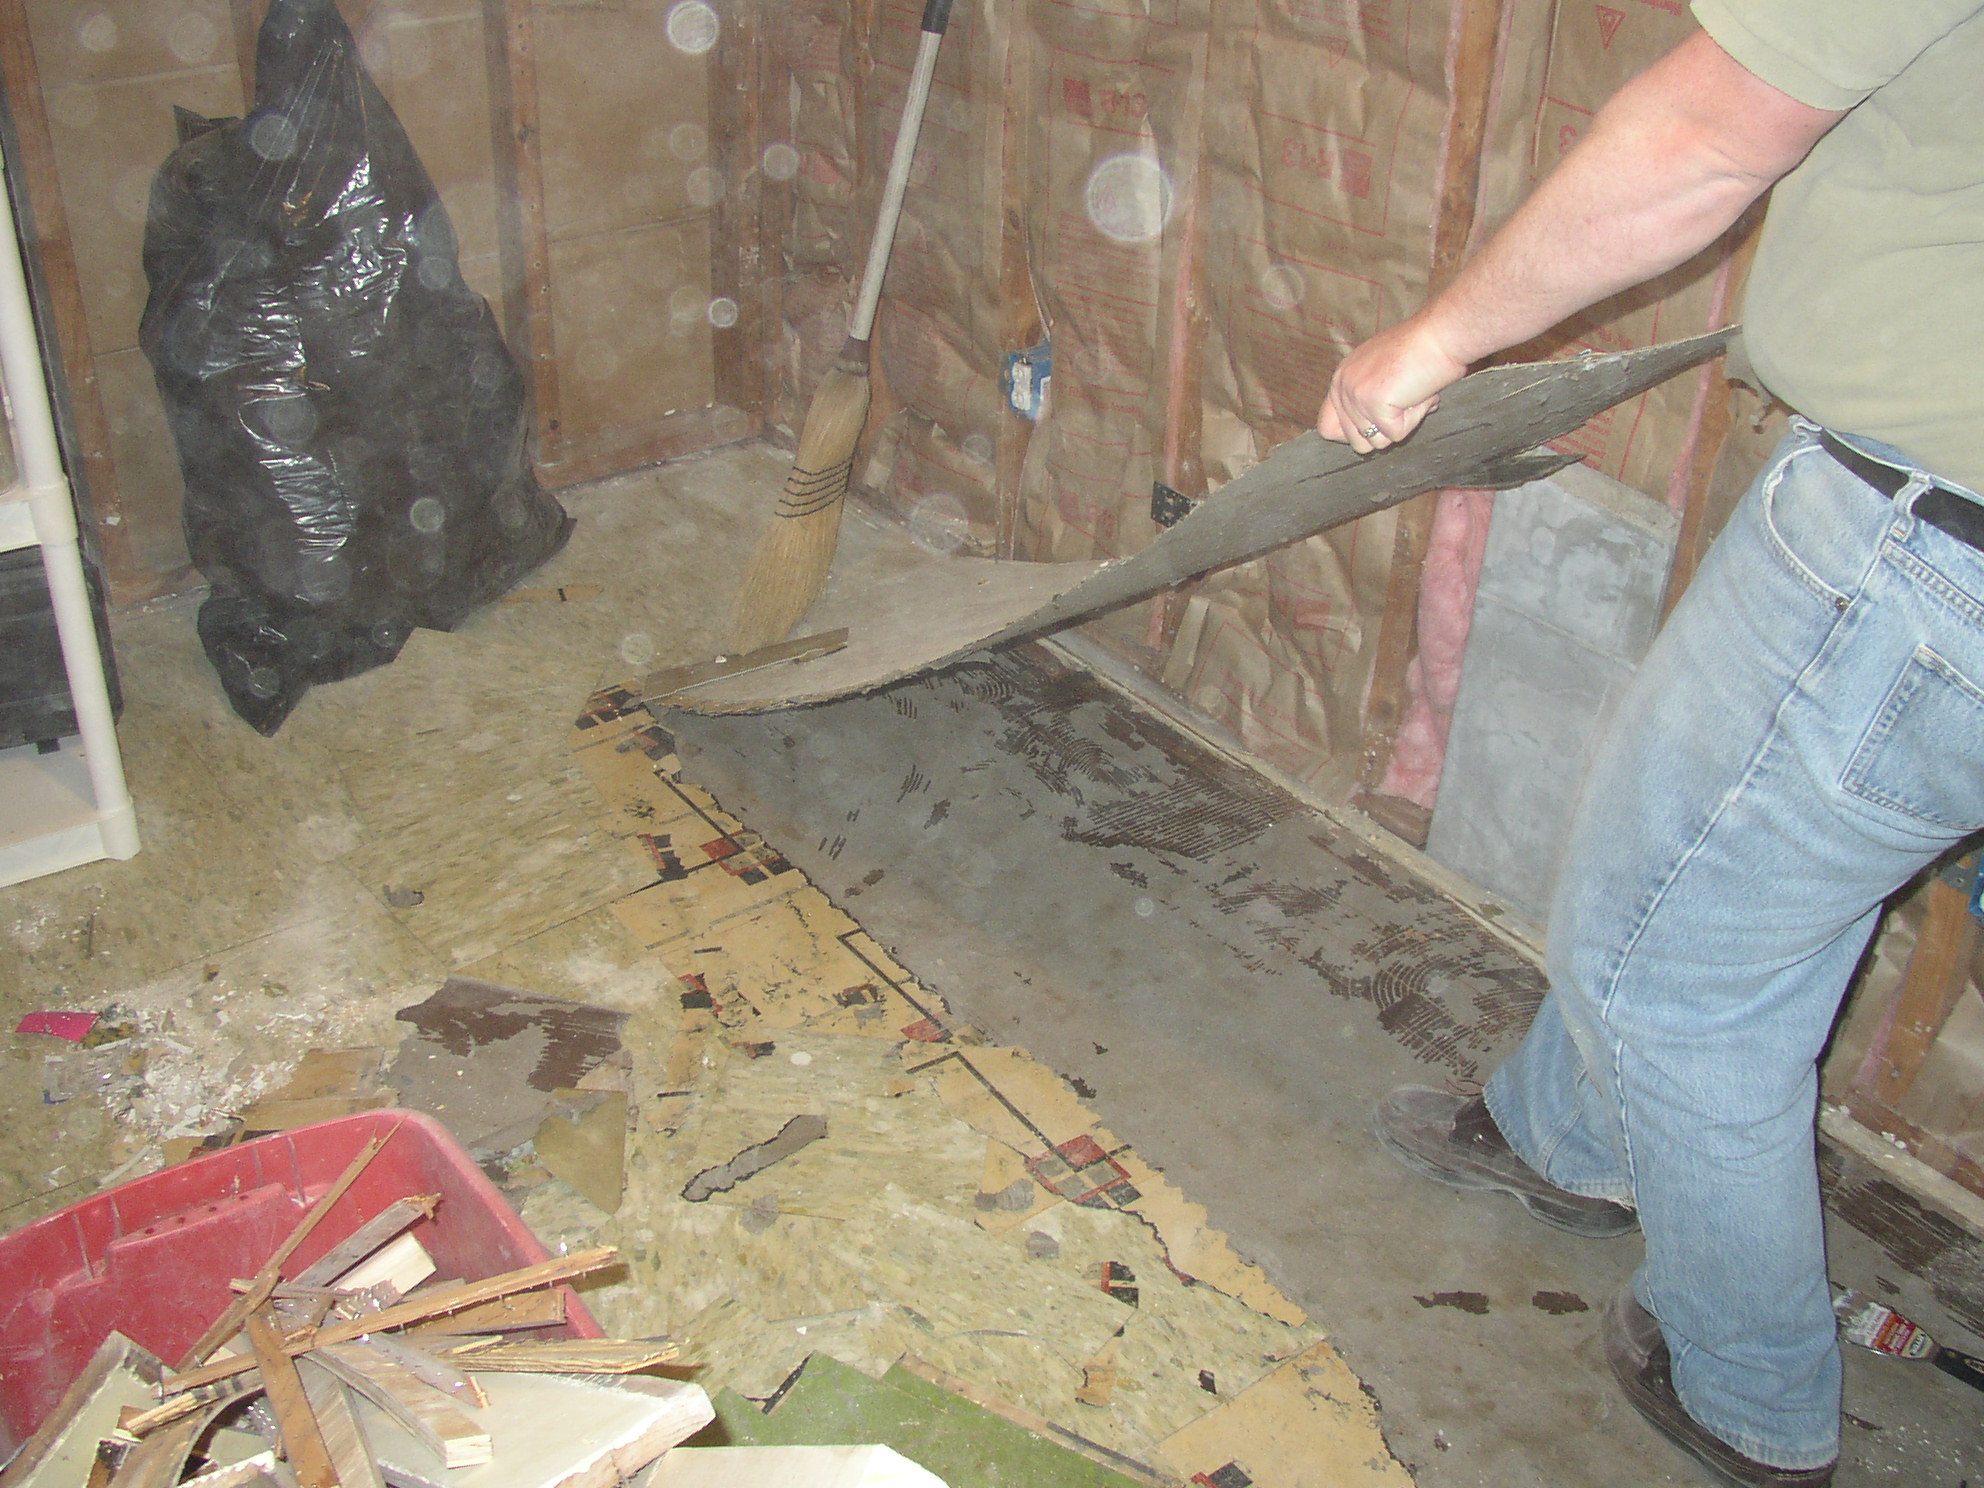
And continued…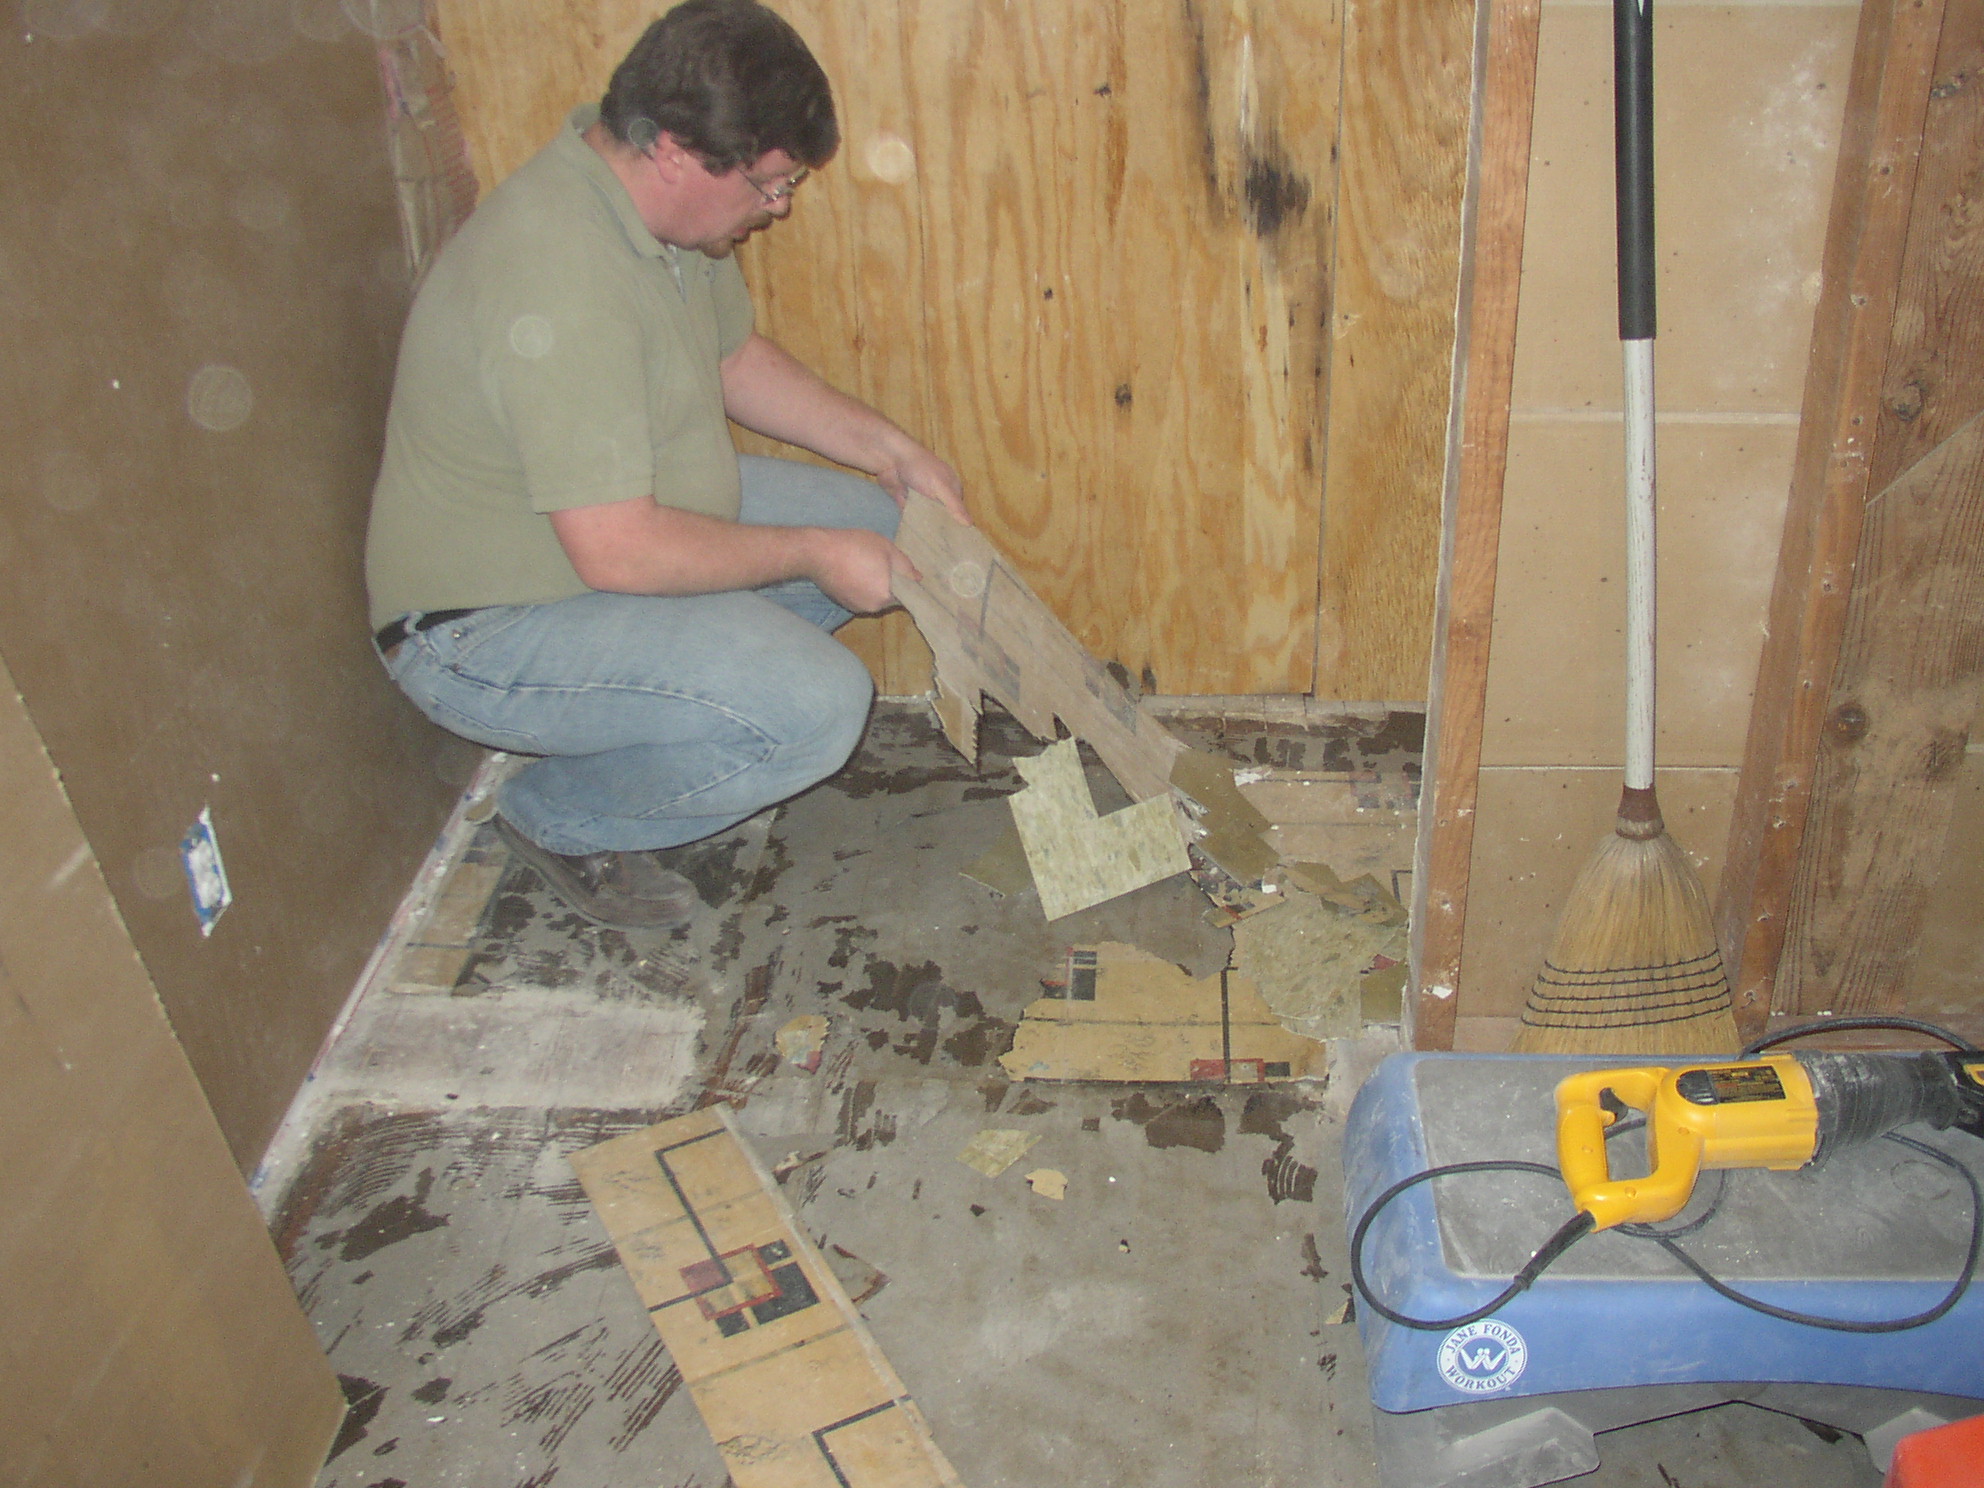
And boy was there a lot of mess – layer upon layer!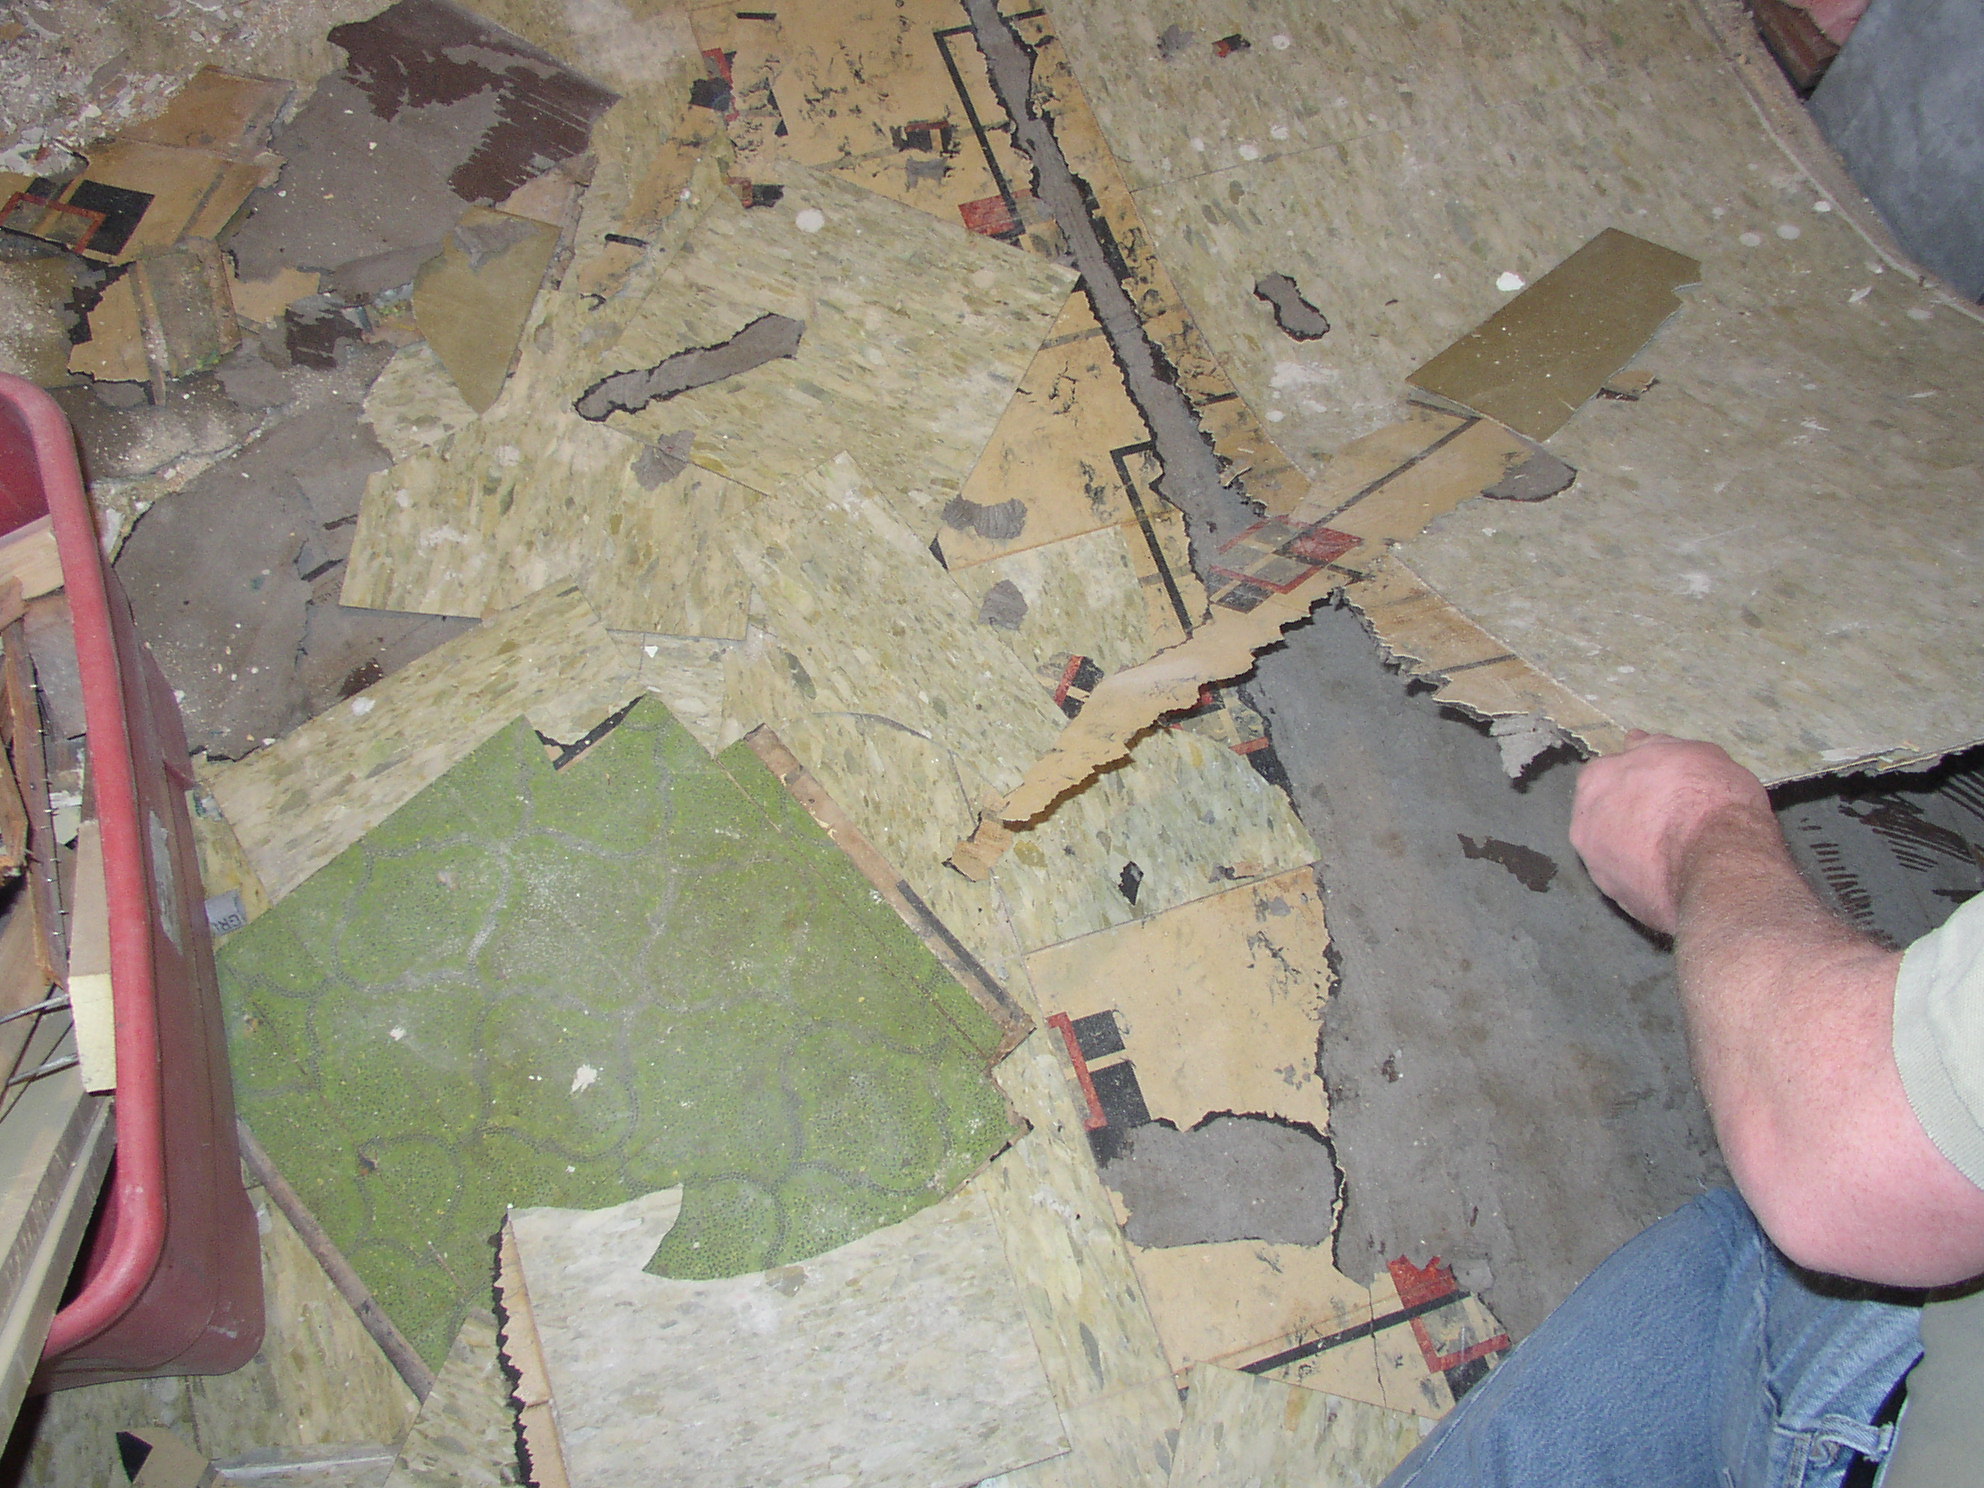
BUT – finally we got to the bottom of the pile, and this is what we found underneath… which wasn’t exactly heartening…
(Sorry, we didn’t take a pic of the whole floor after we pulled the layers – we were just too tired to think of it)
This was a real mess – the whole floor looked like this – a layer of some kind of rosin paper (I think) and adhesive. So now it was time for some serious elbow grease…
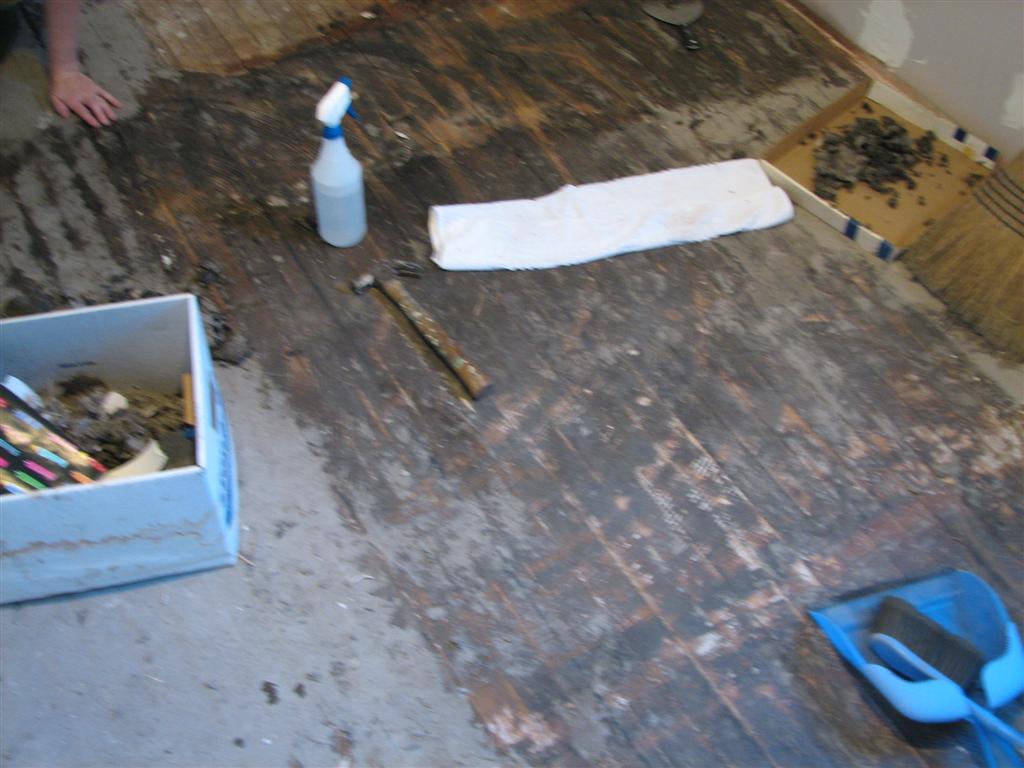
To remove the top layer of gunk, we used very simple tools – 3″ metal scrapers (not putty knives – as I’ve learned to my chagrin there’s a big difference) and spray bottles of water. We would soak a section of floor with the water, let it set in for a minute, and then apply the good old fashioned “wear your fingers to the bone” technique with the scrapers. (Often almost literally, since we banged the floor with our hands more than once).
In the end we got the floor looking like this:
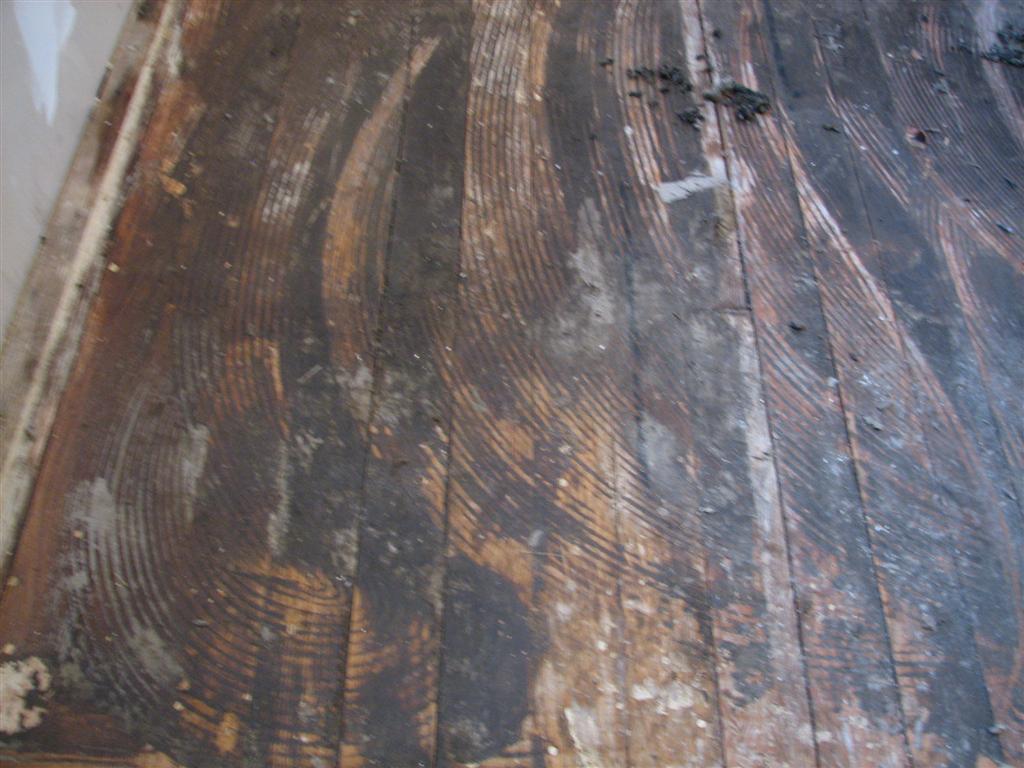

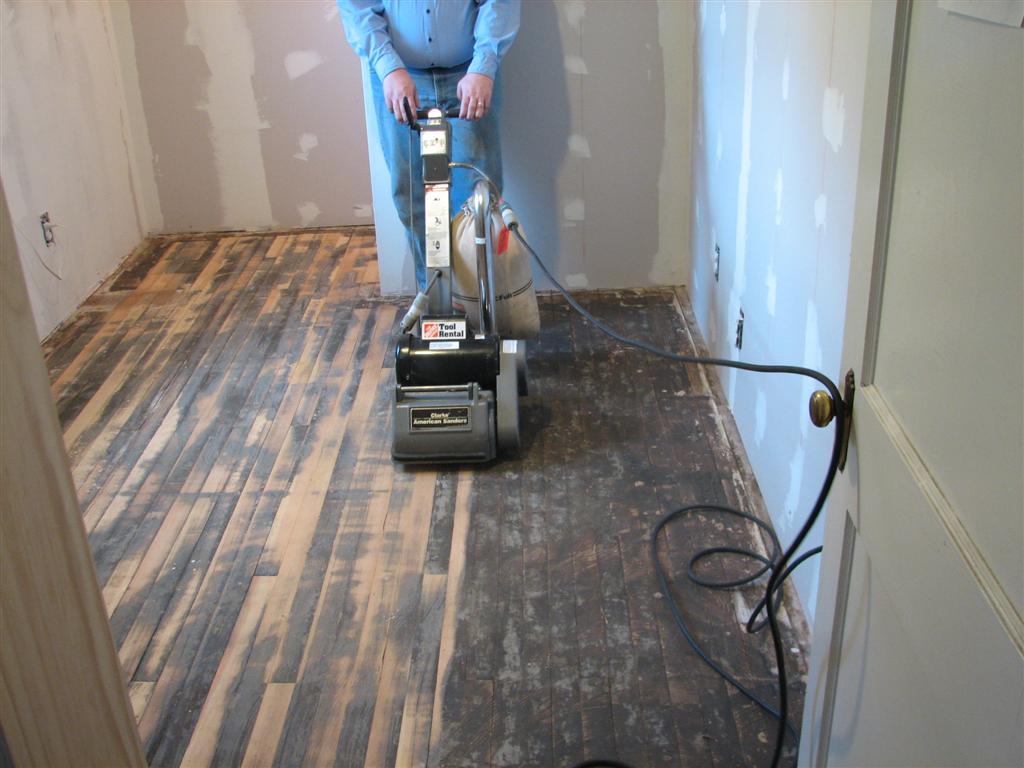
Now we were ready for the next step – the power sander! Now this is a step that, quite honestly, should not be undertaken by the faint at heart, or the inexperienced, when you really care about how the floor ends up looking. In our case, the floor was original 1940 hardwood and we figured a little damage was “character” (hey, at 67 years old, see if YOU look this good!). It’s a good thing we didn’t mind to much because learning how to handle a drum sander takes a bit of getting used to.
I didn’t get a picture of it, and it’s right in the corner so it’s not a BIG deal – but there is a place in the floor where I let the sander rest too long a couple of times, and so the surface ended up looking a bit like waves in the ocean. But still, ALL in all, it was a good experience.
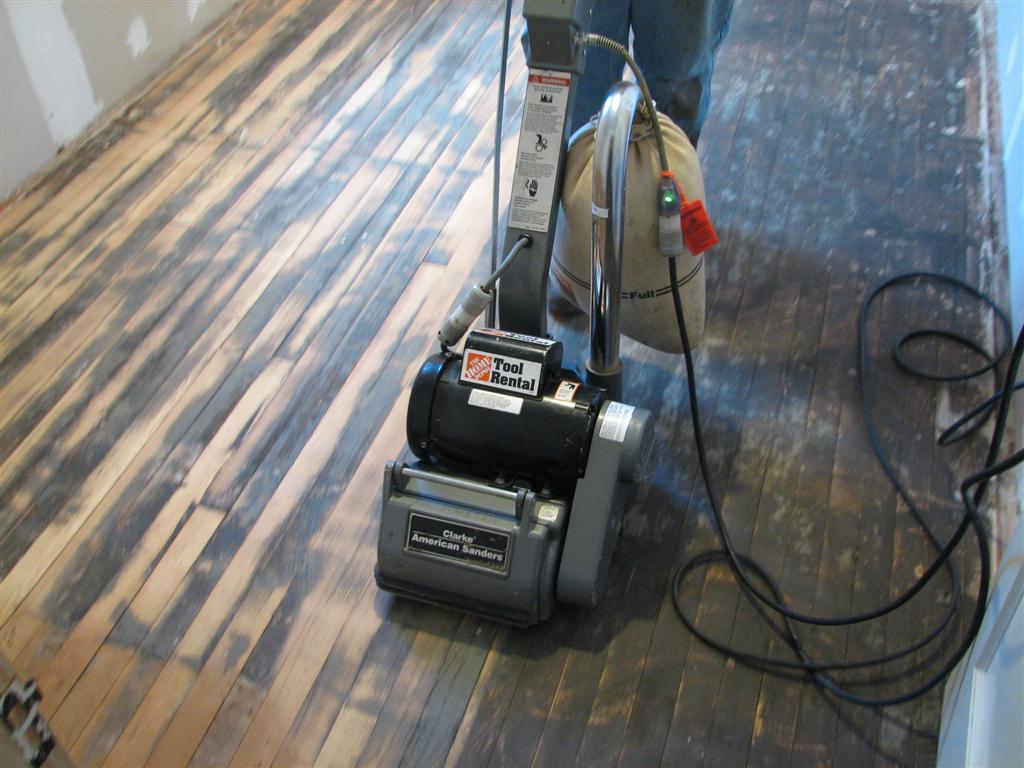
If you want to know, it’s the corner in the back right, not yet sanded here, that ended up wavy…
Even with the first pass, we could tell that the finished floor was going to look really good. With a couple more passes of 80 grit sand paper and cleaning up the edges, here is what we found under all that gunk!
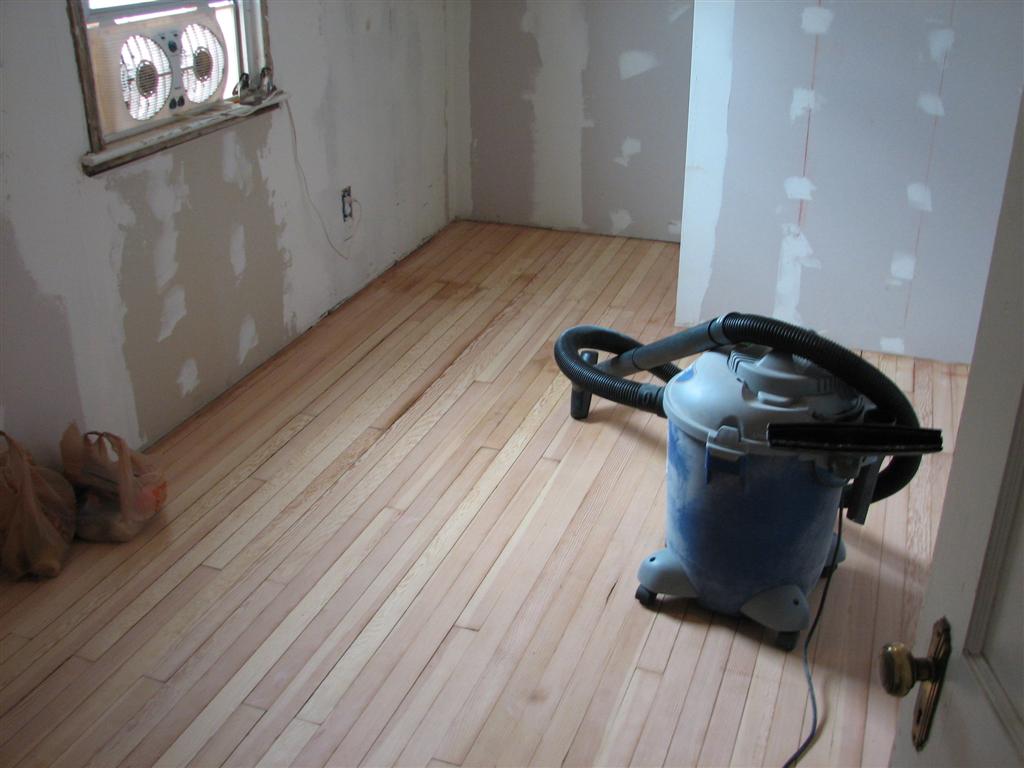
FYI the dark spot just past the window is from where we removed the closet wall and turned it into an alcove. Behind the back drywall is 3/4 plywood – we could mount a jungle gym against that wall if we wanted.. (instead the alcove is filled with Ikea modular shelving…)
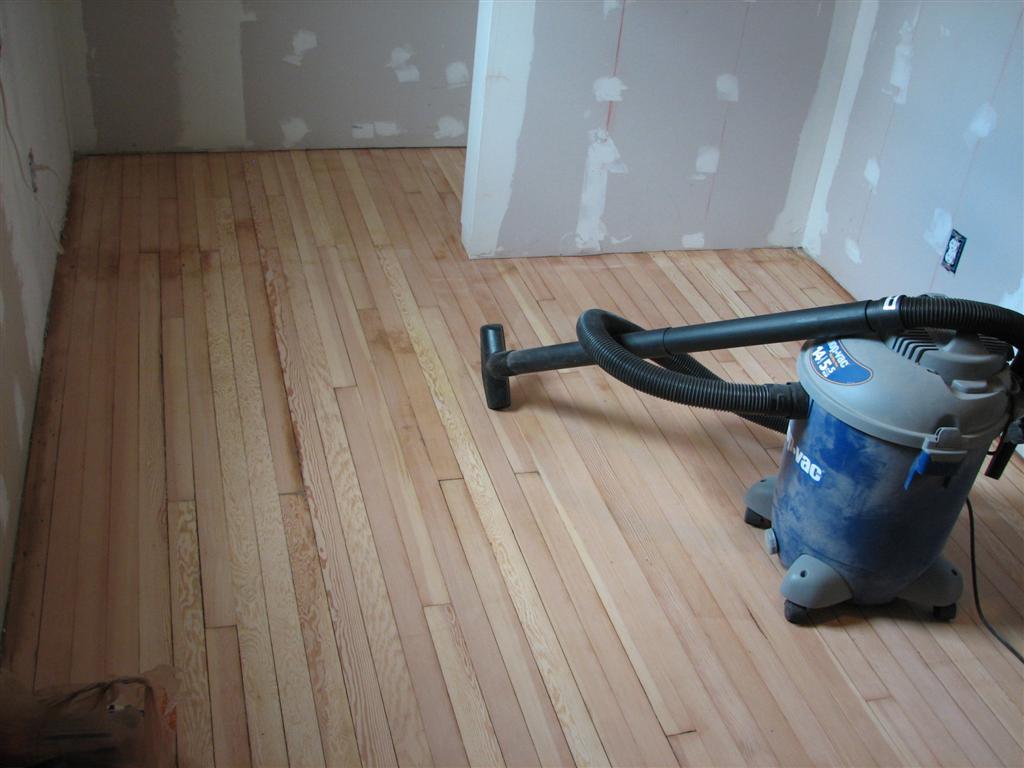
See the ripple? Back right corner, past the shop-vac… sigh And no, the edge sanding wasn’t done yet at this point.
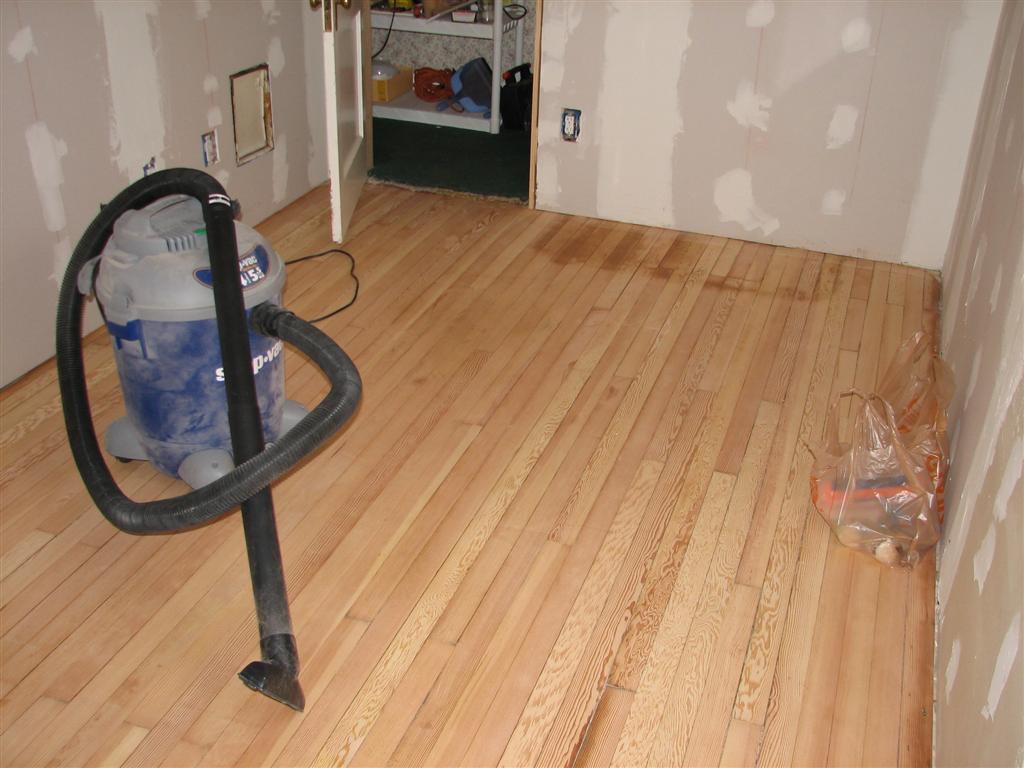
So sure, it’s got some water stains from where the old sink must have been (we know this because we found the water pipes and the old (unsealed) drain stack) but from 1940, covered in three layers of flooring and then carpet, and finally revealed and recovered in 2007, this floor looked pretty damn good!
So if you’ve got an old hardwood floor that’s ugly, maybe even a little damaged – don’t just rush to cover it up. With a little elbow grease (and some rented tools from Home Depot) you can end up with an absolutely beautiful floor again.
(Now please don’t be mad, but we never did take pictures of the final final product – we used a light natural stain and then applied two coats of polyurethane to finish – right now the office is a total mess so if I took a picture and showed it here, my wife would kill me. Sorry…)
Hammer safely!
G
Home Improvement Blog on Google+
Home Improvement Blog on FaceBook
Bloggers Wanted
Latest Articles
Topics
- Electrical (8)
- Introductions (7)
- Plumbing (3)
- Projects (13)
- Repair (4)
- Safety (5)
- Tips and Tricks (5)
- Tool Review (5)
- Tools (6)
- Uncategorized (5)