Posts Tagged ‘sink’
Beginner Faucet Fixin’
A good starter DIY project is fixing or replacing a faucet. It looks overwhelming at the start, but the fix is usually straightforward: just replace the parts that look broken.
To determine if this is a good DIY project, determine the relative importance of the sink, how much you value your time and knuckles, and if you can shut the water off at the sink.
In my case, my kitchen faucet had been dripping for awhile and was driving me crazy. I have a shutoff under the sink and all my available free time is dedicated to playing dinosaurs or trains. We have a bathroom sink nearby if things go horribly wrong and a local plumber who’s set me right before. So I’m ready to take this on.
Once you’ve decided to do a fix, determine the manufacturer of your faucet. All the big brands have excellent websites for finding parts and diagrams. One of the best kept secrets is the stellar phone support. They really can answer questions like: “What is this plastic doohickey that slides over the rubber thingy and is held on with a screw?” My experience has been that they’re knowledgeable, patient, and give clear advice and instructions.
I actually cheated for this project and previously determined that the cartridge on my Moen faucet was the culprit, but a couple of my plastic connector pieces looked a little rough too. Easiest just to replace “the guts” of the faucet.
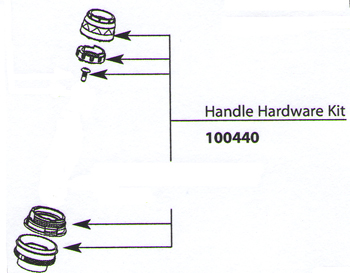 Thanks to the magic of the internet, I obtained a Moen 100440 Replacement Handle Hardware Kit and Moen 1200 cartridge a few days later. Once I had a few spare hours I was ready to take this on.
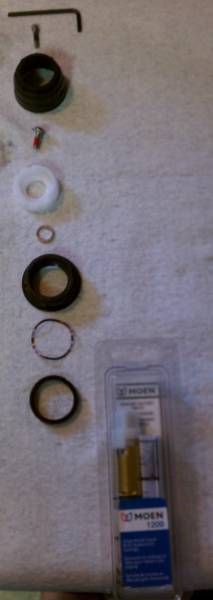
Here’s what you receive in the kit, with the new cartridge underneath.
First turn off the water and make sure it’s off. That’s a lousy surprise while your hands are full.
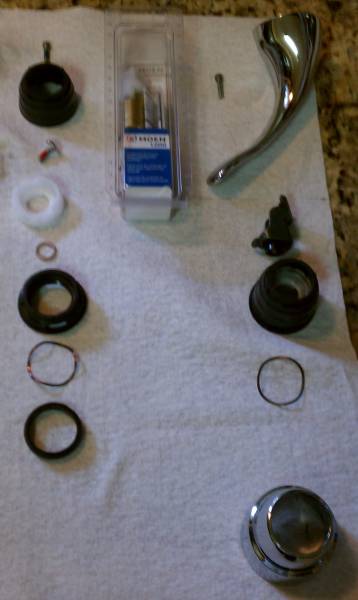
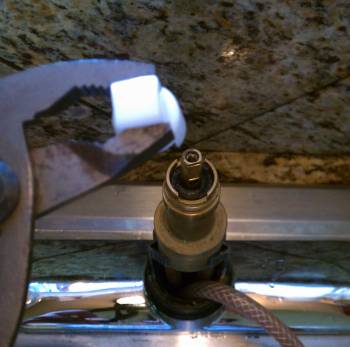
Disassembling my faucet is pretty straight forward. There’s a red/blue logo “button” in the front of the handle that covers a hex screw. Removing that allows you to remove the chrome handle. Then there’s a phillips screw in the top holding the “handle adapter” down. After that’s out, just start pulling and unscrewing parts, using an adjustable wrench as needed. I try to lay my parts out in the order removed, so I have a prayer of putting them back together properly.
 As you can see a number of connector parts between the “handle adapter” and cartridge that are stuck together. This is probably from my previous attempts to “fix” the leak by tightening things down just a bit more.
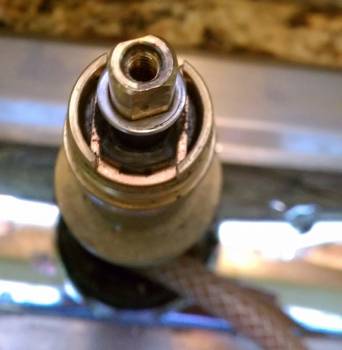 Now I just remove the brass clip in front and actually pull the cartridge out. The clip comes out with pliers, no problem. The cartridge is actually trickier. Sometimes you can loosen the cartridge with pliers, but with this one and just about every other faucet I’ve seen, you need the white plastic tool that comes with the new cartridge to remove the old one. Put it on there and twist it a few times back and forth and the cartridge can now be pulled out with pliers.
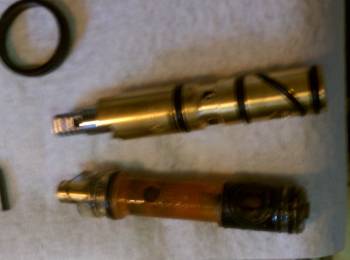
Here’s an old icky plastic cartridge and my new brass one. I doubt it makes a real difference, but it was maybe a dollar difference in price to get the brass one, so I did.
After that, push the new cartridge in, and reverse the dissasembly steps. It’s always a little difficult to get the next part lined up, but it’s manageable. If you’re like me, test the faucet before it’s fully assembled. I always reverse the hot and cold and need to rotate the stem 180 degrees.
That’s all there is to it. If you can assemble children’s toys, you can handle replacing faucet parts.

Home Improvement Blog on Google+
Home Improvement Blog on FaceBook
Bloggers Wanted
Latest Articles
Topics
- Electrical (8)
- Introductions (7)
- Plumbing (3)
- Projects (13)
- Repair (4)
- Safety (5)
- Tips and Tricks (5)
- Tool Review (5)
- Tools (6)
- Uncategorized (5)