Posts Tagged ‘hurricane-proof’
Introduction: Adding on a New Room
I have been writing blogs for about 2 years but mostly the previous blogs I have been involved with are politically related.
I have enjoyed DIY for most of my teenage and adult life. So, when I came back from a 12-month stint in Iraq, I had some extra money that I could use to add on to my home.
Luckily, adding on wouldn’t be that hard since there was a preexisting trussed roof over the screened patio I planned on enclosing. By enclosing the new room, it gave me an additional 170 sq ft. As it turns out, during construction of the new room, my 15 year old air conditioning system also bit the dust. While I am still paying for my new Trane XR15 with heat pump system, it has saved me tons of money on my electric bill every month since being installed – and I now have an air conditioned 170 sq ft addition – which I wasn’t originally planning on doing.
On to the pictures!

Before constructing the new room, I hired an architect and engineer to certify the blue prints. Being a stickler, I obtained a legal permit through my local city for this construction. During the architect and engineering phase, it was determined that a suitable hurricane-proof footer must be poured along the existing foundation. Seeing as this house was built in 1983 – and the hurricane codes were not as up to date as today – this step cost me more money than I had originally intended to spend, but doing things the legal way led to less stress in the end.

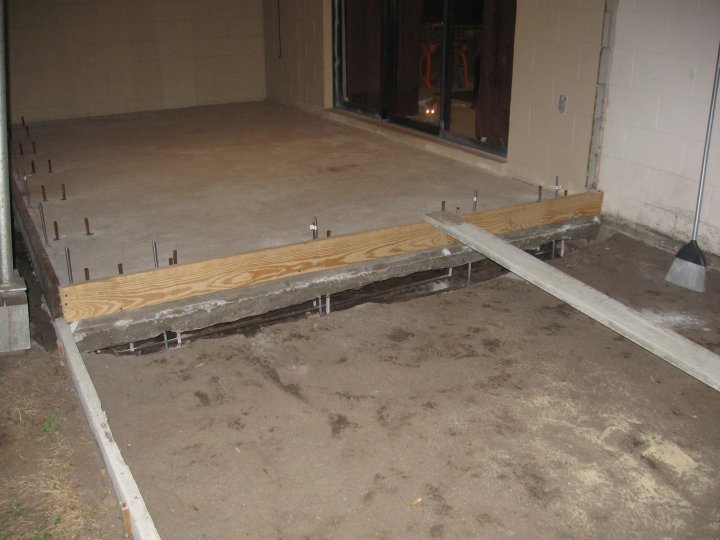
When I had hired a masonry contractor to provide me with a quote, one thing he mentioned was that since we were going to use so much fiber-crete concrete that why not just pour a patio slab outside the new room? It made sense because for the amount of money you end up paying the concrete company to come out and deliver concrete to your home, you might as well use it up.
In this construction, you can see several bars. The brownish color bars are rebar and that helps fuse the existing slab to the new slab. The silver bars are two and half foot long all thread rods from Lowes, cut to length. This is where the pressure-treated 2x4s will attach with a nut and two inch washer later on.
You can also see the sliding glass door that will ultimately be removed to make the room flow better.
The fiber-crete concrete was something new introduced to me by my architect. This concrete requires no rebar mesh. It is infused with fiberglass and makes it stronger than any concrete fused with rebar. It is a little more expensive but easier to work with.
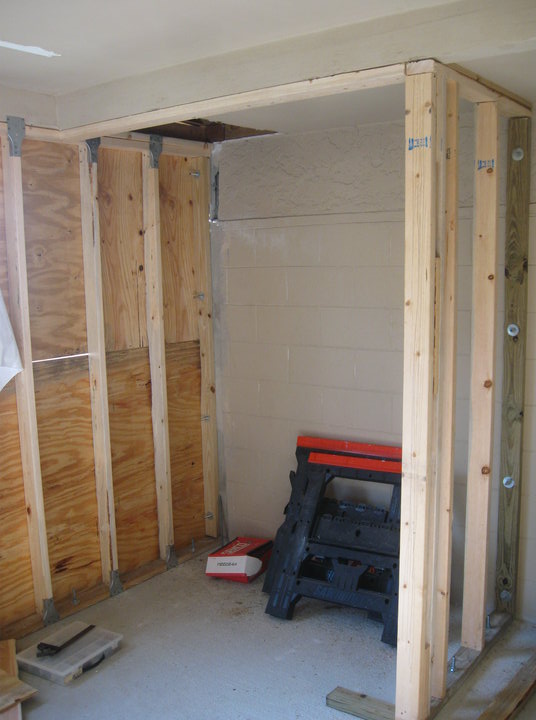
I’m going to skip ahead here a little bit since I didn’t take pictures as much as I would have liked. Here, you can see the pressure treated 2x4s mounted as I said previously. The corners are also attached to the adjacent wall using the same all thread rods cut to length, epoxied and then attached with a nut and two inch washer. The top and bottom plate are attached to the walls by SP1 and SP2 plates that are required by hurricane code. Pressure-treated plywood is used and in the picture above, you are looking at a 4 ft deep by 6 ft long closet. Next to the closet is an alcove we designed to have as a computer area.
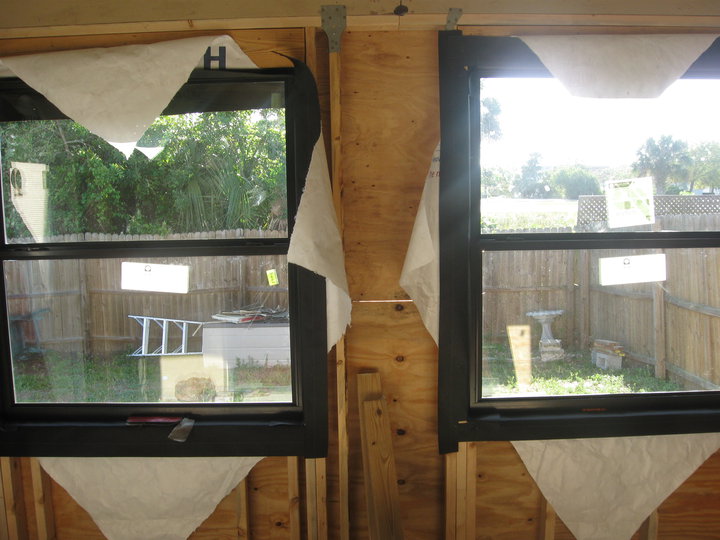
These windows are double-paned, energy efficient windows.
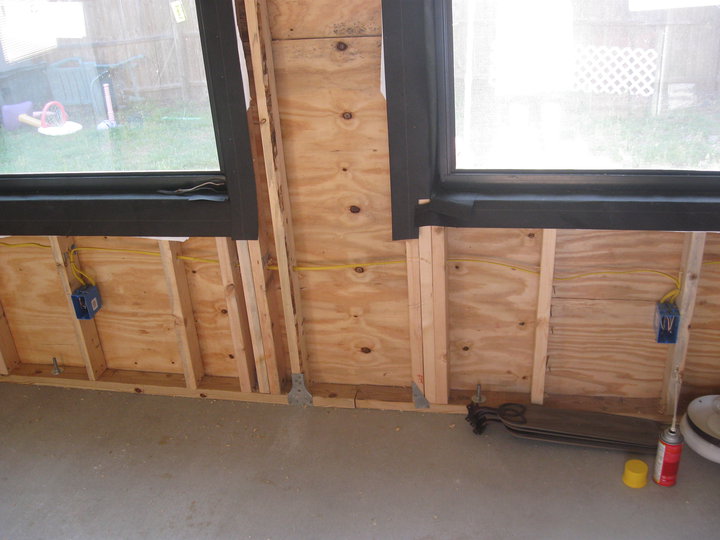
I hired an electrician to do all my electrical work. The only two things I sub’d out were masonry work and electrical work. This was all done to code. Here, you can see the cripples, jack, and king studs with the window. SP1 and SP2 plates are used to help hold everything together. We used Tyvek on top of tar paper to keep everything dry over the years and increase the R value of the room. I would later add insulation in every cavity and foam to close up little holes.
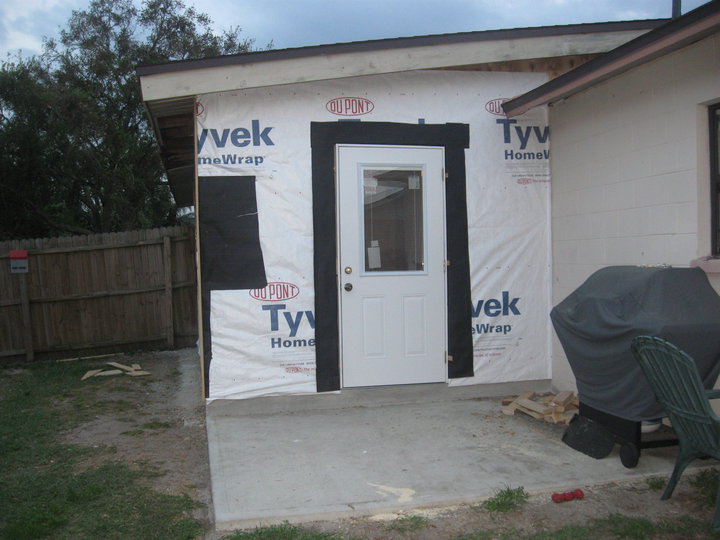
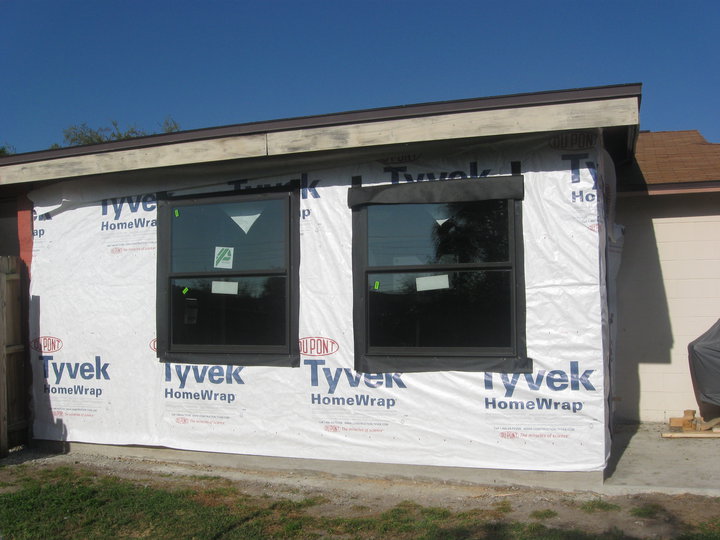
The board at the top of the room would later be replaced and I would install new vinyl soffits later on in the year.
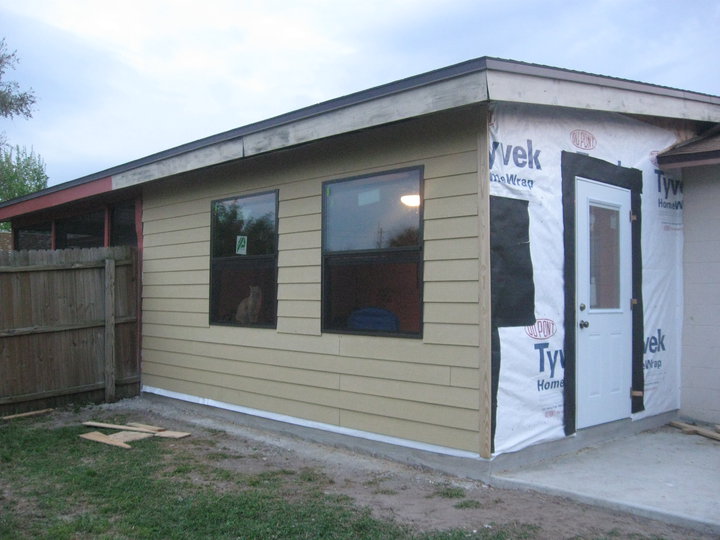
We used HZ-10 Hardiplank board. This was my first experience with it but installation was a snap.
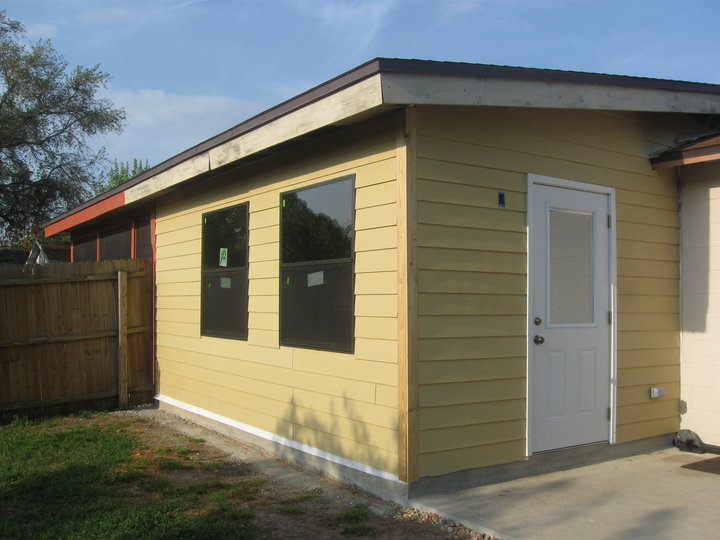
This is about the final end result before the electrician came back and installed my outdoor light. Electrical outlets were installed every 6 feet per code. The brick molding used on the door is vinyl. It is something I found at Lowes and it does not rot. Looks like the real thing. This is the HZ-10 color so I painted it a slightly tan color about 90 days later. Manufacturer recommends you paint it within 90 days. I used two high-security locks from Schlage and had my alarm system extended to the two windows and door. The door has a built-in window with blinds, which really helps with letting light into the home.
The room was also added with an outdoor receptacle that is GFCI certified. This is also required by code.
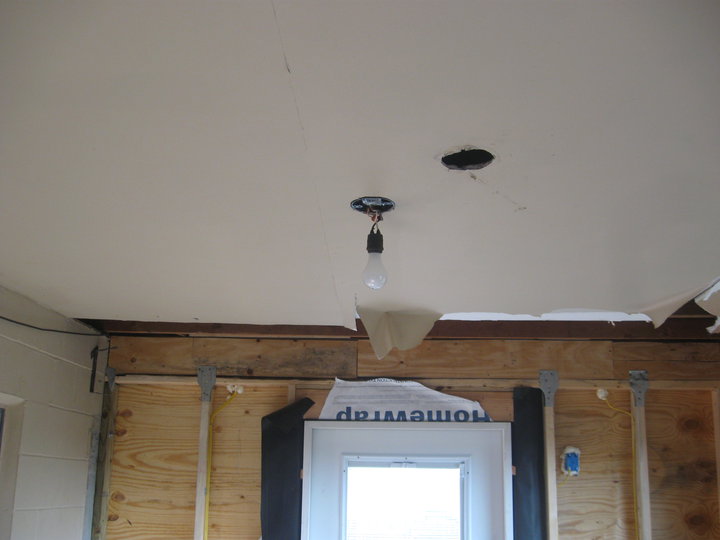
The new room wasn’t originally insulated in the ceilings so I rented a recycled paper blower from Lowes. This made it really easy to insulate the ceiling area by blowing in recycled newspaper into the ceiling cavity. Lowes was running a deal at the time, where if you purchased $200 in insulation, you were able to rent the machine for free.
The drywall was attached to the concrete by using pressure treated 1x4s fastened using Tapcon masonry screws. They were placed about 16 inches apart all along the wall.
The ceiling was painted using roll-on popcorn ceiling to match the existing ceiling texture of adjoining rooms.
We ended up tiling the floor and using bi-fold doors for the closet. The baseboard molding we used was called “base” and it matched the rest of the home.
In this picture you can see the final footer all the way around the home with the new patio that was poured. We have been talking about now enclosing the new patio slab with a screen to help beat the mosquitoes and the Florida heat.

Home Improvement Blog on Google+
Home Improvement Blog on FaceBook
Bloggers Wanted
Latest Articles
Topics
- Electrical (8)
- Introductions (7)
- Plumbing (3)
- Projects (13)
- Repair (4)
- Safety (5)
- Tips and Tricks (5)
- Tool Review (5)
- Tools (6)
- Uncategorized (5)