Author Archive
First-Time DIY: Duct Tape ≠ Plumbing
Hello again everyone! When my wife & I bought our first house, we went right to work remodeling it. We started by refinishing the hardwood floors and updating our shutters to add some curb appeal. After the floor was finished, we moved on to begin remodeling the kitchen. While I don’t have all of my kitchen photos ready for you, I wanted to show you what I found while re-plumbing the kitchen.
Let me just explain that the previous owners turned the laundry room into a laundry/bathroom – adding a shower, sink, and toilet. They decided to have the washing machine and sink share the long drain pipe (left) and that the shower would drain straight down. The only thing holding these pipes together was the duct tape – no primer, no glue – just duct tape.

Long pipe (left) is from washing machine & sink
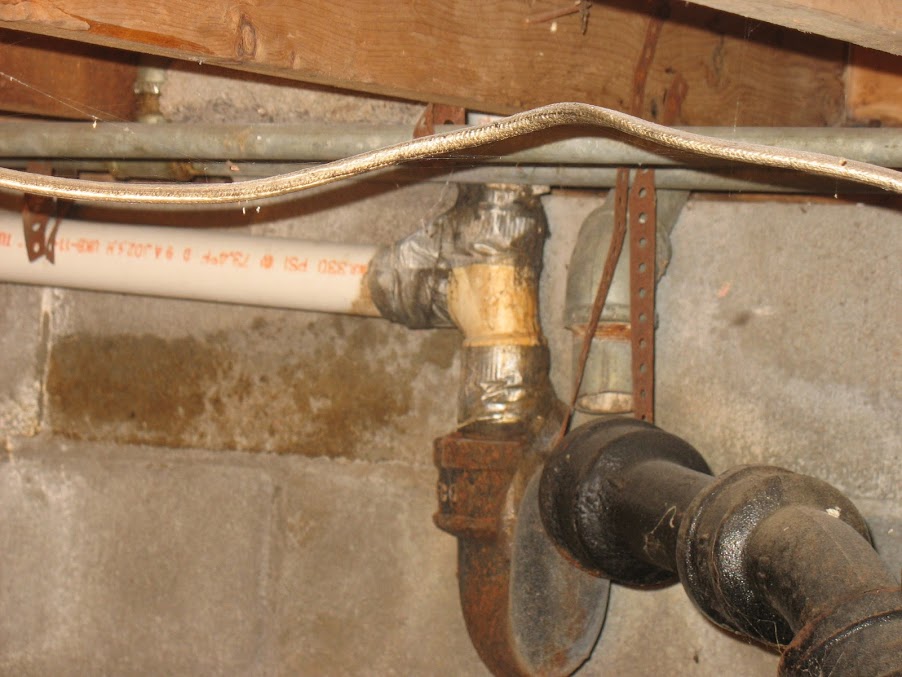
Corner shower drains straight down
I replaced this incredibly nasty, 3-Way Sanitary Tee (what an oxymoron in this case) with a Flexible 3-Way Sanitary Tee connector. I used silicone sealant on the inside of the connector before tightening it all and on the seams afterwards.
So the lesson here is always use the correct tools for the job … and duct tape doesn’t always fix everything…
What’s the worst “quick fix” you’ve ever run across? Let us know in the comments!

First Time DIY: Carpet vs Hardwood
When my wife & I decided to buy our first house I had never thought about whether I wanted hardwood floors or not. My wife on the other hand, LOVED them. After we had picked out our house, we were doing a walk through to determine what things needed to be fixed by the sellers (a sampling):
- Repair the moldy bathroom
- Find and repair the gas leak
- Clean the carpet
We walked into the now guest bedroom and I saw that there was no molding in the closet and that the carpet was loose. Instead of just marking it down as something for them to fix, I was curious and pulled back the carpet. To our surprise, we found original hardwood floors! My wife flipped.
After pulling back the closet’s carpet completely, we saw that it looked almost as if the floors had been refinished and then someone laid carpet on top of it. What a shame.
Once we found the flooring, the repair list looked more like this:
- Repair the moldy bathroom
- Find and repair the gas leak
Clean the carpetWhatever you do, do NOT clean the carpet!
But, what the sellers heard was:
- Don’t worry yourself about the mold in the bathroom, just knock a couple hundred off the price
- Gas leak? *sniff* What gas le–…. *passes out*
- Ignore our requests and please clean the carpet and leave it wet
Pay ZERO attention to this!
First Time DIY: How to Attach Wooden Shutters To Brick
Hey all! Here’s a fun project you can do over a weekend or two! I say “or two” in case you’re like me and this is the first time you’ve ever done something like this. HAHA!
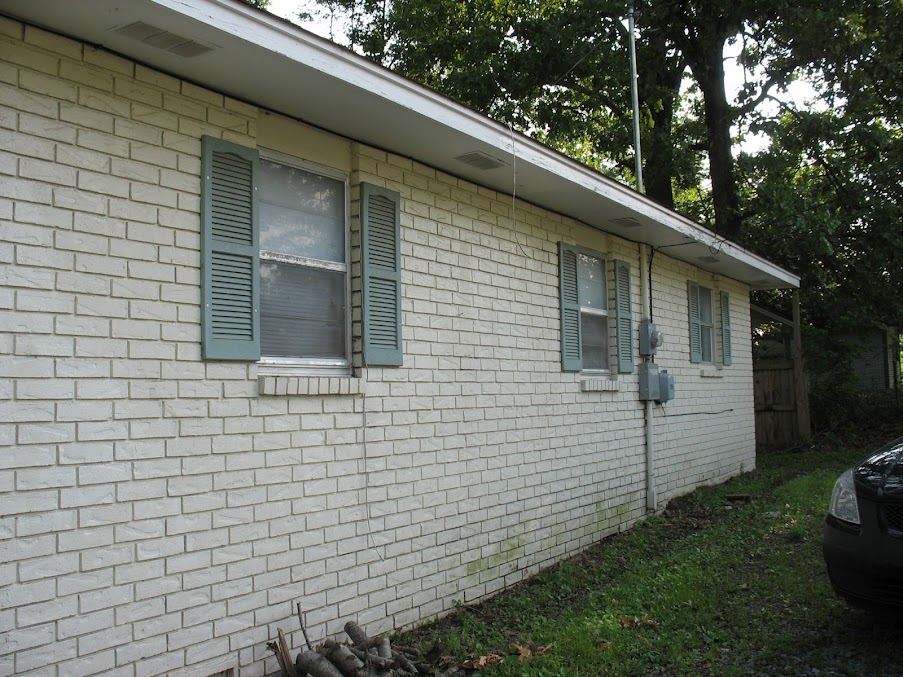
My wife hated the shutters we had on our house… and rightly so…
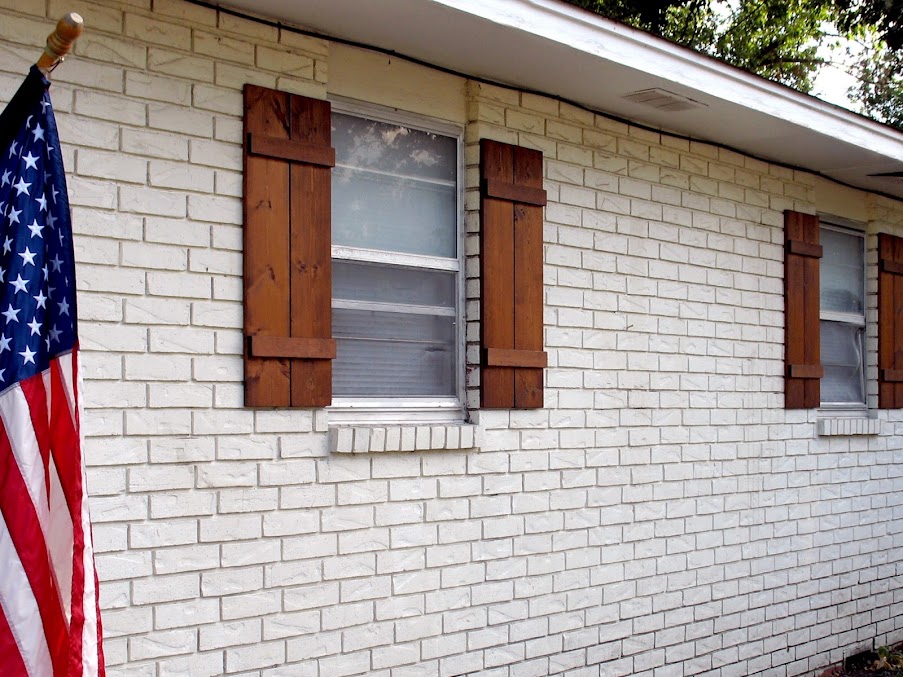
So, we decided to build some board & batten shutters. FUN! Now, if I only knew what board & batten shutters were…
Board & Batten Shutters – “Board & batten” usually refers to vertical siding where wood strips (or battens) hide the seams where other boards are joined. Here’s a site that has a lot of examples of the different styles of board & batten shutters.
After figuring out what they were exactly, I looked up a design and built them. I’m not going to go into detail on how to build them, because frankly, I screwed up too much to properly teach you. But, if you’re interested, here’s a tutorial from Lowes that matched with the style that I built.
Again, I had never done anything like this so, like a good lad, I went to where the experts were: DIY.StackExchange.com! This post is actually based on my question to them. Now, onto the process:
- Measure, level and mark boards, appropriately aligning the future holes with the mortar between bricks.
- Drill pilot holes into the wood shutters, including a 1/4″ countersink to cover the screw heads up with wood filler.
- What I learned: Unlike screwing wood to wood, where you can sink the screws into the wood easily without a countersink, when attaching wood to mortar, if you do not provide the countersink hole already and attempt to perform said action, you will strip the mortar and the screw will just spin and stay loose. Not good.
- Next, re-level shutters and mark the mortar with the masonry drill bit through the pilot holes. I found that only drilling the top two holes worked best for me. I’ll get to why in a minute. An extra set of hands comes in handy here.
- Set the shutter down and drill the top two mortar holes completely.
- What I learned: Be sure to drill into the mortar enough to where the screw tip won’t hit a dead-end (Most recommended a 1/16″ or 1/4″ of extra room beyond the screw tip). If you don’t give a little extra space at the tip, you’ll encounter a great deal of resistance, the screw will not go in all the way and you’ll have to get the masonry bit out again.
- Attach the shutter to the house using the top two holes.
- Now, we’ll finish the bottom two holes: with your masonry bit, drill into the mortar through the board.
- What I learned: I found this process to be the easiest for me, as my pilot holes didn’t always match up completely when I attempted marking then drilling all four at the same time. Less margin of error on my part. But, this is became a personal preference. Decide for yourself.
- Finish attaching the shutter to the mortar at the bottom with your screws.
- Use wood filler to patch the holes, lightly sand filler.
- Paint/stain/seal accordingly.
- What I learned: I had already applied a sealer to the back of the shutters before attaching them. I taped off my house using wide painter’s tape after they were up and it saved me a huge headache of cleaning sealer off my house with mineral spirits.

click to enlarge
Overall, I also learned:
- I marked & drilled all of the pilot holes into the shutters at one time which saved me on having to switch between the masonry & wood drill bits. HINT: If you forget to take out the masonry bit and attempt to drill into wood, you very likely could start a friction fire! Haha!
- Having two drills is a life-saver: I had my hammer drill set up with my masonry bit and my cordless drill had my Phillips bit in it ready for the screws.
- Having a second pair of hands throughout the entire process was also a great deal of help. Thanks, Seymour!
- The DIY.SE community is of great help!
Thanks for your help folks! I hope this walk-through helps someone else, too!

Intro: First-time Homeowner/DIYer
My wife & I purchased this house almost three years ago with enthusiasm and dreams of what it could be some day. We were wide-eyed and drunk on our dreams!
That was three years ago…
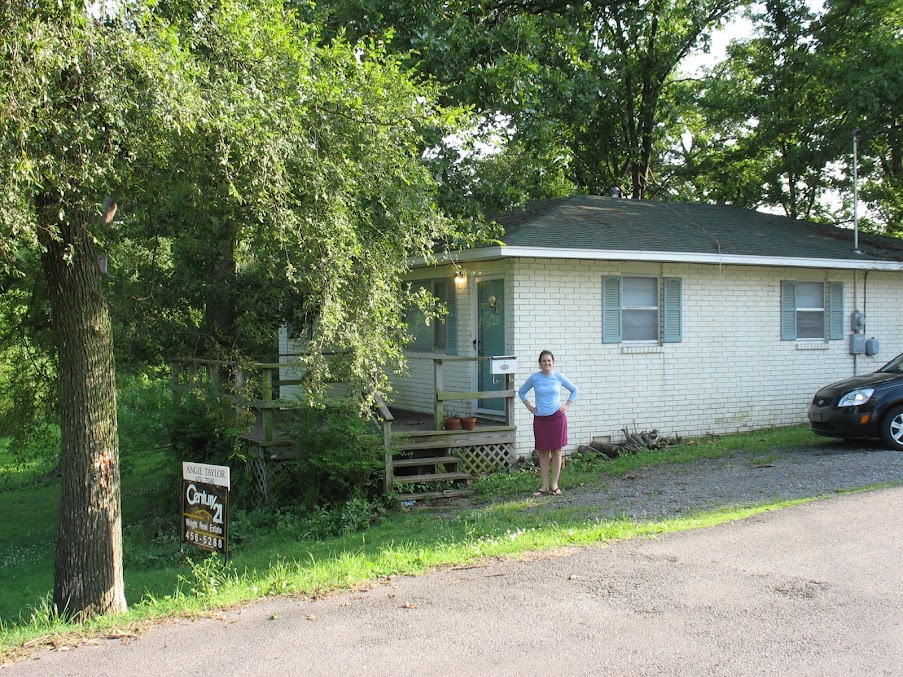
By the way, we took that tree in the foreground out after another tree fell on our fence!
It’s been an adventure and quite the learning experience ever since. You thought I was going to say “And, it’s been hell!” didn’t you? Well, I’m not going to say that (although, it has felt like it sometimes).
Buying this house has been one of the best decisions I’ve made in my life (besides marrying my wife, of course!).
My name is Josh and I plan on sharing my First Timer’s Experience with you as I turn this house into a home!
Home Improvement Blog on Google+
Home Improvement Blog on FaceBook
Bloggers Wanted
Latest Articles
Topics
- Electrical (8)
- Introductions (7)
- Plumbing (3)
- Projects (13)
- Repair (4)
- Safety (5)
- Tips and Tricks (5)
- Tool Review (5)
- Tools (6)
- Uncategorized (5)