Posts Tagged ‘repair’
Beginner Faucet Fixin’
A good starter DIY project is fixing or replacing a faucet. It looks overwhelming at the start, but the fix is usually straightforward: just replace the parts that look broken.
To determine if this is a good DIY project, determine the relative importance of the sink, how much you value your time and knuckles, and if you can shut the water off at the sink.
In my case, my kitchen faucet had been dripping for awhile and was driving me crazy. I have a shutoff under the sink and all my available free time is dedicated to playing dinosaurs or trains. We have a bathroom sink nearby if things go horribly wrong and a local plumber who’s set me right before. So I’m ready to take this on.
Once you’ve decided to do a fix, determine the manufacturer of your faucet. All the big brands have excellent websites for finding parts and diagrams. One of the best kept secrets is the stellar phone support. They really can answer questions like: “What is this plastic doohickey that slides over the rubber thingy and is held on with a screw?” My experience has been that they’re knowledgeable, patient, and give clear advice and instructions.
I actually cheated for this project and previously determined that the cartridge on my Moen faucet was the culprit, but a couple of my plastic connector pieces looked a little rough too. Easiest just to replace “the guts” of the faucet.
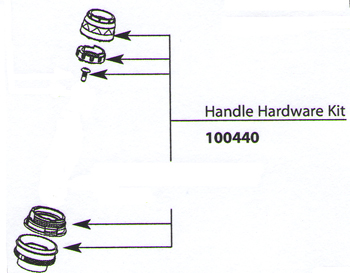 Thanks to the magic of the internet, I obtained a Moen 100440 Replacement Handle Hardware Kit and Moen 1200 cartridge a few days later. Once I had a few spare hours I was ready to take this on.
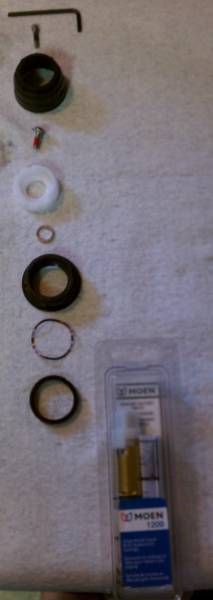
Here’s what you receive in the kit, with the new cartridge underneath.
First turn off the water and make sure it’s off. That’s a lousy surprise while your hands are full.
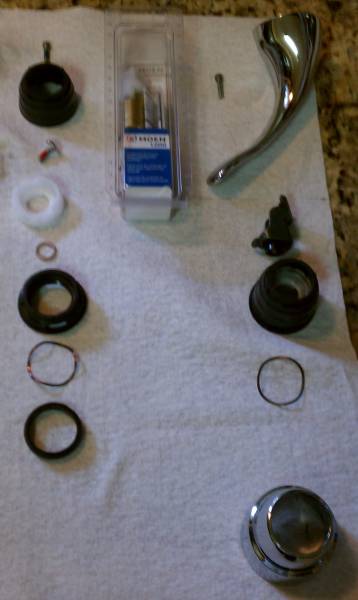
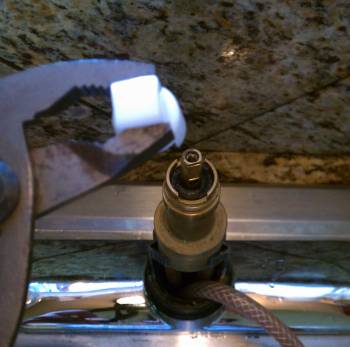
Disassembling my faucet is pretty straight forward. There’s a red/blue logo “button” in the front of the handle that covers a hex screw. Removing that allows you to remove the chrome handle. Then there’s a phillips screw in the top holding the “handle adapter” down. After that’s out, just start pulling and unscrewing parts, using an adjustable wrench as needed. I try to lay my parts out in the order removed, so I have a prayer of putting them back together properly.
 As you can see a number of connector parts between the “handle adapter” and cartridge that are stuck together. This is probably from my previous attempts to “fix” the leak by tightening things down just a bit more.
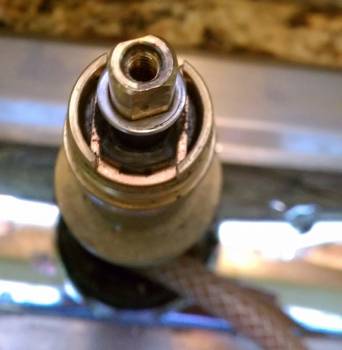 Now I just remove the brass clip in front and actually pull the cartridge out. The clip comes out with pliers, no problem. The cartridge is actually trickier. Sometimes you can loosen the cartridge with pliers, but with this one and just about every other faucet I’ve seen, you need the white plastic tool that comes with the new cartridge to remove the old one. Put it on there and twist it a few times back and forth and the cartridge can now be pulled out with pliers.
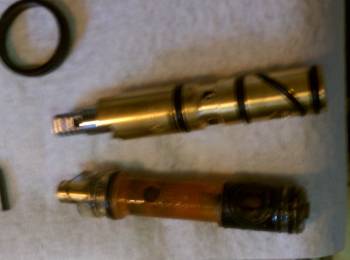
Here’s an old icky plastic cartridge and my new brass one. I doubt it makes a real difference, but it was maybe a dollar difference in price to get the brass one, so I did.
After that, push the new cartridge in, and reverse the dissasembly steps. It’s always a little difficult to get the next part lined up, but it’s manageable. If you’re like me, test the faucet before it’s fully assembled. I always reverse the hot and cold and need to rotate the stem 180 degrees.
That’s all there is to it. If you can assemble children’s toys, you can handle replacing faucet parts.

Tool Review: Homax Popcorn Ceiling Spray Texture
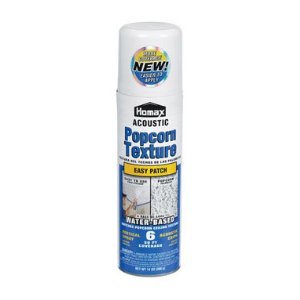
As detailed previously, I recently had the opportunity of patching a umm…vintage popcorn ceiling. I found the Homax Popcorn Ceiling Spray Texture at my local hardware store for about $10 a can. I had huge reservations, but decided to give it a shot.
Technical Details:
| 14 ounces |
| Contains actual polystyrene chips |
| Patches popcorn acoustic ceiling textures |
| Maximum coverage: 6 square feet |
The manufacturer’s product description reads: “An easy-to-use vertical spray texture will patch Popcorn textured ceilings with acoustic chips. The texture is designed to match existing Popcorn ceilings. The special nozzle provides controlled delivery for the textured thickness.”
Here’s what is true in that description: “A vertical spray texture with acoustic chips.” The phrases easy-to-use and controlled delivery are outright lies.
That’s not to say this product can’t be used for patching a popcorn ceiling. Unfortunately the learning curve is steep and the product is expensive.
I was initially interested in the product because I’ve sprayed texture with a hopper before. I made a huge mess and only started to get the hang of it towards the end. With this product – I made a huge mess and only started to get the hang of it towards the end.
This really can’t be stated often enough: the spray goes everywhere. Your eyes, hair, walls, floors, and if you’re lucky, the ceiling. There’s a cute little video on the Homax website of a gentleman holding a small cardboard box with the bottom knocked out, presumably to contain the overspray. This has no chance of working on the planet Earth.
Plan on gloves, multiple pairs of goggles, and sheeting off the work area with plastic curtains and floor covering. Here’s what my setup looked like.
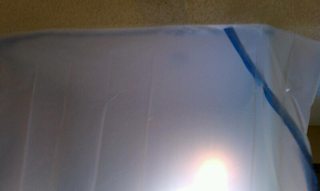
First I primed the patch and let it dry overnight. I cut plastic sheets to go floor to ceiling and thumbtacked those in place. Then I used painters tape on the ceiling edge of the plastic to keep the spray from sliding underneath. More tape down the sides to seal the corners. Plastic tarp on the floor with canvas on top to keep from dragging the plastic around. Goggles (only one pair, don’t make that mistake!), gloves, ladder and cans inside the curtain.
Now the claim is you can get 6 square feet of texture out of one can. Well you may be able to, but I sure didn’t. I had 16 square feet to cover and used 8 cans (one was a dud). If I did it again, I might be able to do it in 4 or 5, which was my initial estimate.
So if you’re with me so far, you’ve bought a can per two square feet of needed coverage, obtained enough plastic to sheet off the area completely, and have a few pairs of goggles and gloves ready. (By the way, if you were with me, you should have volunteered to help me scrape the whole ceiling. Where were you anyway?)
Let’s talk technique. Each can is good for around 10 sprays IF you only use about a second per spray. If you hold down the trigger, it’s going to run out of aerosol instantly. Additionally that first spray is going to splatter (high pressure) and the last will dribble out. This isn’t a normal spray paint button, you get this screw on plastic deal that puts the nozzle between your fingers, like a can of whipped cream.
 I knew everything you’ve read up to this point and thought I could handle it. I crawl into my containment area, don gloves and goggles (and the stupid cardboard box for the first attempt – lets never speak of that again). Next step, shake can vigorously for a couple minutes. Climb ladder, put nozzle 12 inches from the ceiling. Then I mentally prepared to spray short bursts, quickly, to get as much product out before I ran out of aerosol. Pull trigger. Nothing happens. Naturally my instinct is to put the can closer to the target and pull it again. BLAM. Wet goopy stuff dripping from the ceiling. Ugh. But can’t stop, hurry, hurry, hurry. I applied about 1 square foot of thick cottage cheese and it’s just glopped on there (see the top left corner below). And 10 or so ounces of additional spray on my curtain, hands, etc.
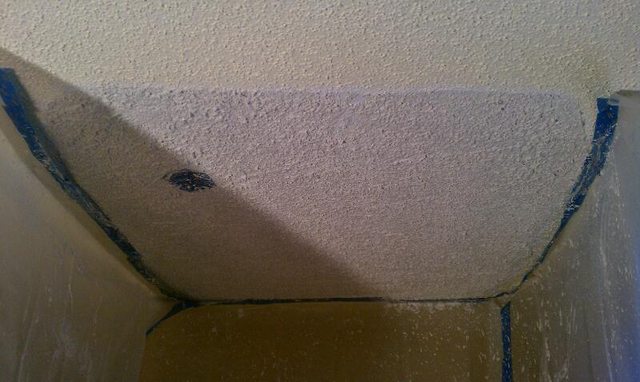
Here’s what worked for me. Hold the can 20 inches from where you’ll spray. Pull the trigger a little harder on that first spray to get it going, but keep your hand back. Keep with the short sprays and you’ll be able to cover a larger area and it won’t look as bad. If it’s too light, hit it again in an hour.
If you’ve taken the proper precautions the clean up is pretty easy. I’d recommend leaving the floor covering for a few hours as the texture takes a while to dry.
This review is pretty negative, but to be fair, this product is trying to do something quite difficult: provide a ready-to-use apparatus that can apply solid material in a vaguely liquid form while still being easy to clean up and relatively harmless. I applaud the attempt.
I’d estimate 15 or so square feet is where this product becomes cost prohibitive. If I had to patch another ceiling of less than 10 feet I would consider using this again. Anything past that – rent the hopper. Prep and cleanup are nearly the same. Considering you can practice with the hopper and not waste $10 worth of material in two seconds makes it a clear winner in my mind.
Apparently Homax also makes a roll on popcorn texture, which I didn’t know existed. Does anyone have any experience with it?
I’m conflicted on where this rating should end up. On the one hand, it’s a pain to use, but it can be used to patch a popcorn ceiling and the alternative method isn’t that great either. So I’ll say this rates one Captain Construction. Poor guy took one for the team while his buddies went off to play with the cool tools.

Repairing Stripped Out Wood Screw Holes
Occasionally things become worn out and require repair. Wood has a tendency to expand and contract as it gets wet, hot, or cold. This can cause various pieces to come undone.
One of the common problems is a stripped or damaged wood screw hole. I have used this technique to fix wooden fences and galvanized nail holes, so it does not only apply to wood screw holes.
The technique is not difficult to learn but requires you to have a few tools on hand.
1. Hammer

(image courtesy ReviewsHardware.com)
2. Punch
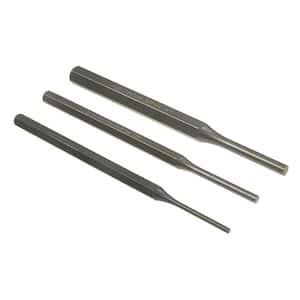
(image courtesy Home Depot.com)
3. Side cutters

(image courtesy Home Depot.com)
4. Thick toothpicks or match sticks (work best)
5. Leather work gloves
6. Safety goggles
Step 1. Starting with your hole, take the match sticks and cut off the strike points (red or blue round points) with your cutters. All match sticks should be about the same length after you cut the tips off. Use as many match sticks as you think you need to fill the hole. This step is not needed if you are using toothpicks.
Step 2. Coat your match sticks or toothpicks with wood glue. This will ensure that the sticks make a good bond with the surrounding wood.
Step 3. Insert the match sticks into your stripped out hole as far as you can with your hands. Use the hammer to lightly tap them into the hole further.
Step 4. Use your side cutters to trim the match sticks so that it is as flush with the adjacent wood surface as possible.
Step 5. Use a punch tool with your hammer to tap the match sticks in further.
Step 6. Allow about 5 minutes for the wood glue on the sticks to dry before re-drilling your wood screw or hammering in your nail.
Step 7. Re-drill your hole with the wood screw or nail in your nails. If you drill almost completely but leave a bit of the screw out, you should be able to tug on the screw to feel that it is tight and does not move around. The same goes for the nail. Finish drilling your screw and you are done.
The below video also demonstrates this method (courtesy mymilescity.com):
Additional links:
How to Fix Stripped Out Wood Screws
Repairing a stripped screw hole
How to Repair a Loose Wood Screw Hole for a Hinge

Home Improvement Blog on Google+
Home Improvement Blog on FaceBook
Bloggers Wanted
Latest Articles
Topics
- Electrical (8)
- Introductions (7)
- Plumbing (3)
- Projects (13)
- Repair (4)
- Safety (5)
- Tips and Tricks (5)
- Tool Review (5)
- Tools (6)
- Uncategorized (5)