Posts Tagged ‘Renovation’
Tiling a Fireplace Surround
THE SETTING
Our 1869 foursquare farmhouse had been renovated around 1905 to make it more “upscale and modern”. The front and back parlors were joined and a fireplace was installed. In 1999, the house again got a makeover, with new beams, plumbing, wiring, but maintaining much of the molding, windows, and style from the turn of the 20th century.
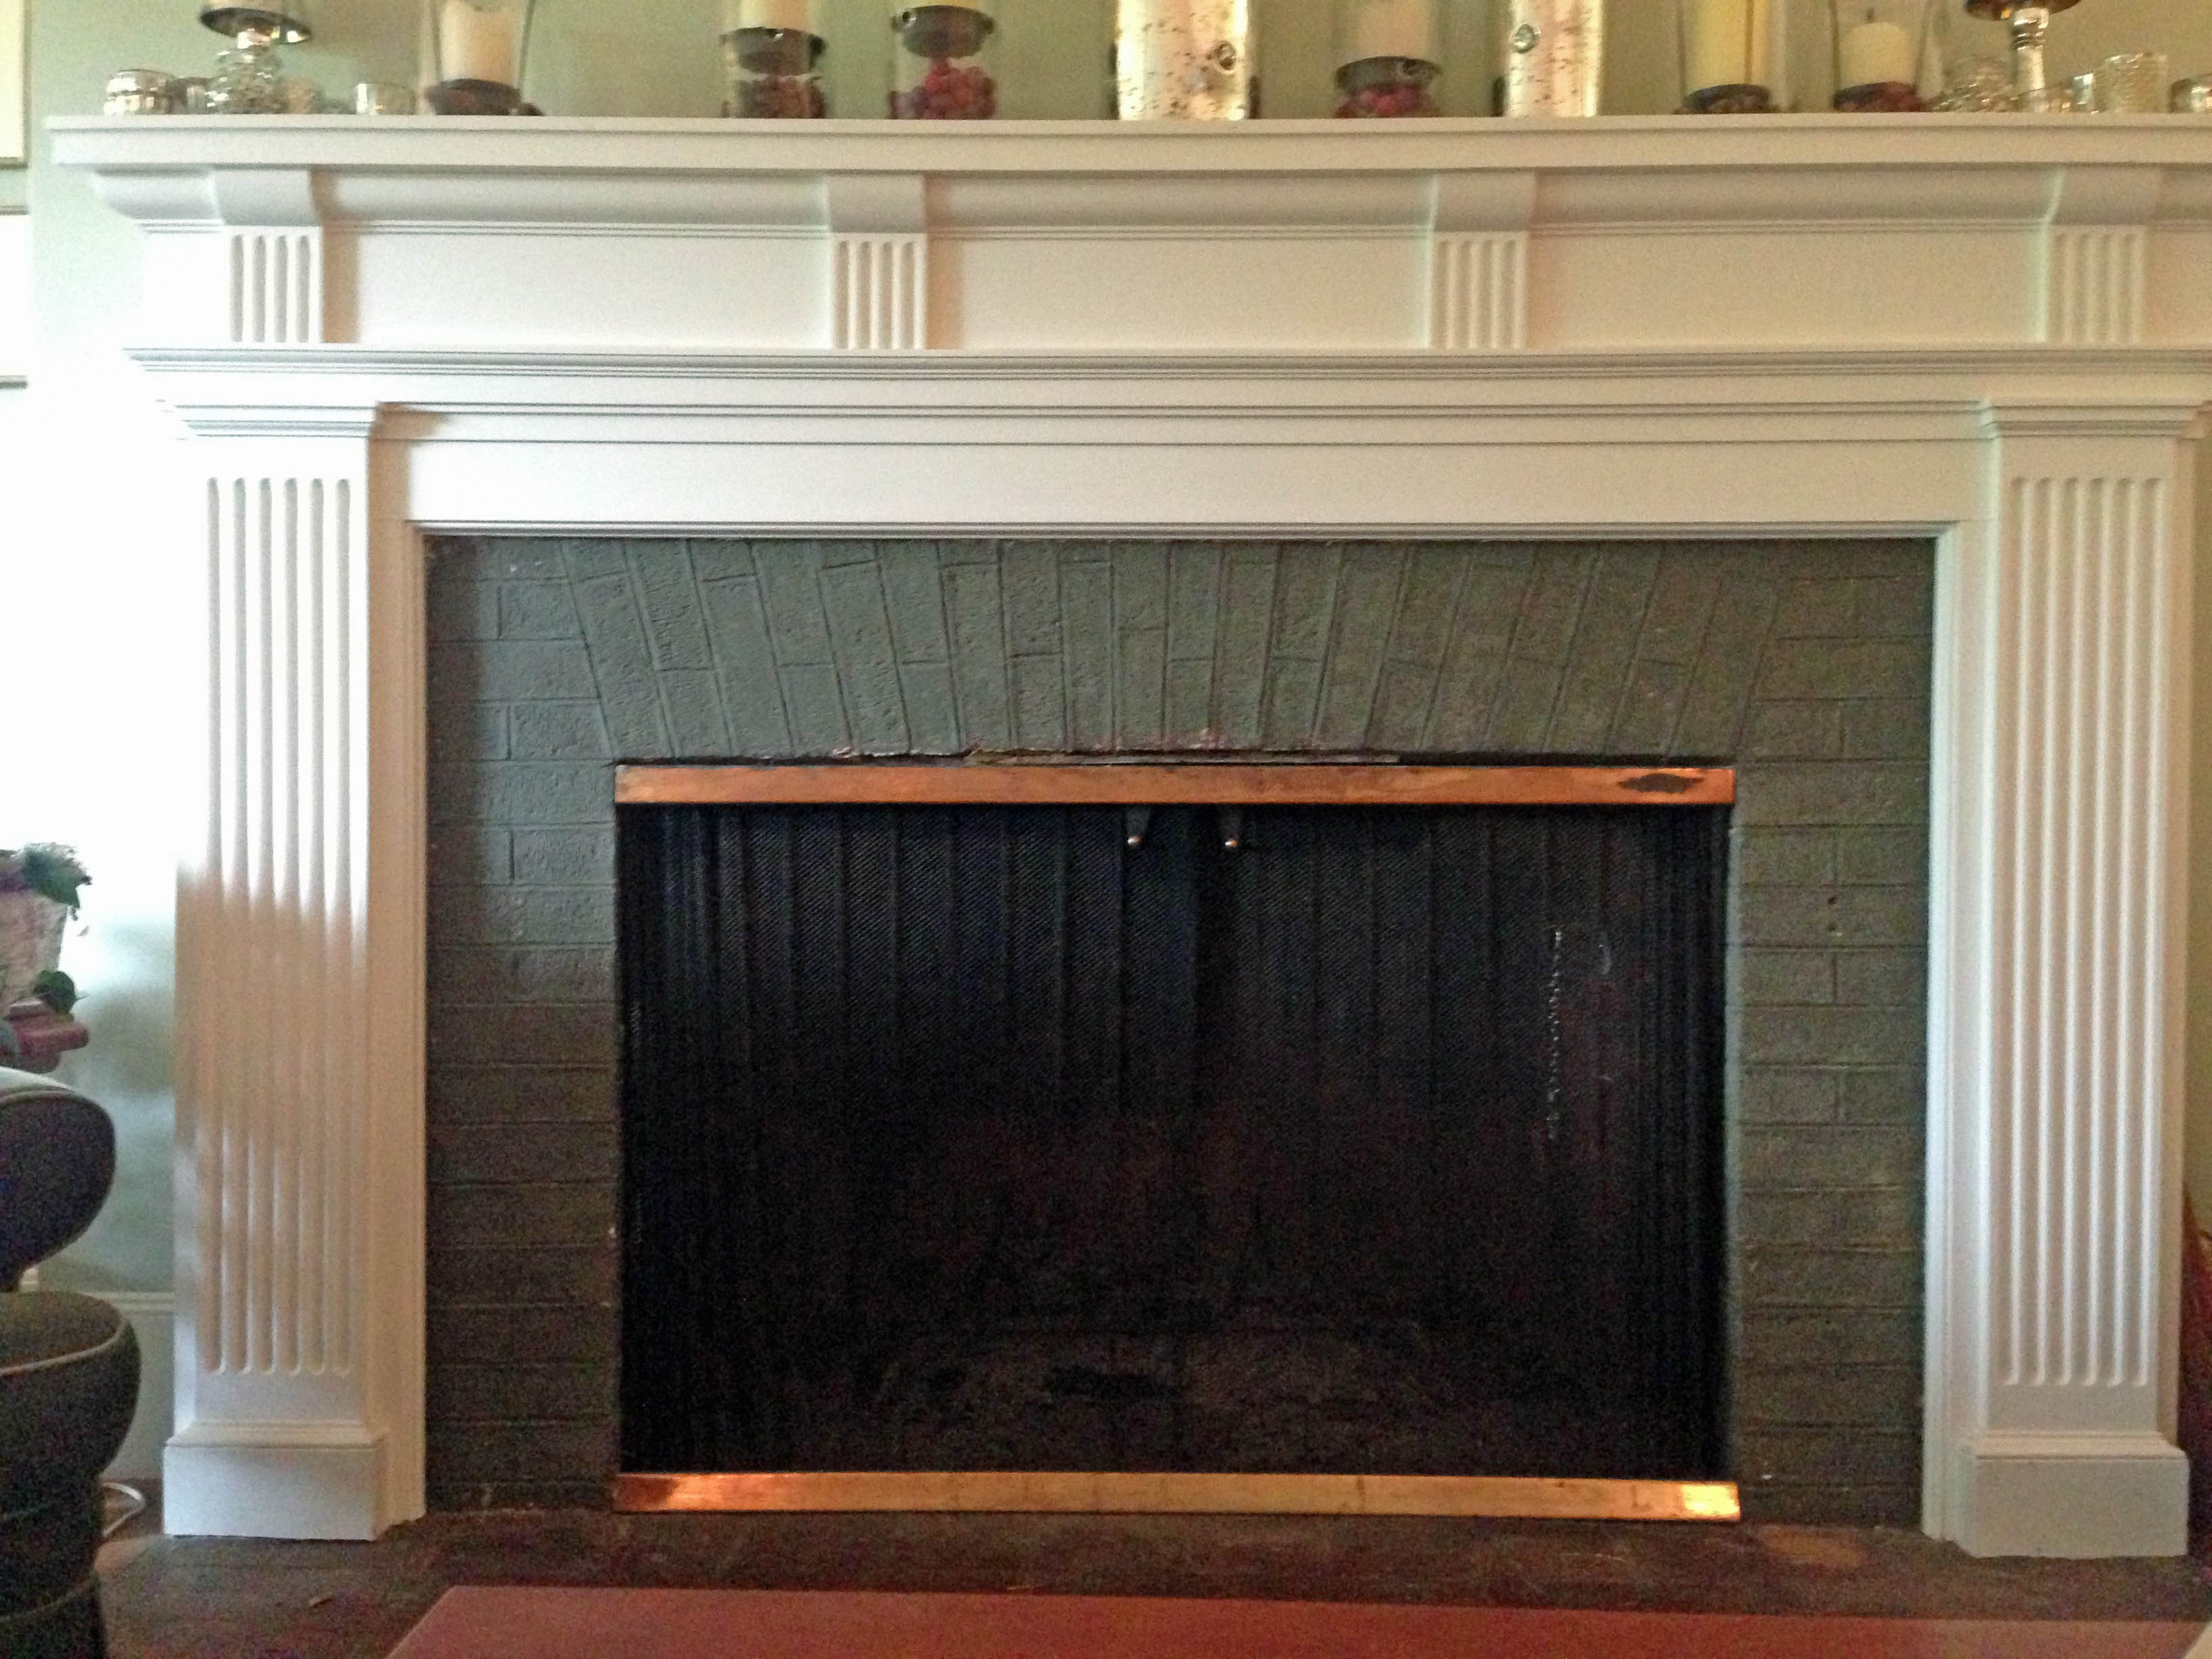
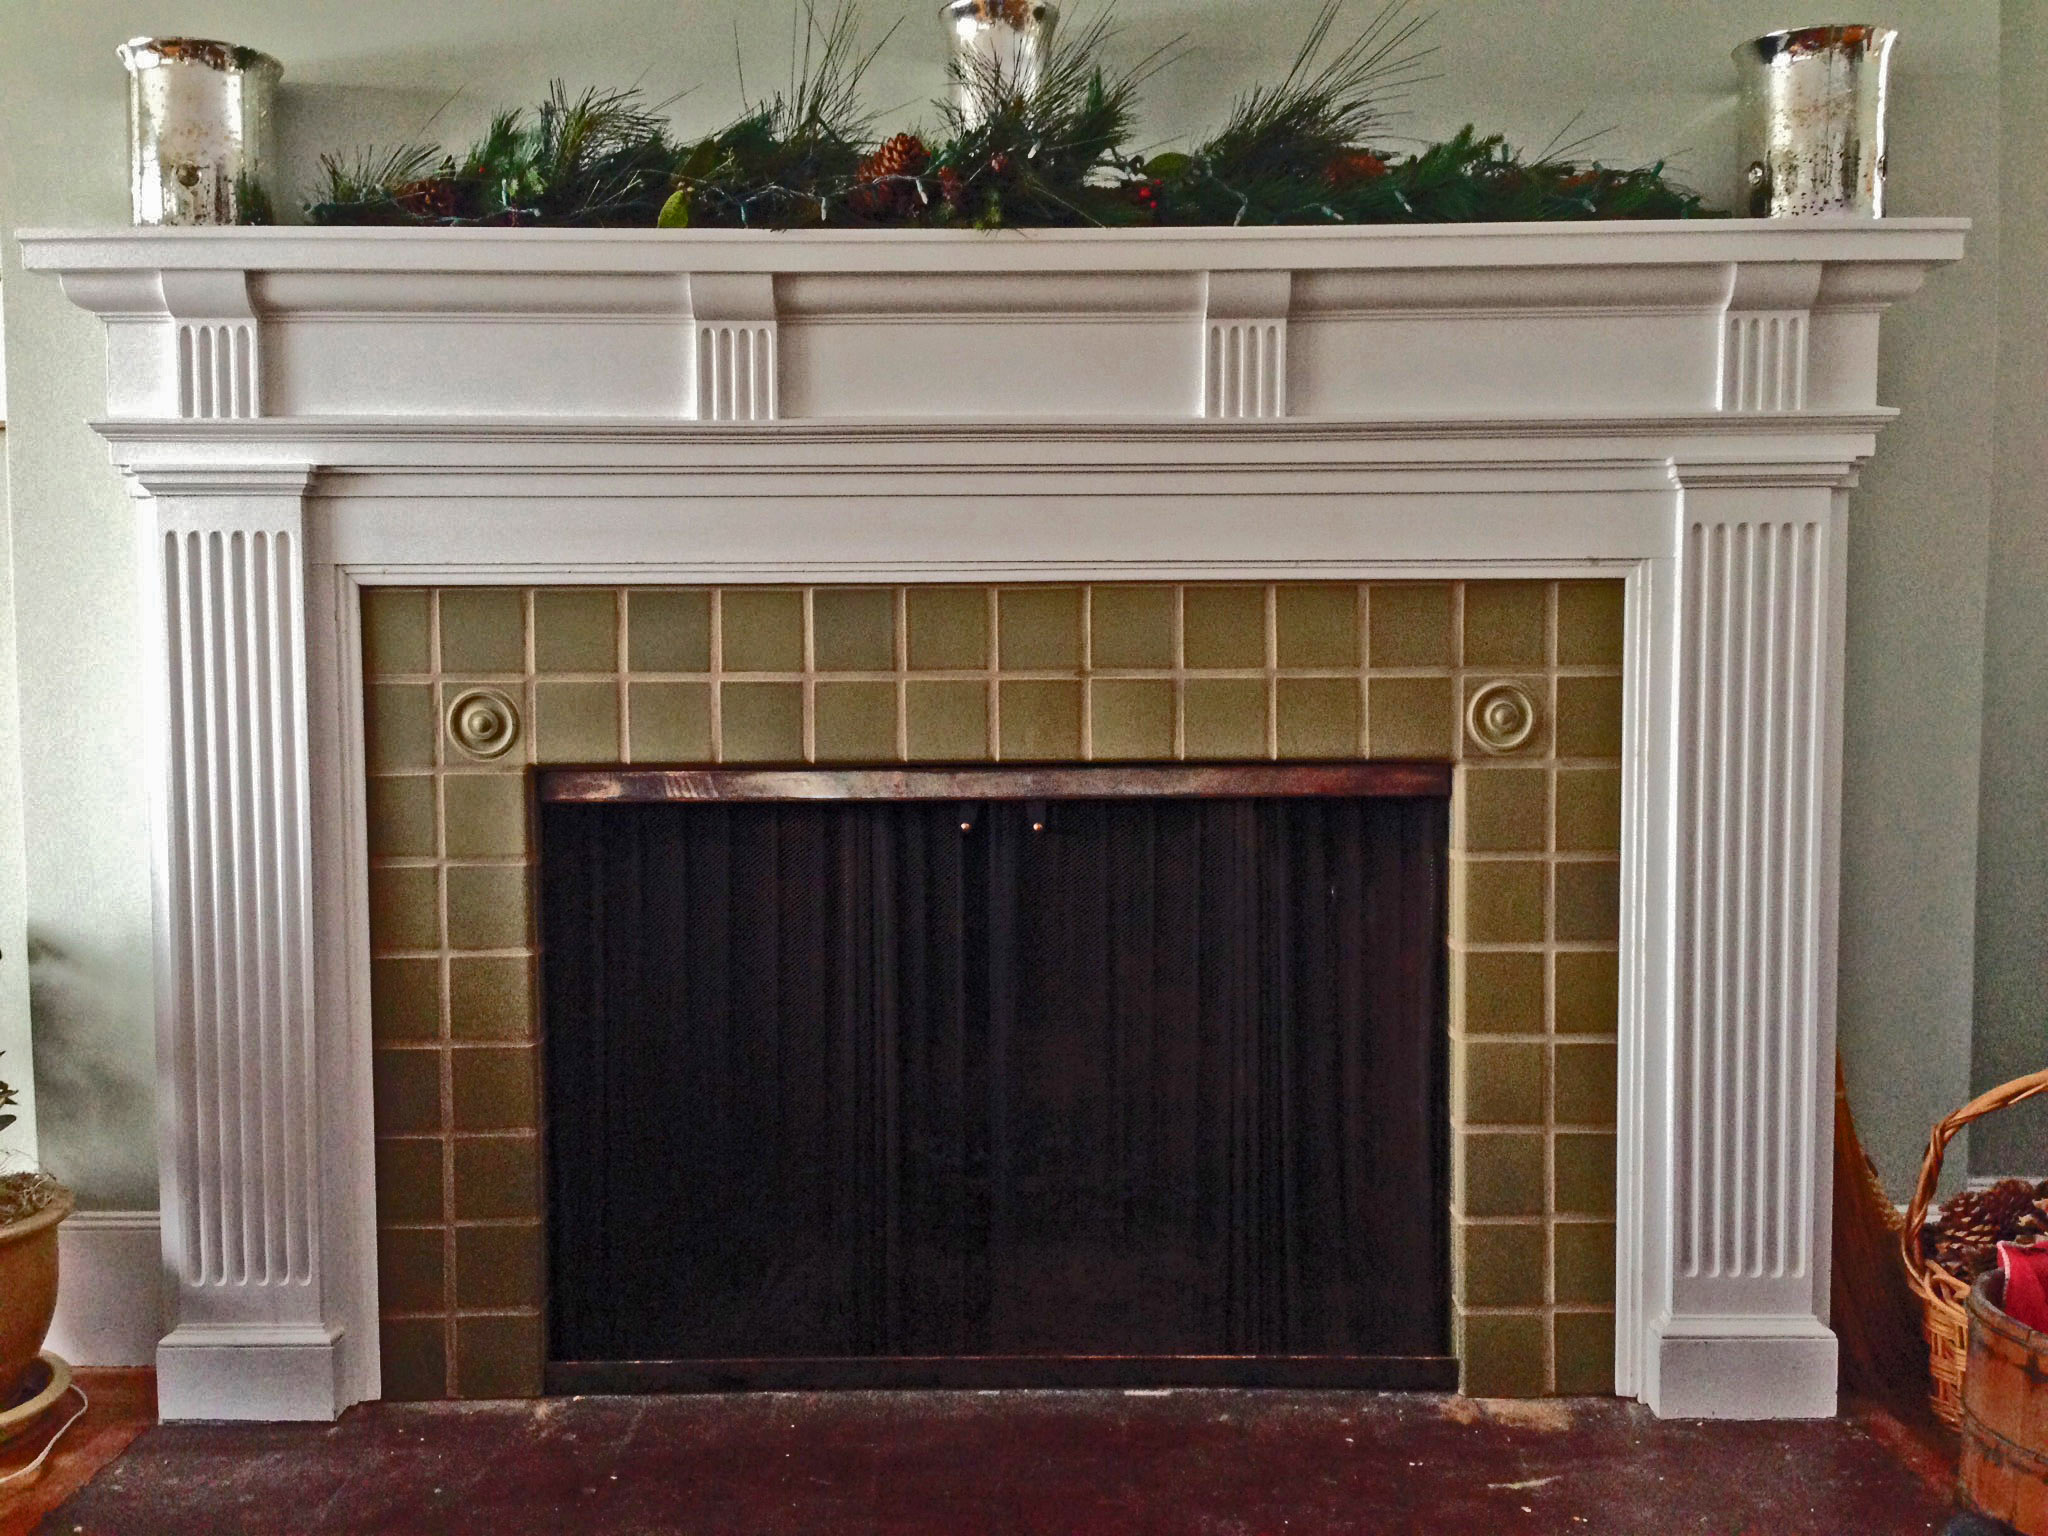
The fireplace now consisted of a painted wooden mantle and trim, with a brick façade around the firebox. The façade had been painted several times, but seemed fairly sound. It was now a dull, dark greyish green. Time for a freshening up.
DESIGN
We decided on tile, selecting an arts-and-crafts style that would have been in keeping with early 1900s décor. The 4 ¼” x 4 ¼” tiles were handmade in California. We chose field tiles (regular four sided tiles), bullnose tiles (with one sloped finished edge) and a few decorative bulls-eye tiles for accents. The tiles were about 1/2” thick and slightly irregular, with no built-in spacers.
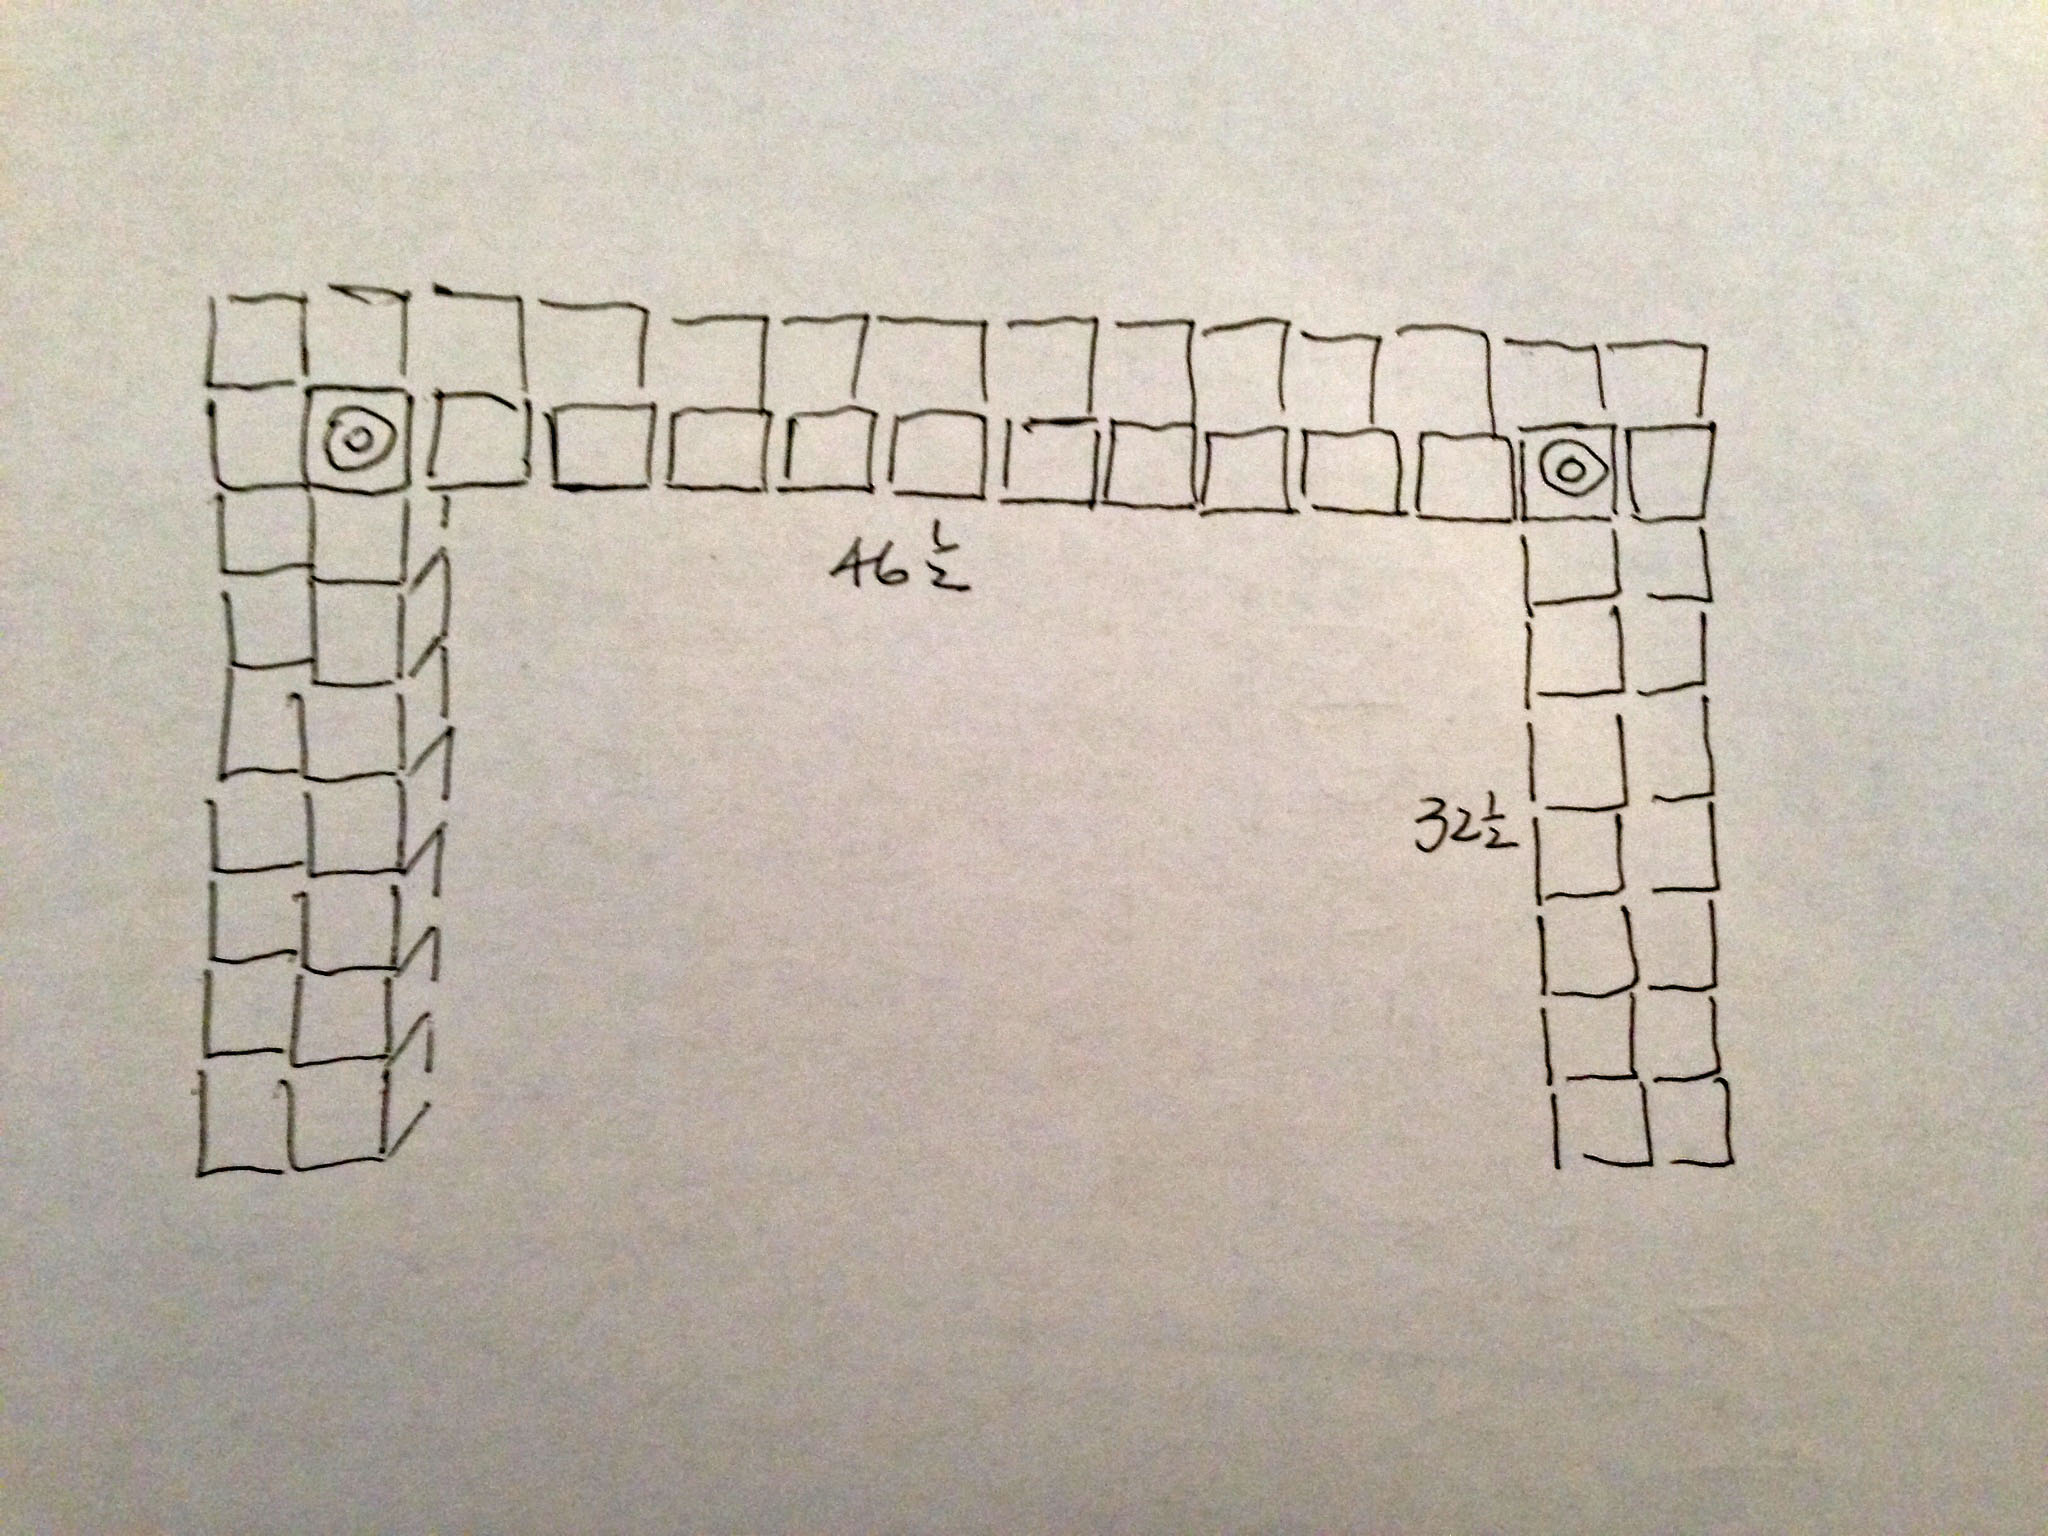
The layout worked out fortuitously. We wanted wide grout lines, often seen on arts-and-crafts projects. We also wanted decorative tiles on the inside corners where the vertical and horizontal runs met.
With the moldings closest to the façade removed, and with a careful adjustment of the grout spacing, we were able to get a pattern that gave us two columns wide on the sides and two rows deep on the horizontal section. We wanted only full tiles between the decorative corners, but the 48″ spacing between the inside edges of the firebox was a bit too wide for 10 tiles, even with 3/8″ grout. Stretching them out was not an option because the grout lines would be too wide compared to the vertical runs. So we decided to add tiles to the vertical inside edge of the firebox. This narrowed the horizontal opening by about 1½” ( the thickness of two tiles and thinset), down to an overall width of 46 1/2″ . With just a little fudging of the grout width to a hair more than 3/8” (but not quite ½”), we got a satisfactory fit of ten tiles horizontally between the bulls-eyes.
PREPARATION
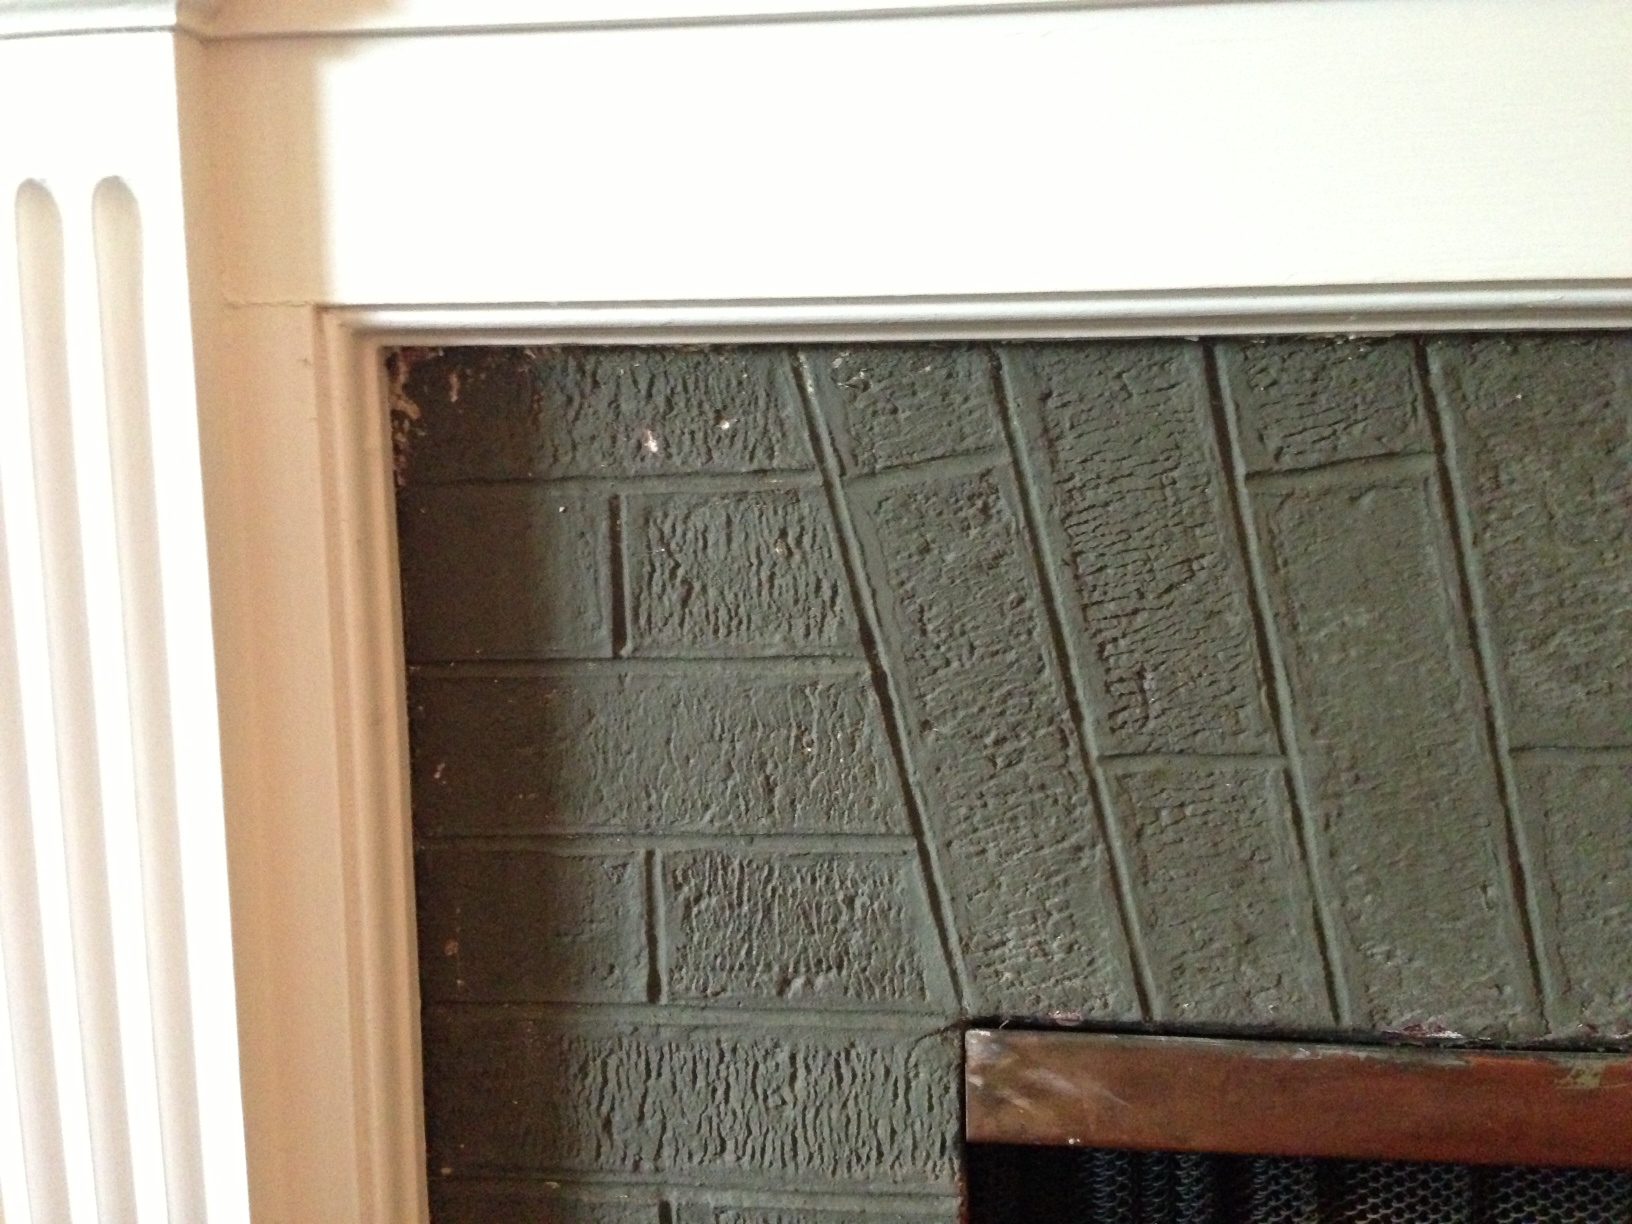
Getting ready for the installation, we took a closer look at the brickwork, only to find that it was not. The sloping angle of some of the “brick” corners should have been a giveaway. This was actually stucco that had been textured and grooved to look like decorative brick.
As I begin each DIY project around our house, my wife asks “Have you ever done this before?” the unstated, but obvious worry being that I was going to serious wound myself, set the place on fire or cause a giant sinkhole to swallow up our homestead. My usual answer is a smug, silent look, implying that, beyond question, I am up to the task. But his time, I actually hadn’t done ceramic tiling before. Time to start reading, surfing the web, and asking my good old friends on diy.stackexchange.com.
While the paint on the “brick” façade was largely intact, we were a bit unsure about whether the thinset mortar used to mount the tiles would adhere well enough. A quick post on DIY brought me some great feedback. Regular contributor HerrBag suggested trying a test patch of thinset on the surface to see how well it adhered. The test showed fair (not great) adhesion with some paint peeling away and some thinset sticking pretty solidly.
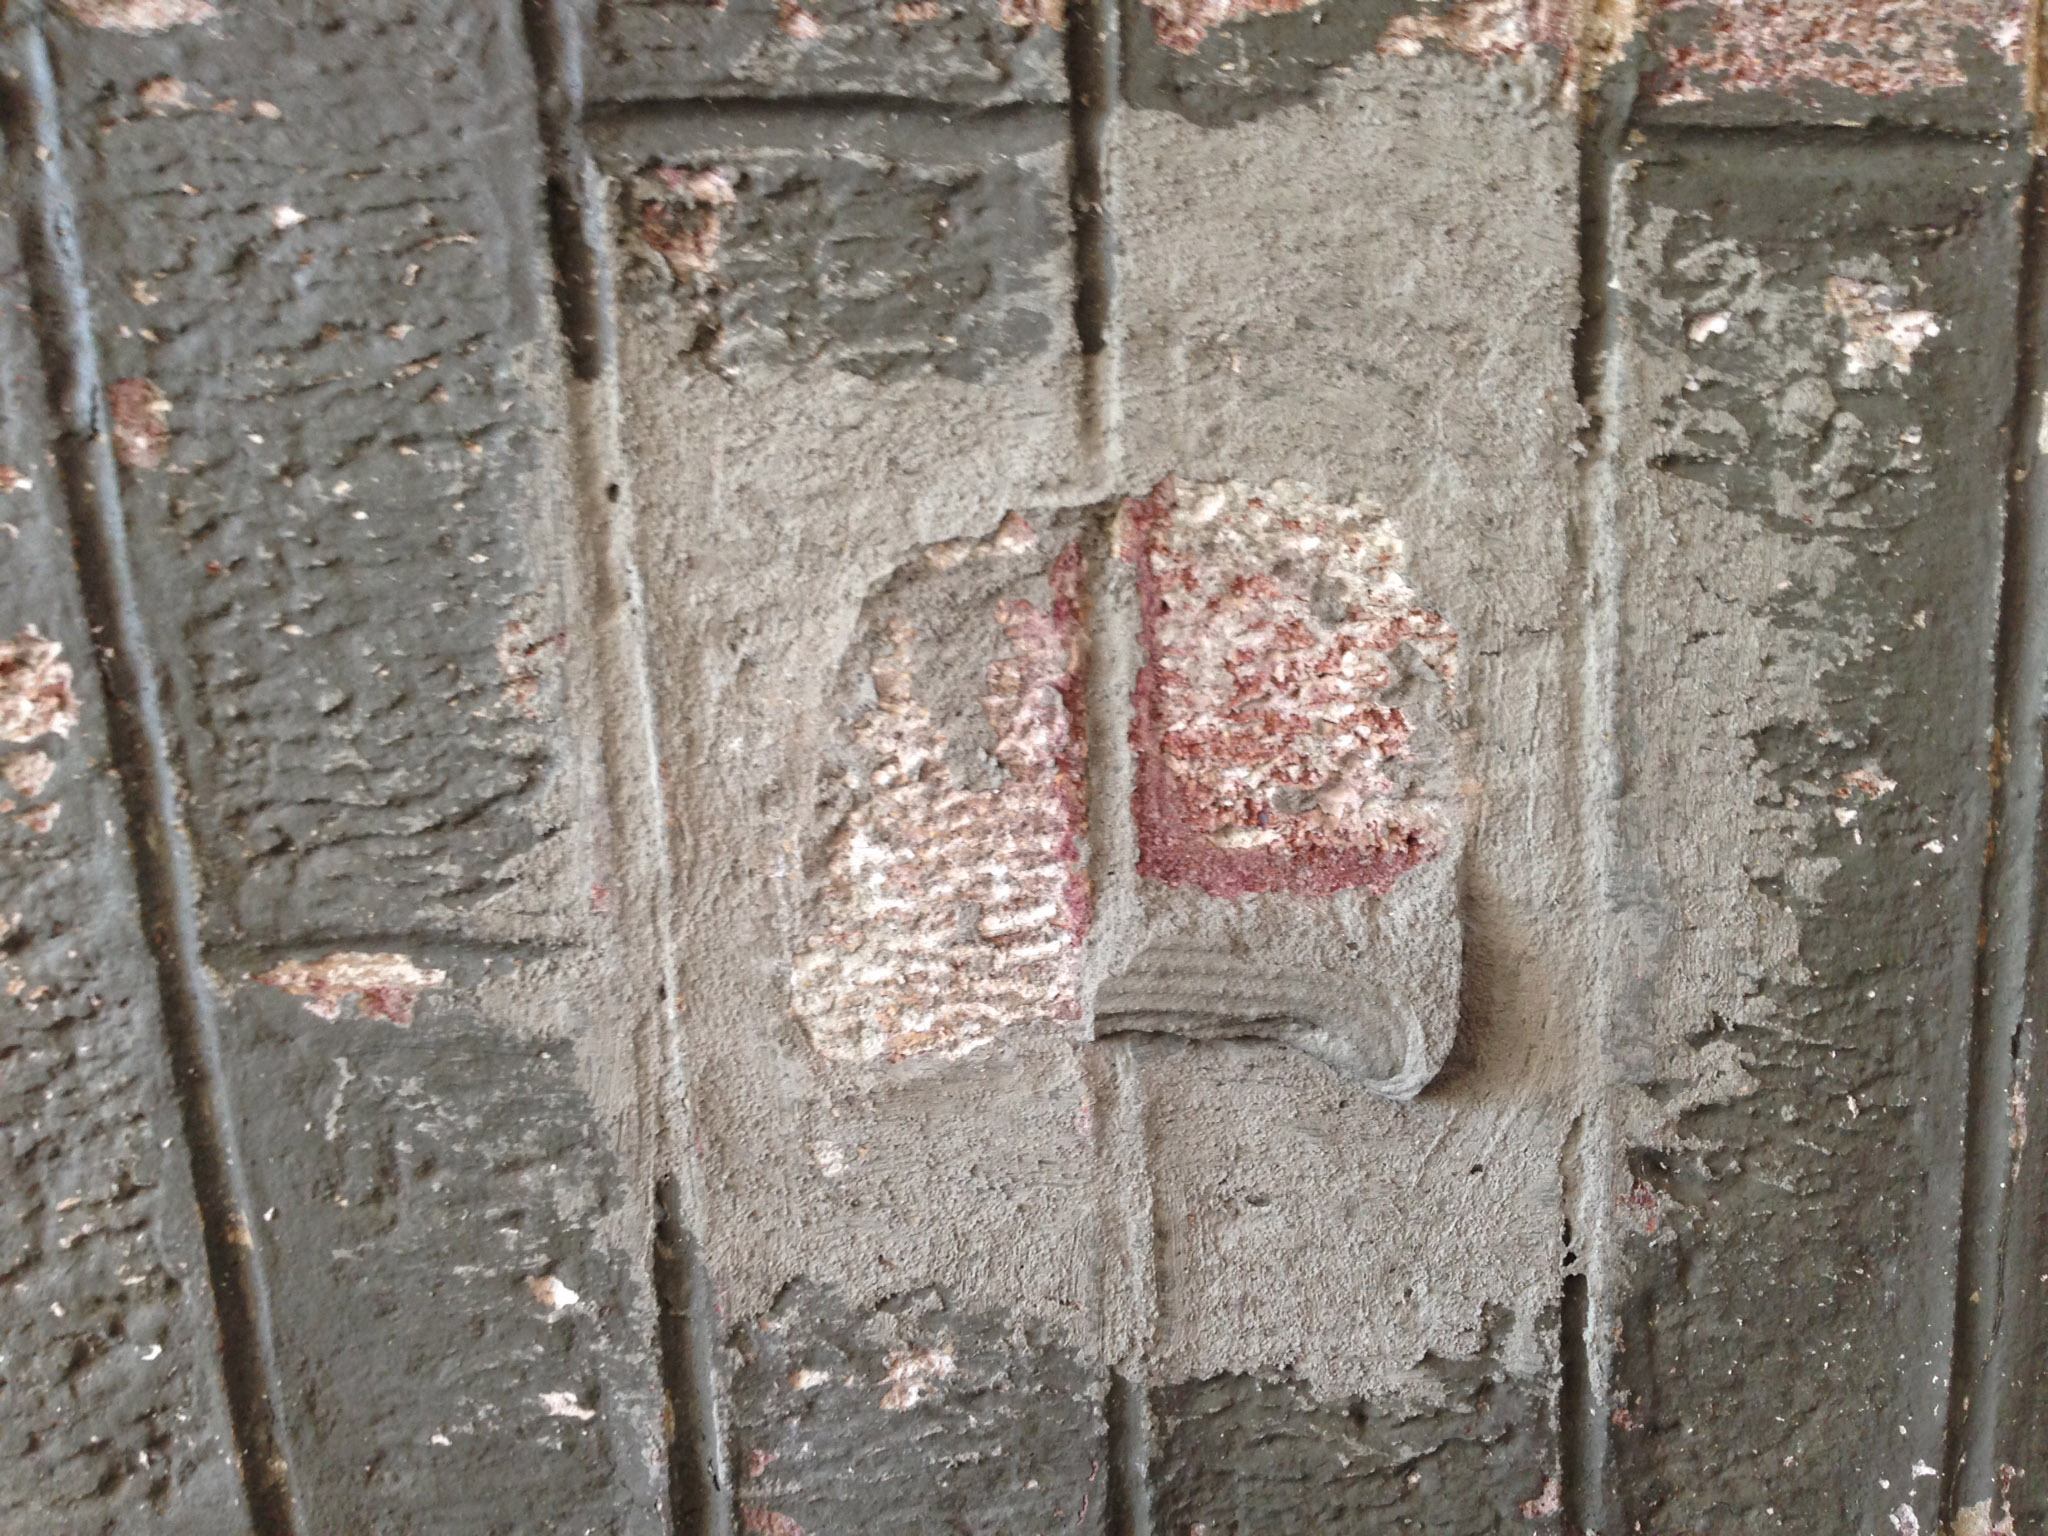
Heavy tiles and some exposure to heat suggested a stronger grip was needed, so we went through a vigorous scraping of the painted surface with a wire brush to remove any loose paint. Then we did a thorough scarifying of the surface using an angle grinder with an abrasive wheel to cut grooves into the stucco.
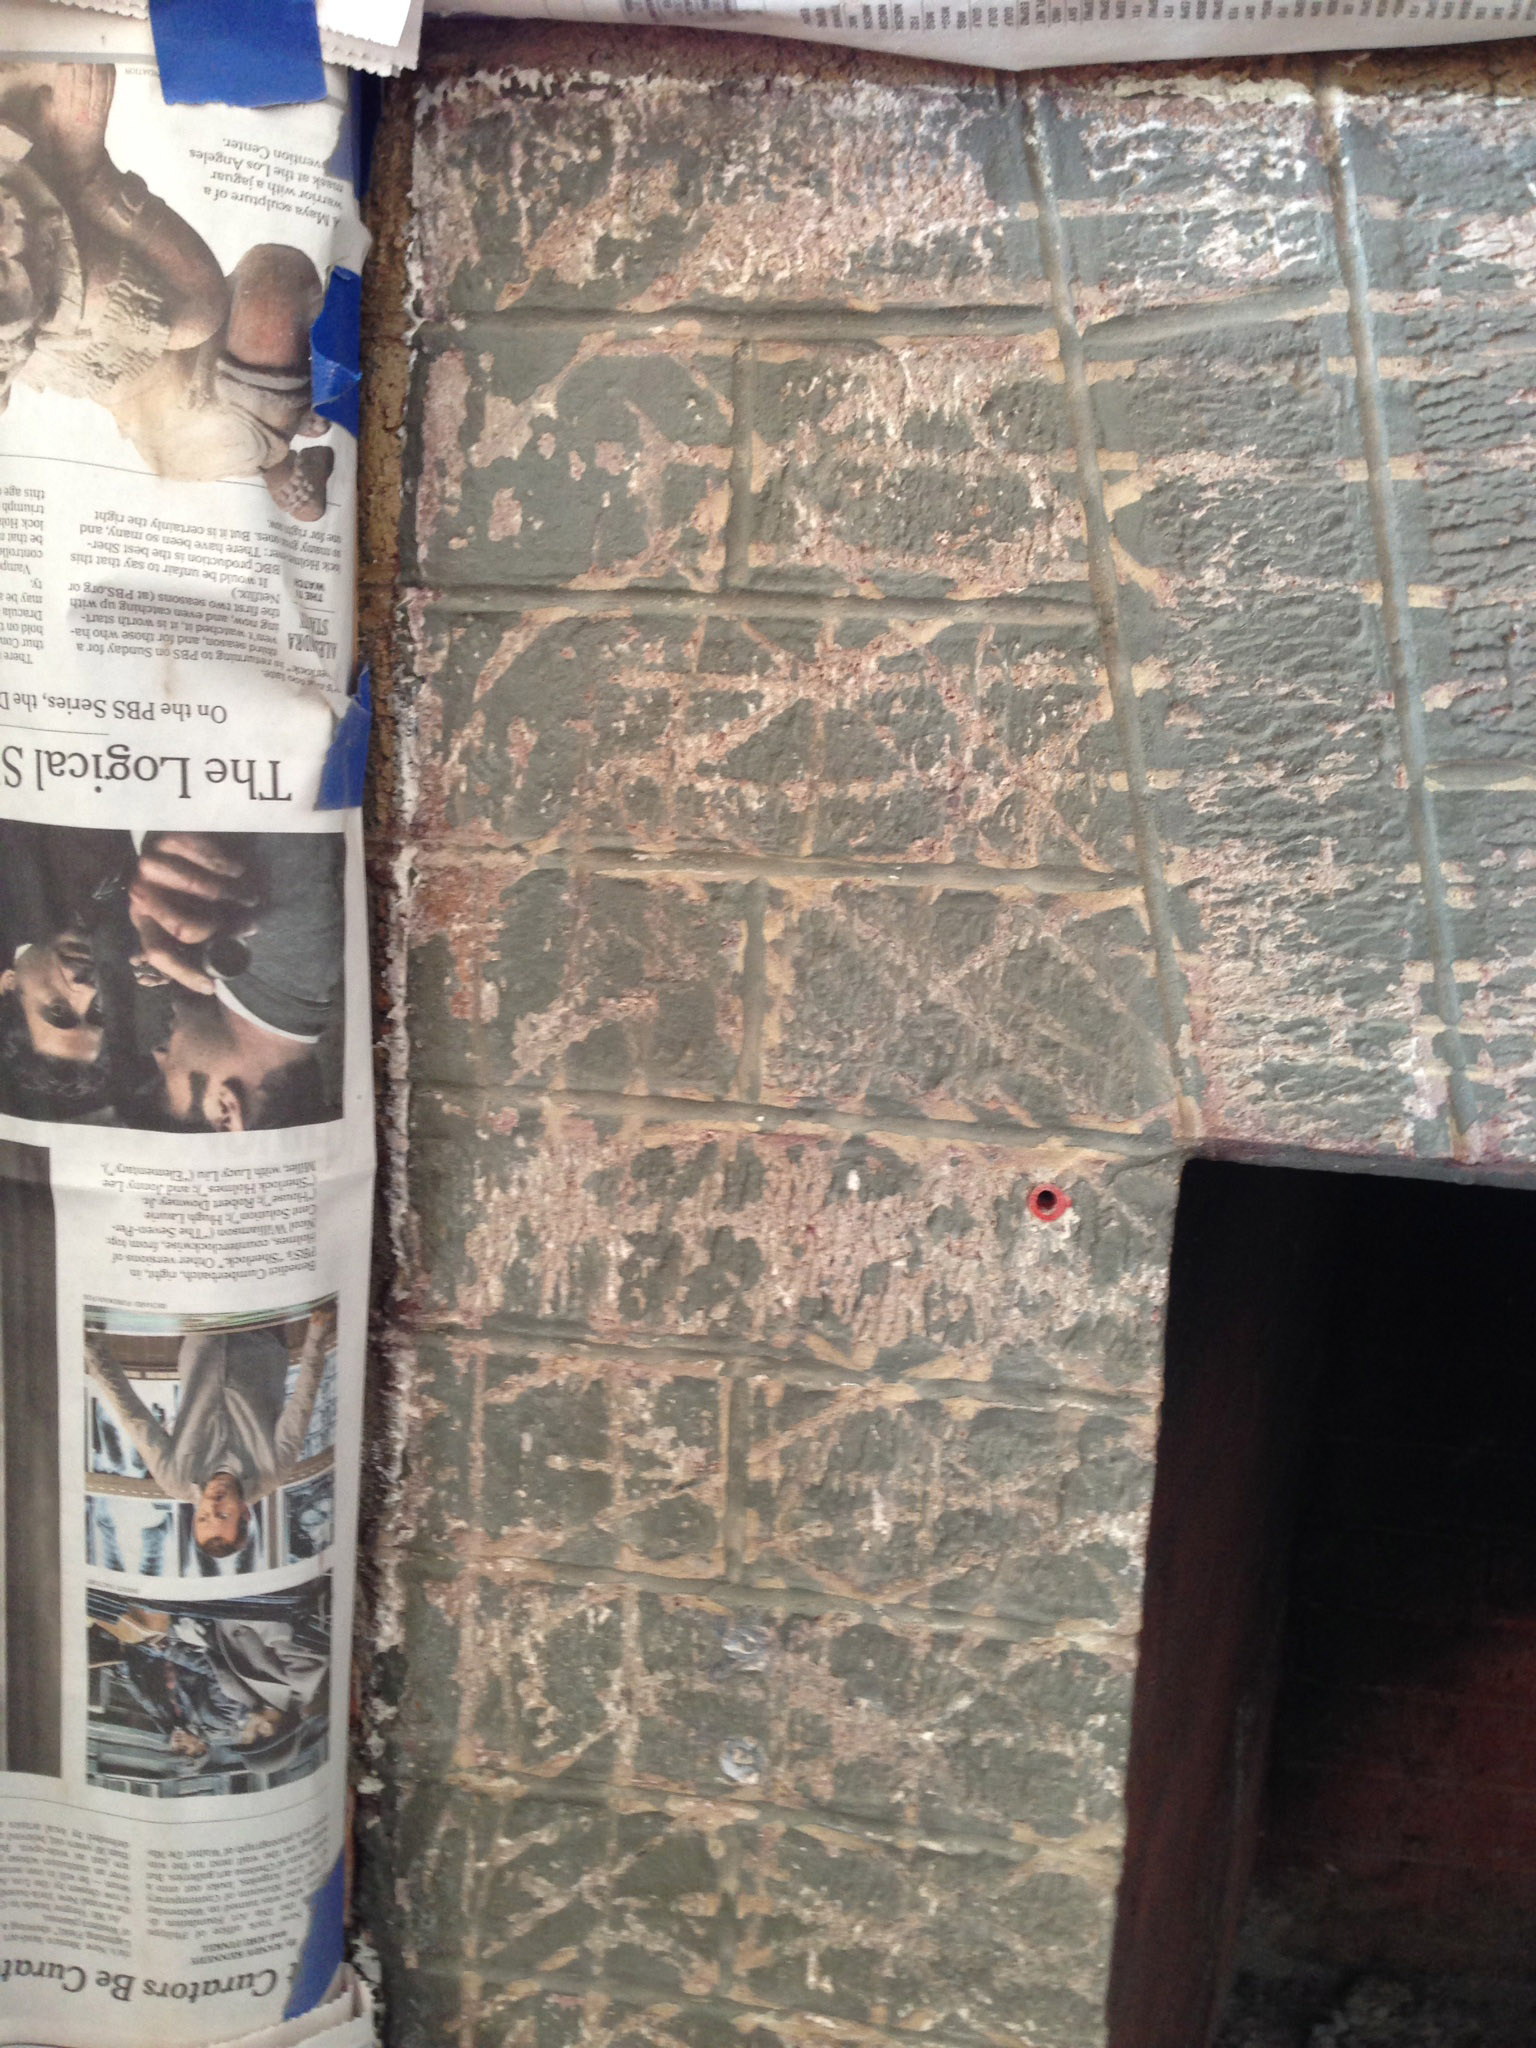
You know how they say “preparation is more than half the task”? Well we didn’t prepare well enough for the hurricane of dust that blew through our entire house. We had taped and masked the wood of the fireplace and put down newspapers for several feet. We wore safety goggles, dust mask and gloves. Nowhere near enough protection! The grinder threw up clouds of paint and stucco dust, worst in the immediate vicinity, but the film reached upstairs bedrooms! We have since been cleaning for weeks. And with old paint there is always the risk of lead contamination. (Next time, a full plastic tent around a grinding project.)
TILE MOUNTING (Part 1)
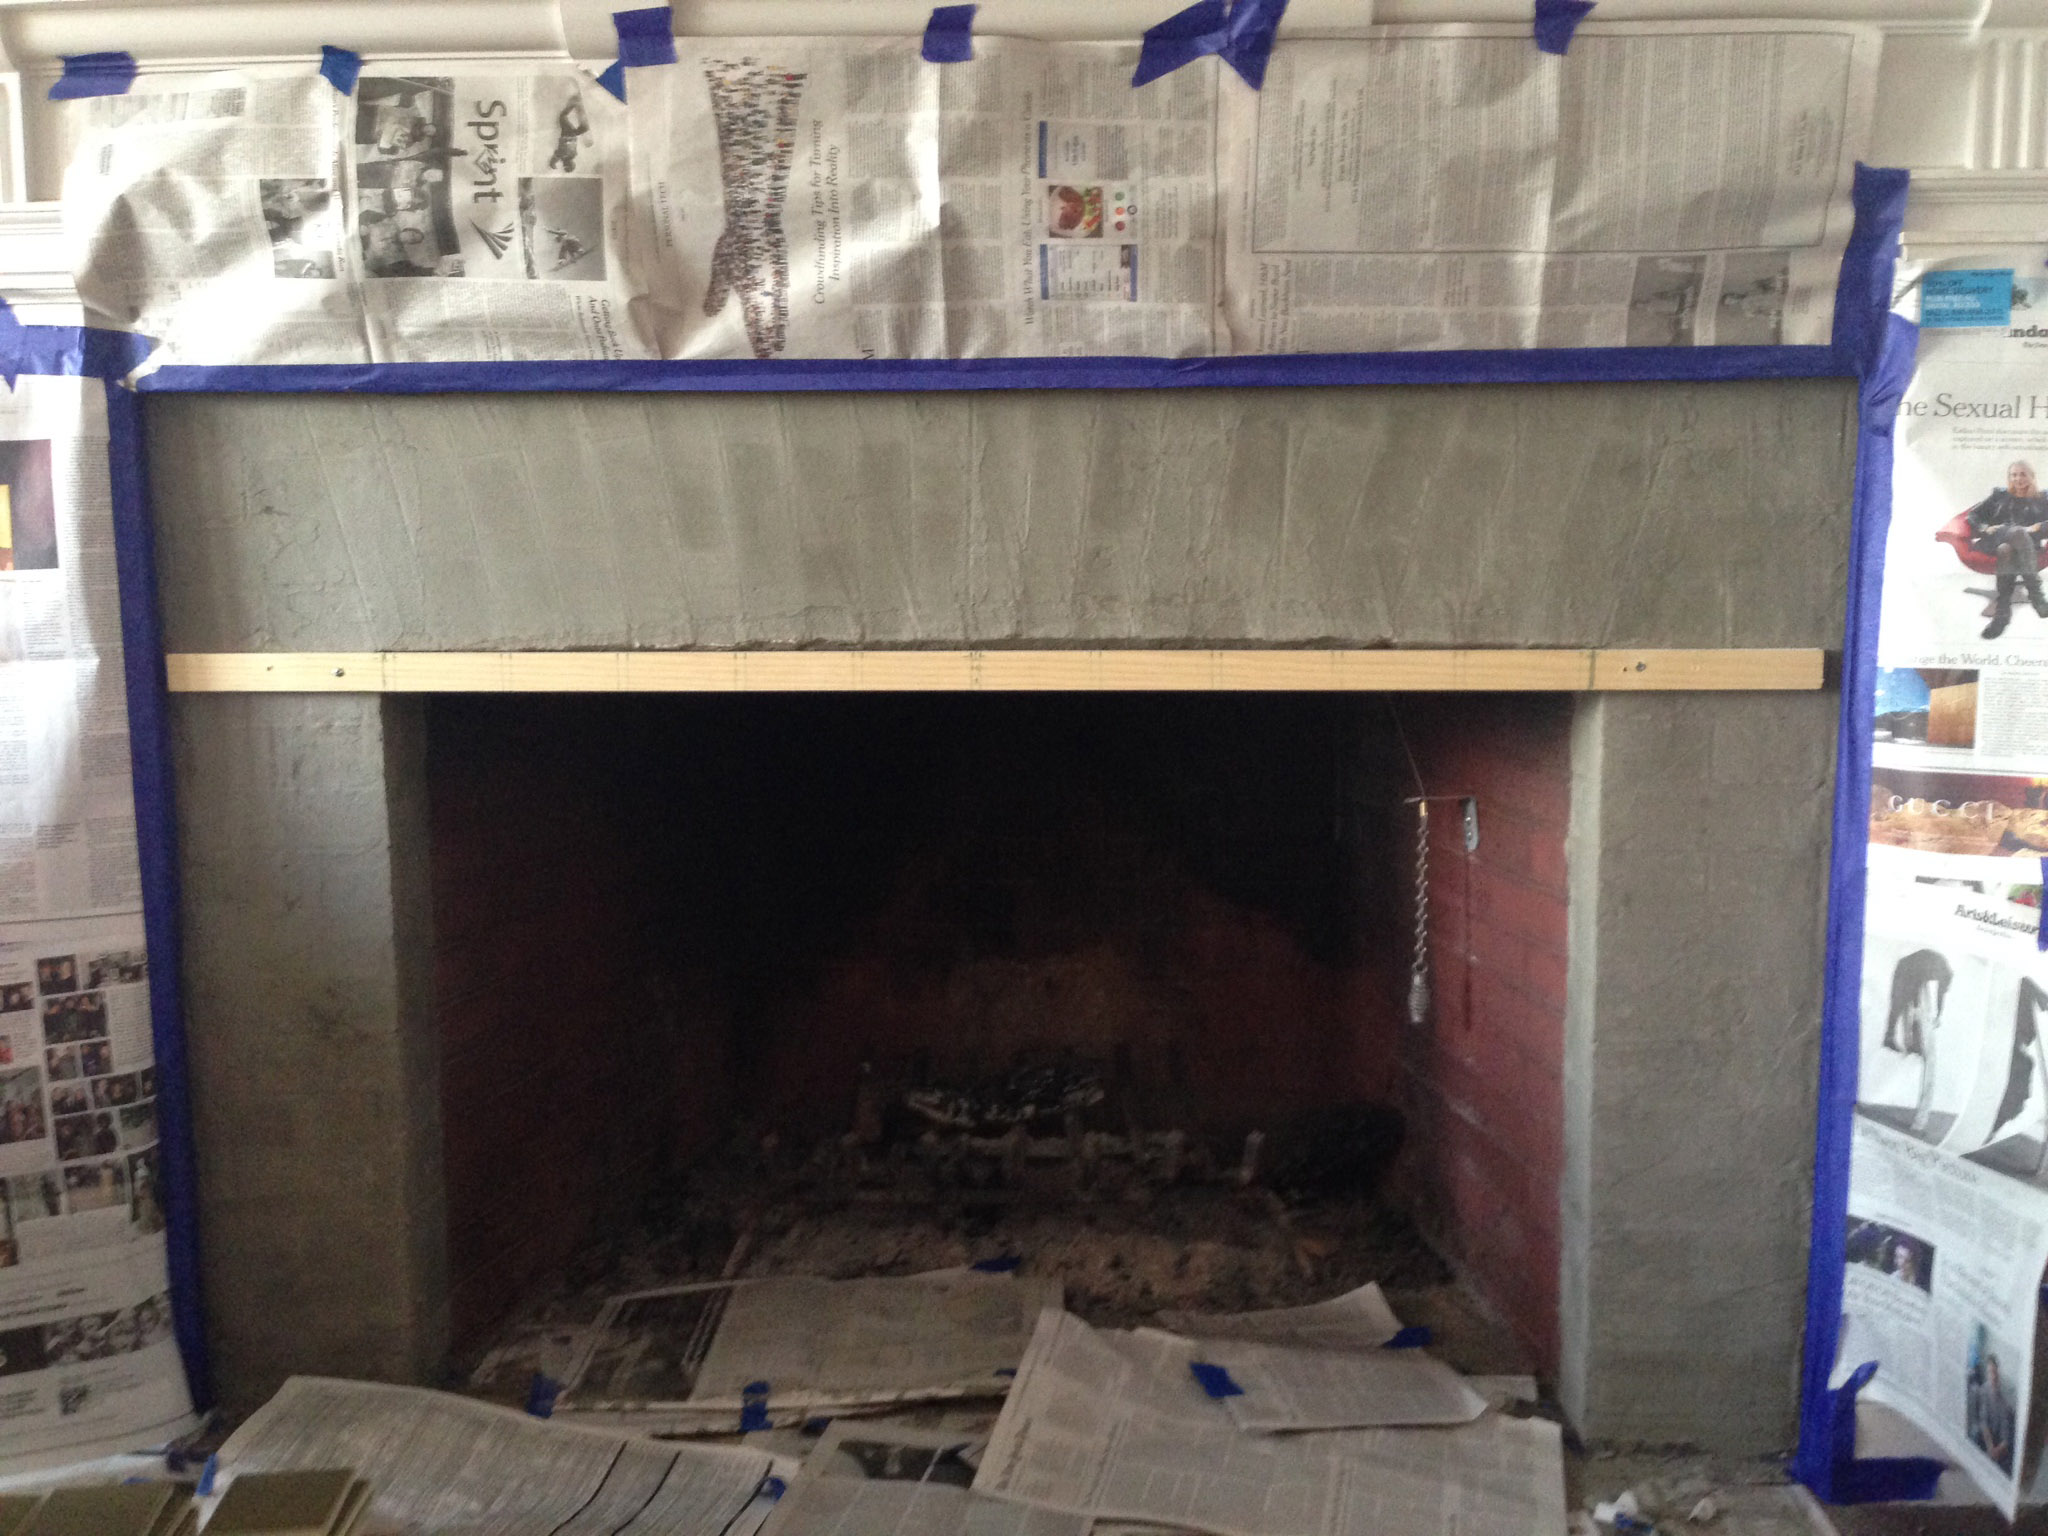
Before beginning the actual tile mounting, we put on a skim coat of thinset to level out the variances in the stucco and give a more complete base for the tile.
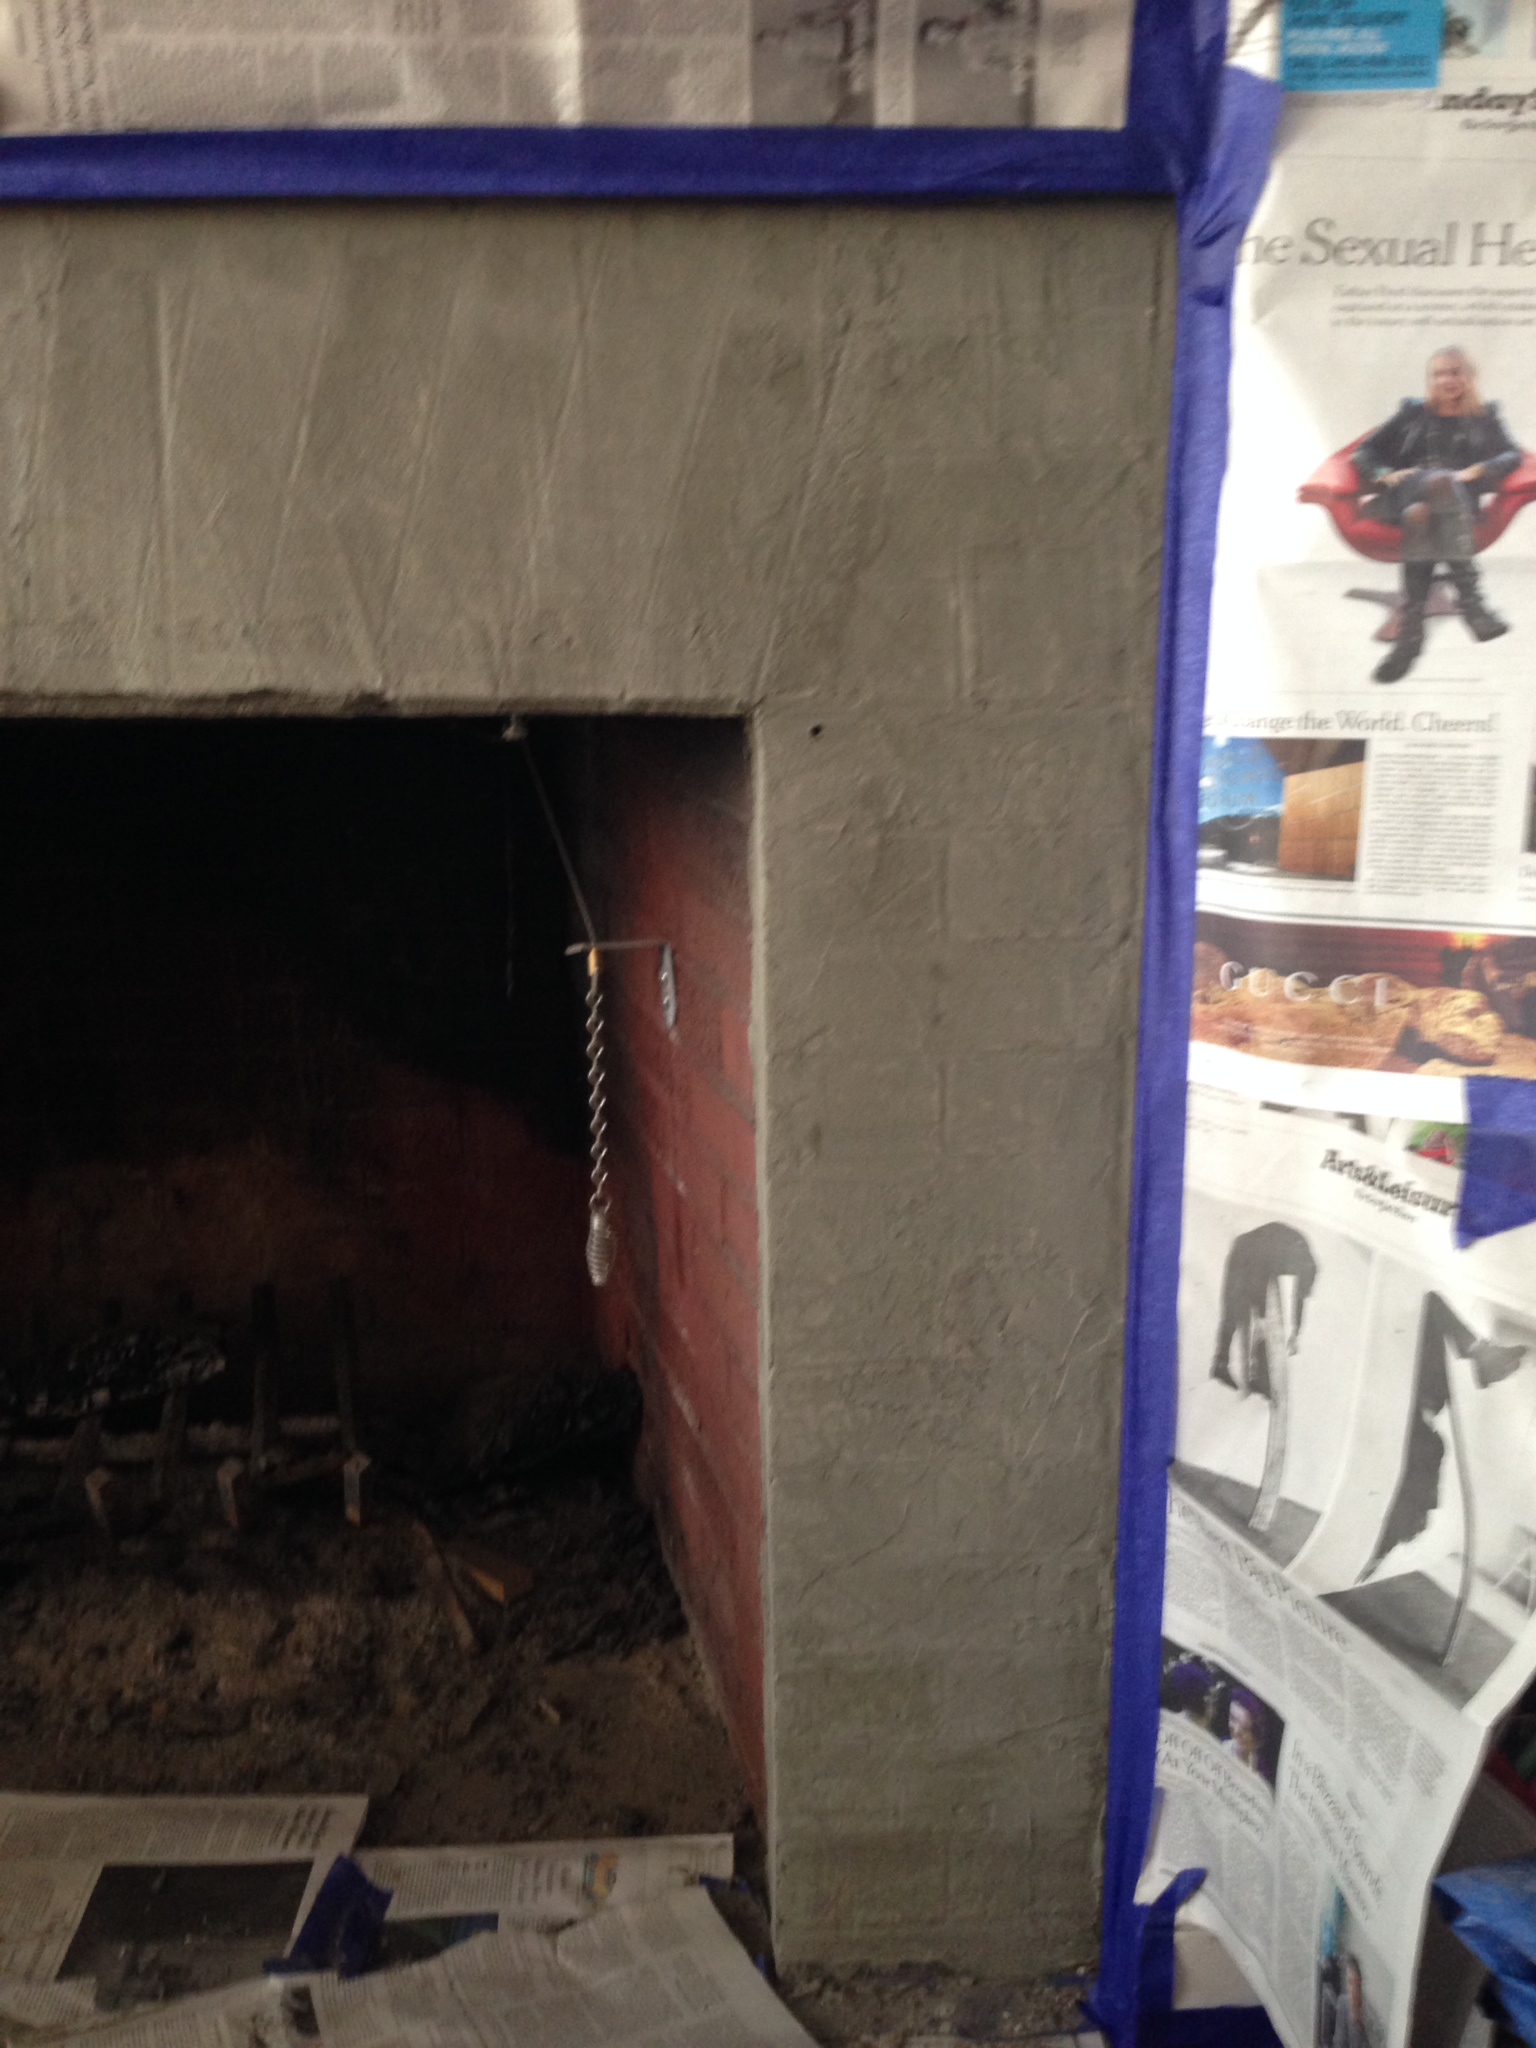
Now on to the actual installation! Guided by several books on tiling and an internet sweep, we positioned a support brace at the top edge of the firebox (the bottom edge of the horizontal run). It was leveled and attached with light duty anchors and screws (it’s only temporary).
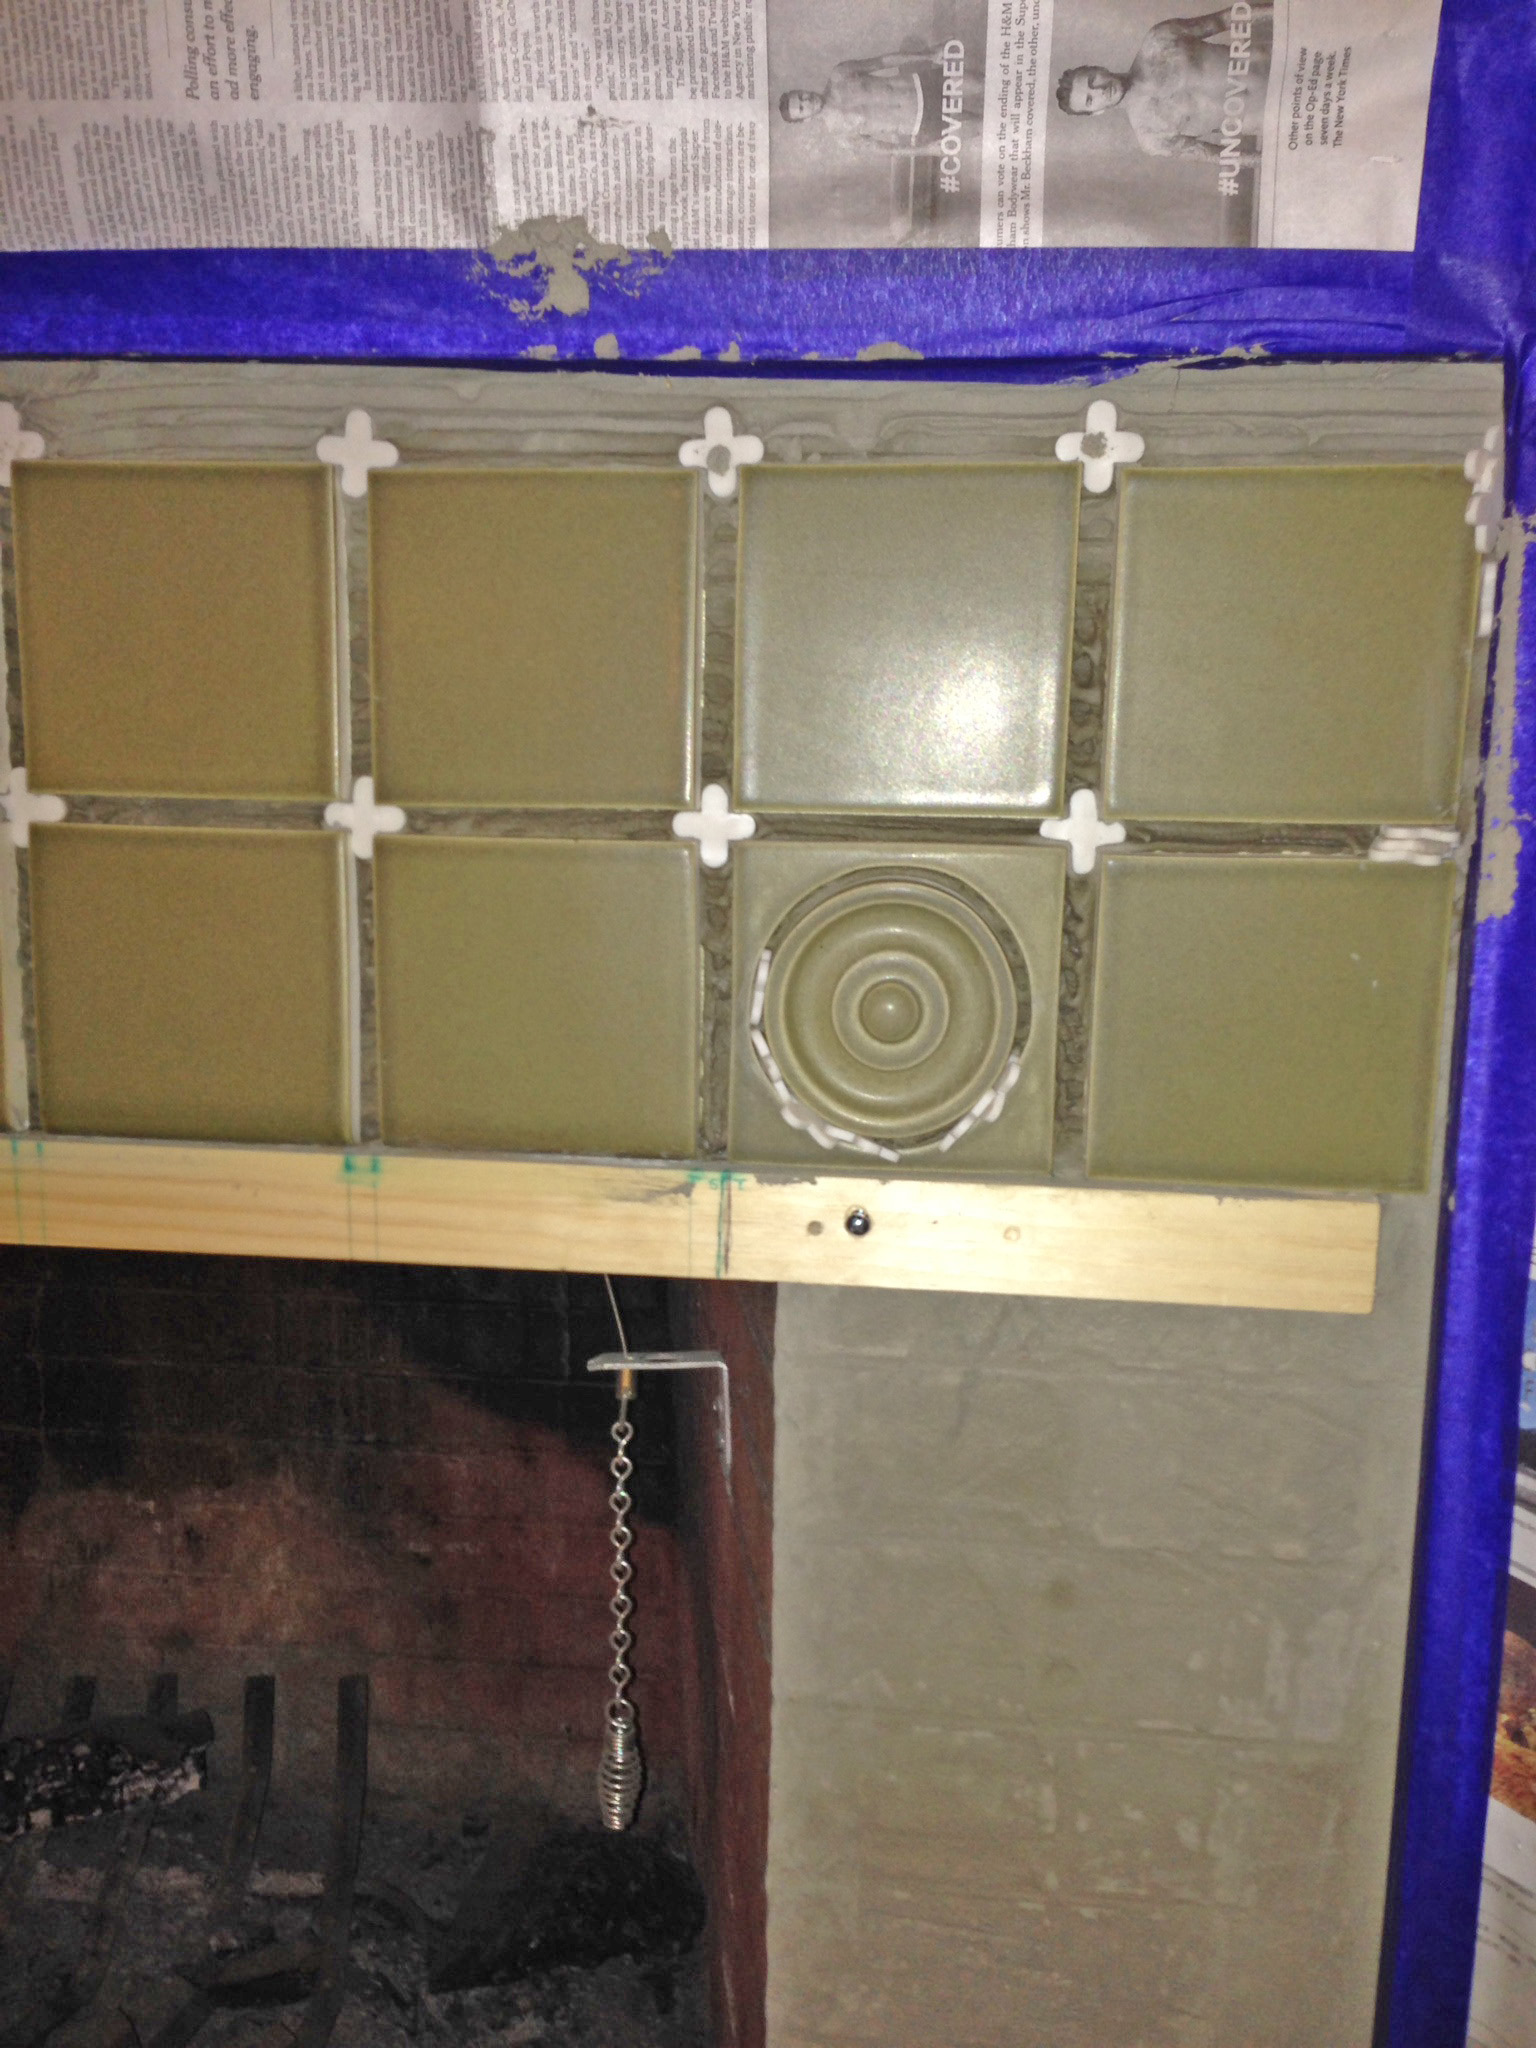
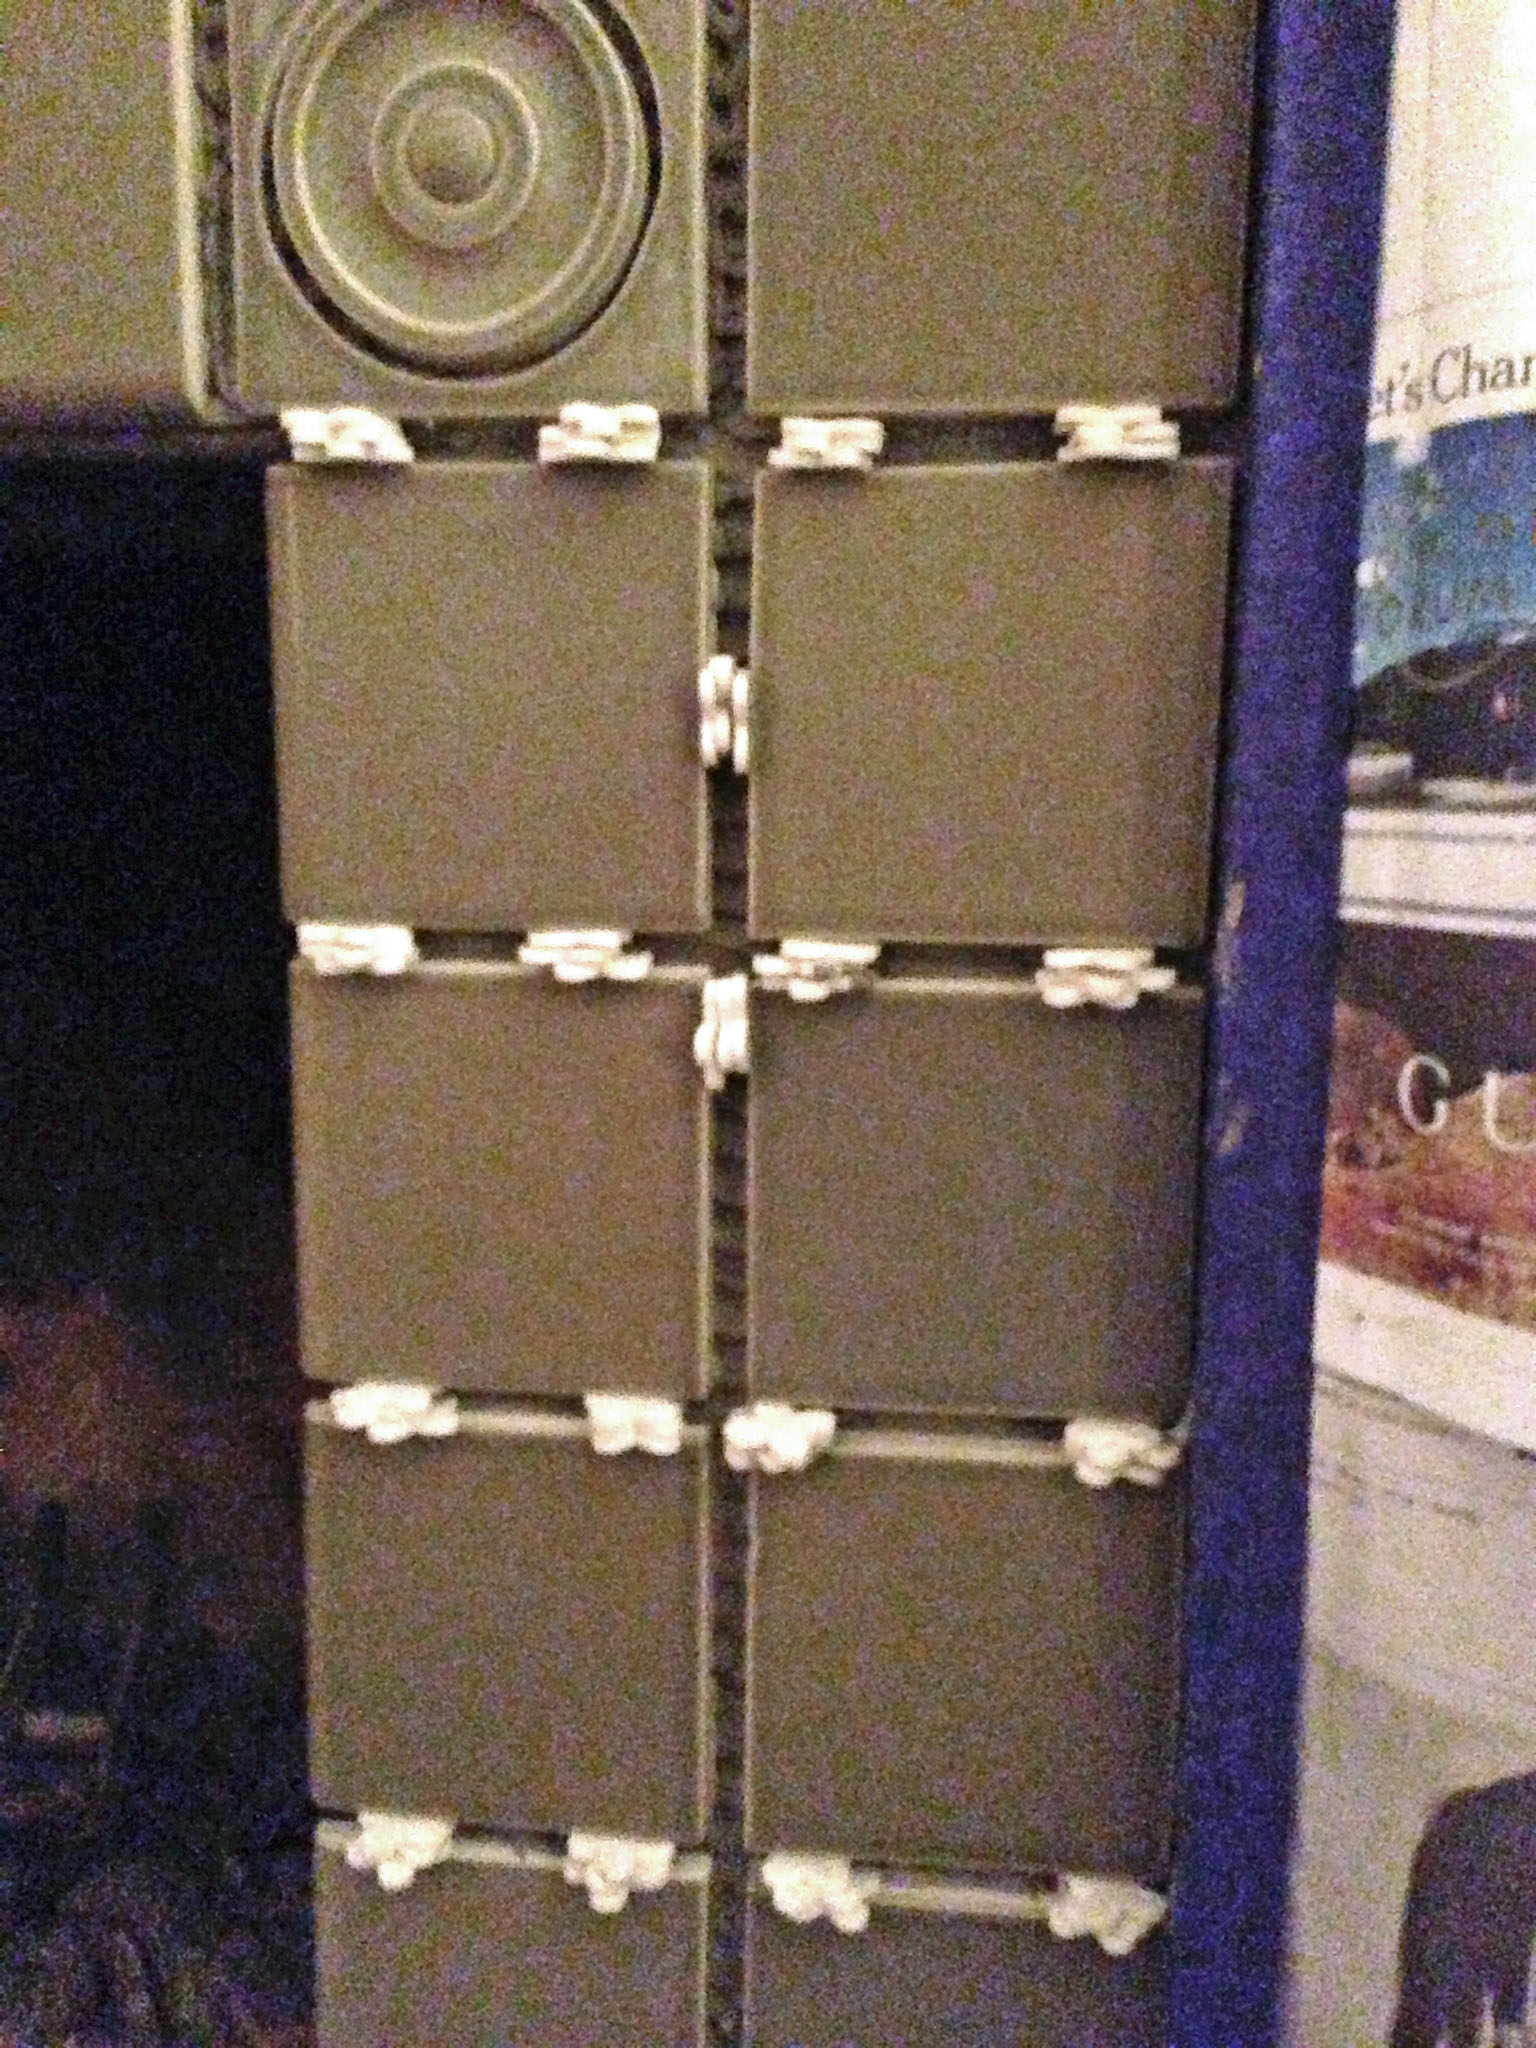
After mixing the thinset powder (having been warned away from premixed products) with a drill and mixing paddle, waiting the required slaking time (to fully absorb the water), and remixing, we slathered on the mixture, and then striated it using a notched trowel. Finally, we began setting the tile, beginning with one of the corner decorative tiles, working across to the opposite decorative tile, using spacers to guide the placement and then tweaking to get even spacing. Over the firebox, bullnose tiles are used, with the tapered edge facing down.
The row above then followed, finally filling in the area outside of the decorative tile, both using field tiles. Numerous spacers were used to keep the tiles in position (including additional spacers gently wedged in where additional support or a slightly wider gap was needed). Tiles are tapped into place with a rubber mallet to seat them firmly. If precise leveling were needed, a tapping block, several tiles wide would be used under the mallet, but the slight irregularity of the hand-made tiles didn’t call for it. We wiped off stray thinset from the faces of the tiles (lots on the first few, less as we got better at it). Step back. Admire. Now go to bed.
TILE MOUNTING (Part 2)
Time to remove the brace and begin the vertical legs. Same routine with thinset and then to the tiles. Line up the first row just below the bottom of the upper section, and work your way down. What? Wait! What’s going on?!? The tiles are sliding downward!!! Oh, yeah. Now I remember, the books, the videos said “Start from the bottom, work up”. Now we see why. Gravity!
Pull the tiles, scrape off the thinset. Begin again at the bottom of the leg, with a flat spacer under the edge of the bottom tile, building with tile, spacer, tile, until they meet the upper section. Adjust the gaps, using spacers as wedges until the gaps are comfortably uniform. As discussed earlier, the layout resulted in a lucky positioning that didn’t require any tile cutting, a pretty unusual occurrence. If a partial tile had been needed, it would have been determined in advance, cut with a wetsaw and placed at the bottom.
The tiles on the inside of the vertical legs are bullnose. They are placed so that the inner edge will line up with the face of the return tiles that will be placed inside the firebox in a later session. Now do the other leg. (Is it getting easier or are we getting better?) Again, time to knock off to let the mortar dry. But clean up before retiring (uncured thinset comes off oh-so-much easier).
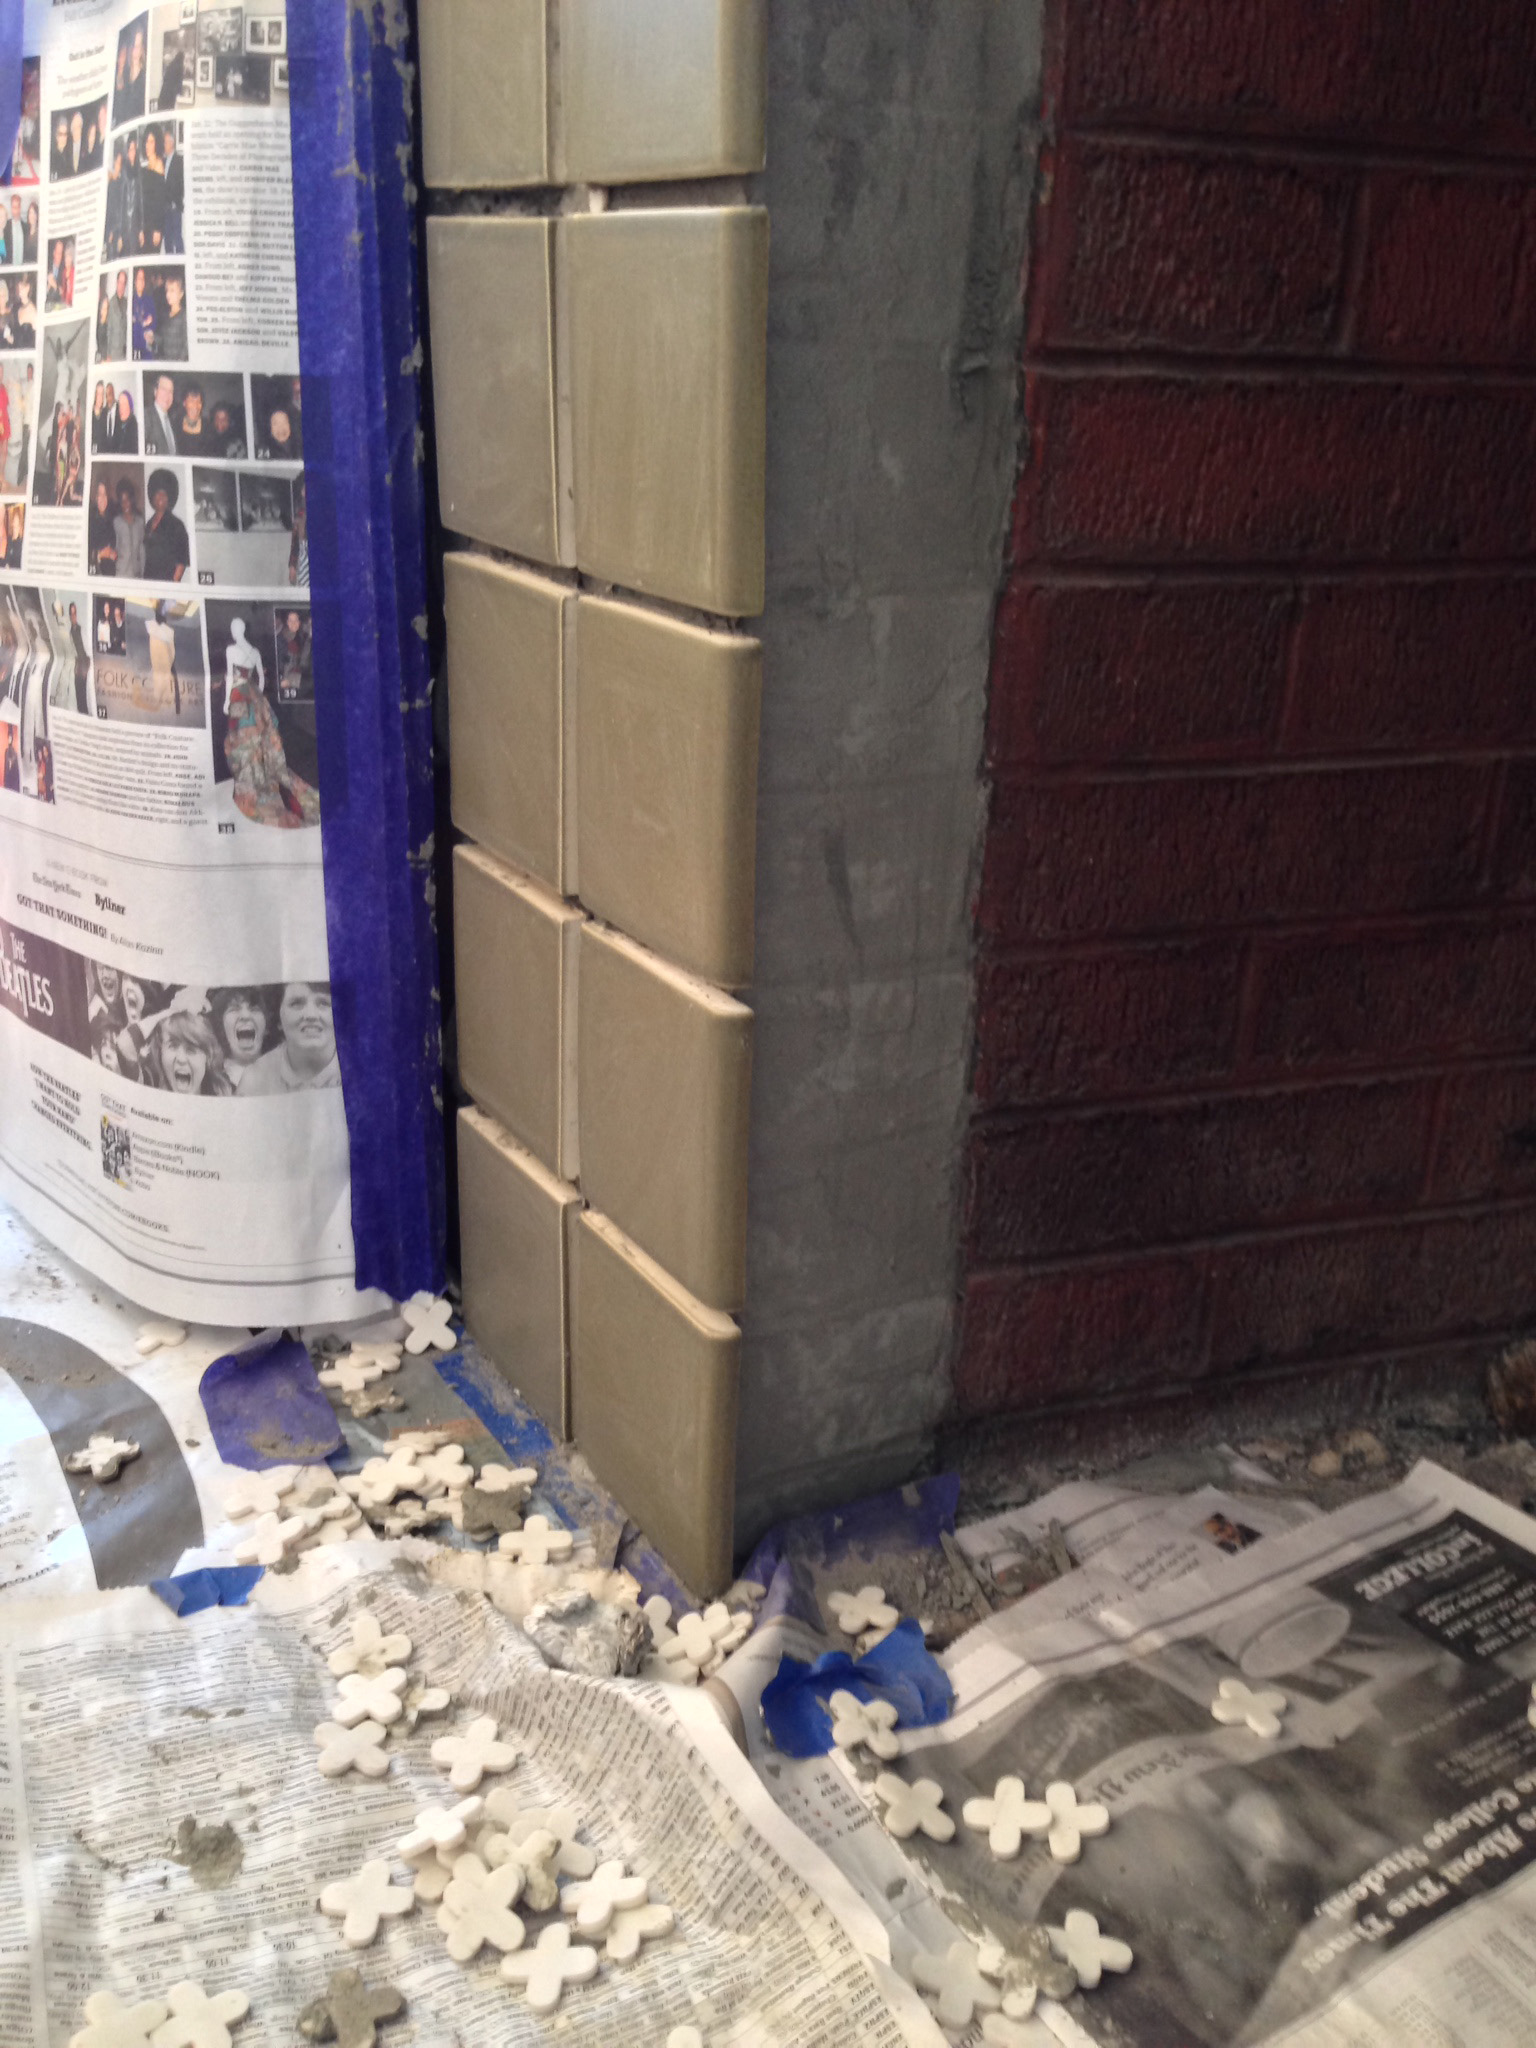
The last tiles to be set are the return tiles inside the front vertical edges of the firebox. Same routine as the legs, beginning with a spacer, tile, spacer, building from the bottom to the top. Again, luck (and a little tweaking on grout width) gave us full tiles with no cutting. Clean up, let dry overnight and pull all spacers. The tiling is done! (Not the project, just the tiles).
GROUTING
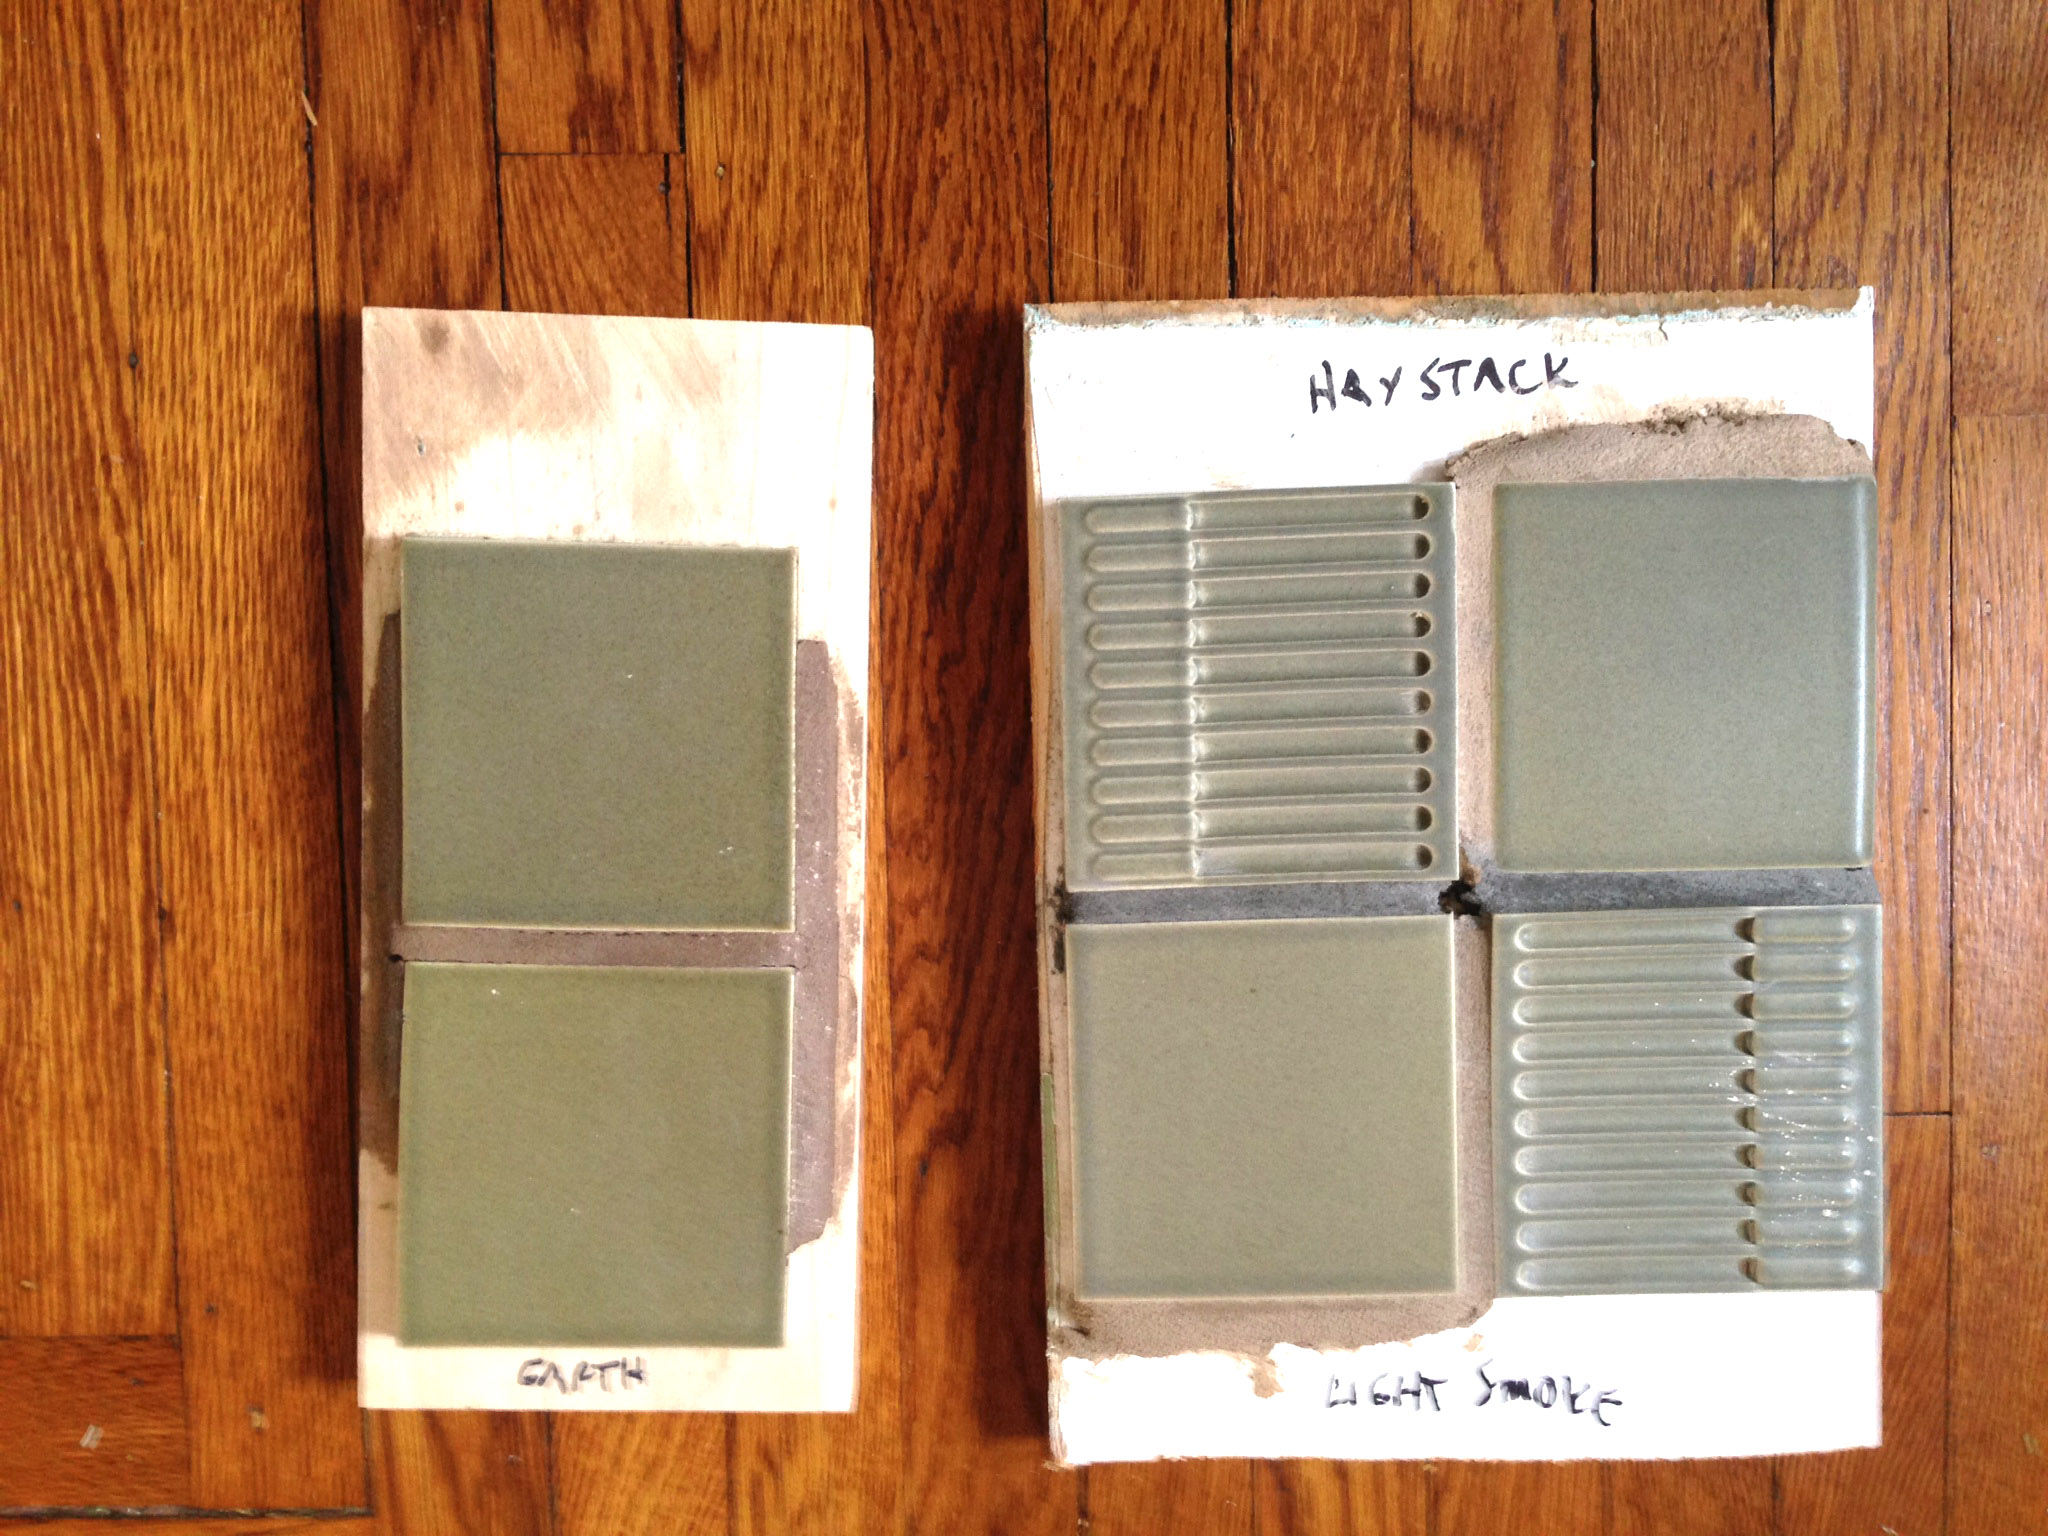
Next day, grouting begins. Huzzah! We knew exactly which grout color we wanted – Tobacco! So warm, so rich. But let’s mix up an actual sample. A few tiles on a board, grout around the edge. Uh, oh. The tiles are wrapped in fudge!? OK, the next color lighter, Earth!! Hmm. Still pretty muddy looking. Five days and four more colors on a sample board led us to the right complement color. Seeing the grout colors in reality, alongside actual tiles, is much more informative than a color chart. Given the cost of a tiling project, “wasting” a few tens of dollars on several bags of different colors of grout is a small investment to be sure you get a shade that you like. And once the grout is installed, it is cast in concrete.
One more step before the actual smear. The top edge of the upper horizontal row will get a grout line that will show below the upper molding. To keep that line on the same level as the rest of the grout, we installed a strip of furring level with the surface of the tiles.
Grout mixing and installation is like the books and videos say, but pay attention to the amount prepared at one time. Amateurs (like us) really should limit themselves to a small bucketful.
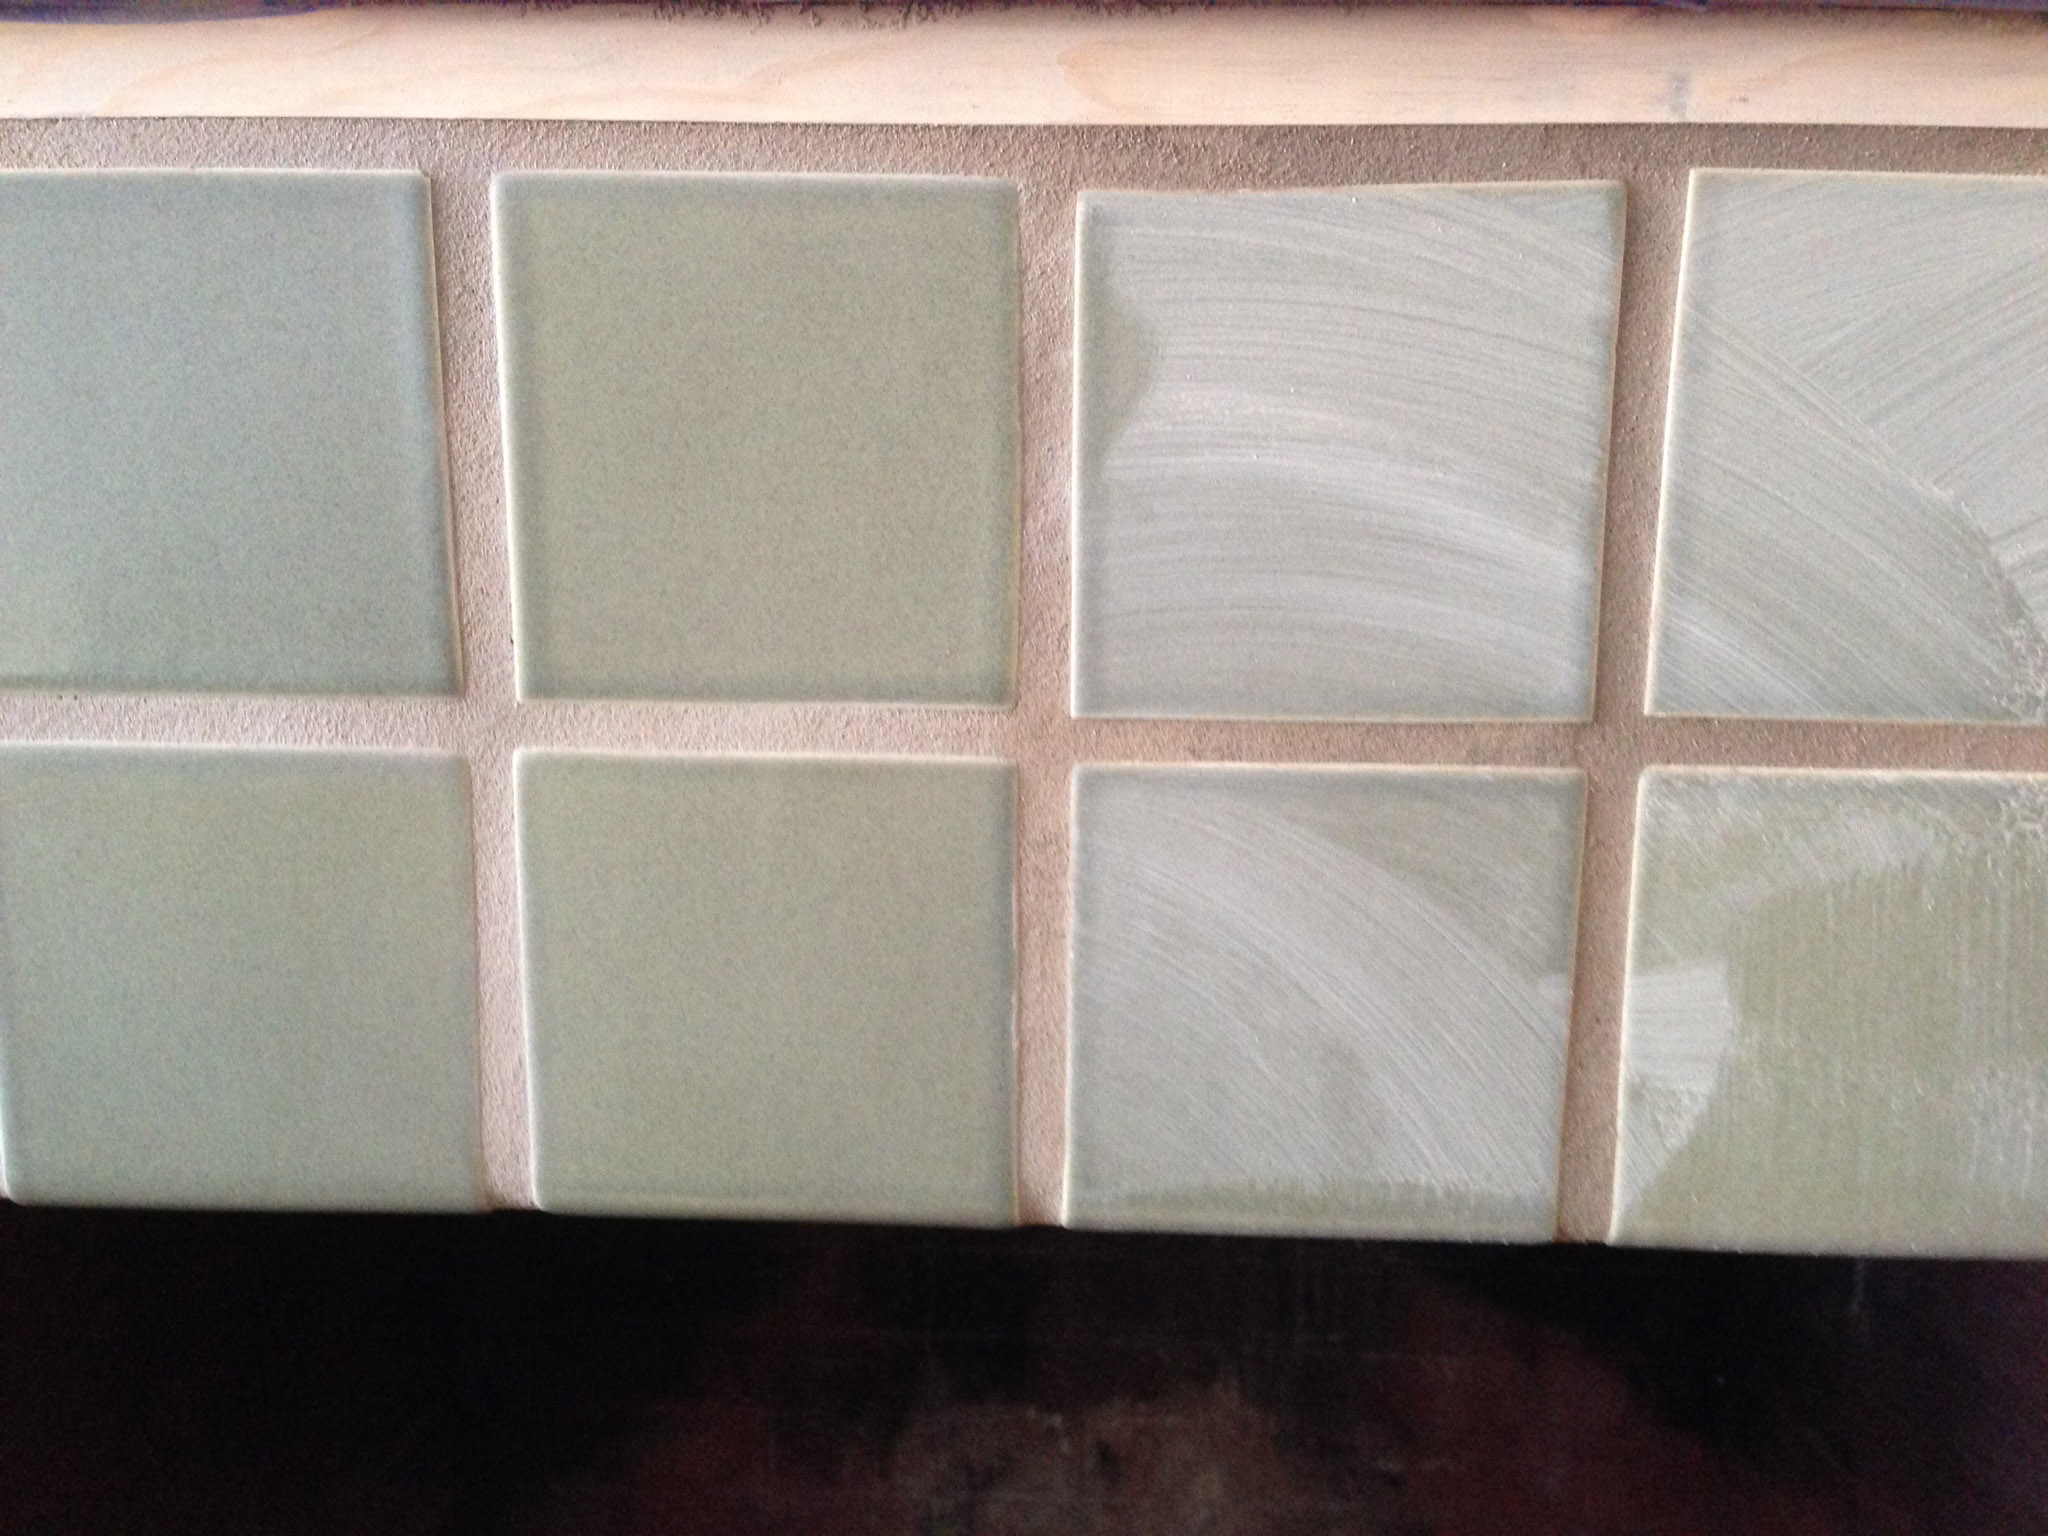
Mix, let slake, remix and apply. The pundits vary in their advice about consistency from thinner than mayonnaise (or even soupy) to thick peanut butter. Because of the wide joints, we leaned toward the stiffer end. Using a grout float, work it into the channels, scrape off, holding the float at nearly a 90 degree angle and on the diagonal. It really is a question of practice makes easier, if not perfect. The nice part is you can go back over the area a few times if the first pass is a bit ragged.
GROUT CLEANUP
Follow the grout’s instructions about waiting before wiping down with a sponge, and then do so gently. Aggressive will just undo the careful joints you have so lovingly created. You may need to finesse the ends of the joints, especially as they round toward the firebox returns and the decorative corners.
After wiping, wait the designated hours (as instructed on the grout bag, RTMS) to allow a good set before polishing the haze off with a soft cloth. You can gently tune up the edges of the tiles if the grout is still a bit high, but moisten the rag to avoid digging out too much.
You may need to do the grout process in several stages. It took us three sessions – one for the horizontal field and one for each of the vertical legs and their firebox returns.
With moldings reinstalled, the project is now just waiting for caulk, color-matched to the grout at the base, grout sealing, and the first blazing fire.

DIY Nightmares – an Introduction to Home Owner Hell
It’s a bit daunting submitting the first blog post (that I know of, aside from test blogs) to DIY StackExchange – well, to any new blog, really, but especially to a community blog site that’s just getting off the ground. Not only are you setting the tone for your own blogs to come, but you’re also kind of doing it for the entire community, which in my case is a particularly precarious position to be in, since I’m kind of naturally a smart-ass (kind of is, in this case, not so much an understatement as it is a supreme understatement to end all understatements…).
So anyway – this is me. I’m known as Greebo – which for non Fantasy readers is a quasi-magical cat from Terry Pratchett’s “Discworld” series. “The Evil” comes from my reputation as an “evil overlord” on the various forums I’ve administered over the years. None of the previous paragraph (save my name) has any bearing on DIY projects except to tell you a bit about myself and clue you in to my writing style, which is something akin to rambling prose with a healthy dash of stream of consciousness thrown in.
I hail from the Baltimore, Maryland region which lies on the eastern coast of The United States of America (for our foreign readers) on the continent of North America (for our foreign readers who don’t know where the USA is), on the planet Earth (for our REALLY foreign readers). The climate is humid all the time except when it’s cold. I’m not a fan, but there you are, this is where I live.


If you want any more detail on where I live, you’ll have to buy me dinner. 🙂
So – a bit more about me and why I’m blogging on a DIY site. In addition to my own house, which was built in 1940 and pretty much needs to be gutted inside and out and top to bottom, my wife and I also manage three other properties (1 ours, 2 my mother in laws) which are rental properties. We end up needing to do a LOT of work on these properties at time, and financially its just more economical to do a lot of it ourselves.
To give you a real idea what my own house needs – the plumbing is galvanized, the electrical ISN’T knob and tube but IS the old armored/cable with fabric/cloth insulation that’s now so deteriorated that it’s all black (hot line? what’s a hot line?) and if you touch it, it crumbles, there’s no insulation in the walls (except in our office which we gutted a few years back), and our HVAC is really just HV and there’s no air return on the 2nd floor, so the AC does nothing up there, plus the AC died 2 days before Hurricane Irene came through.
So in fact, for a few months, this blog will be historical in nature, as I look over photos and see what projects were well enough documented to post about, because right now we’re in a major “save money” mode in order to upgrade the electrical panel to 200A and add a new HVAC system in the attic before late spring of 2012.
So to start, I thought I’d show you my basement. Here it is:
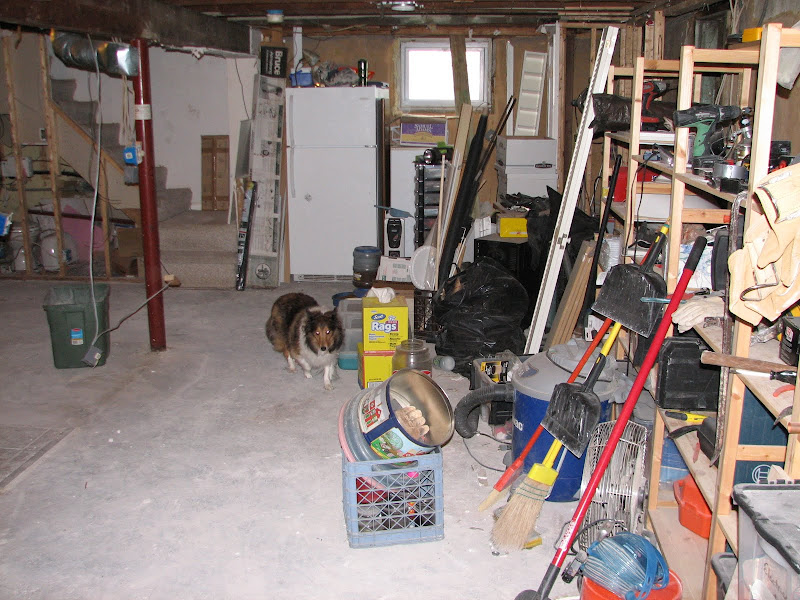
(Dog not included)
Bit of a mess, isn’t it?
Actually, it’s an improvement over what used to be there, but you don’t know me well enough yet to see that.
The goal in this basement is rather involved – because before we finish it, we really want to upgrade ALL the electrical (many non grounded outlets in my house) and the plumbing (galvanized, did I mention?) really needs replacing as well.
To give you an idea of what I’m facing, have a look at this wall:
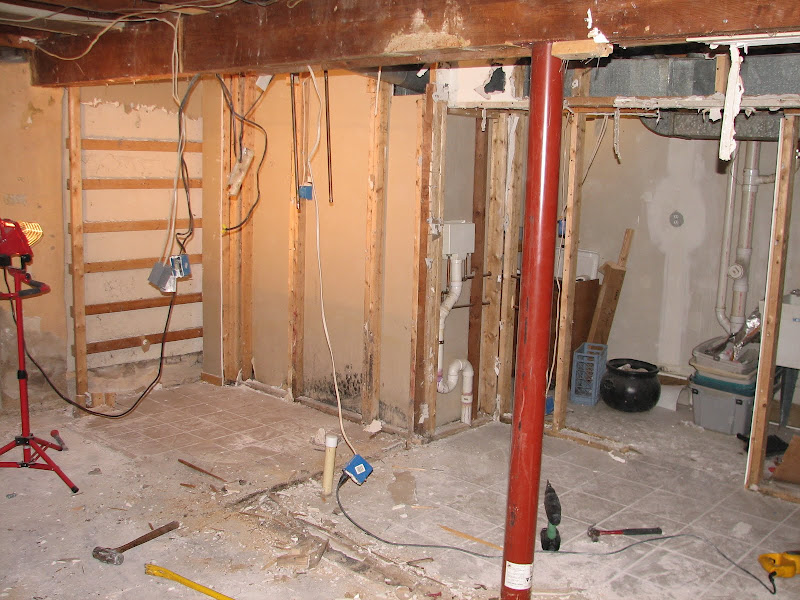
The previous owners built that wall (and several others which are now gone). As you can see, there’s a washer fixture there – so you can guess that our washer and dryer are back there. What you probably can’t guess is what it looks like back there.
So here it is:
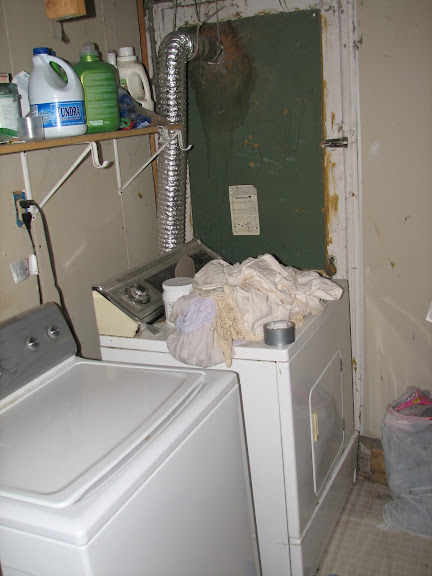
Yes. That’s a basement door behind the dryer. And no, those aren’t dirty undies, they’re curtains or something…
See, the previous owner was SO smart, they decided to turn this:
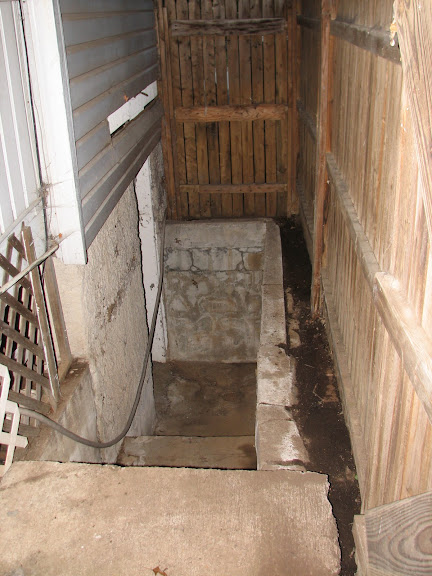
into this:
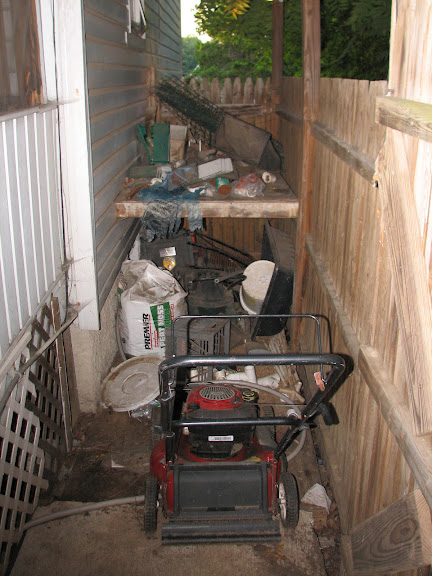
Brilliant – right? And yes, I know, I used it as storage too, but only until I built the new shed (pics not on this computer). Now it looks like this again:
But in addition to putting the w/d where they did, they also walled up the area they were in AFTER putting them in place. How do I know this? Because one day our washer died, and in order to remove it, I had to do this!
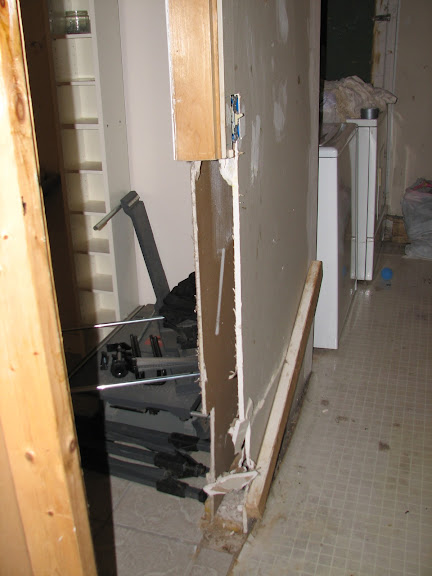
Yep – had to literally cut the door frame out to remove the washer and bring in the new one.
So, eventually we need to get through that door again, which means the w/d need to move, so the plan is to move them over under that window that you saw in the first picture of our basement. But then we have a lot of plans, and we have a lot of nightmares in this house – and this? This is just the teaser to get you interested. 😉
(Did I mention… evil?)
So – hopefully you’ll enjoy walking with me, through the past first, but eventually (once we have $$ for it) in the future as well, as we continue to explore and discover the hell that is our (my wife’s and I, not yours and my, obviously) home , and the steps we (my wife and I… ok you got it, good…) take to turn Hell into Heaven.
Hammer safely!
G

Home Improvement Blog on Google+
Home Improvement Blog on FaceBook
Bloggers Wanted
Latest Articles
Topics
- Electrical (8)
- Introductions (7)
- Plumbing (3)
- Projects (13)
- Repair (4)
- Safety (5)
- Tips and Tricks (5)
- Tool Review (5)
- Tools (6)
- Uncategorized (5)