Posts Tagged ‘ceiling’
Tool Review: Homax Popcorn Ceiling Spray Texture
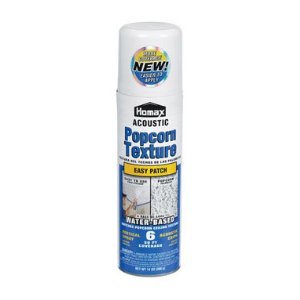
As detailed previously, I recently had the opportunity of patching a umm…vintage popcorn ceiling. I found the Homax Popcorn Ceiling Spray Texture at my local hardware store for about $10 a can. I had huge reservations, but decided to give it a shot.
Technical Details:
| 14 ounces |
| Contains actual polystyrene chips |
| Patches popcorn acoustic ceiling textures |
| Maximum coverage: 6 square feet |
The manufacturer’s product description reads: “An easy-to-use vertical spray texture will patch Popcorn textured ceilings with acoustic chips. The texture is designed to match existing Popcorn ceilings. The special nozzle provides controlled delivery for the textured thickness.”
Here’s what is true in that description: “A vertical spray texture with acoustic chips.” The phrases easy-to-use and controlled delivery are outright lies.
That’s not to say this product can’t be used for patching a popcorn ceiling. Unfortunately the learning curve is steep and the product is expensive.
I was initially interested in the product because I’ve sprayed texture with a hopper before. I made a huge mess and only started to get the hang of it towards the end. With this product – I made a huge mess and only started to get the hang of it towards the end.
This really can’t be stated often enough: the spray goes everywhere. Your eyes, hair, walls, floors, and if you’re lucky, the ceiling. There’s a cute little video on the Homax website of a gentleman holding a small cardboard box with the bottom knocked out, presumably to contain the overspray. This has no chance of working on the planet Earth.
Plan on gloves, multiple pairs of goggles, and sheeting off the work area with plastic curtains and floor covering. Here’s what my setup looked like.
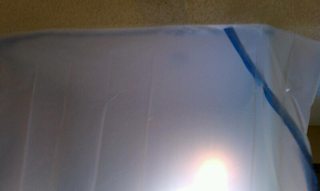
First I primed the patch and let it dry overnight. I cut plastic sheets to go floor to ceiling and thumbtacked those in place. Then I used painters tape on the ceiling edge of the plastic to keep the spray from sliding underneath. More tape down the sides to seal the corners. Plastic tarp on the floor with canvas on top to keep from dragging the plastic around. Goggles (only one pair, don’t make that mistake!), gloves, ladder and cans inside the curtain.
Now the claim is you can get 6 square feet of texture out of one can. Well you may be able to, but I sure didn’t. I had 16 square feet to cover and used 8 cans (one was a dud). If I did it again, I might be able to do it in 4 or 5, which was my initial estimate.
So if you’re with me so far, you’ve bought a can per two square feet of needed coverage, obtained enough plastic to sheet off the area completely, and have a few pairs of goggles and gloves ready. (By the way, if you were with me, you should have volunteered to help me scrape the whole ceiling. Where were you anyway?)
Let’s talk technique. Each can is good for around 10 sprays IF you only use about a second per spray. If you hold down the trigger, it’s going to run out of aerosol instantly. Additionally that first spray is going to splatter (high pressure) and the last will dribble out. This isn’t a normal spray paint button, you get this screw on plastic deal that puts the nozzle between your fingers, like a can of whipped cream.
 I knew everything you’ve read up to this point and thought I could handle it. I crawl into my containment area, don gloves and goggles (and the stupid cardboard box for the first attempt – lets never speak of that again). Next step, shake can vigorously for a couple minutes. Climb ladder, put nozzle 12 inches from the ceiling. Then I mentally prepared to spray short bursts, quickly, to get as much product out before I ran out of aerosol. Pull trigger. Nothing happens. Naturally my instinct is to put the can closer to the target and pull it again. BLAM. Wet goopy stuff dripping from the ceiling. Ugh. But can’t stop, hurry, hurry, hurry. I applied about 1 square foot of thick cottage cheese and it’s just glopped on there (see the top left corner below). And 10 or so ounces of additional spray on my curtain, hands, etc.
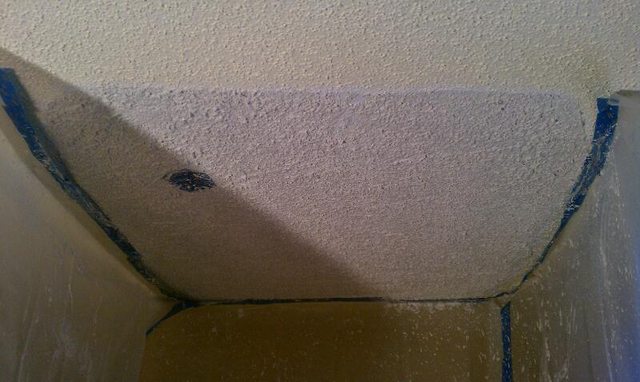
Here’s what worked for me. Hold the can 20 inches from where you’ll spray. Pull the trigger a little harder on that first spray to get it going, but keep your hand back. Keep with the short sprays and you’ll be able to cover a larger area and it won’t look as bad. If it’s too light, hit it again in an hour.
If you’ve taken the proper precautions the clean up is pretty easy. I’d recommend leaving the floor covering for a few hours as the texture takes a while to dry.
This review is pretty negative, but to be fair, this product is trying to do something quite difficult: provide a ready-to-use apparatus that can apply solid material in a vaguely liquid form while still being easy to clean up and relatively harmless. I applaud the attempt.
I’d estimate 15 or so square feet is where this product becomes cost prohibitive. If I had to patch another ceiling of less than 10 feet I would consider using this again. Anything past that – rent the hopper. Prep and cleanup are nearly the same. Considering you can practice with the hopper and not waste $10 worth of material in two seconds makes it a clear winner in my mind.
Apparently Homax also makes a roll on popcorn texture, which I didn’t know existed. Does anyone have any experience with it?
I’m conflicted on where this rating should end up. On the one hand, it’s a pain to use, but it can be used to patch a popcorn ceiling and the alternative method isn’t that great either. So I’ll say this rates one Captain Construction. Poor guy took one for the team while his buddies went off to play with the cool tools.


Home Improvement Blog on Google+
Home Improvement Blog on FaceBook
Bloggers Wanted
Latest Articles
Topics
- Electrical (8)
- Introductions (7)
- Plumbing (3)
- Projects (13)
- Repair (4)
- Safety (5)
- Tips and Tricks (5)
- Tool Review (5)
- Tools (6)
- Uncategorized (5)