Author Archive
The Replacements – Swapping out windows in 2 hours or less
So I thought — “hey, you’ve got two replacement windows that need replacing – you should do a blog with a title like ‘The Replacments – Not the movie starring Kenau Reeves (however its spelled)‘”
Then I wrote the title and it looked dumb. Then I tried “The Replacements – Replacing old replacement windows with new replacement windows”… Yuck. “Replacing Replacements With Replacements” didn’t work either.
So I gave up. The title you see is the title you get – boring, isn’t it? Anyway – this is my second window focused article – and this time, it’s double hung!
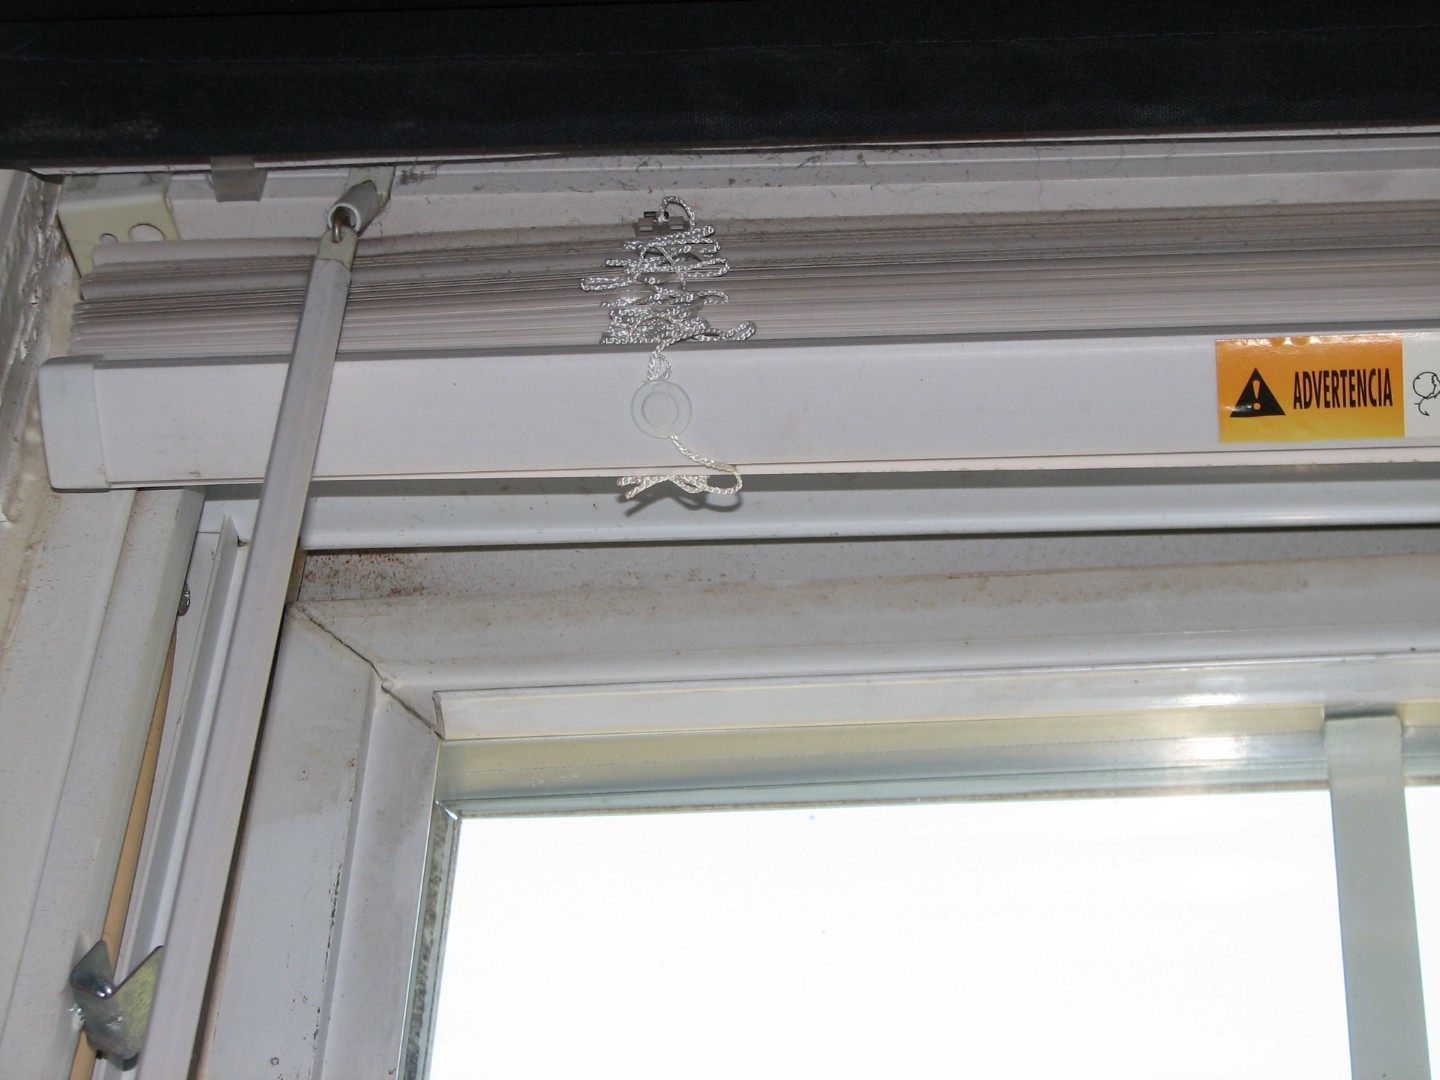
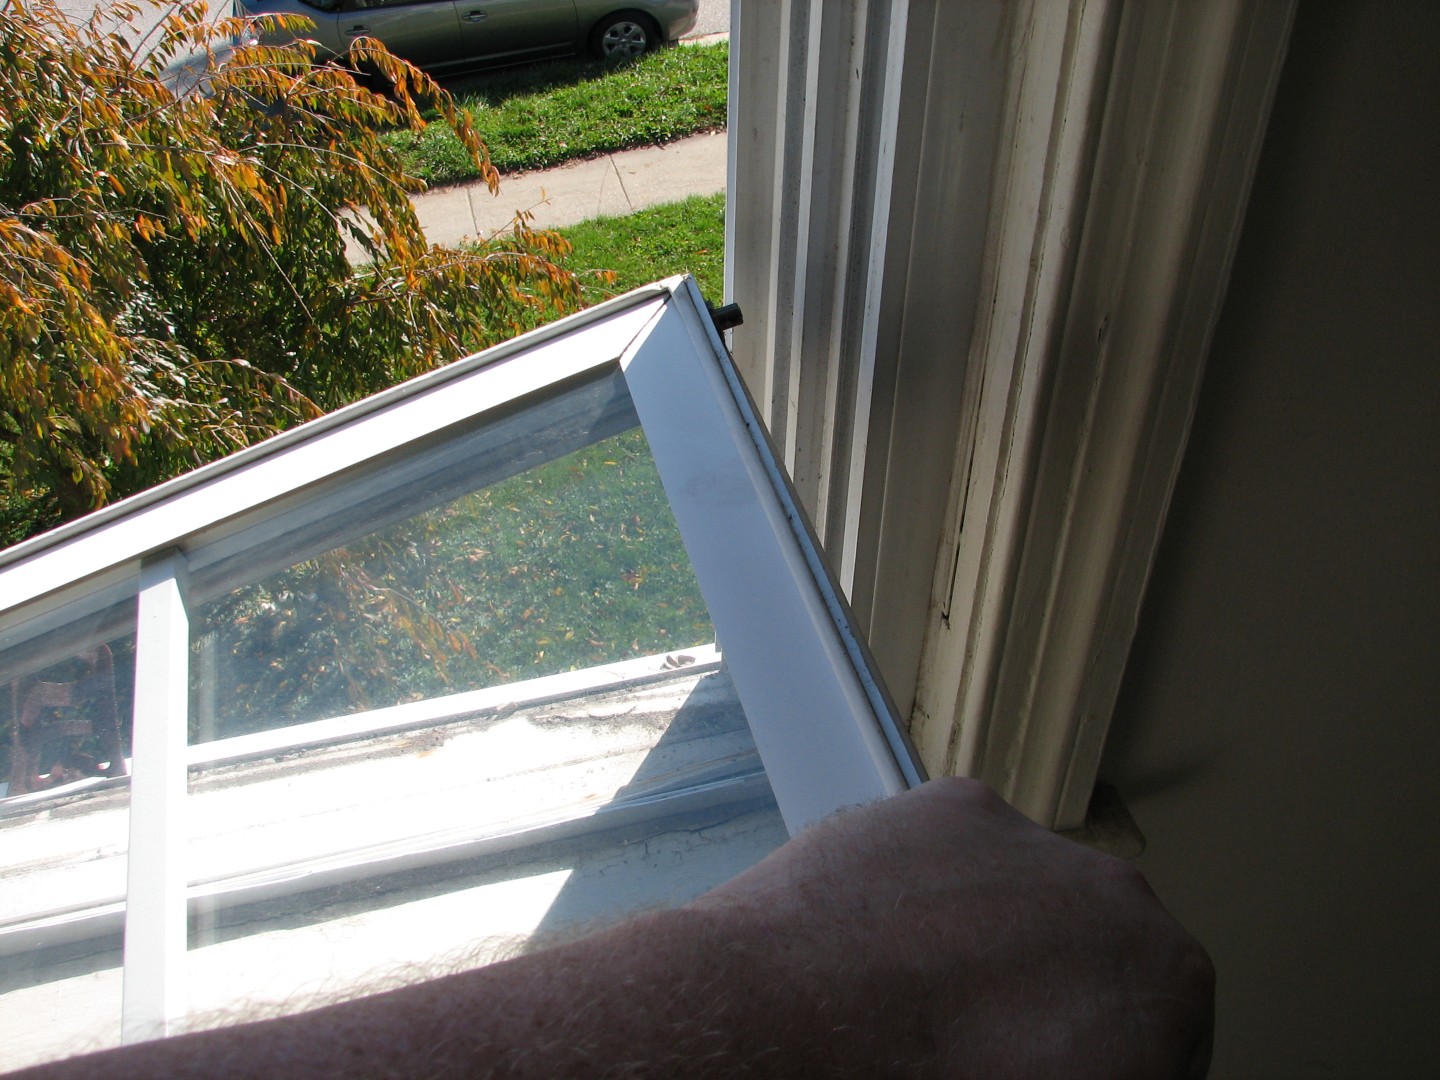
We have a lot of replacement windows in our house that we didn’t install. I don’t know who did – but whoever did should be taken out and flogged. I’d never seen custom made replacement windows that didn’t properly fit their frames, until we moved in here. Several of our windows don’t lock properly, because the windows aren’t quite perfectly sized, so the lock never lines up. This we’ve lived with for some time – but of late, our windows are starting to fail. The clips holding the windows to the tension rods (the spring loaded bars that keep the windows in position) are failing, and when they fail, NOTHING is holding that window closed, except…

Yep – a piece of wood. Isn’t that awesome?
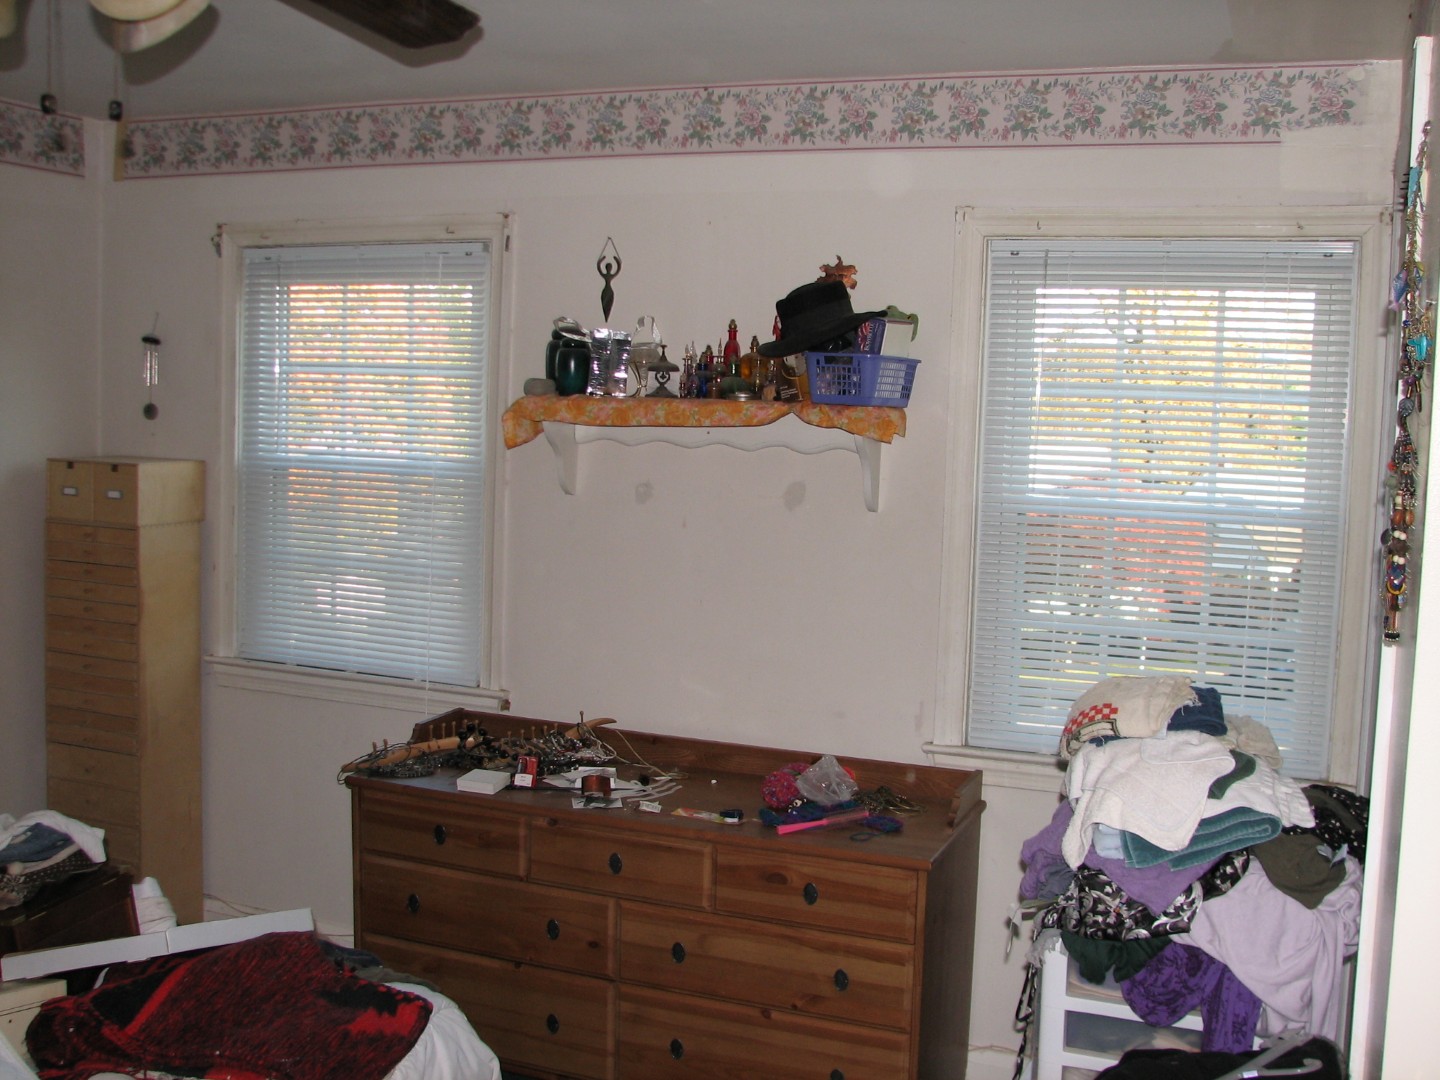
(By the way – this is our office window. Some genius forgot to take good “before” pictures – the bedroom window featured in the near future in this blog was actually worse…)
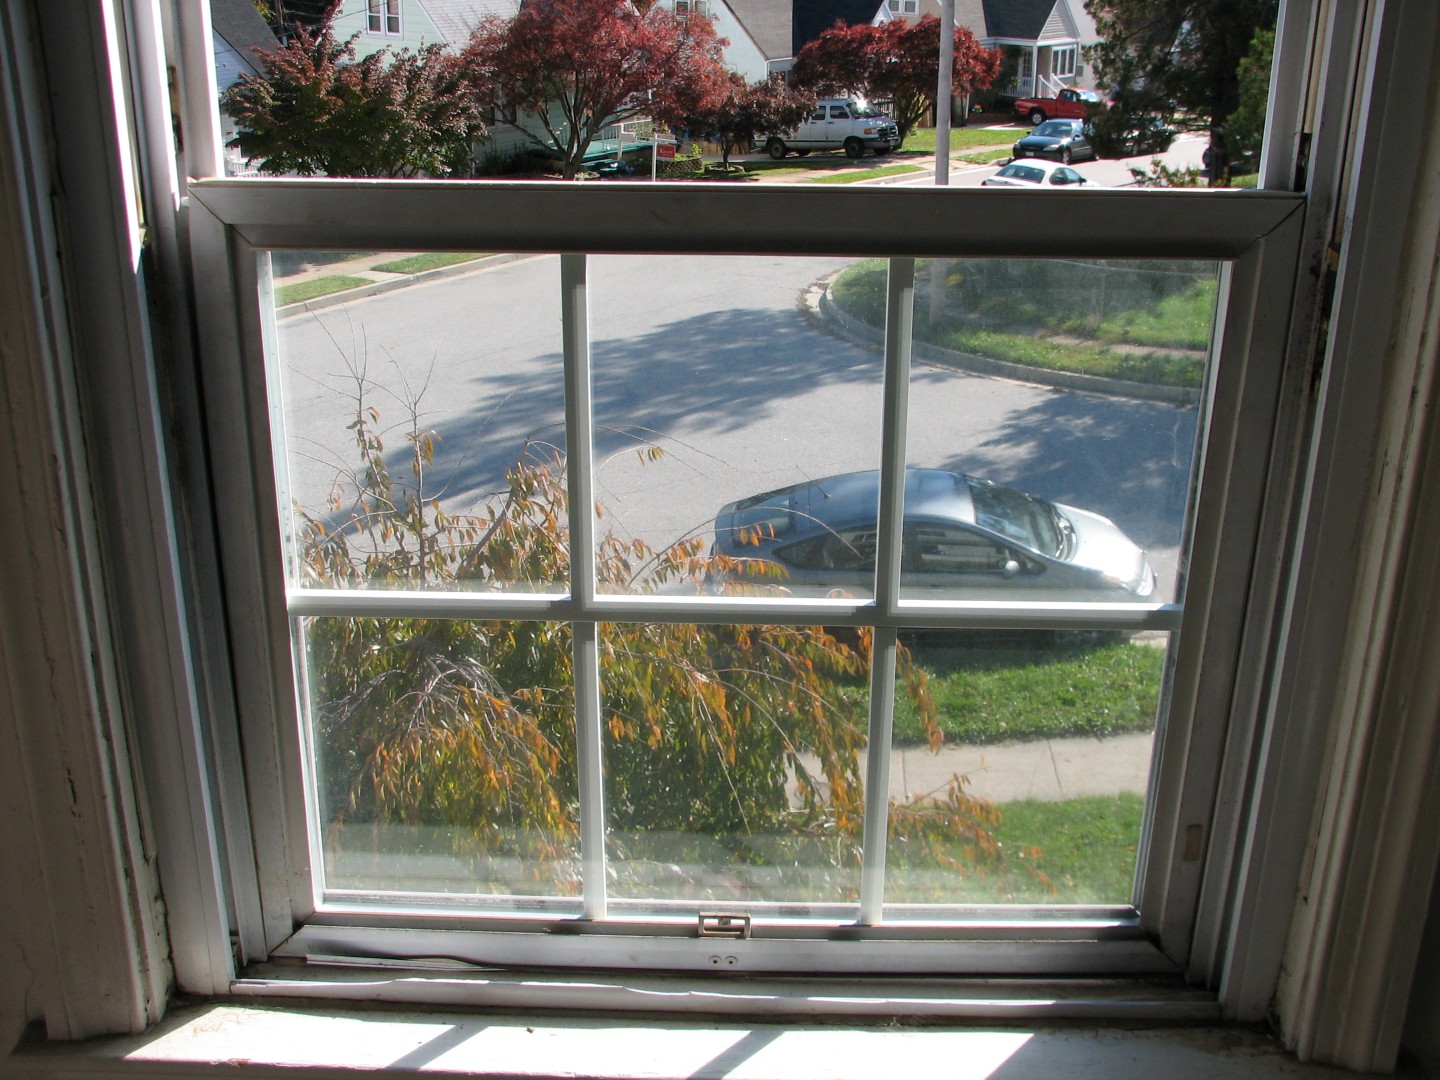
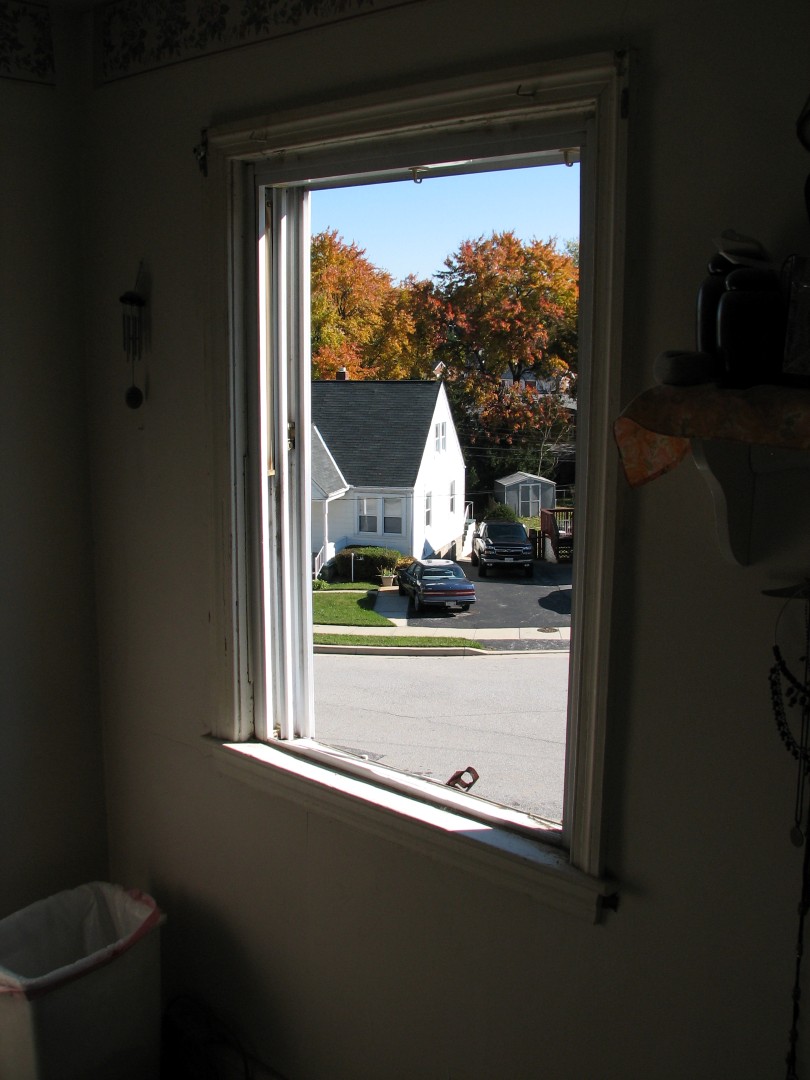
And of course, the window doesn’t exactly sit properly, so the top of the window looks like this:
If it isn’t immediately obvious – look below the blinds, and you’ll see the irregular gap between the window pane and the frame. Talk about your heat loss!
Unfortunately, Congress hasn’t approved the “Evil Greebo TARP Bailout” program, so we’ve been limited in how fast we could buy replacement windows, but the GOOD news is, as we are able to bring them in, they go in fast, because we’re replacing replacement windows with new replacement windows.
So – here’s how it went.
First, I had to remove the old window. Our window tension clips have failed, so this was very easy, as all I had to do was remove the supporting wood and the top pane of the window fell to the bottom of the window at the speed of gravity:
By the way – I actually had to stop and go back and re insert the window pane so I could take this picture, because I forgot to start taking pictures right at the beginning of the project. I really wanted to show you just how bad this window was, but I wasn’t about to try and re-hang the dang thing just for a few pictures, so you’ll have to trust me, it was bad.
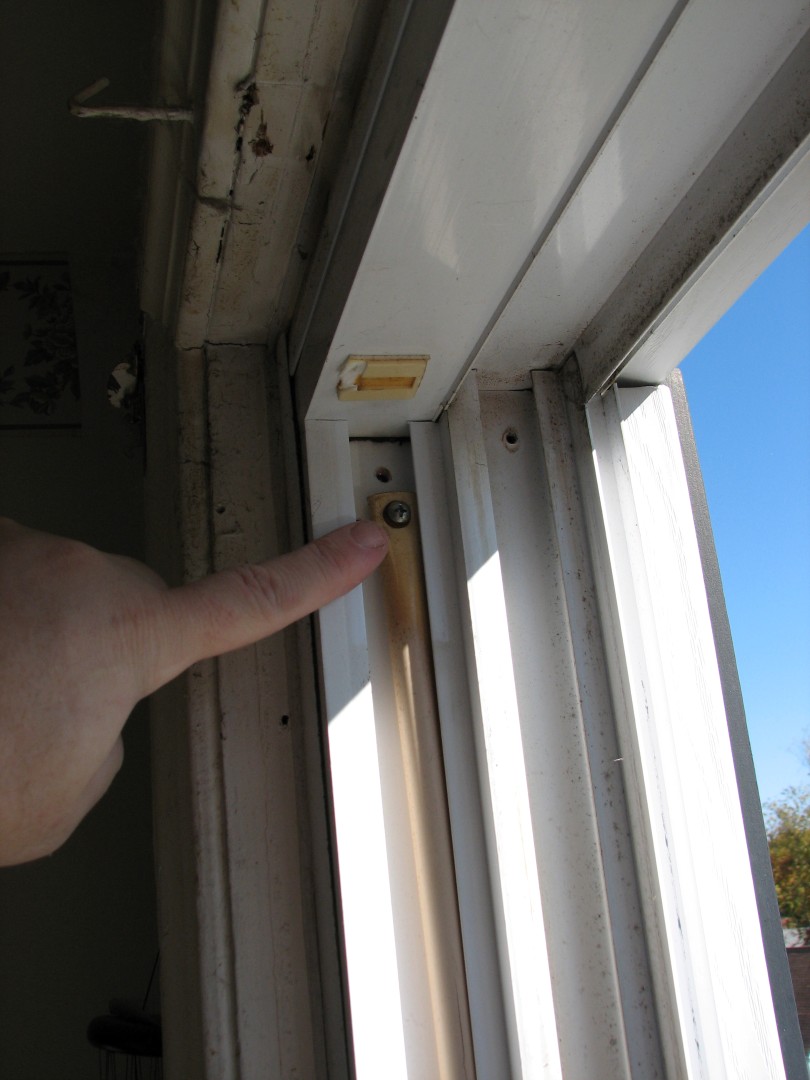
Ok, so how do you remove those panes, you ask? At the top of the pane are two clips. They look different depending on the model, but they’ll be right here:
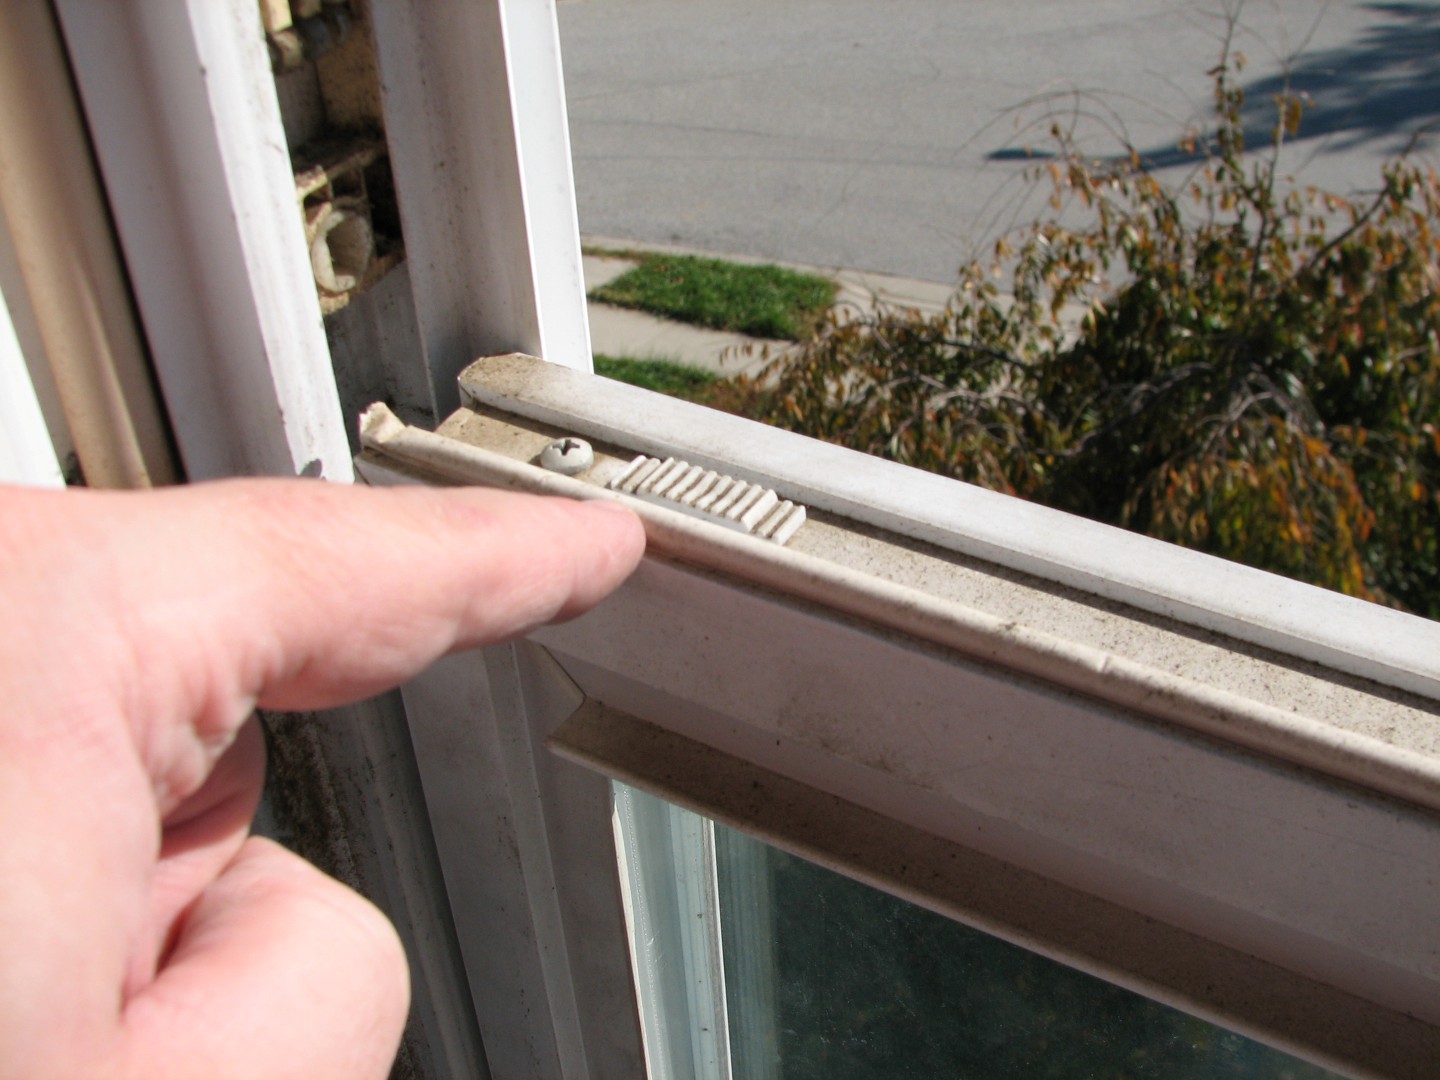
See? Right there by my finger. At the same time, open BOTH clips by sliding them towards the center of the window, and fold the window down towards you like so:
Now, husbands, if you get stuck at this point, ask your wives, because they’ve all done this hundreds of times in order to clean the windows, a task men are incapable of because, well, quite simply, we don’t care if the windows are dirty anyway, too much light blocks out the TV screen.
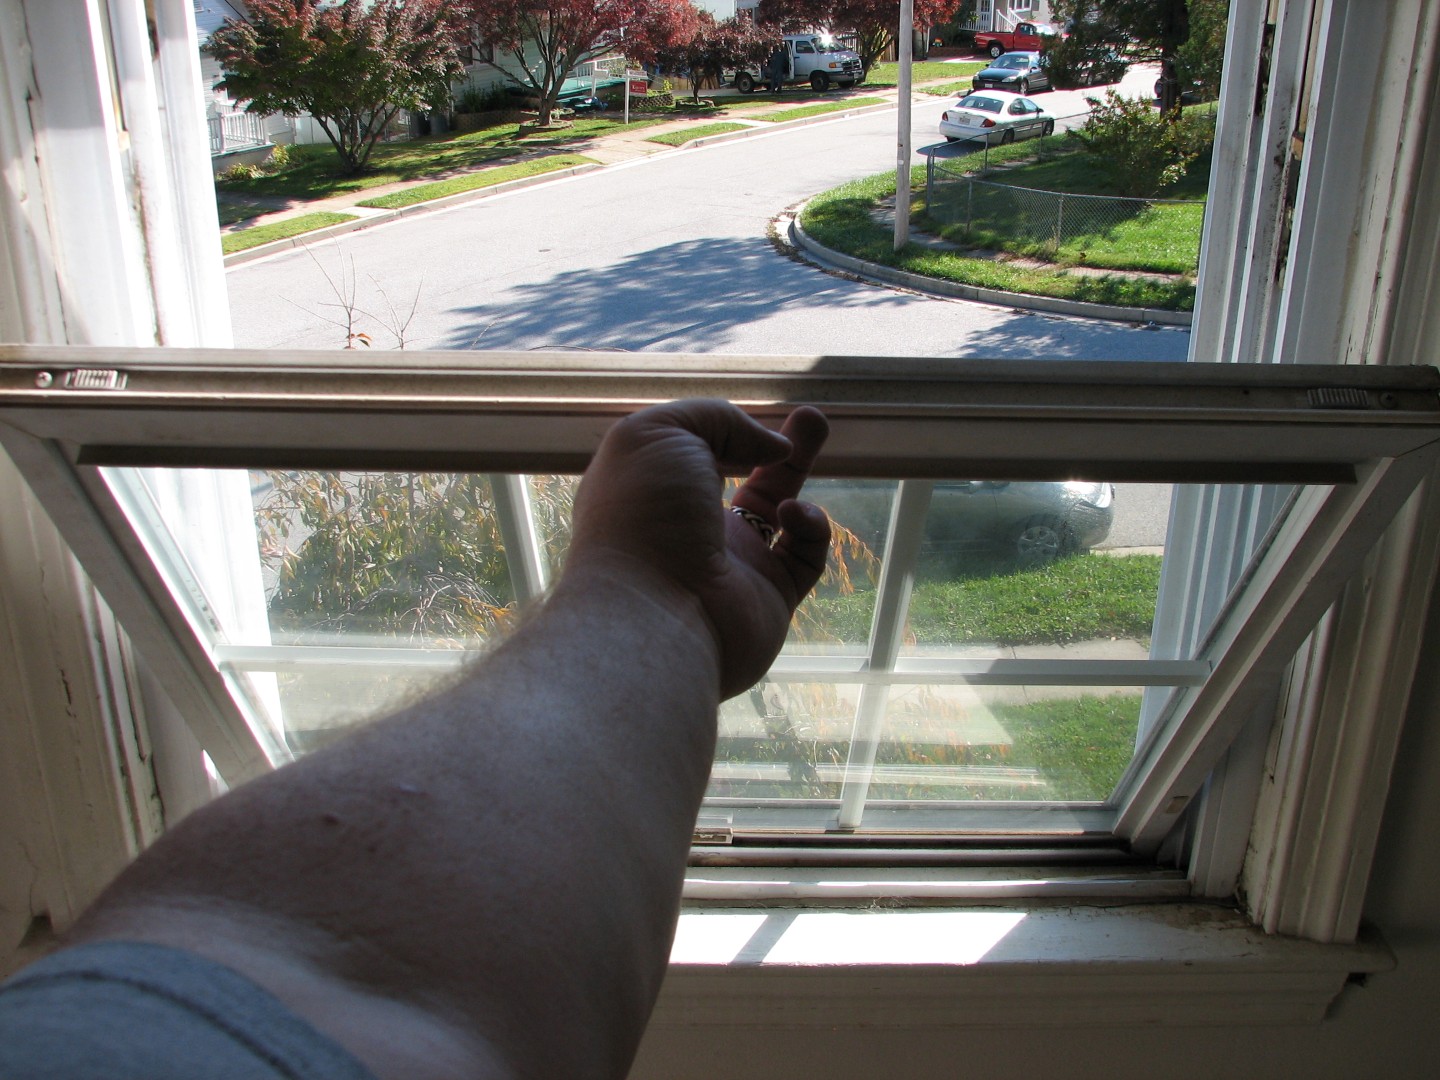
After you fold the window down to a 90 degree angle level with the floor, twist the window so that one corner lifts up and out of it’s clip, and the entire pane should then lift out easily.
A windowless window:
By the way – note how my neighbors windows look so clean and neat? I’m so jealous. On the other hand, I can park properly…
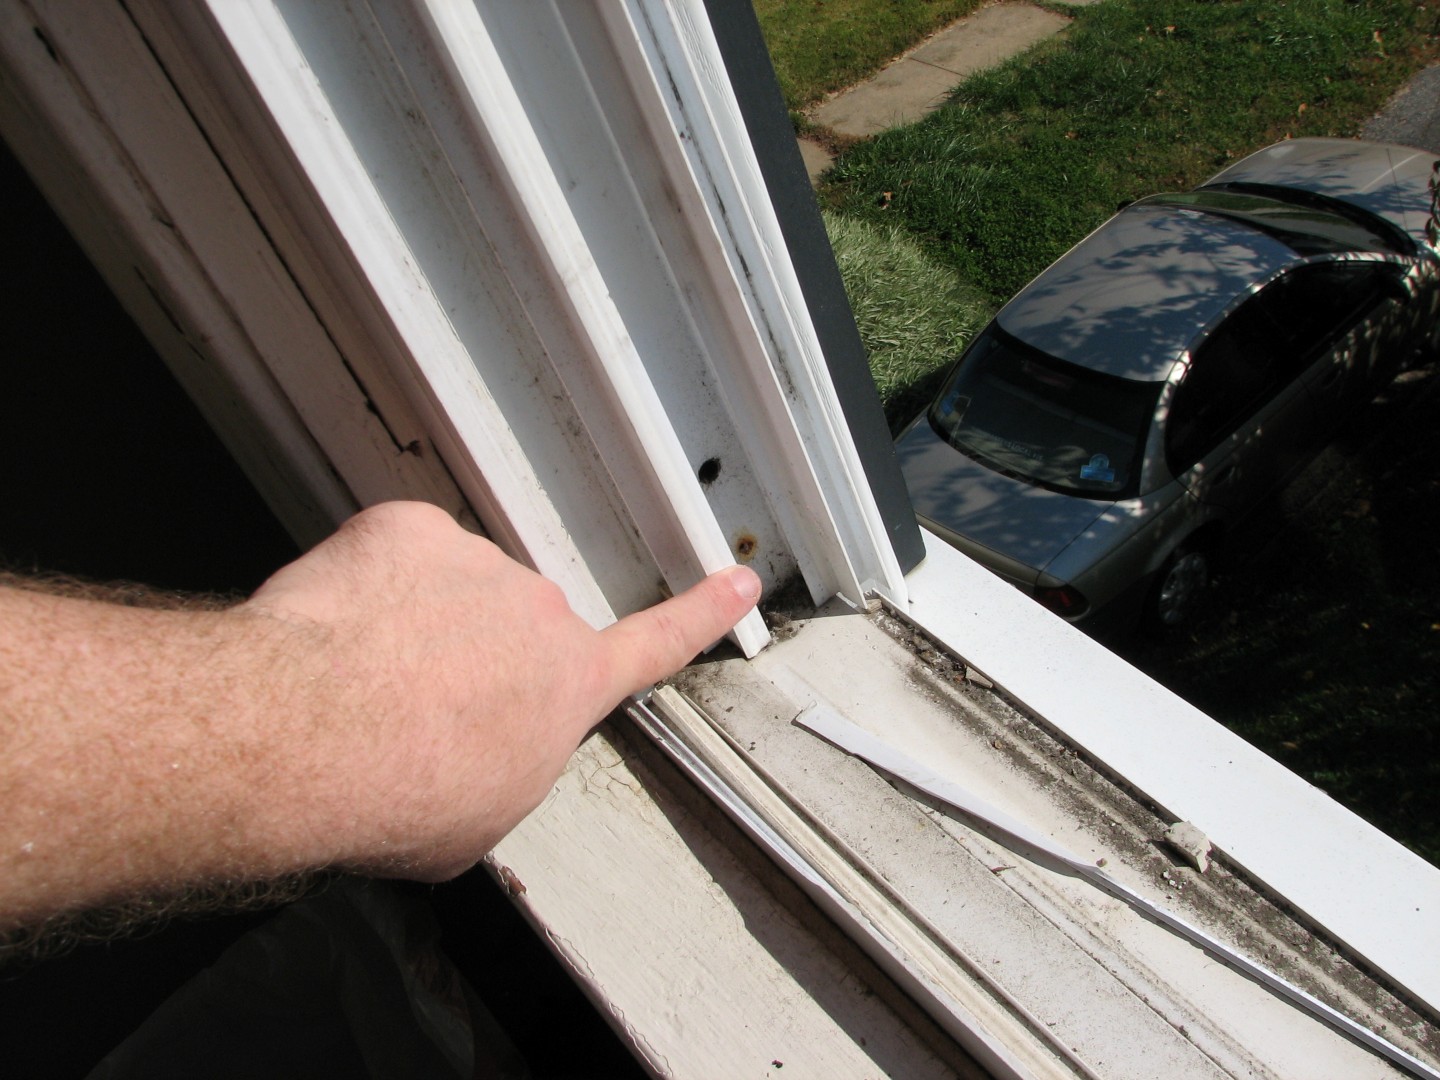
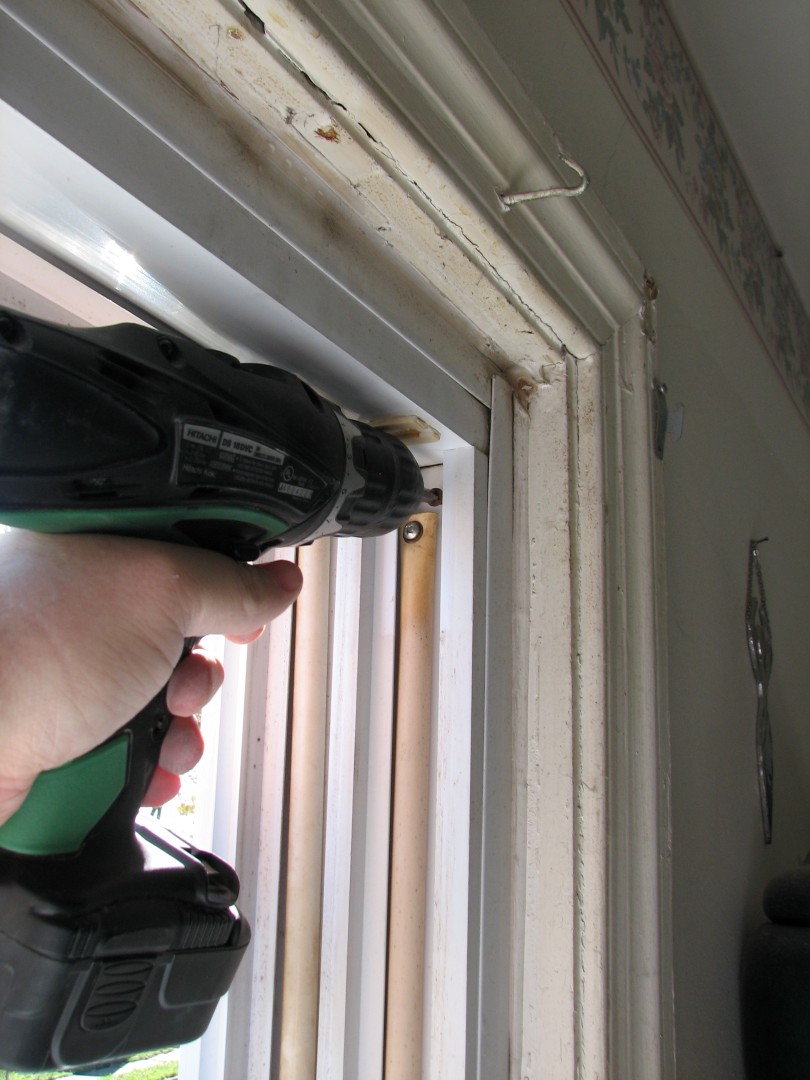
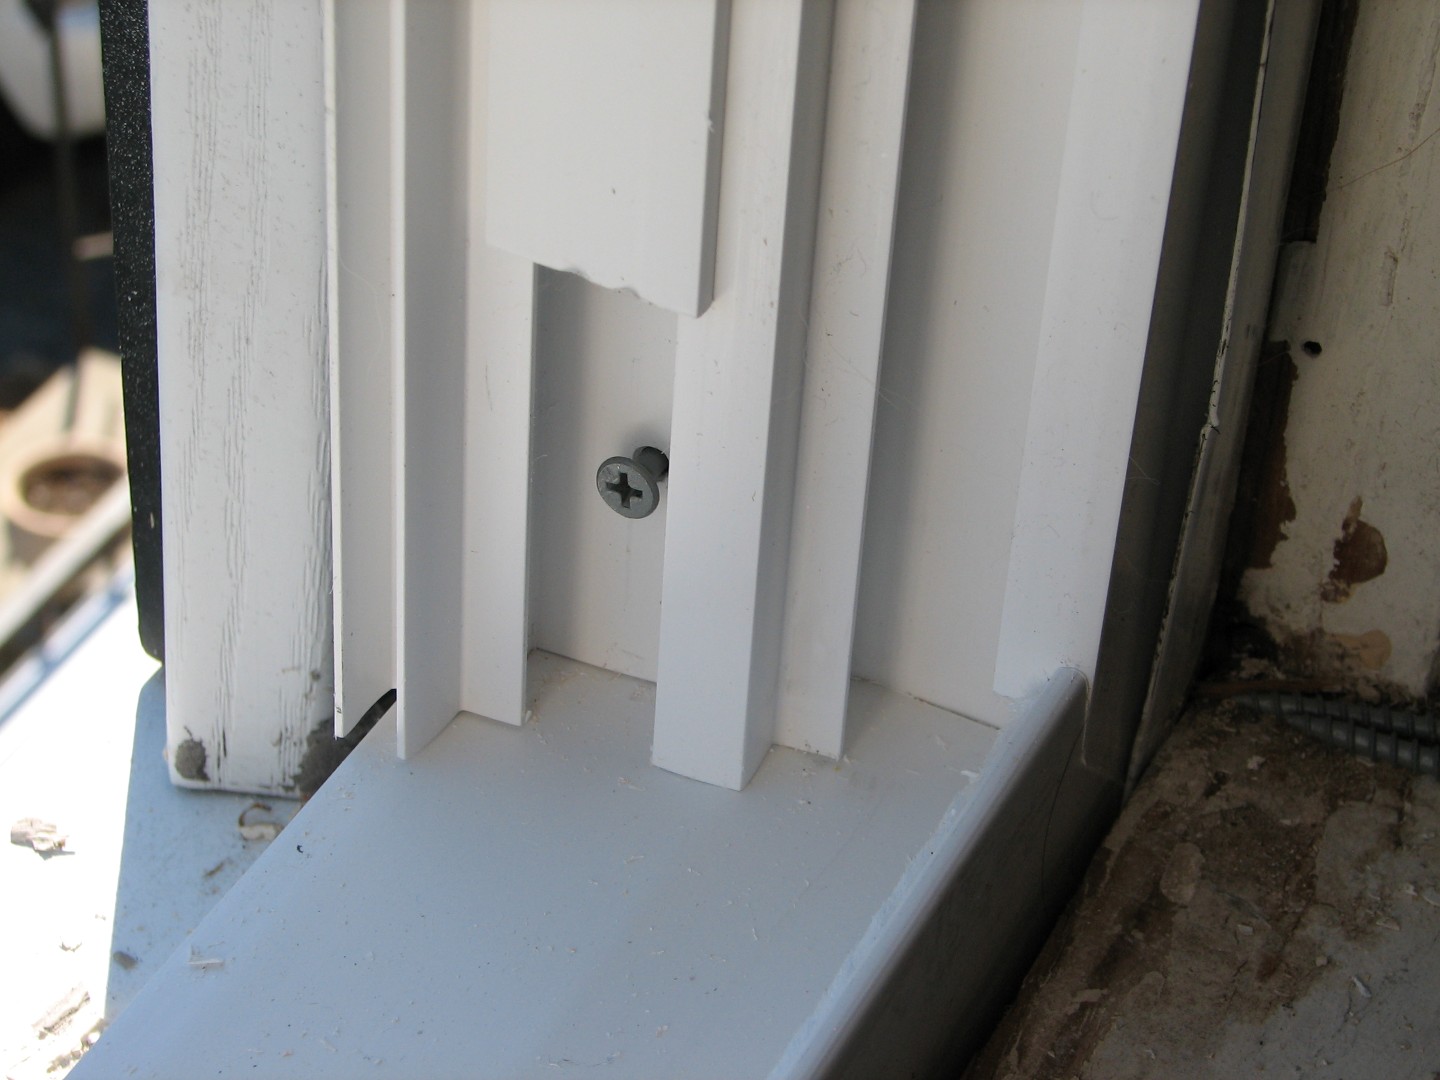
So next up, since I was replacing replacement windows, I needed to remove the old replacement frame. Inside the window tracks themselves, at each of the four corners, are four screws:
I’m actually pointing at the tension rod in this shot – look at the hole ABOVE my finger – the one with no screw in it but lots of rust stains.
As you can see here, I’ve already removed the rusty screws for your convenience.
Here’s what they look like PRE removal (and by the way, guess at which point in the project I finally said to myself, “Hey, lets take pictures!” – Here’s a hint – this is window #2 of the day…I’m such a genius…)
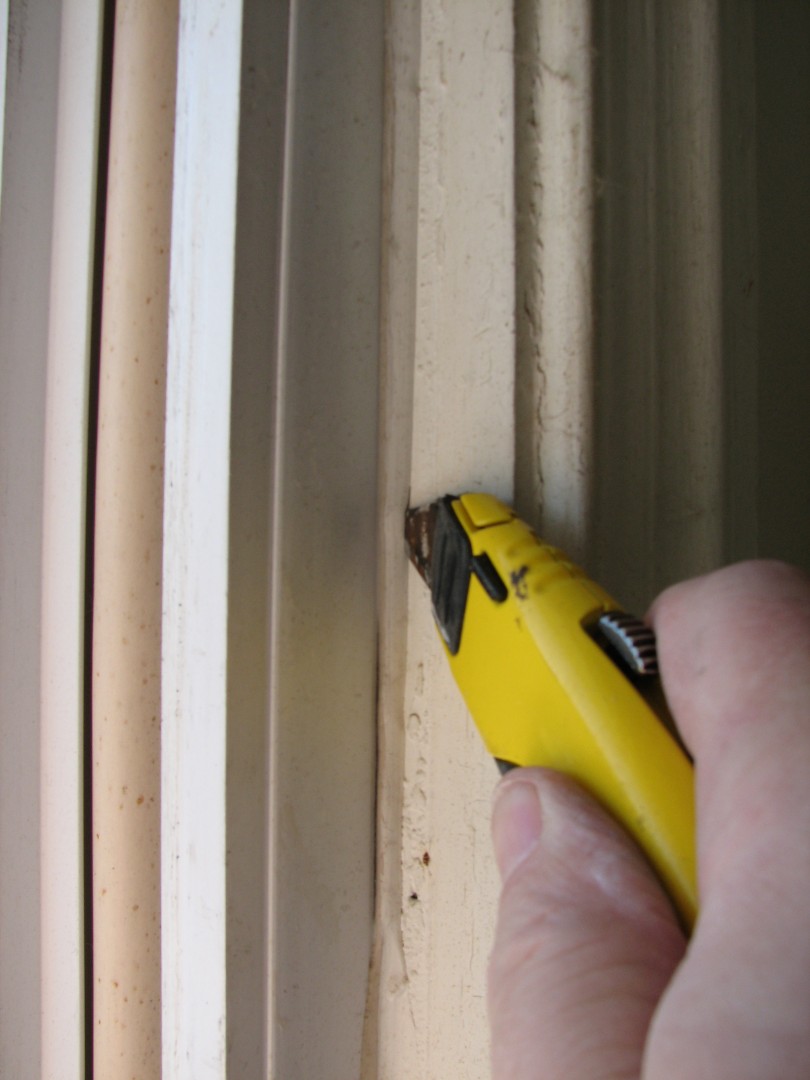
I removed the screws, and then well, see how where the old vinyl frame meets the old wood frame, there’s caulk? Normally that’s good, because it helps support the window and prevents leaks, but NOW its bad because, well, it helps support the window, and you are NOT getting that window out very easily if the caulk is still there. So, using a handy dandy utility knife and 1″ scraper I stripped the caulk or at least cut it to break the seal:
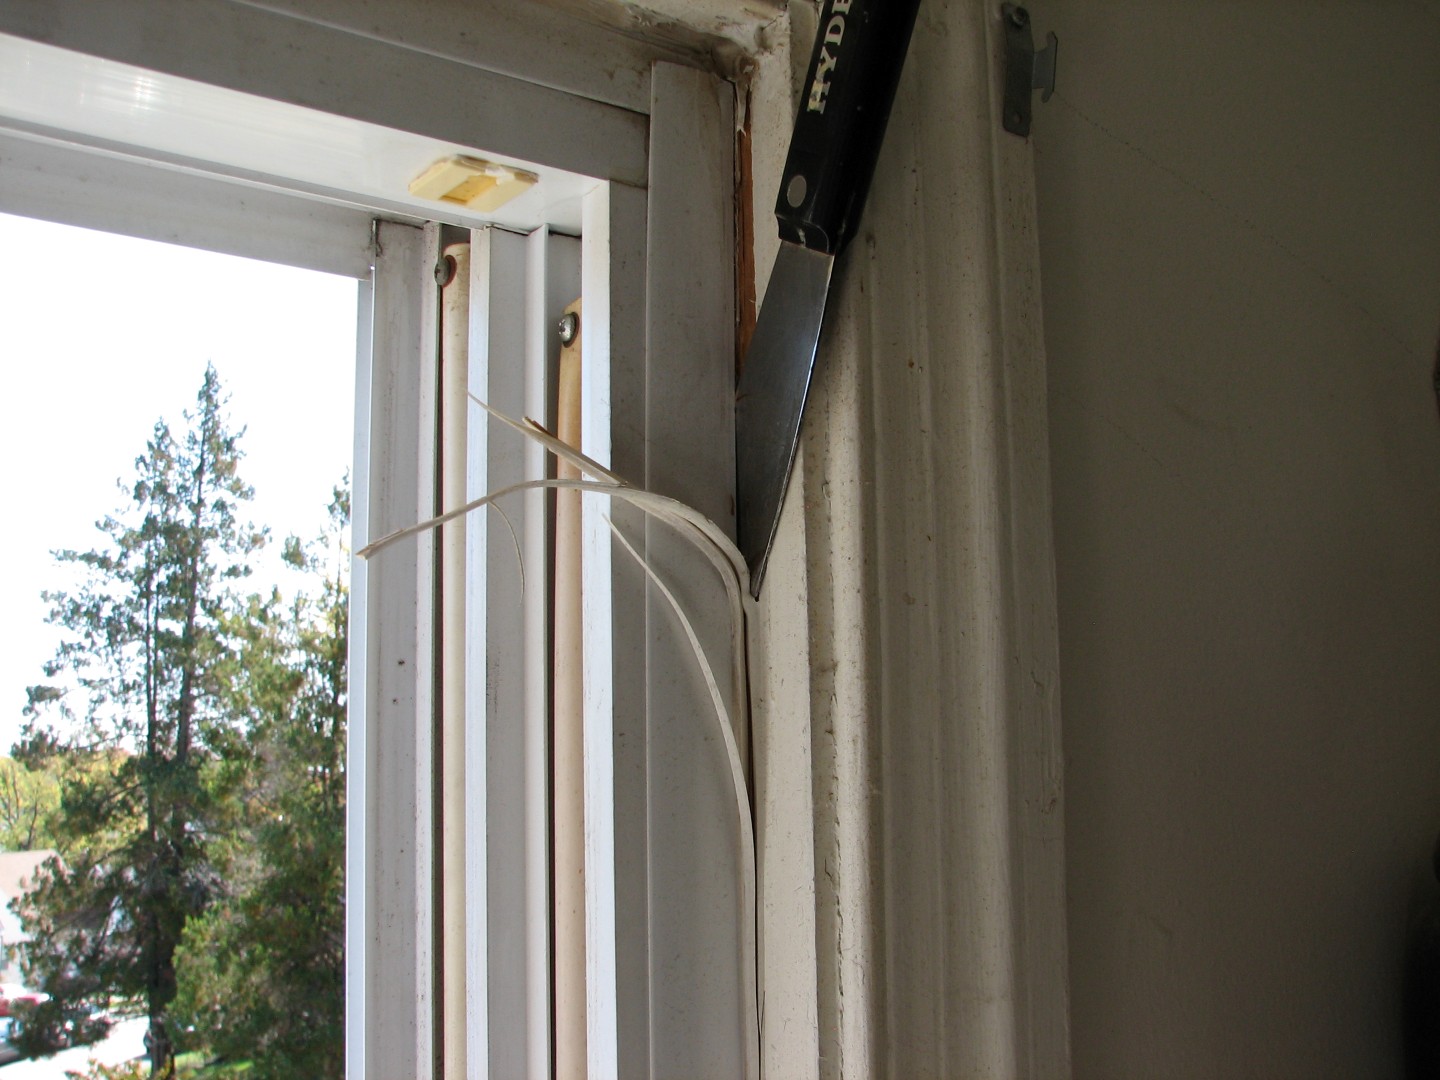
And then gingerly applying brute force, I yanked that old frame out of the wall. Care was necessary though, because I did want to save those vinyl channels the old window was sitting in.
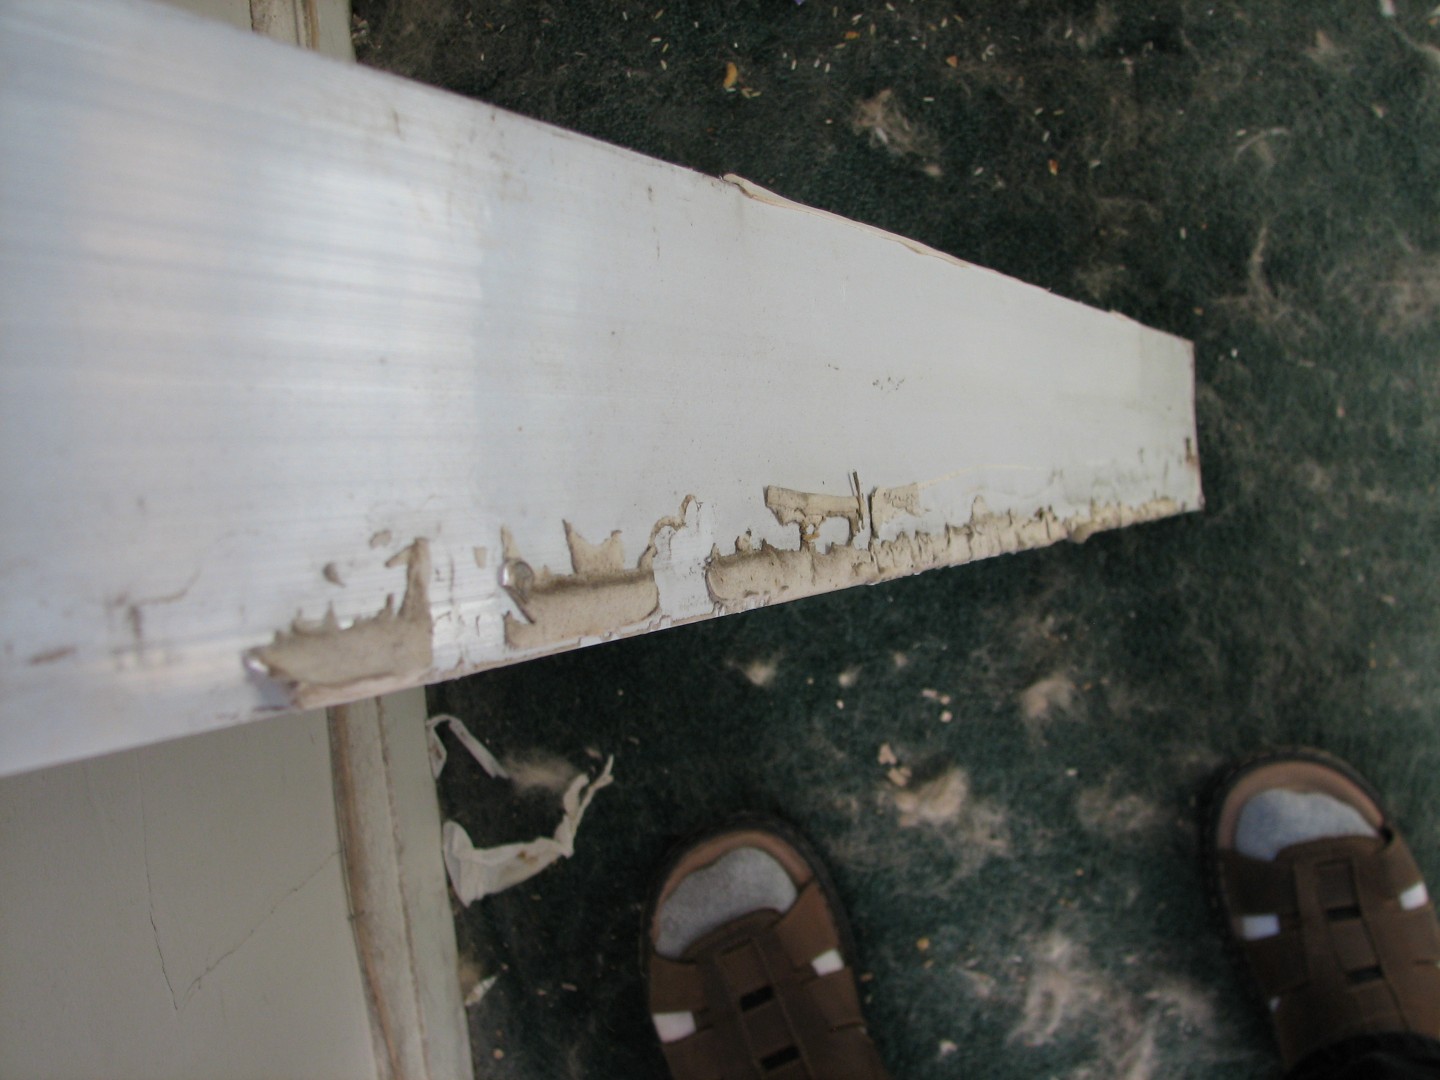
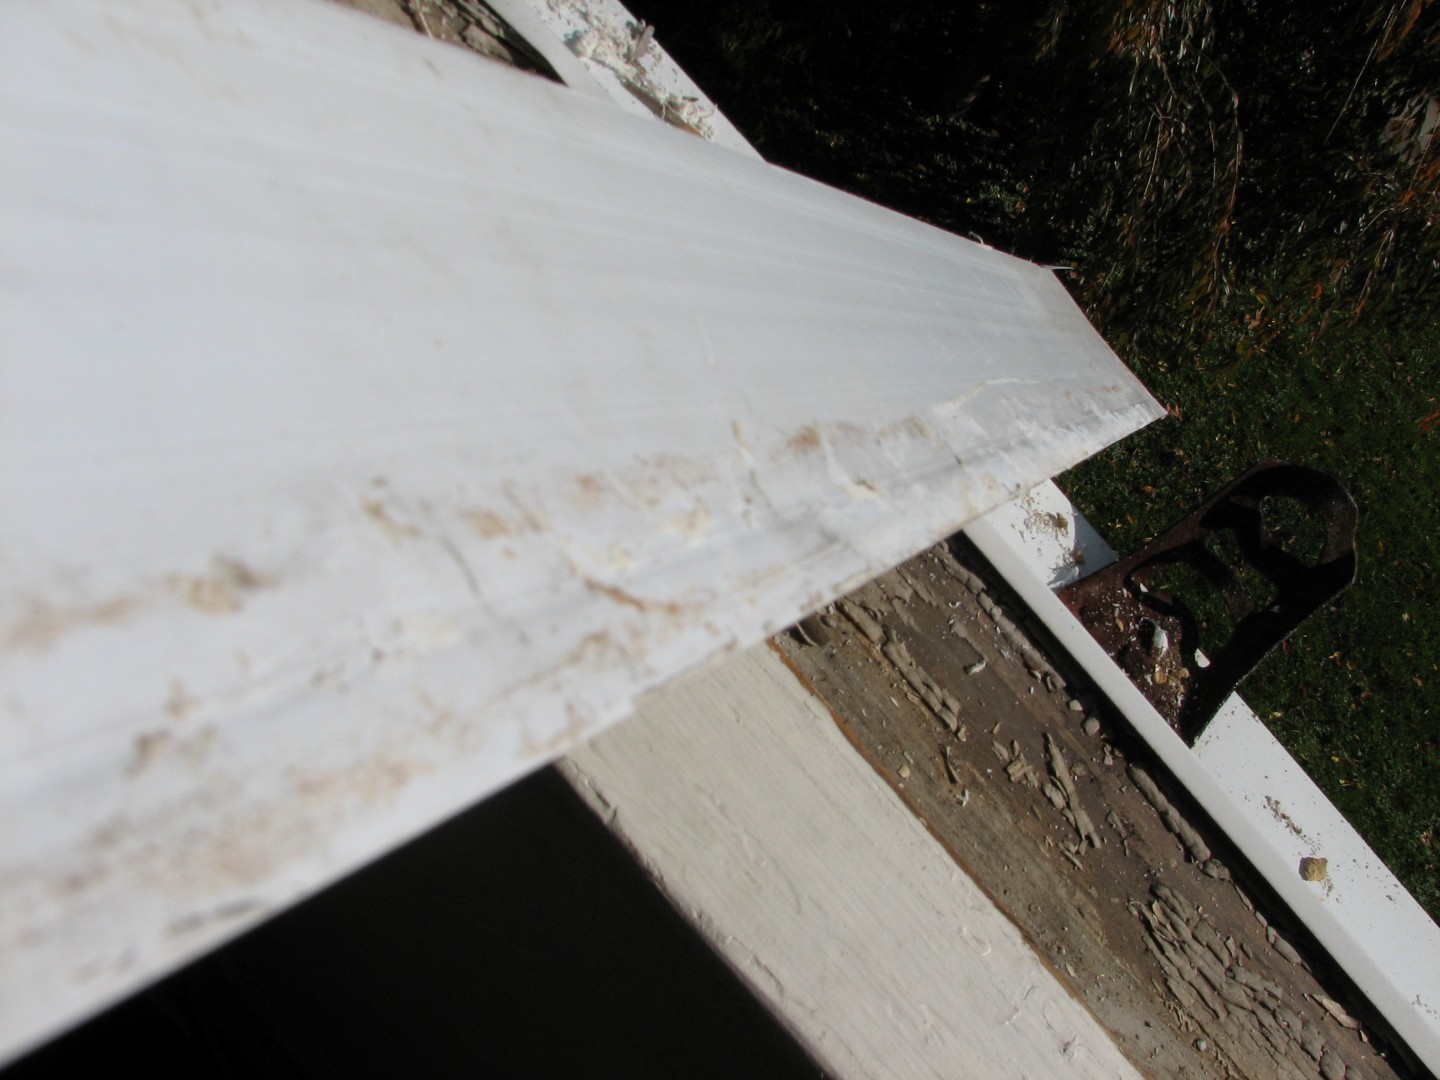
So once the window was out, in this case, I wanted to re-use the vertical side channels because they provided a nice clean look that didn’t require adding a lot of trim, but they were a MESS:
Yes, I wore tube socks with sandals. It was cold, my toes need protecting!
One of my favorite tools, the Bosch multi-tool, was PERFECT for cleaning this up:
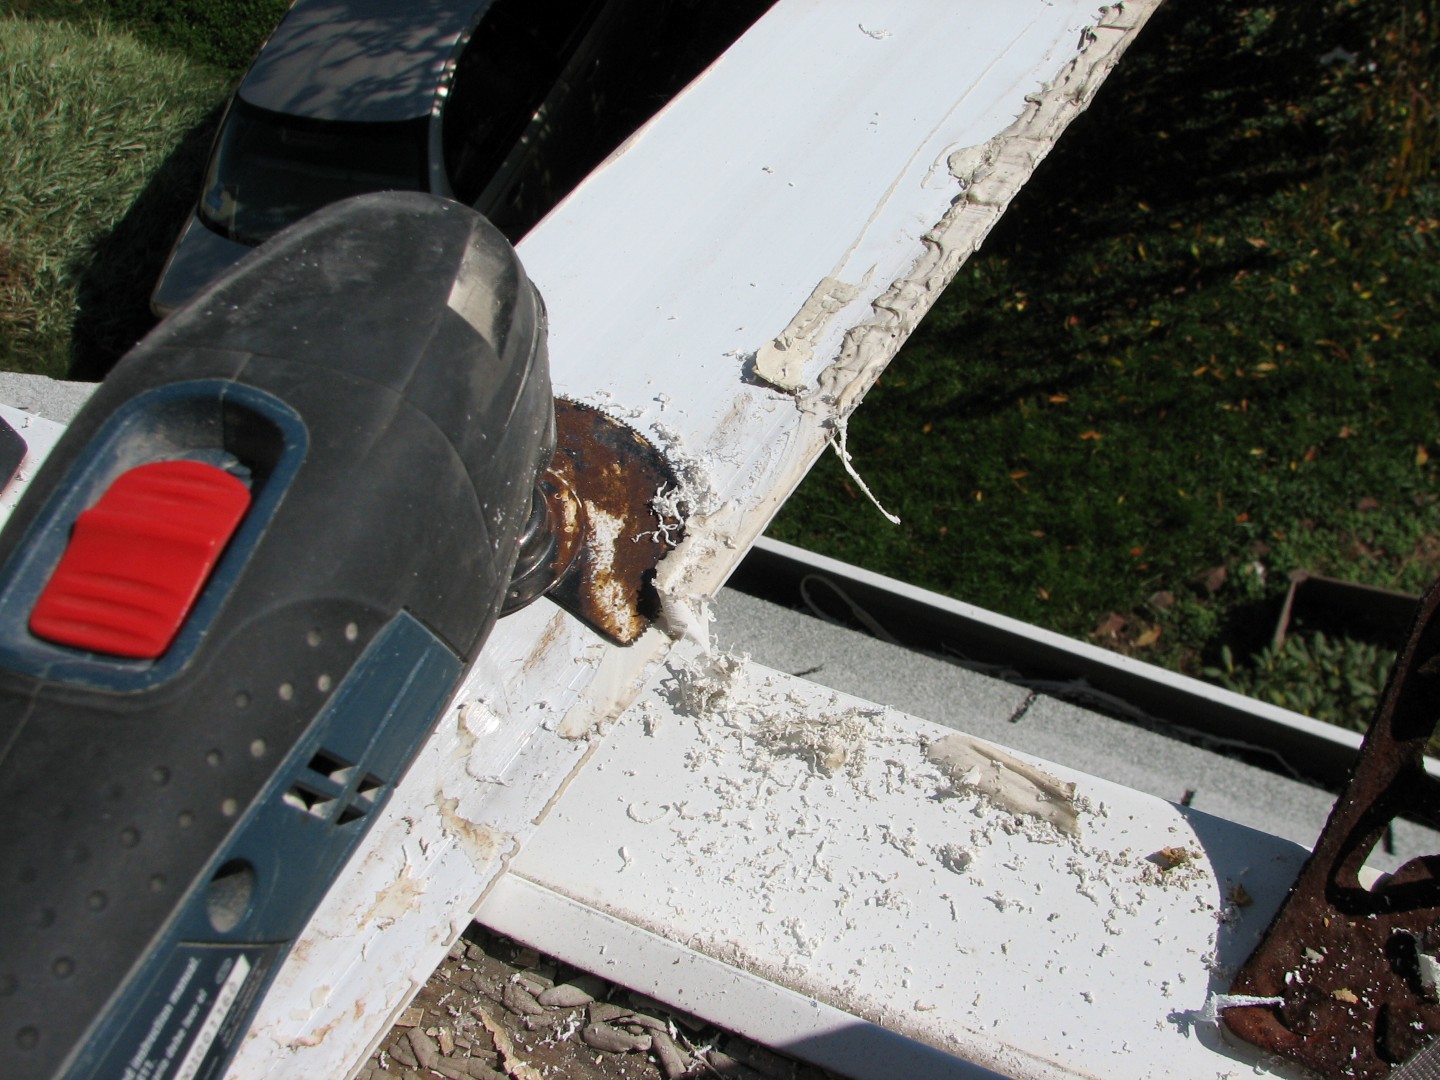
So pretty soon I had a nice clean channel to reuse:
Well, clean enough. 🙂
I’ve learned the hard way about dry fitting. For the uninitiated, this is the step where you put everything in place BEFORE you attach any glue, adhesives, screws, etc. Trust me, nothing sucks worse than getting the adhesive all spread out and then figuring out the piece you were installing doesn’t fit.
Here you can see, I’ve slipped the vertical and horizontal top channels onto the frame. The horizontal channel goes over top of the vertical channels on the outside of the frame, so on the inside, the vertical covers the horizontal. This is done so that if water hits the frame, it’ll run down off the top and onto the side pieces on the outside, rather than get inside the window frame.
And now, a gratuitous shot of one of our dogs, Lacy. She doesn’t like renovation work – the tools scare her.

See how nervous she looks? Or hungry. Probably hungry and nervous that I won’t give her food.
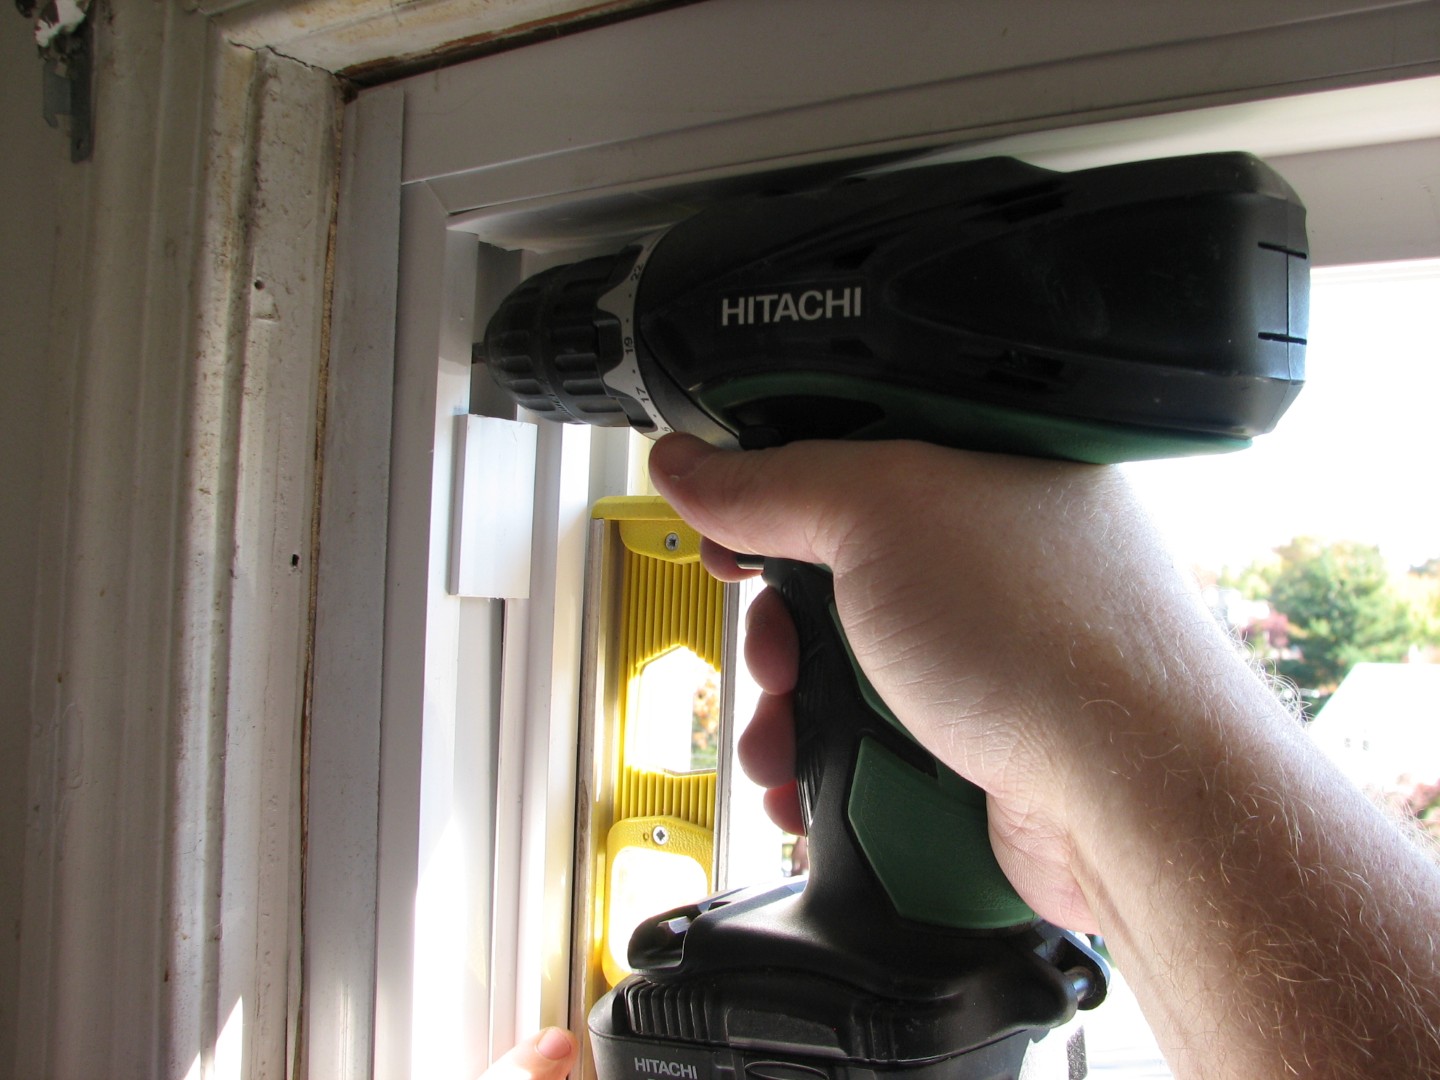
Ok so after test fitting the window, which was a perfect fit, it was time to make a more permanent install. Now you saw the rusty screw holes – shockingly enough, windows get exposed to water, so its smart to use weather proof screws:
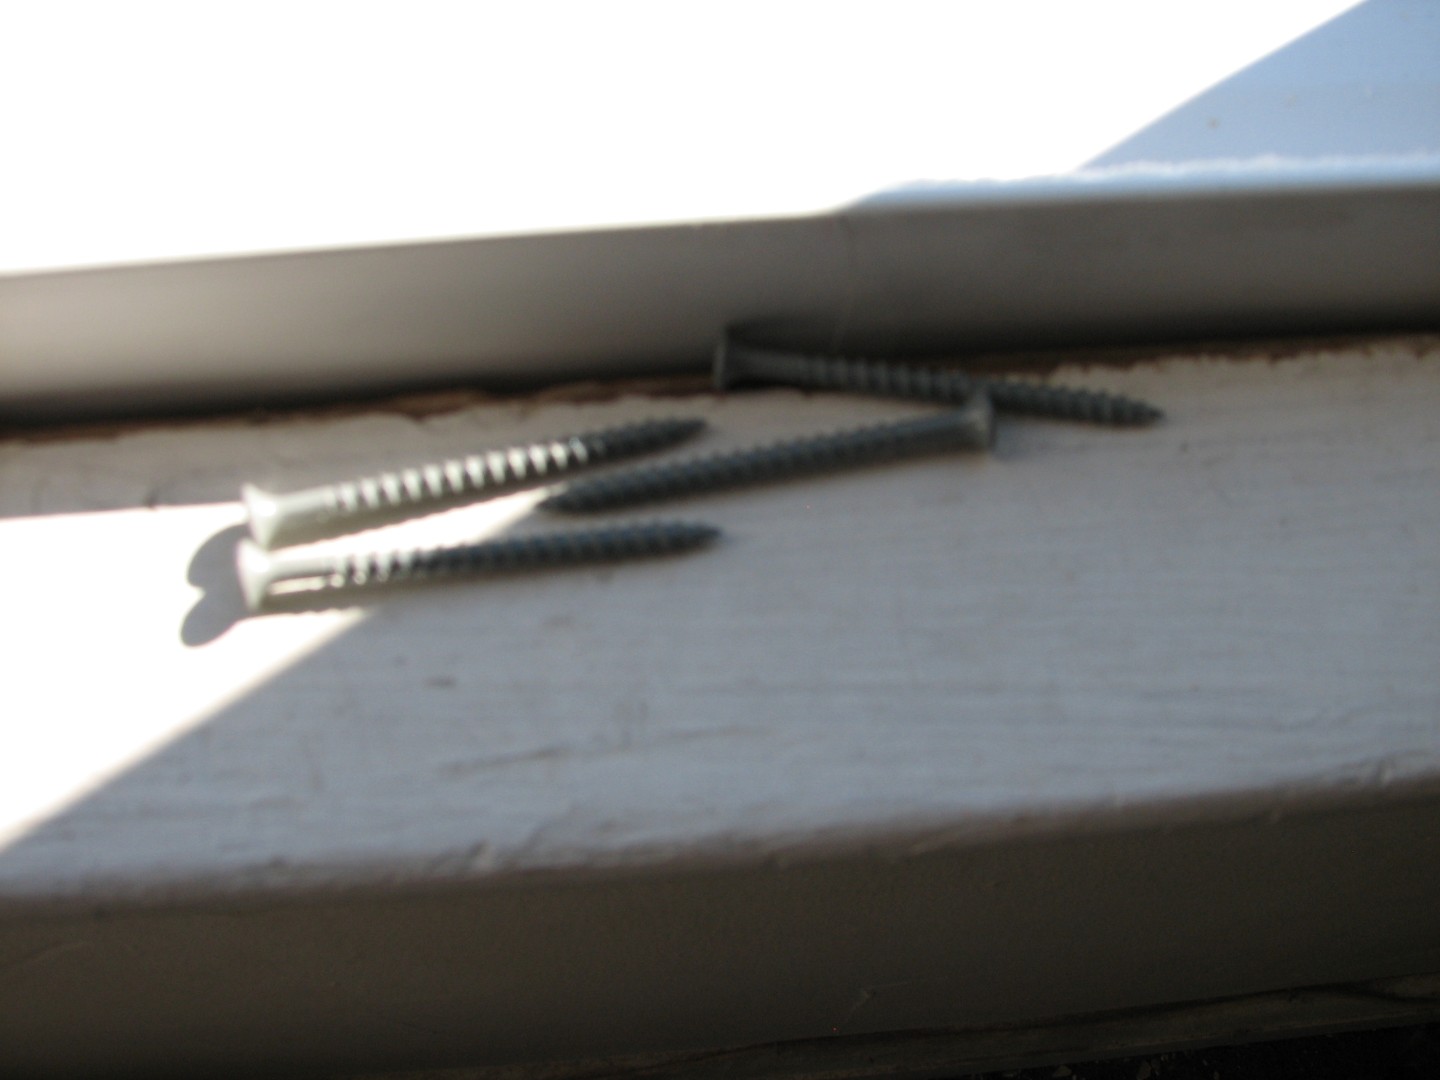
These are 2&1/2″ coated sinkers. Since this was a replacement window and I preserved the original sill, I put the frame back in the window and pulled the base forward as much as possible, then anchored one screw in the bottom at each side. If you do this, DON’T tighten the screw much – just get a bite in the frame. You need to be able to adjust the window for square and level and if you tighten them up, you’ll be sorry.
Next was getting the frame plum (ie: vertically straight) :

Once the frame was level it was just a matter of carefully tightening the screws on both sides to get it internally plum and perfectly rectangular.
After that, it was a pretty simple matter of caulking (inside and out – nothing like hanging out the window of a 2nd floor building…)

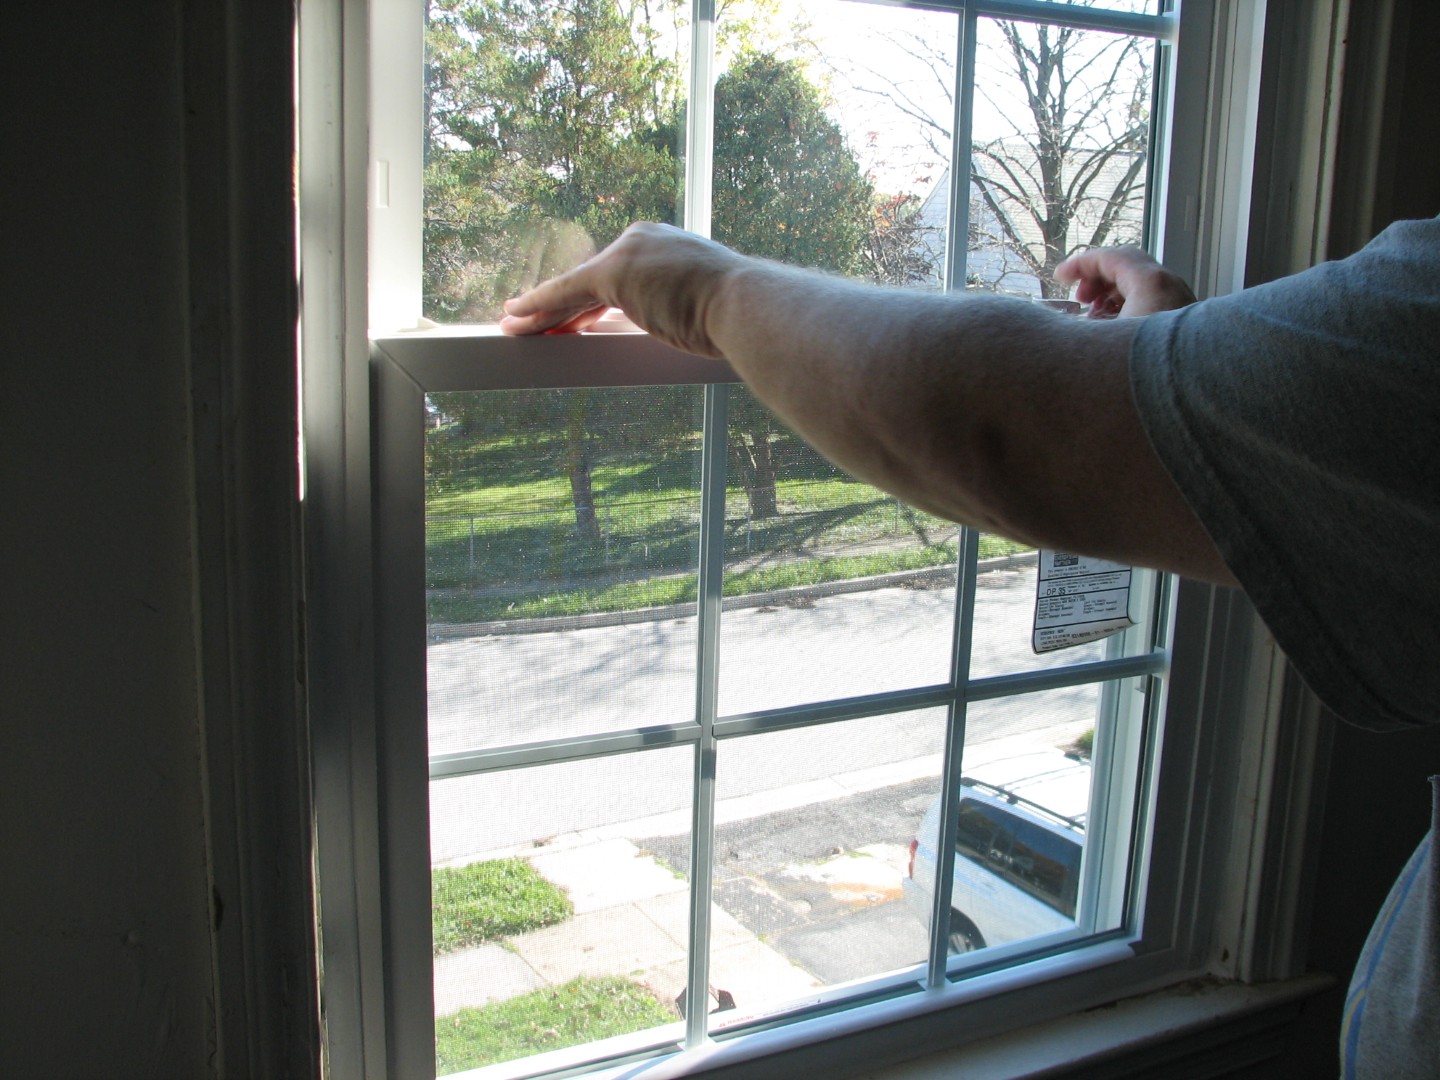
installing the screen and the two new window panes:
And finally, the blinds:

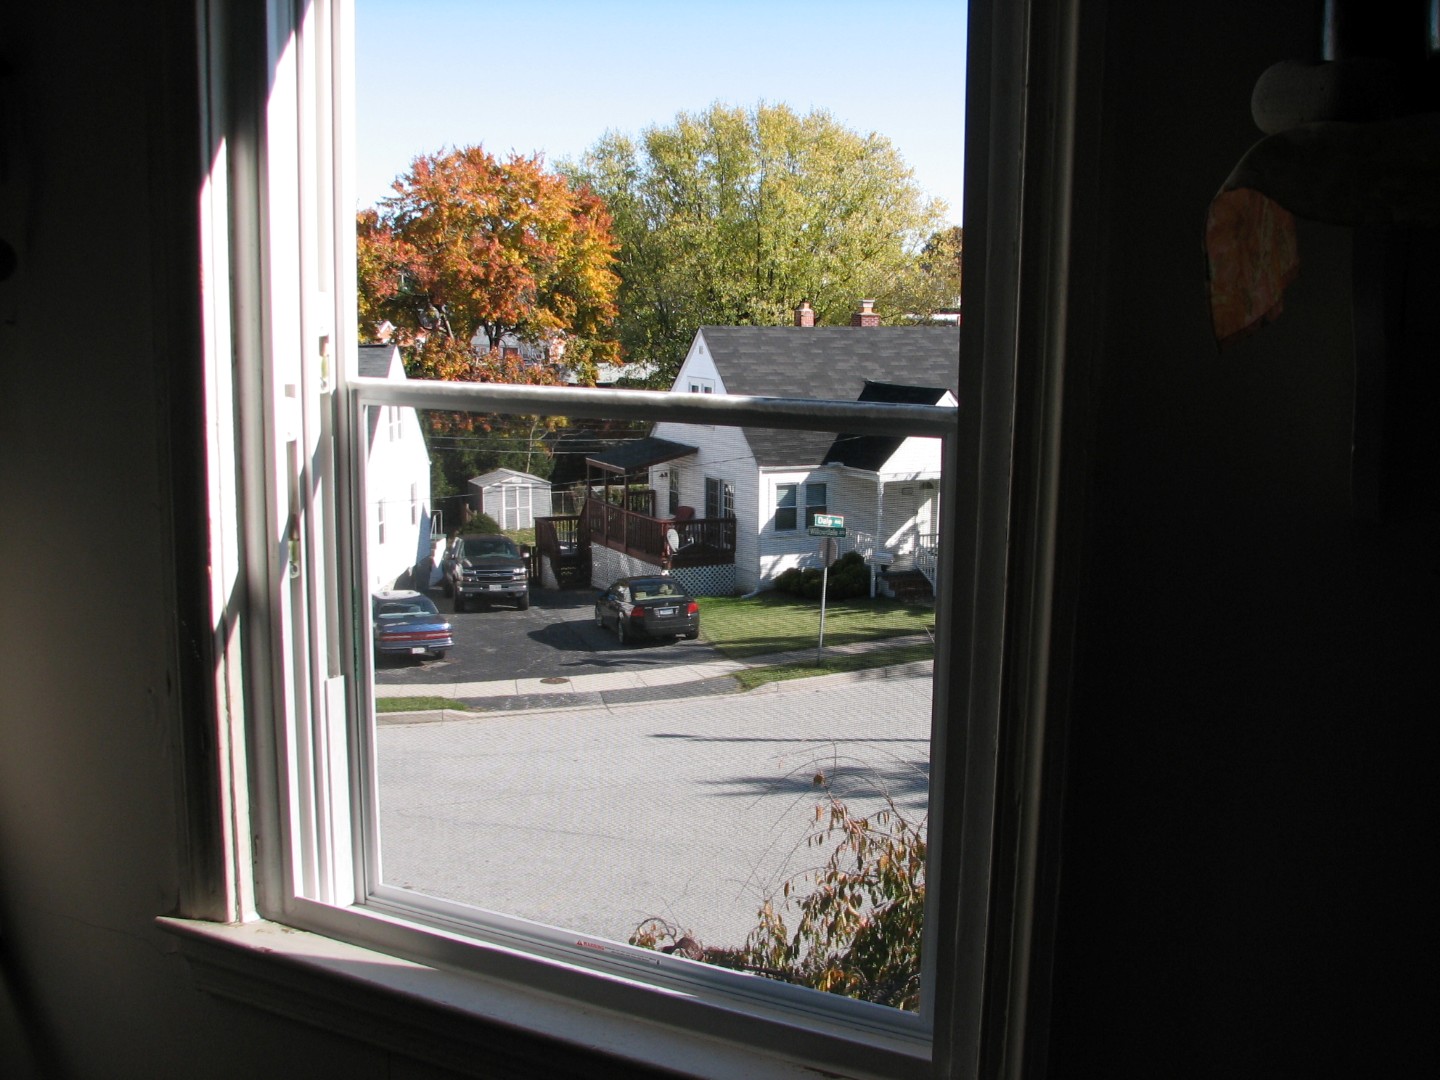
And viola! Two new replacement windows in the bedroom:
Lacy was exhausted! And so was I, but our new windows make our bedrooom warmer, quieter, and the low-E glass means less heat-loss in winter and the AC doesn’t need to work as hard in the summer! In fact it’s been so warm, we’ve got to crack the windows at night…
I’m sure that’s ironic somehow…
Hammer safely!
G

Blocking the Window – Underappreciated Beauty
Let me just apologize up front because I didn’t do this project with blogging in mind, so the photos are somewhat lacking detail of the progress…
Ok apology out of the way. Now for the meat.
I. Love. Glass. Block. Windows.
I mean – seriously – aside from stained glass, where can you get such interesting designs?
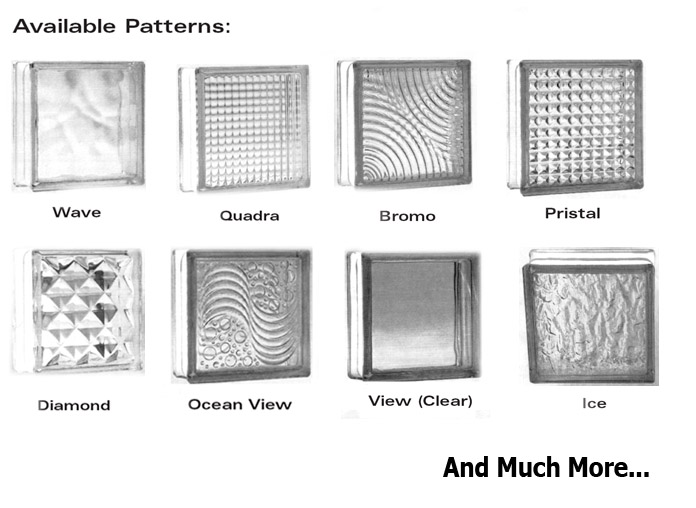
And there are, for the real enthusiasts, plenty of even more ornate, decorative glass block options out there.
I mean – how better to get light AND privacy? And look at what you can do with it!
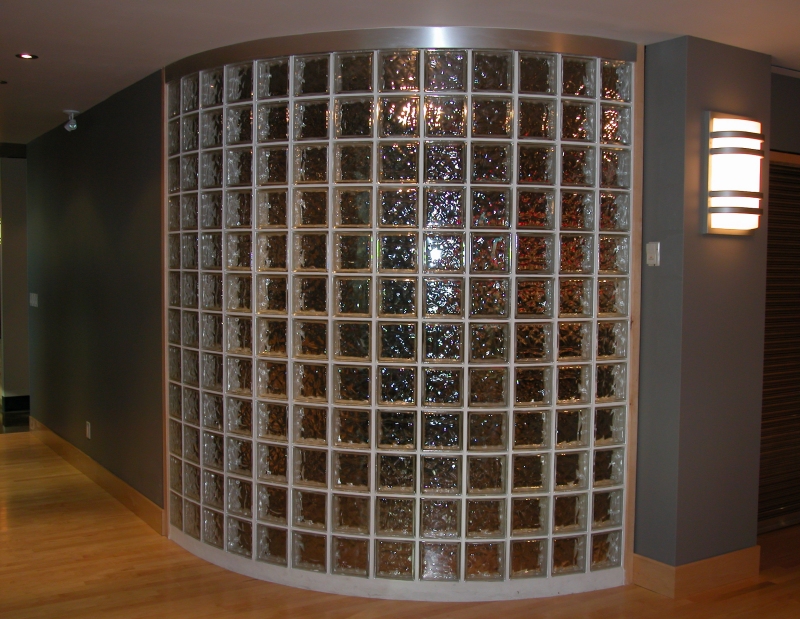
I mean that’s just COOL!
I think glass block is under appreciated today. I base this mainly on anecdotal evidence. It turns out that in the Baltimore metropolitan region, there are only TWO Home Depots that carry glass block and glass block supplies, and both of those are in lower income neighborhoods. How sad is that – that glass block is the “cheap option”? (And seriously at ~$12/sqft JUST for the glass, how that gets to be the “cheap” option is beyond me…) But anyway…
So you may remember our basement:

Specifically, our laundry area:
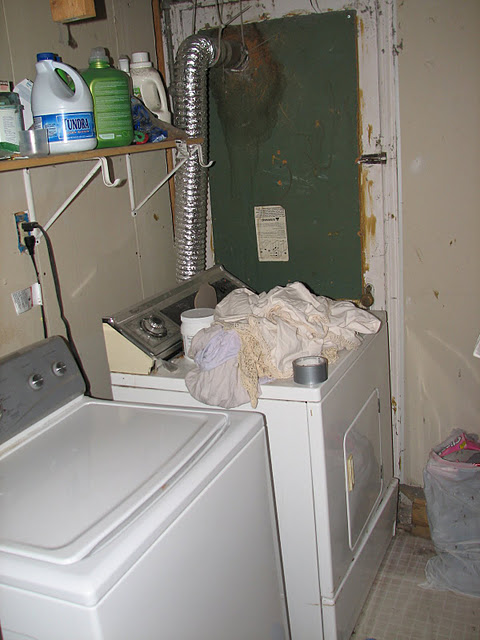
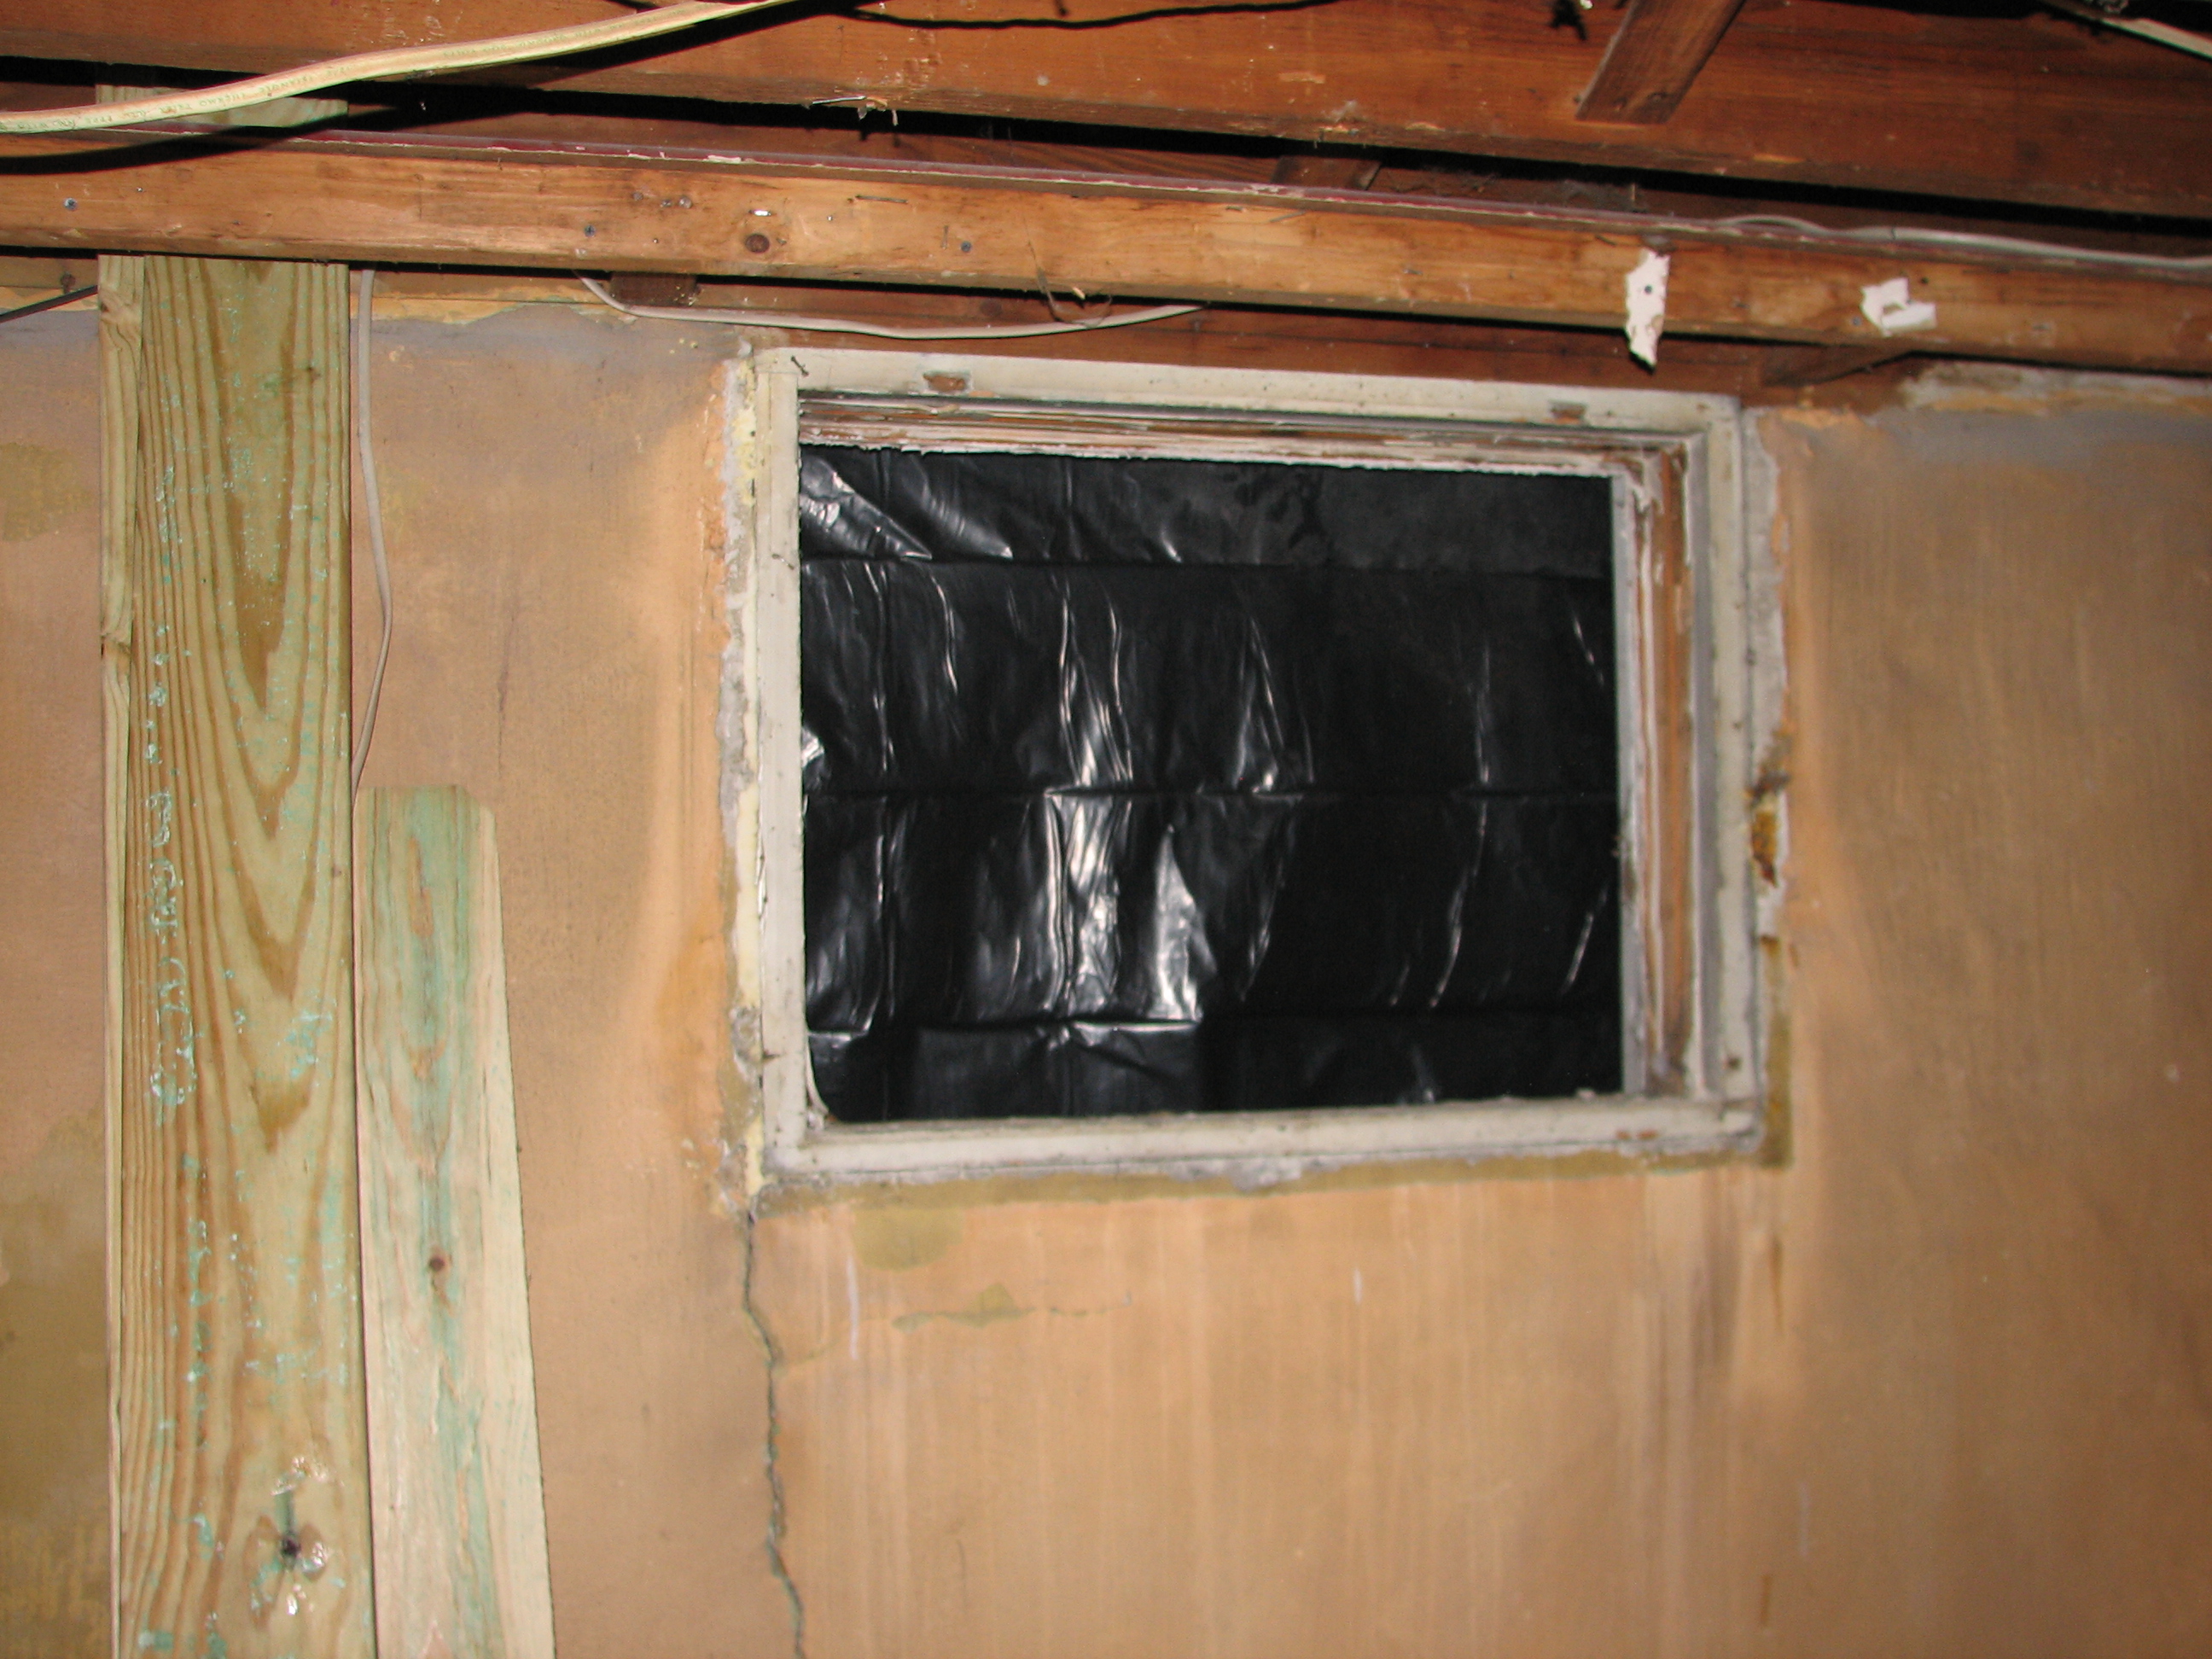
If you haven’t seen this before – what you’re seeing is, indeed, a dryer that is up against and VENTING THROUGH the exterior basement door. Yep, the previous home owners could think of nothing better than to block the secondary exit from the basement up with a dryer and to run hot moist air through it…
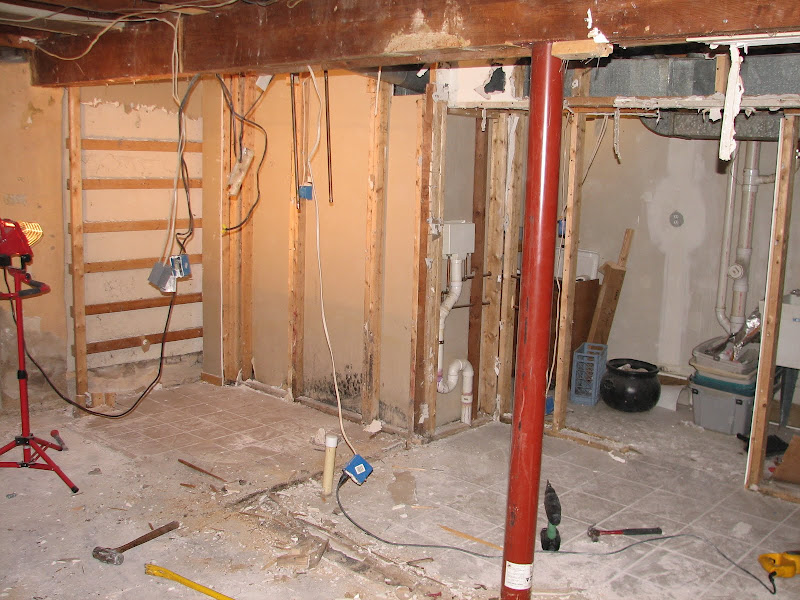
So we decided that this has to go. We want to move our laundry facility here:
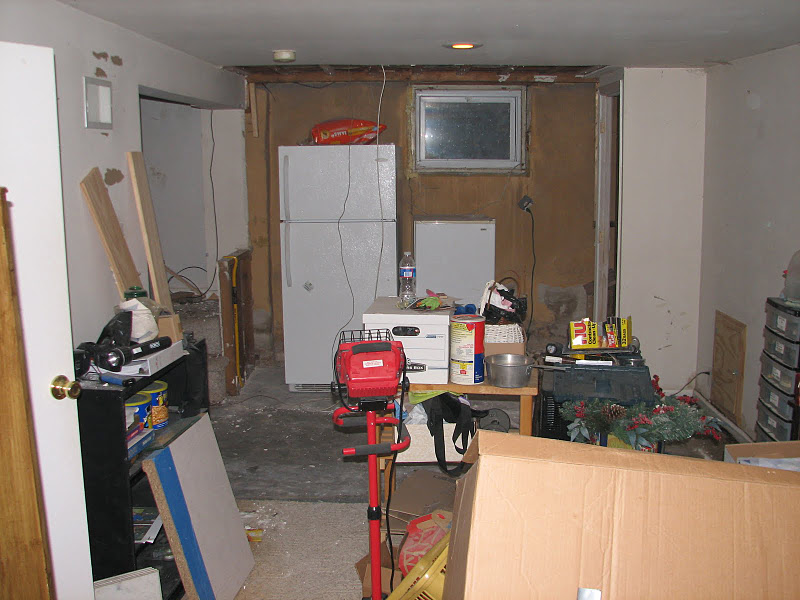
Which actually, now that demo is mostly done, looks more like this:
The idea being – come down the steps, turn left, open a closet door (double folding doors of course) and there’s the washer and dryer, and while we’re at it, reclaim the basic ability to exit the basement directly to the outside world. You know – in case of, oh, things like a FIRE? (Idiot previous owners…)
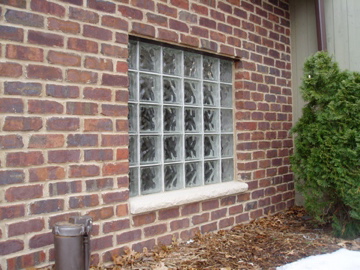
So a few weeks ago, I got to work on one of my favorite kind of projects – a brand new glass block window!
Pittsburgh Corning sells a fantastic glass block system called (rather unimaginatively, I’m afraid) Pro-vantage, which consists of vinyl tracks and spacers, like these.
The tracks are set in a window frame around the perimeter, and the spacers go between each block.
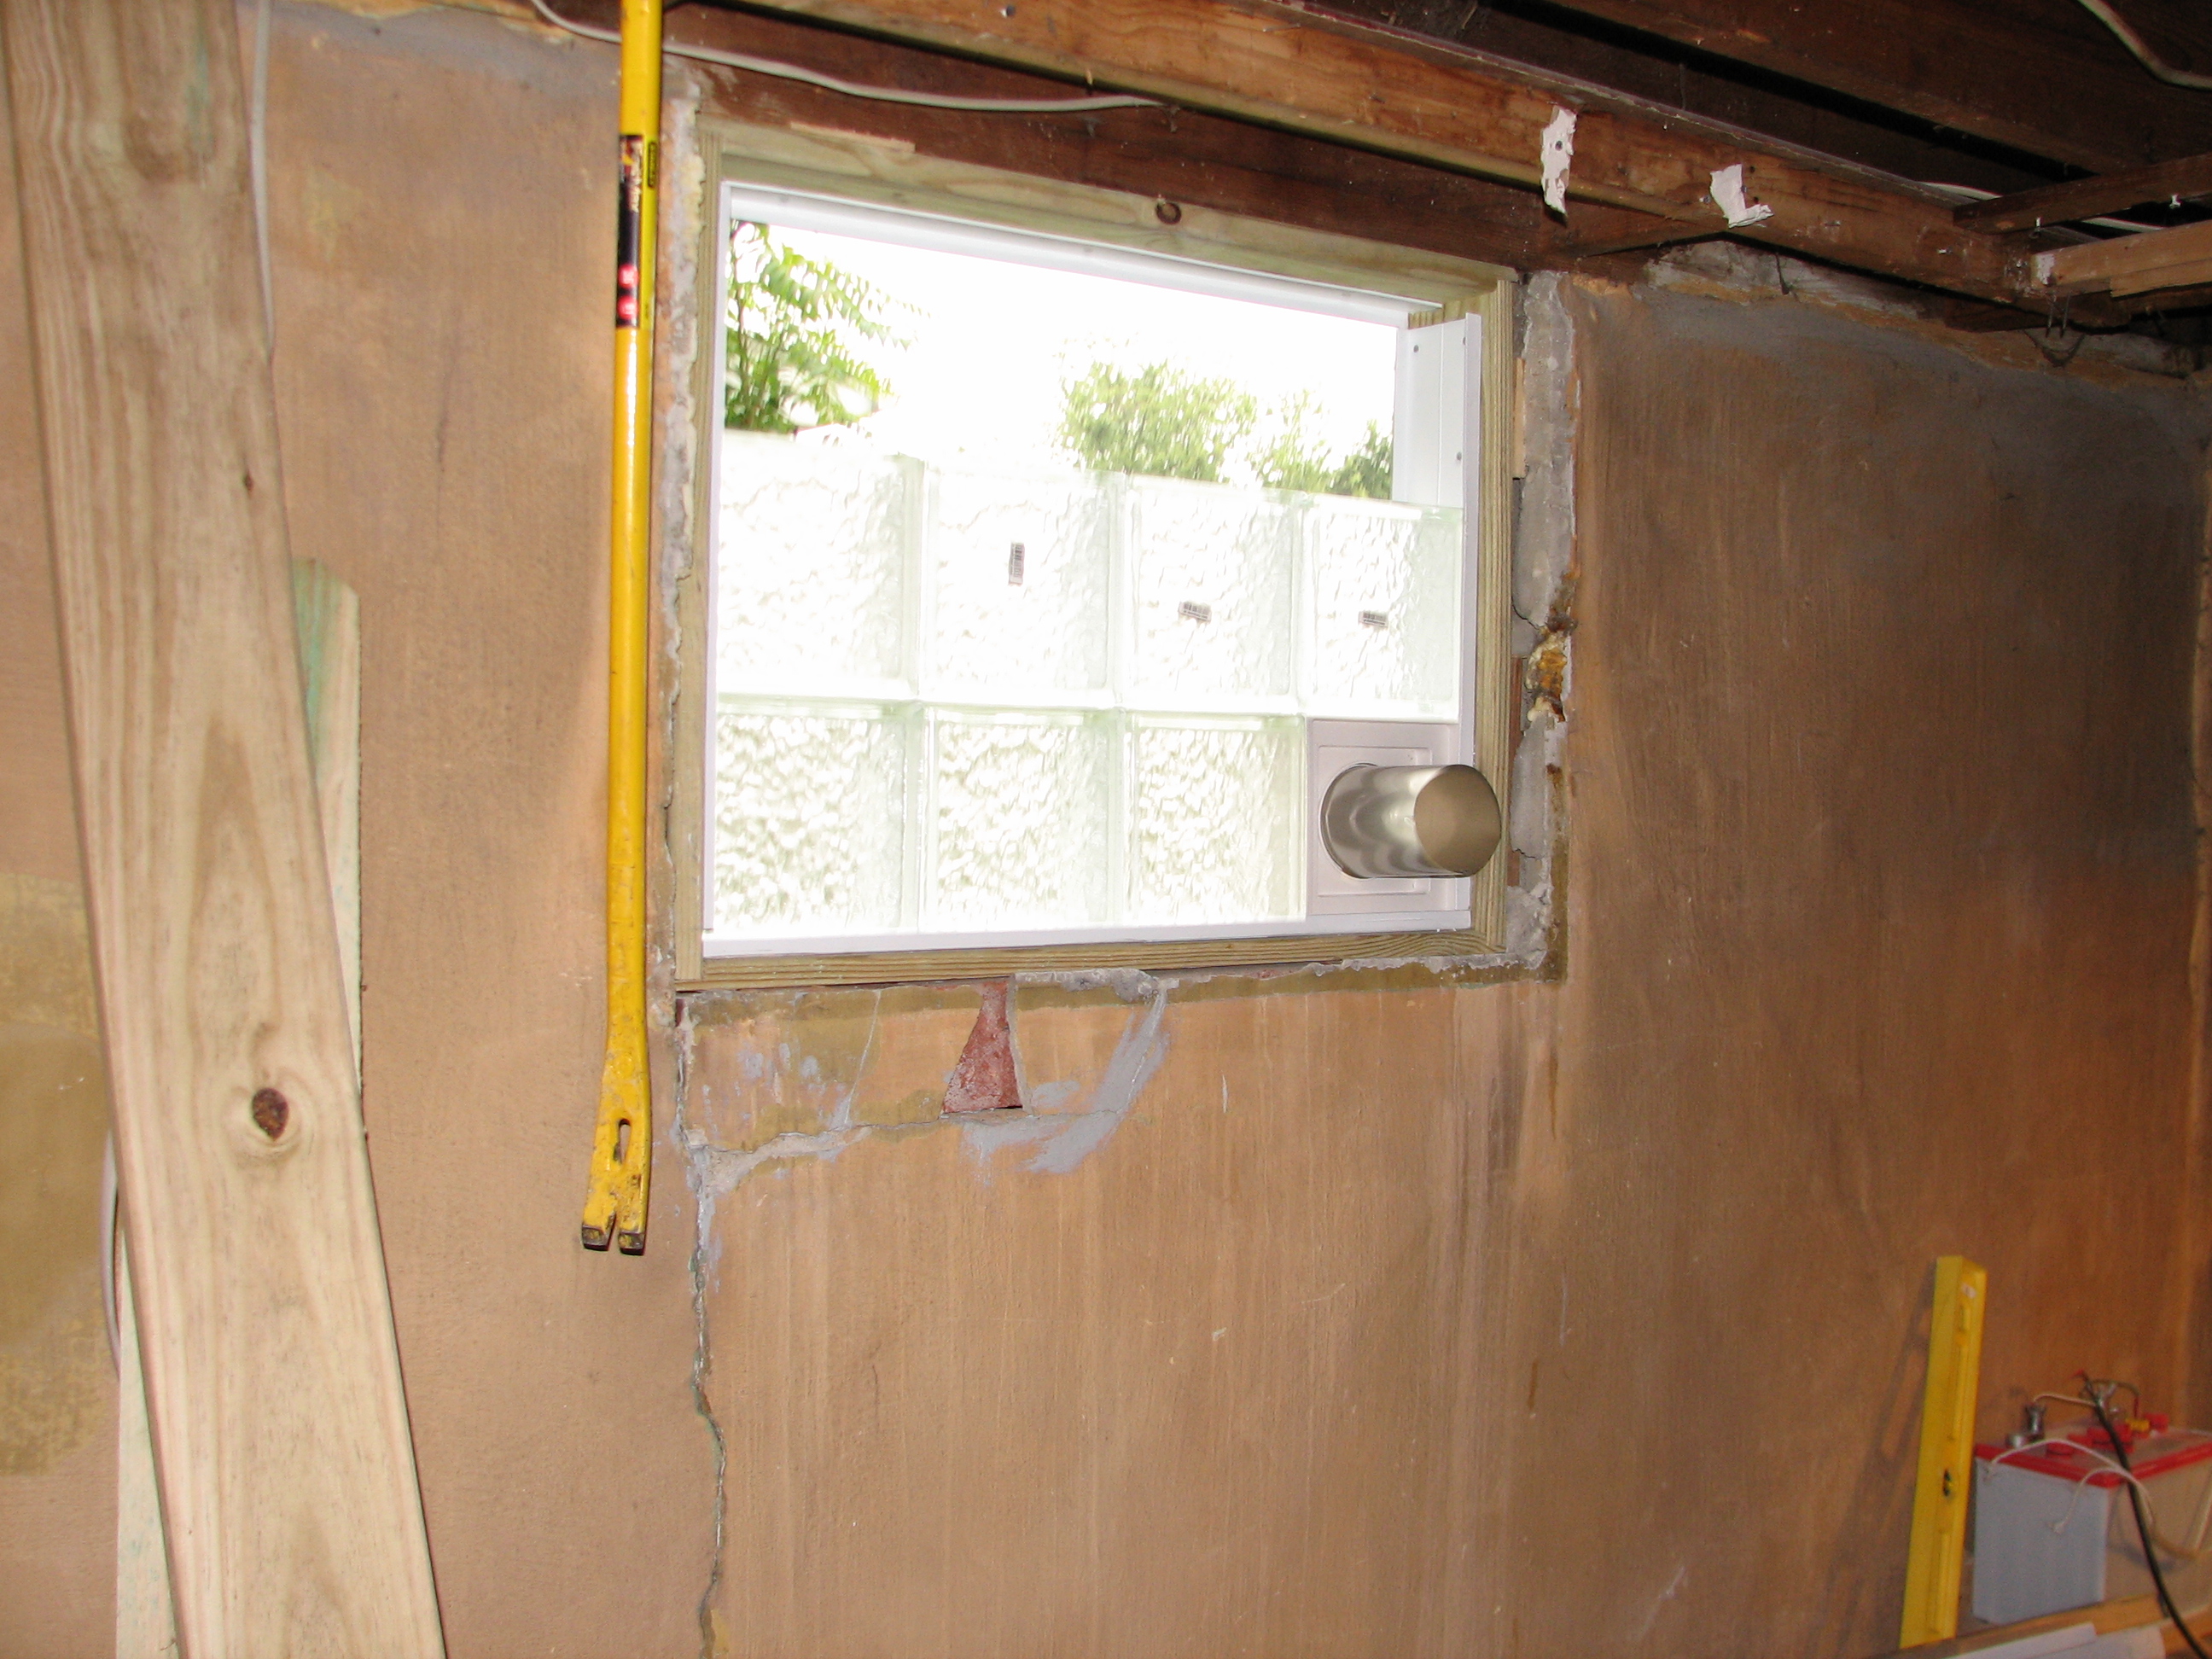
I started by measuring the opening about two dozen times, doing a lot of calculations, checking a lot of wood measurements and finally removed the existing window…
Then I measured it again and again, and I took my outside track and glass block (the icicle pattern) and built the window in a free standing setup on a board on a sawhorse (strapped together to keep it from falling – wish I had pictures of that!) and measured it about a dozen times as well, and ultimately concluded that the frame had to come out.
After a bit more demo, I constructed the new frame, which gave me a chance to use my new dado set. This was the hard part. Building the window itself was SUPER easy.
First you lay the base track in the frame (over a double bead of caulk) and secure it with screws. For windows, I prefer the grey coated screws. Then you caulk the track again on the inside, and put in your first row of blocks, caulking also between each block. Caulk on top of that row and another row and you end up with this:
Click the pic for a full sized shot. You can get a really good look at the new frame, the dado cut, and the general install.
Note how the entire frame is in place except at the top. That’s the secret I didn’t know – you cut the top track in half long ways, put your block in, and then seal the second half in after it’s all done!
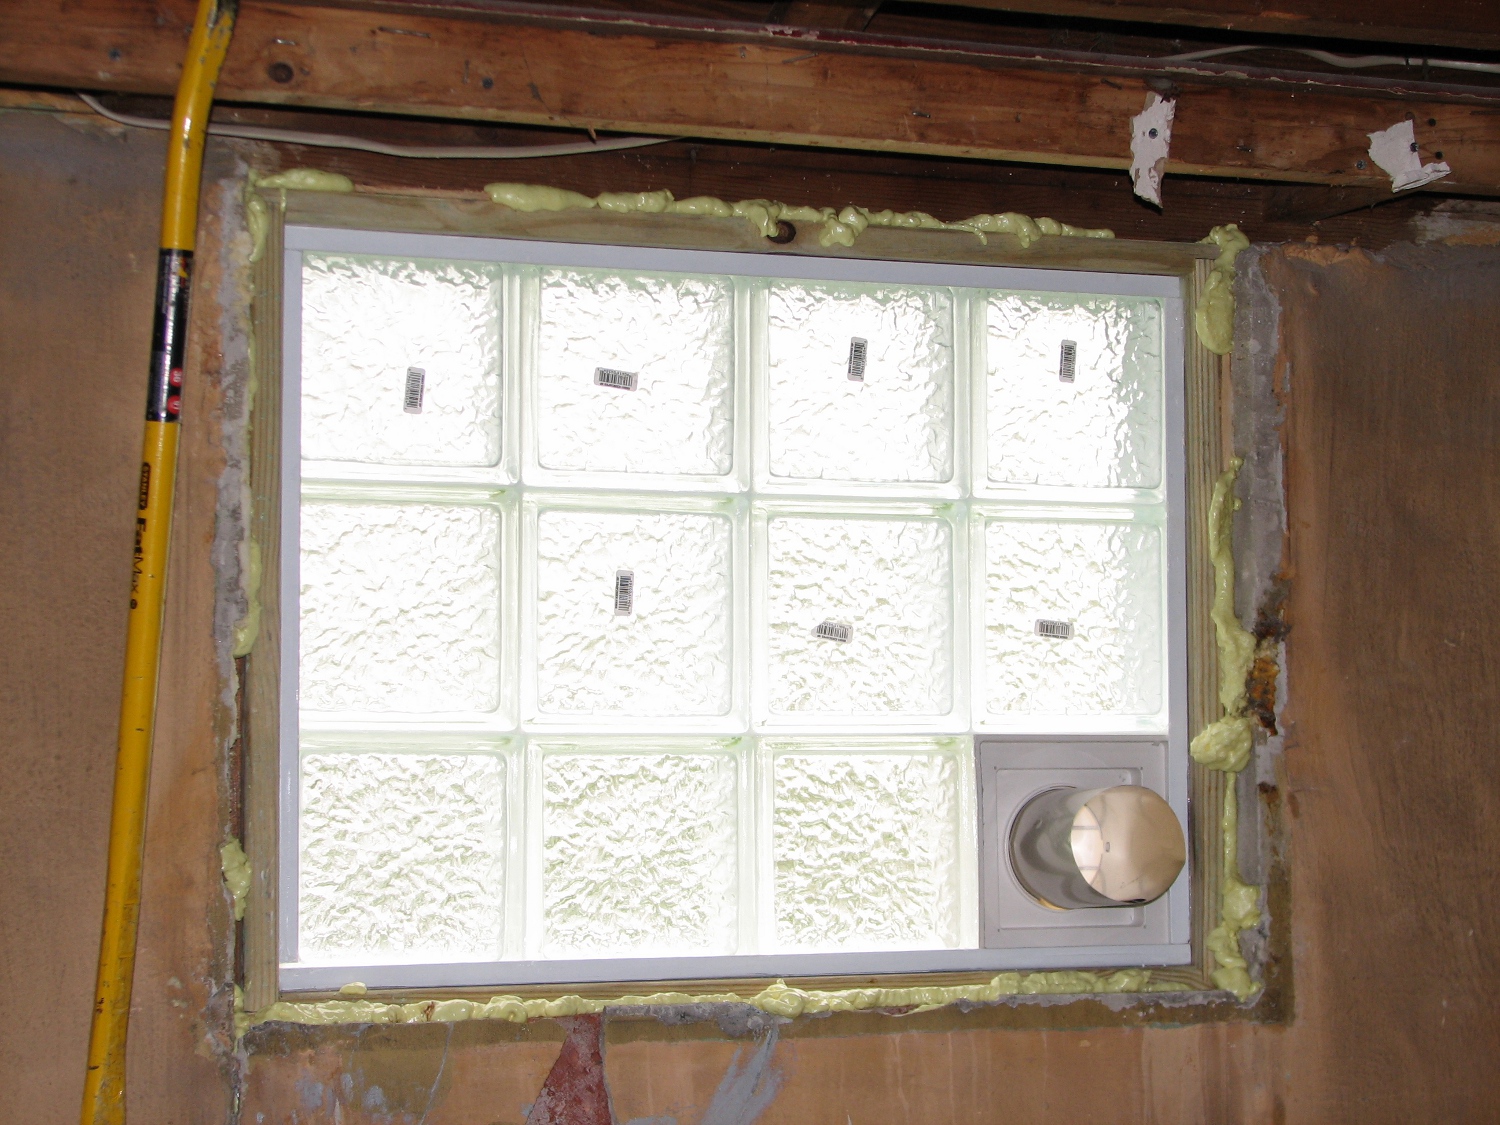
Once in place, you cannot tell that the top row was cut in half.
Right now it looks ugly on the inside – but that’s because this is all initial work. From the outside, I think it looks fantastic!

Well, ok, except for my caulking job. I really should have left that for the missus – she’s the better caulker.
Hammer safely!
G
Romancing the Floor – Saving and Restoring Old Hardwood
Some years ago, after our finished (not by me) basement flooded for the third time, and we decided that the carpet posed too much of a health risk to spend serious time down there until we redid it (a project that’s still not finished, FYI), we decided to convert the 3rd bedroom in our house to an office.
This project involved a lot of learning experiences for me, but one of the best was learning the value of the phrase, “old but good”.
A little history. House was built in 1940. We are the third owners, if I remember correctly – fourth at the most. At one point, the house was converted into two apartments, and so the 3rd bedroom had a history – at one time, it had been a kitchen.
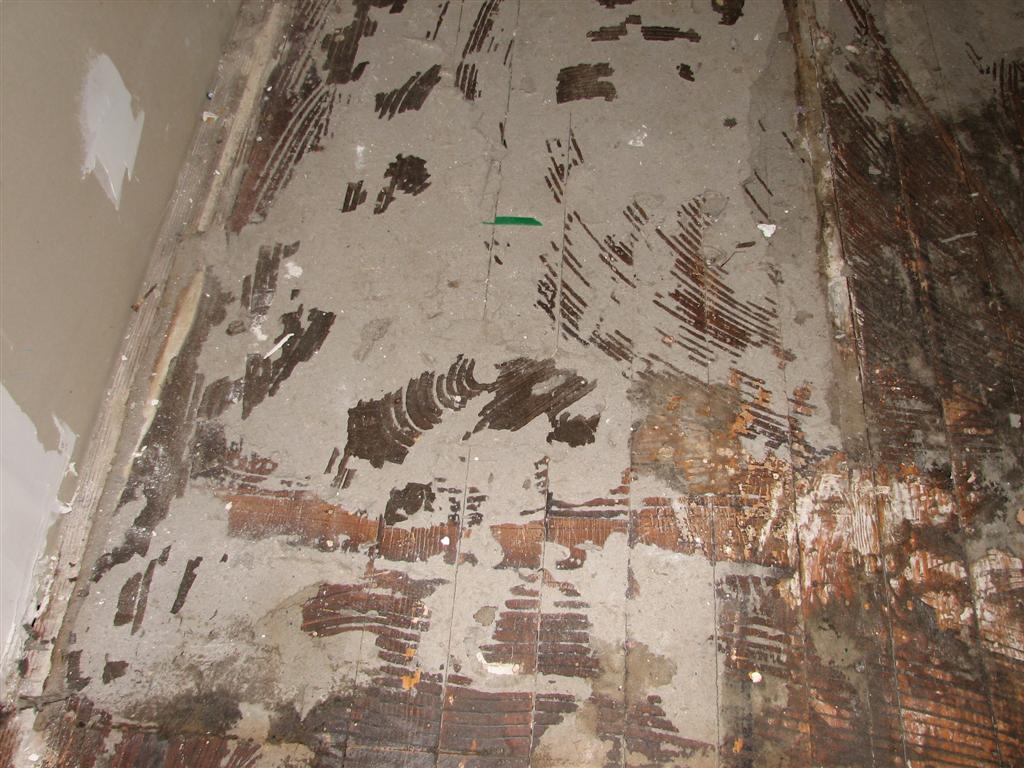
So that probably explains why the flooring we found under the carpet (the same forest green carpet that filled the house when I bought it) looked like this: 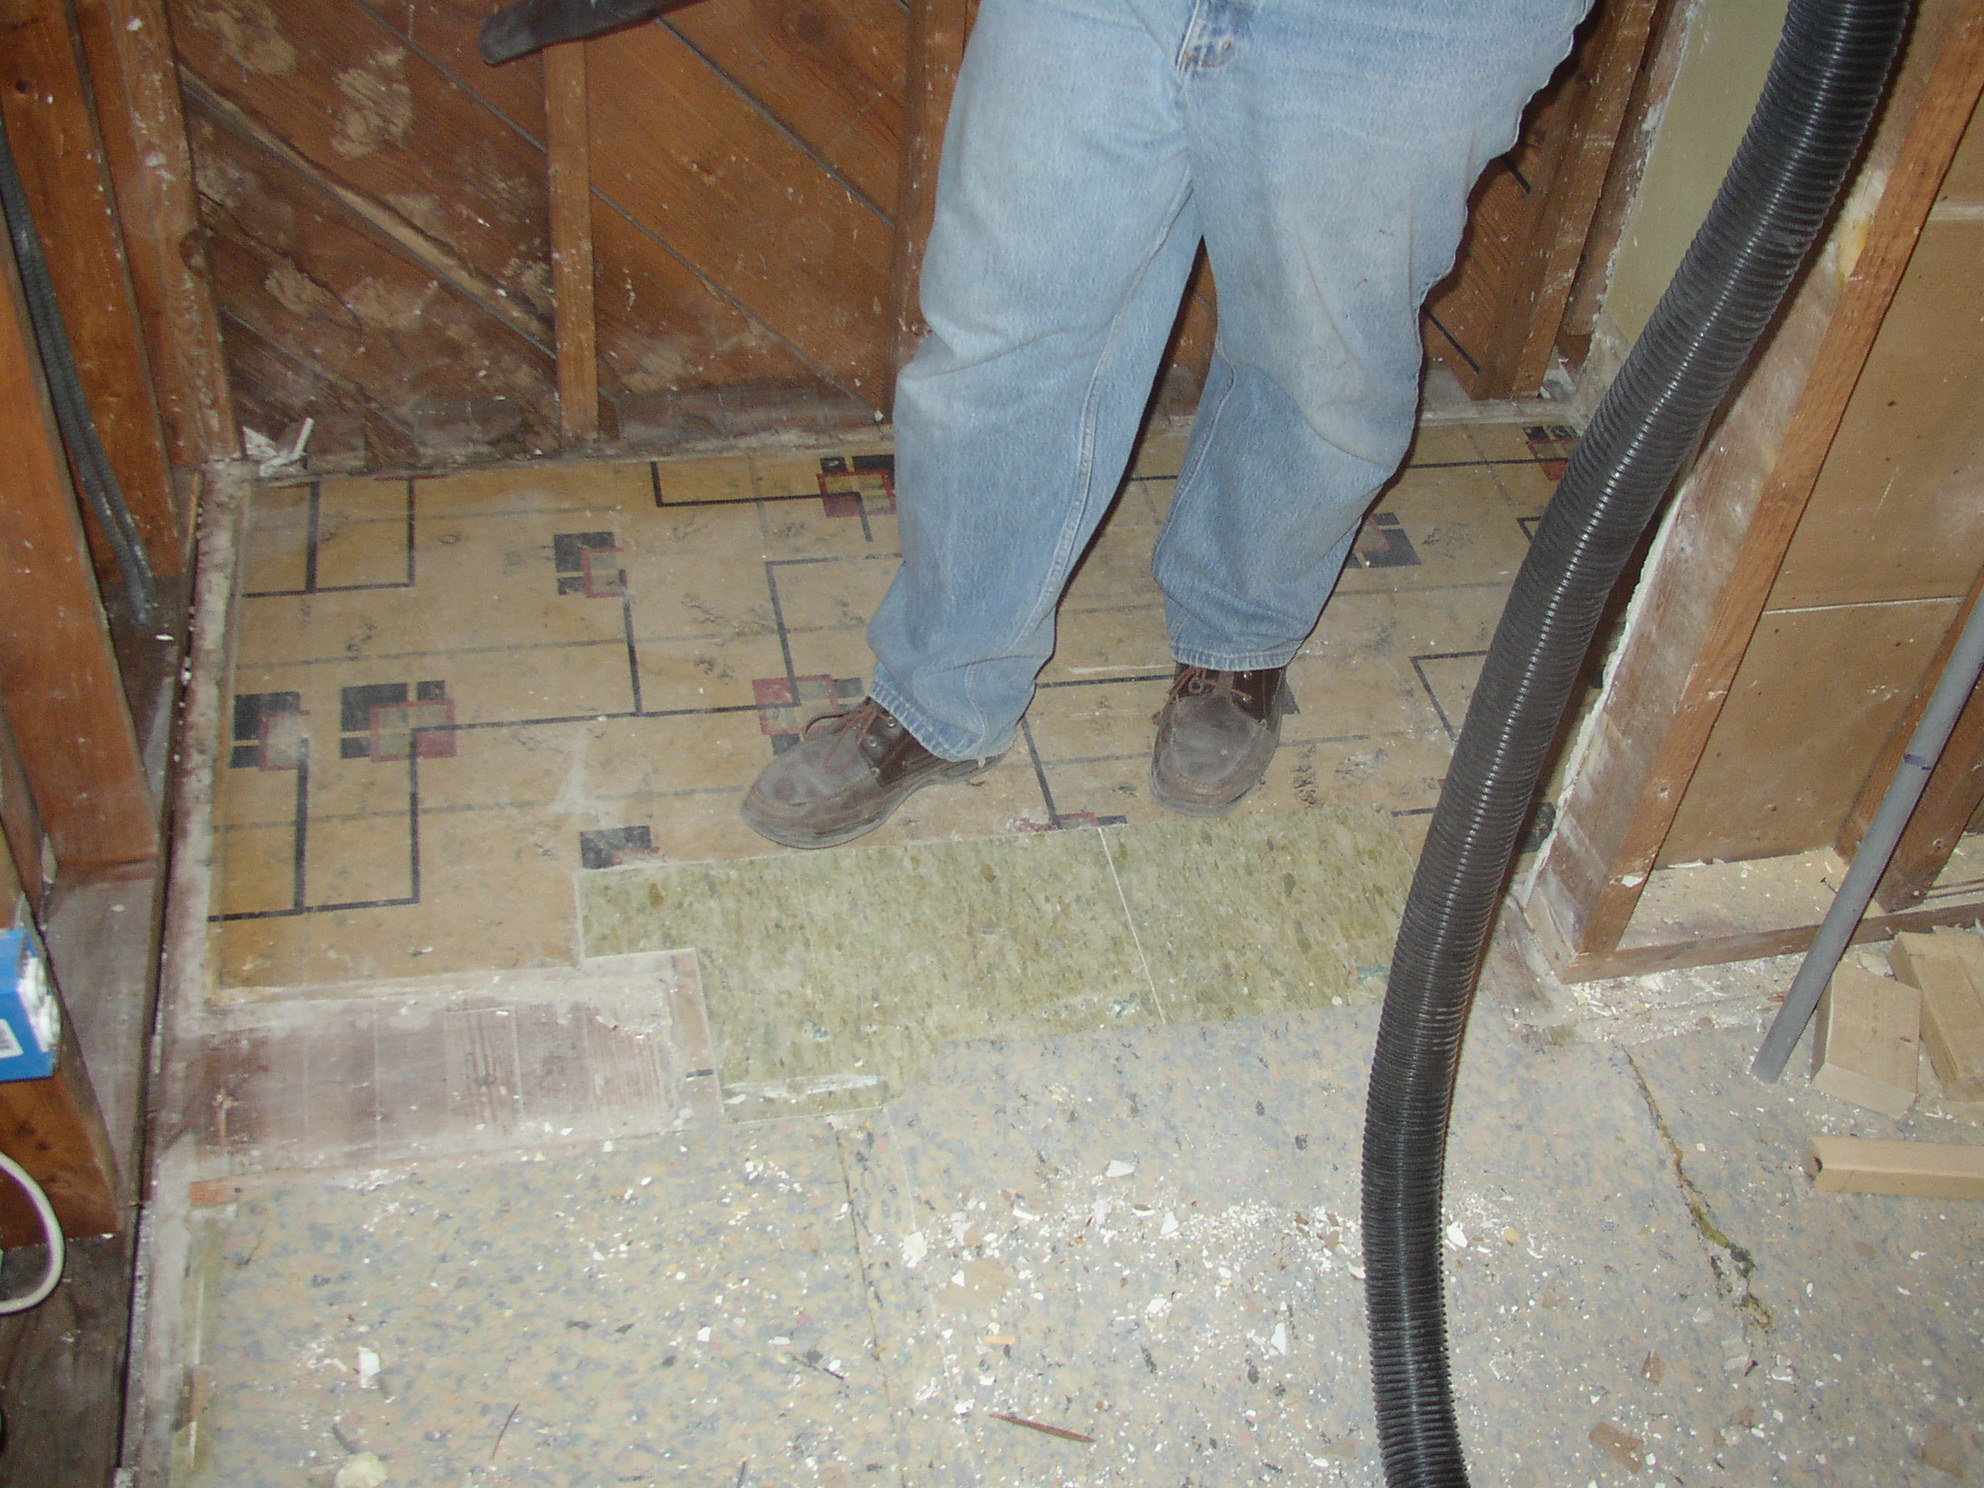
(Stop staring at my sexy legs!)
Well, of course, being the meticulous and conscientious DIYer that I am, and as a big fan of Mike Homes’ “Do It Right!” philosophy, I couldn’t just cover this floor up again. So, the work began:
And continued…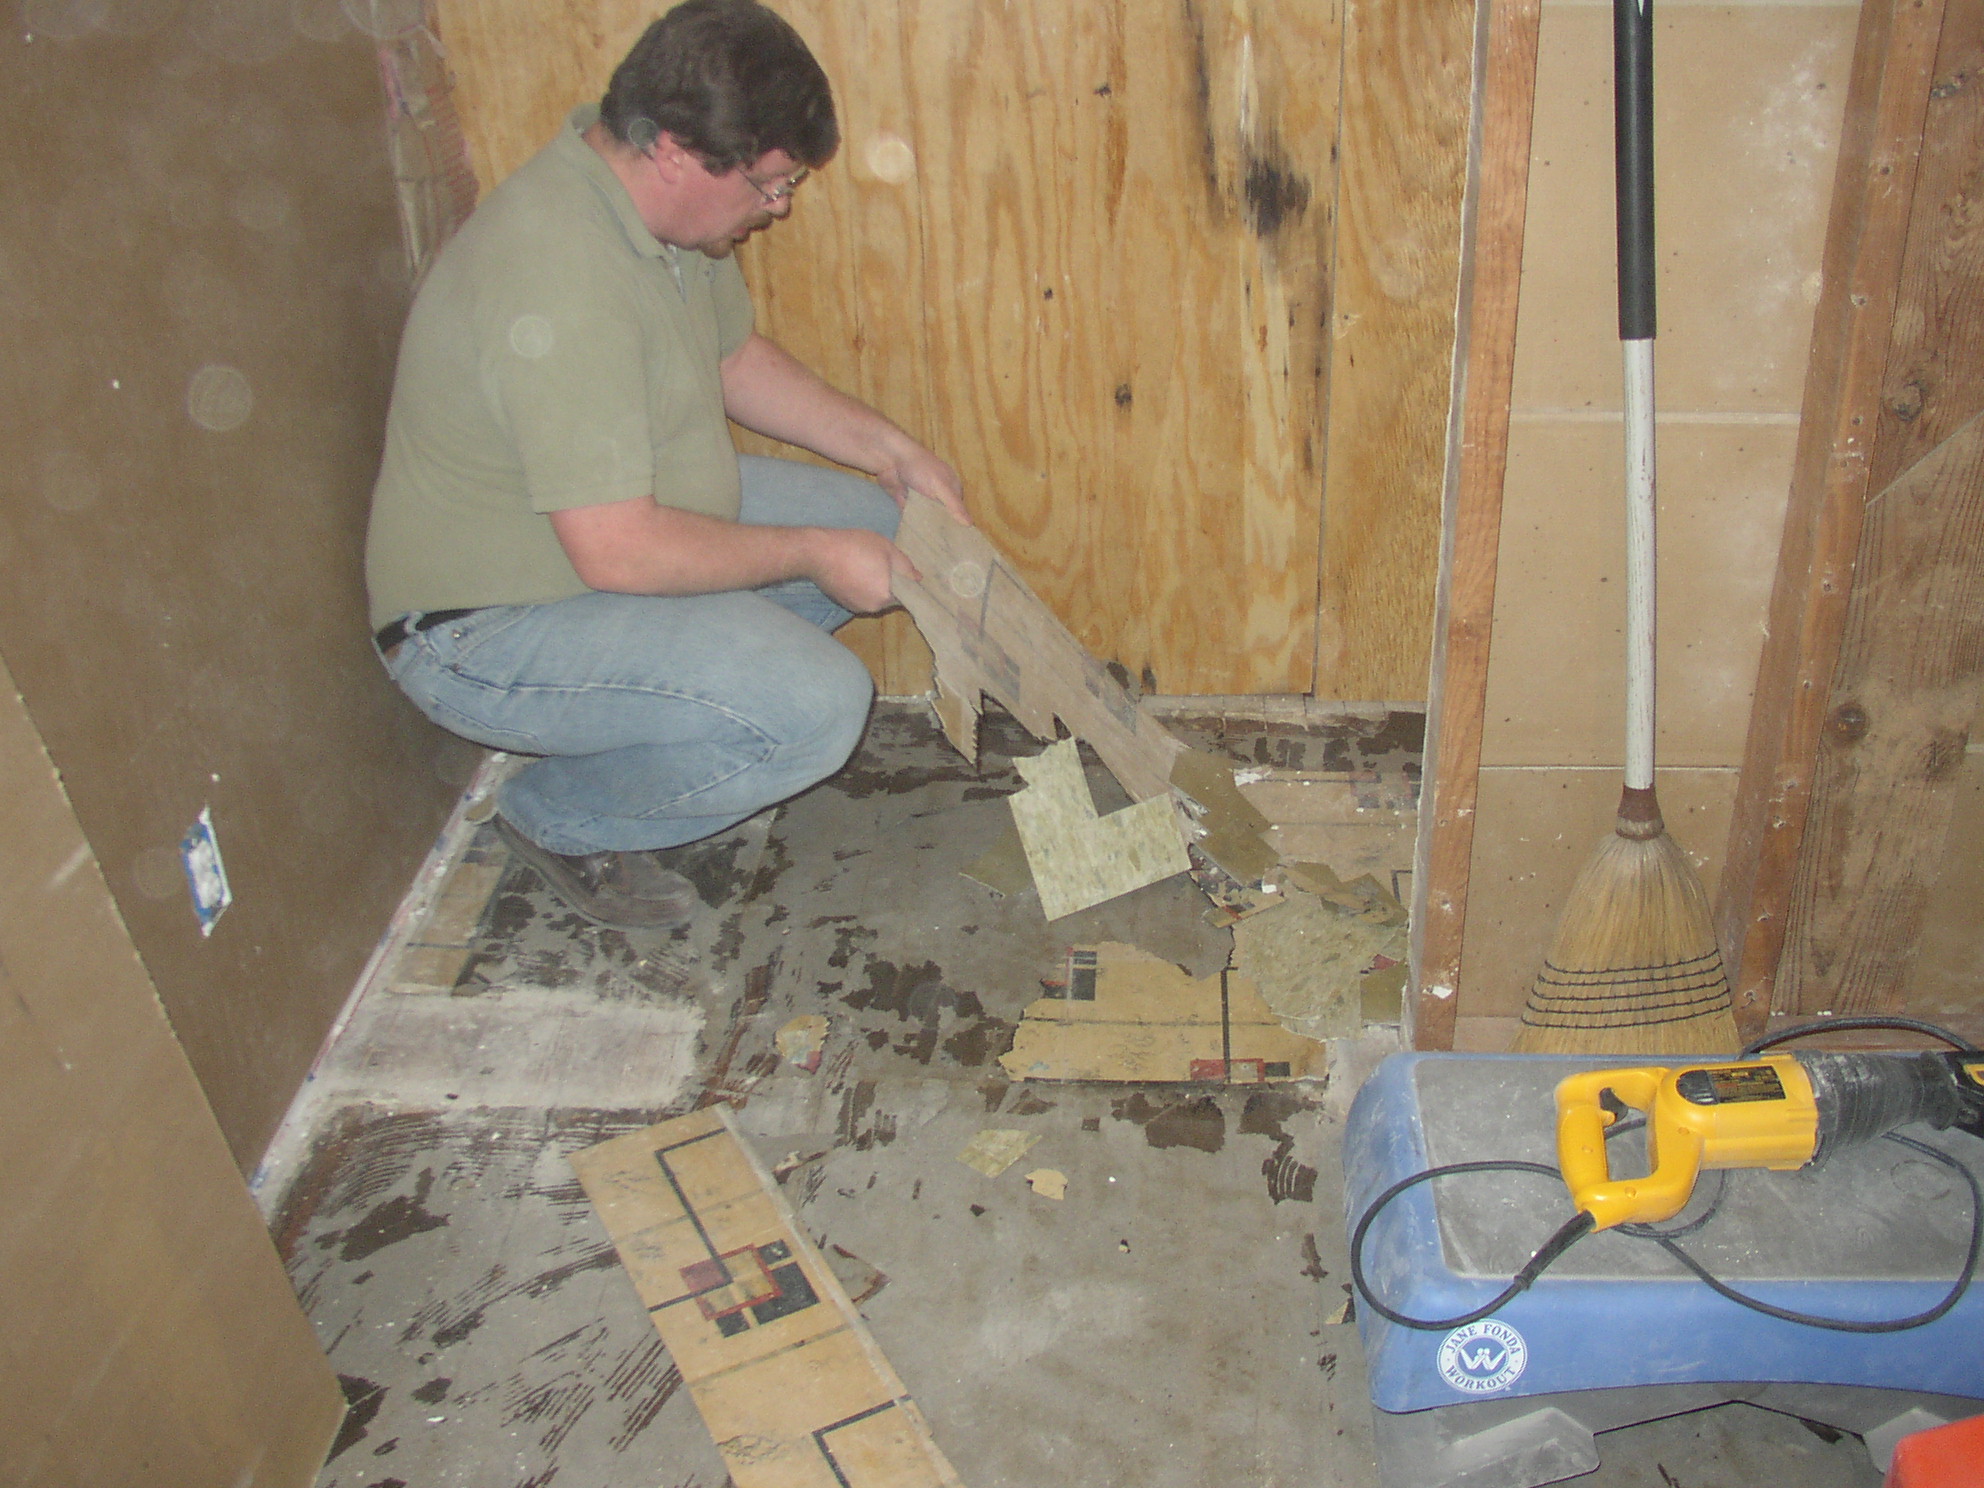
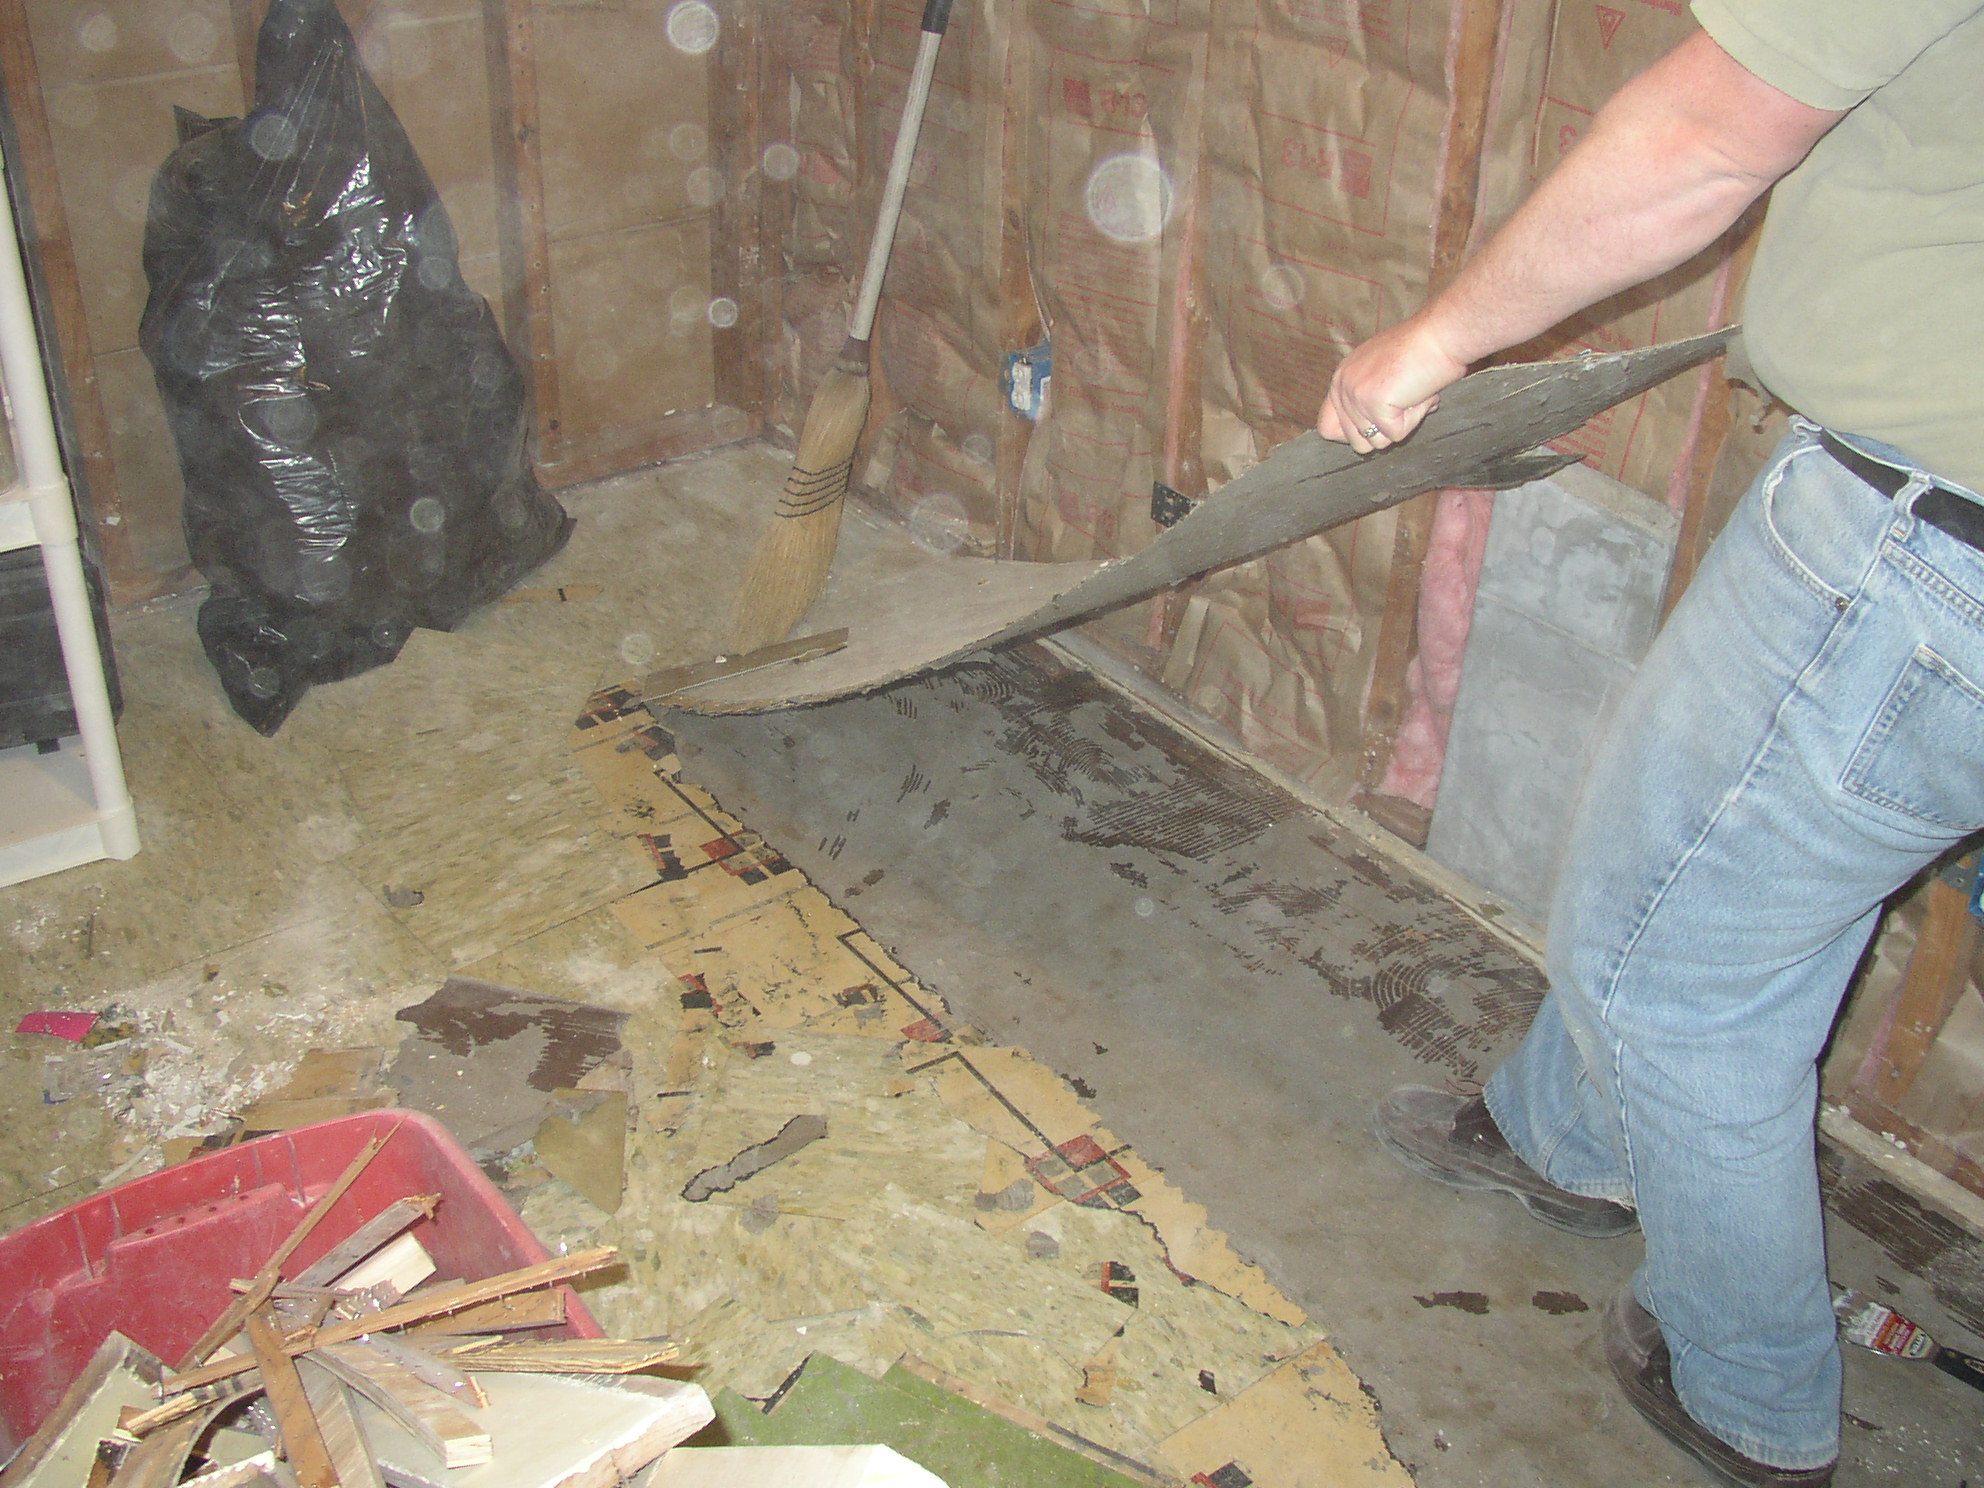
And boy was there a lot of mess – layer upon layer!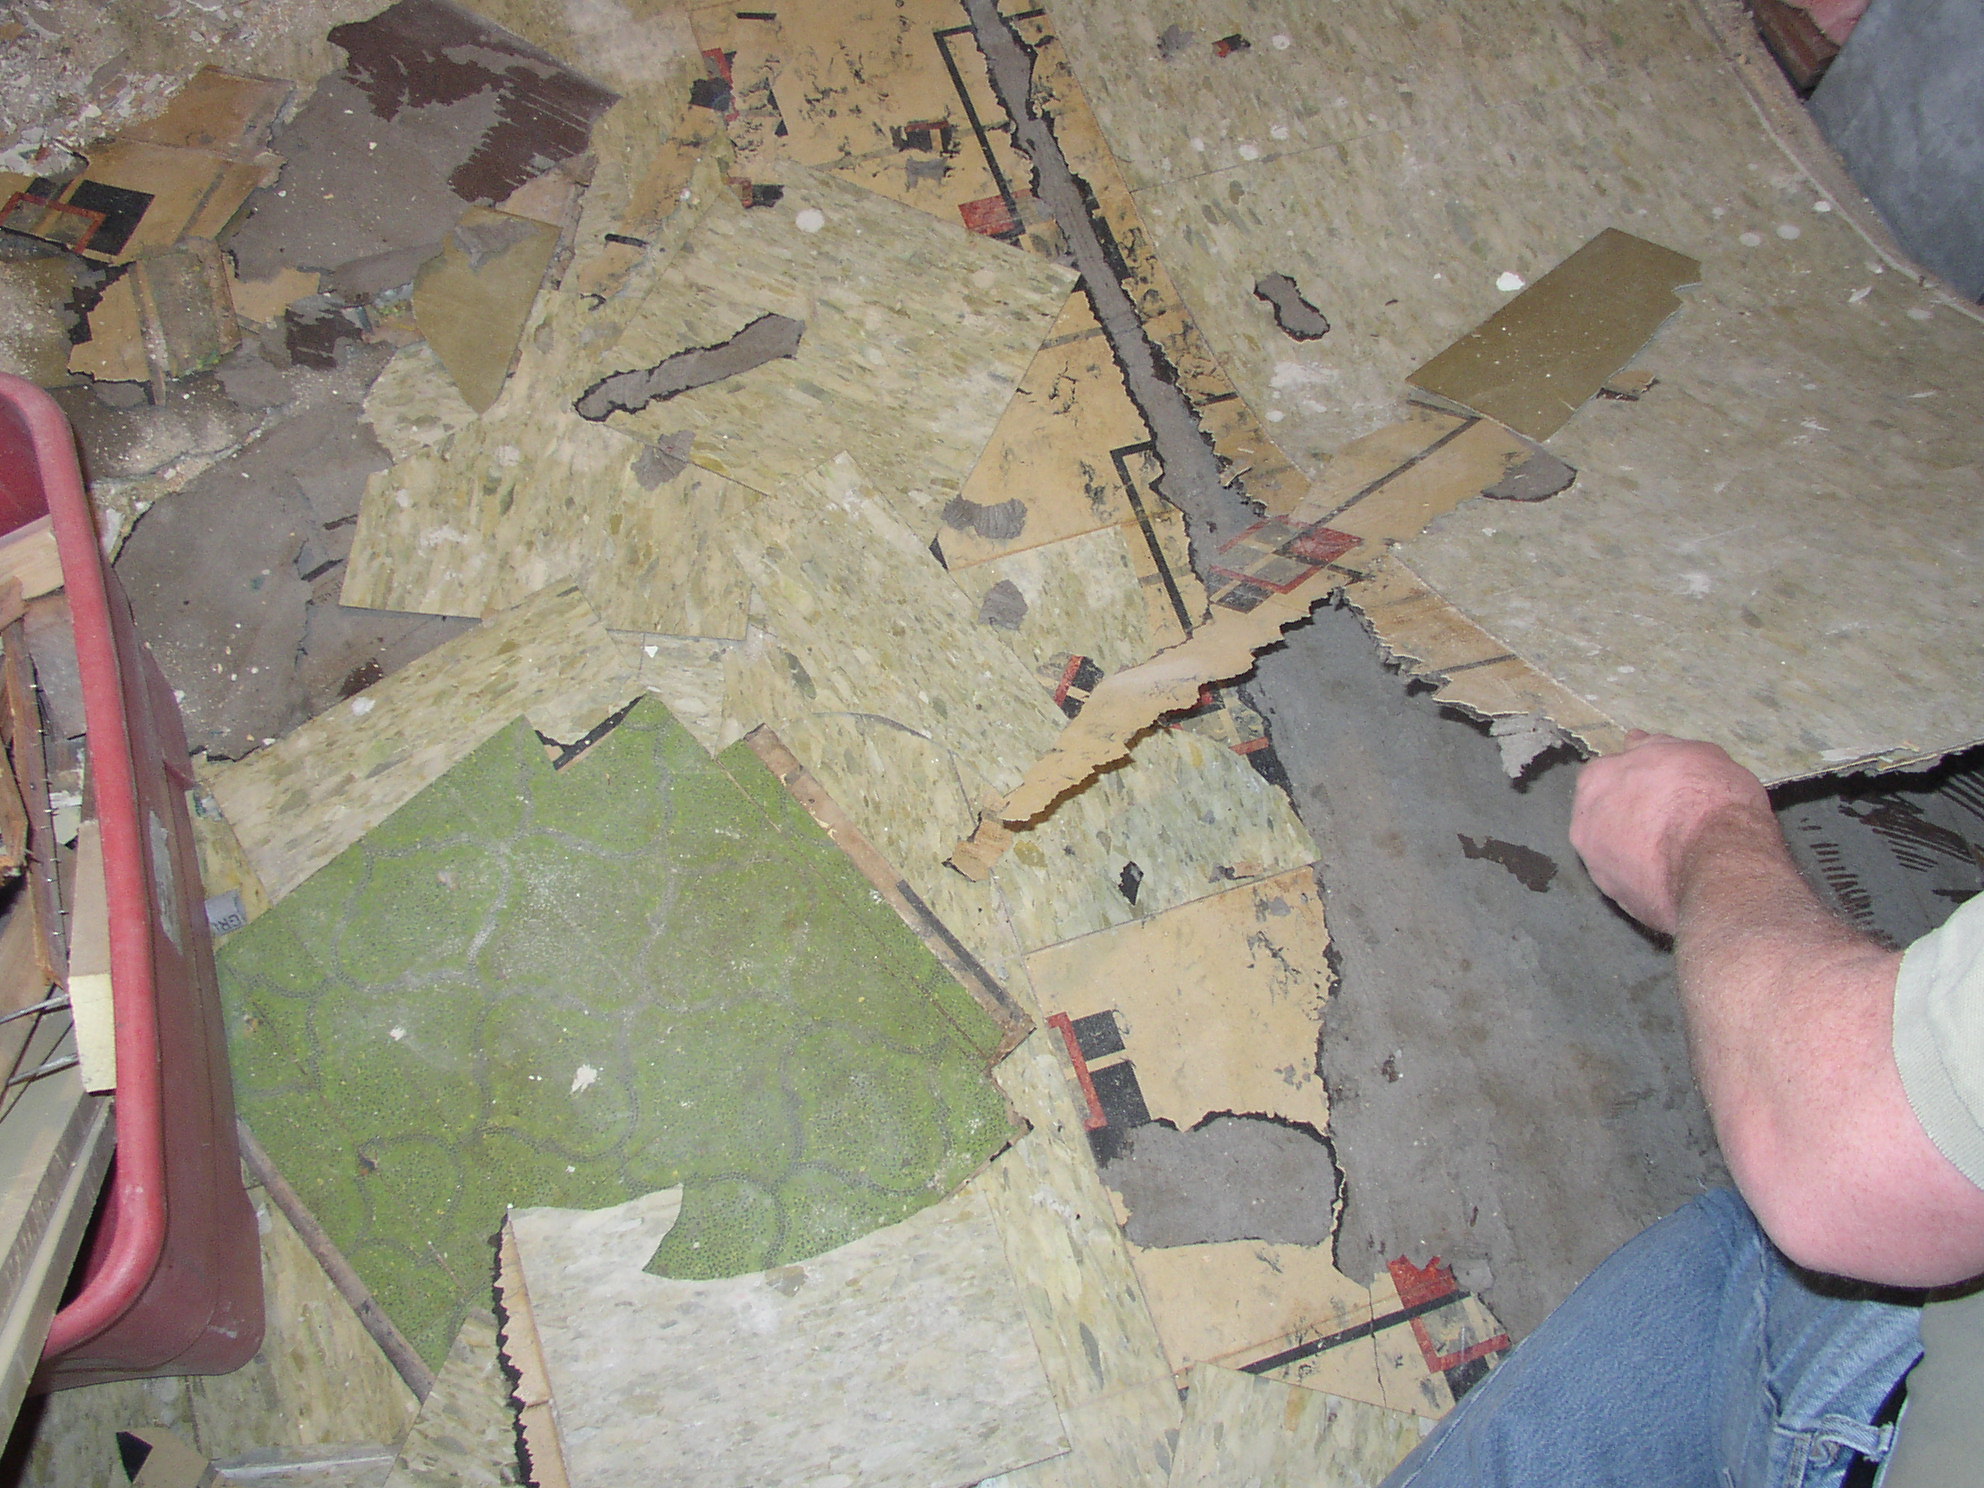
BUT – finally we got to the bottom of the pile, and this is what we found underneath… which wasn’t exactly heartening…
(Sorry, we didn’t take a pic of the whole floor after we pulled the layers – we were just too tired to think of it)
This was a real mess – the whole floor looked like this – a layer of some kind of rosin paper (I think) and adhesive. So now it was time for some serious elbow grease…
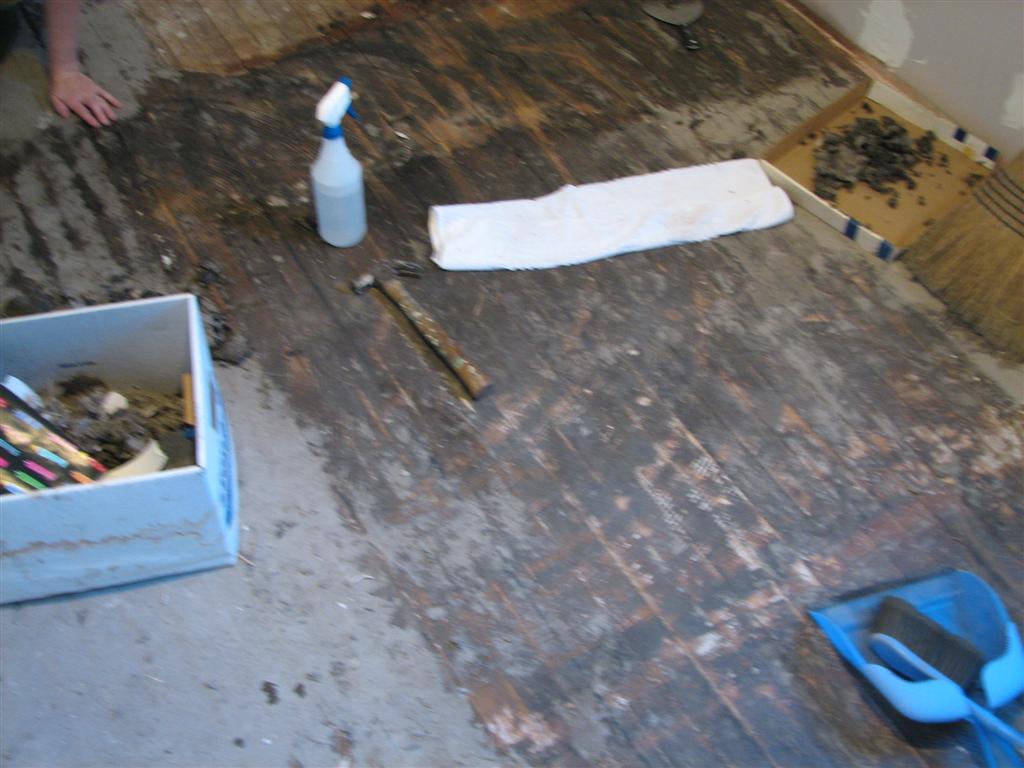
To remove the top layer of gunk, we used very simple tools – 3″ metal scrapers (not putty knives – as I’ve learned to my chagrin there’s a big difference) and spray bottles of water. We would soak a section of floor with the water, let it set in for a minute, and then apply the good old fashioned “wear your fingers to the bone” technique with the scrapers. (Often almost literally, since we banged the floor with our hands more than once).
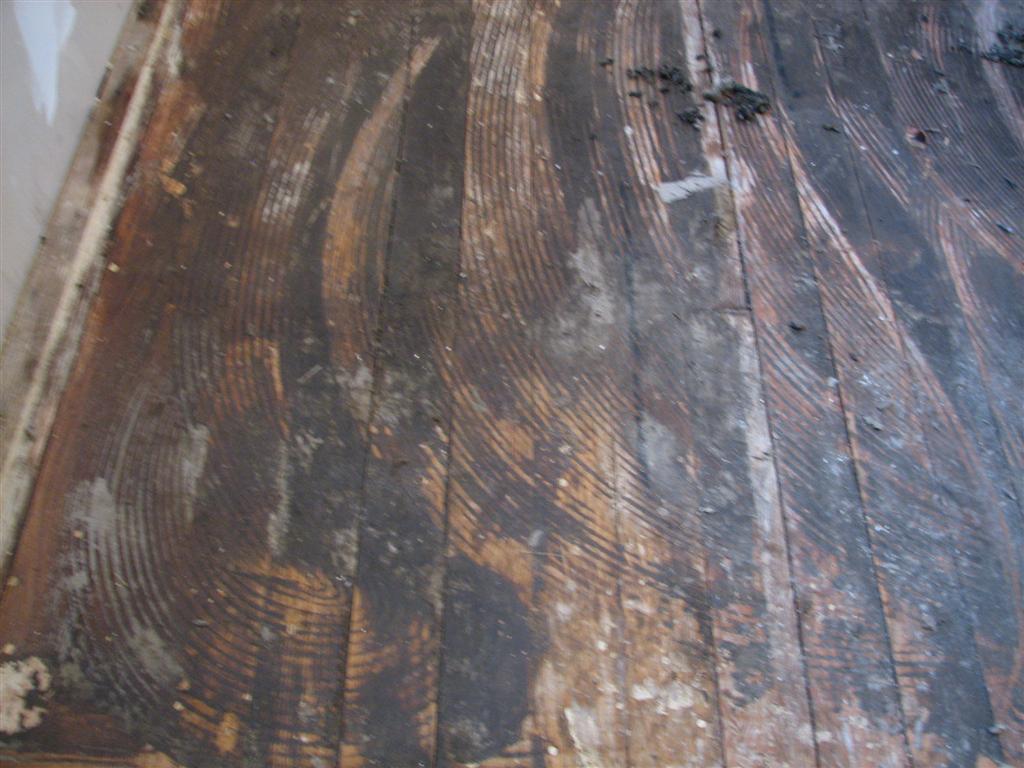
In the end we got the floor looking like this:

Now we were ready for the next step – the power sander! Now this is a step that, quite honestly, should not be undertaken by the faint at heart, or the inexperienced, when you really care about how the floor ends up looking. In our case, the floor was original 1940 hardwood and we figured a little damage was “character” (hey, at 67 years old, see if YOU look this good!). It’s a good thing we didn’t mind to much because learning how to handle a drum sander takes a bit of getting used to.
I didn’t get a picture of it, and it’s right in the corner so it’s not a BIG deal – but there is a place in the floor where I let the sander rest too long a couple of times, and so the surface ended up looking a bit like waves in the ocean. But still, ALL in all, it was a good experience.
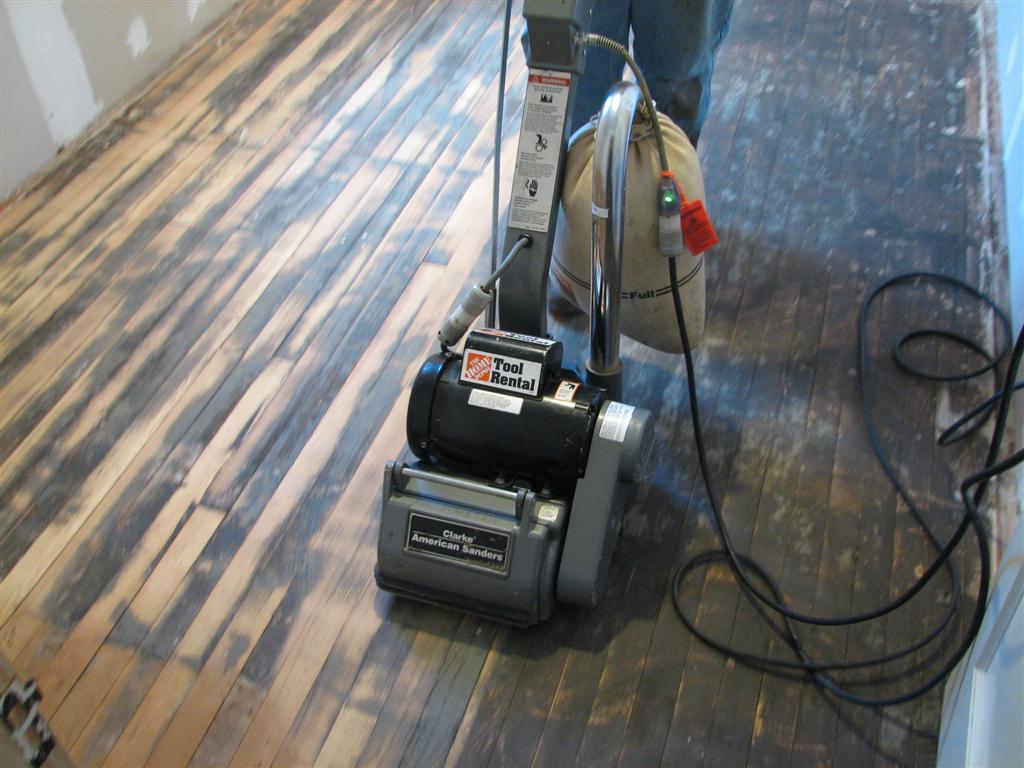
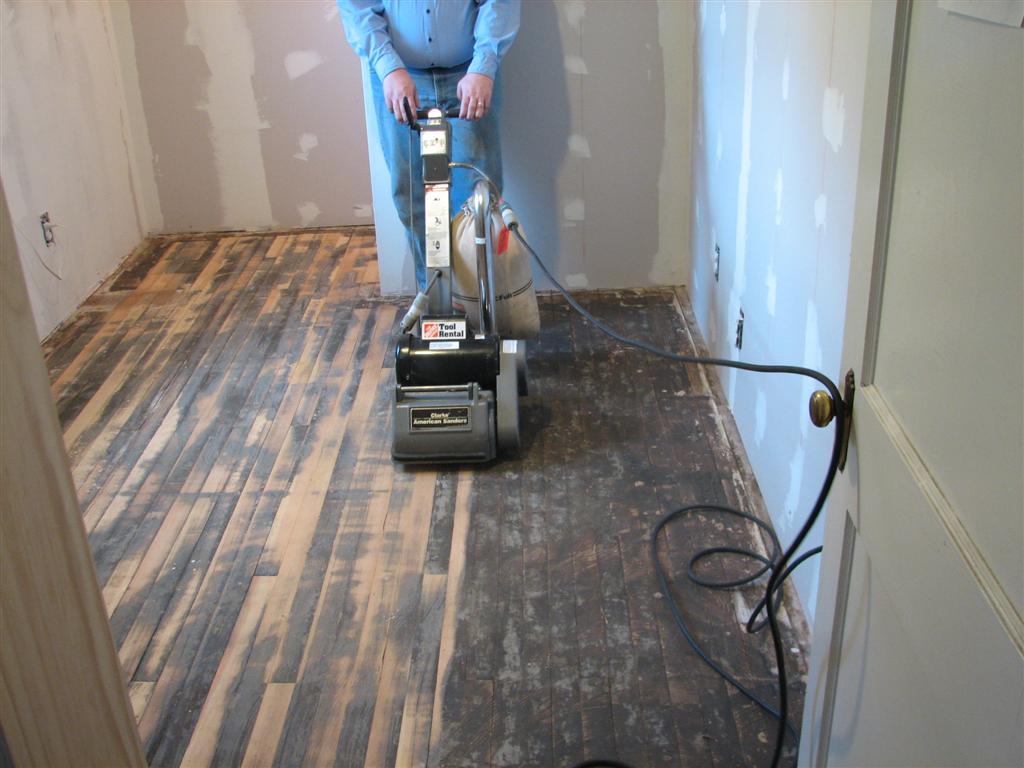
If you want to know, it’s the corner in the back right, not yet sanded here, that ended up wavy…
Even with the first pass, we could tell that the finished floor was going to look really good. With a couple more passes of 80 grit sand paper and cleaning up the edges, here is what we found under all that gunk!
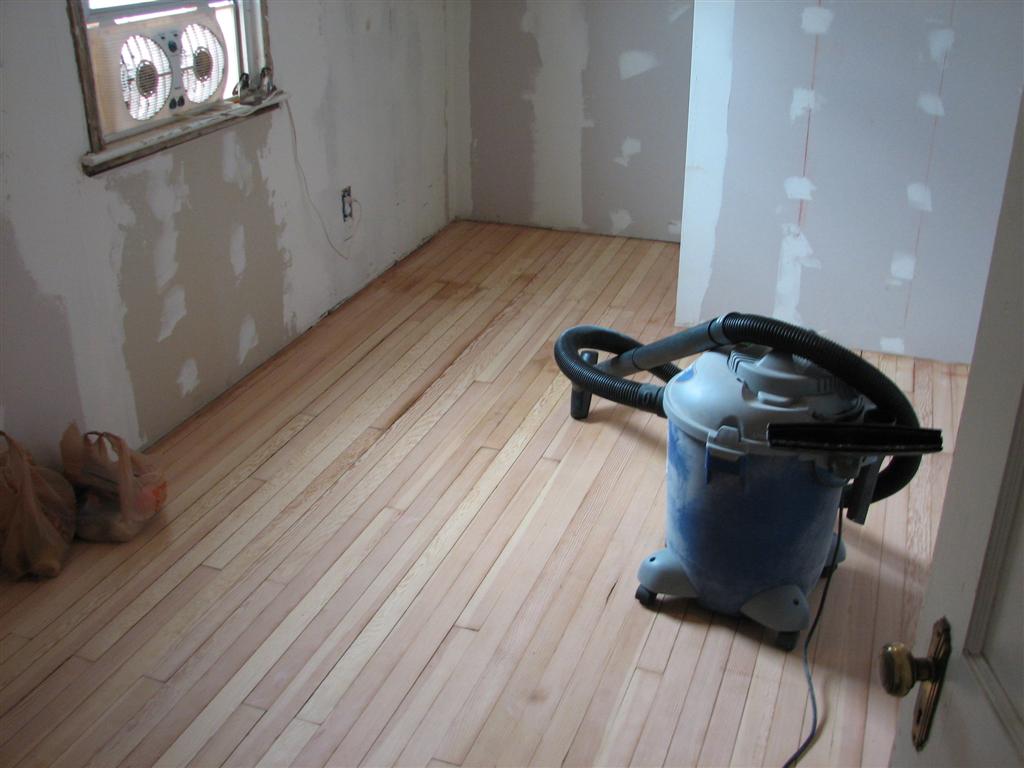
FYI the dark spot just past the window is from where we removed the closet wall and turned it into an alcove. Behind the back drywall is 3/4 plywood – we could mount a jungle gym against that wall if we wanted.. (instead the alcove is filled with Ikea modular shelving…)
See the ripple? Back right corner, past the shop-vac… sigh And no, the edge sanding wasn’t done yet at this point.
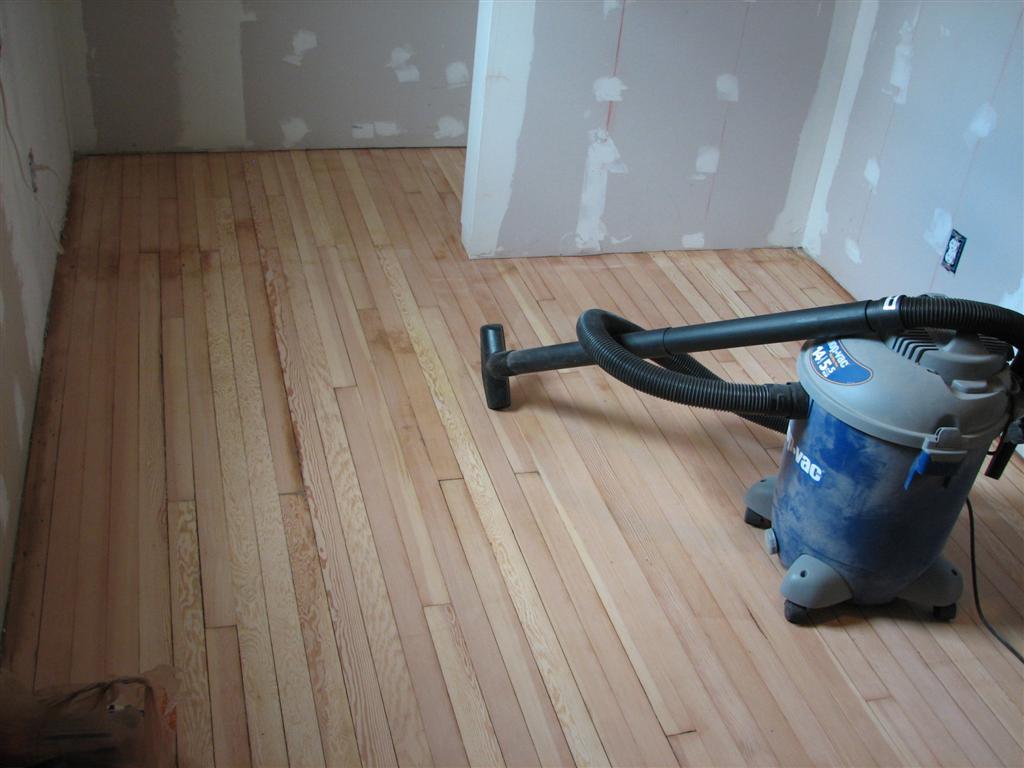
So sure, it’s got some water stains from where the old sink must have been (we know this because we found the water pipes and the old (unsealed) drain stack) but from 1940, covered in three layers of flooring and then carpet, and finally revealed and recovered in 2007, this floor looked pretty damn good!
So if you’ve got an old hardwood floor that’s ugly, maybe even a little damaged – don’t just rush to cover it up. With a little elbow grease (and some rented tools from Home Depot) you can end up with an absolutely beautiful floor again.
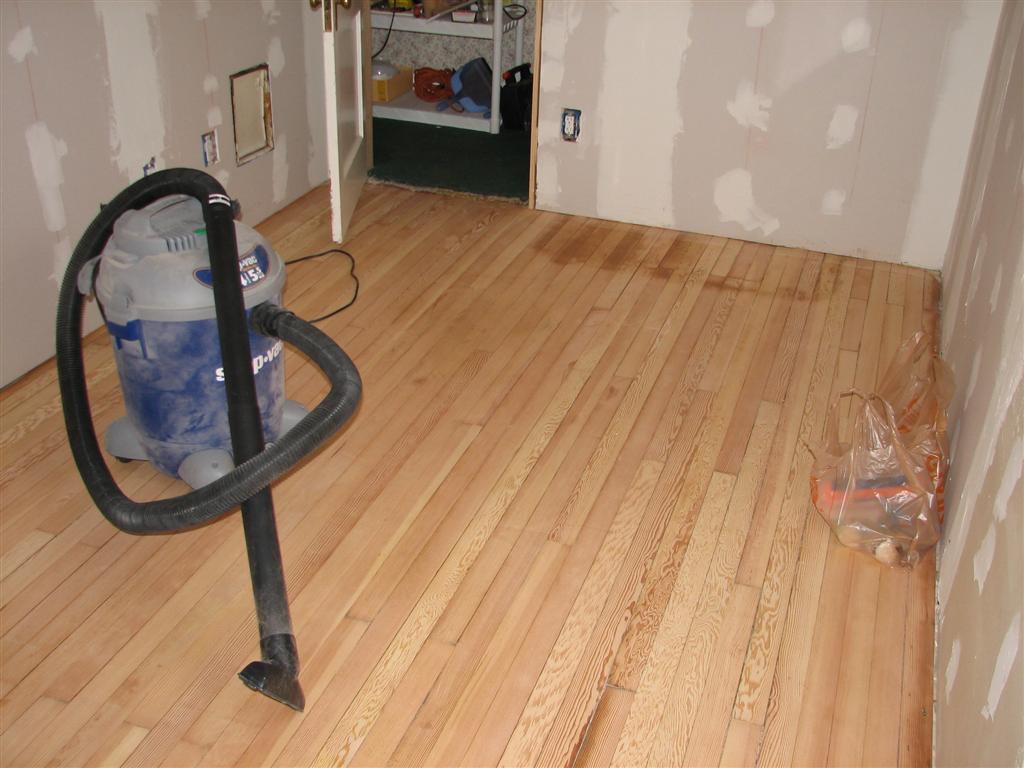
(Now please don’t be mad, but we never did take pictures of the final final product – we used a light natural stain and then applied two coats of polyurethane to finish – right now the office is a total mess so if I took a picture and showed it here, my wife would kill me. Sorry…)
Hammer safely!
G
DIY Nightmares – an Introduction to Home Owner Hell
It’s a bit daunting submitting the first blog post (that I know of, aside from test blogs) to DIY StackExchange – well, to any new blog, really, but especially to a community blog site that’s just getting off the ground. Not only are you setting the tone for your own blogs to come, but you’re also kind of doing it for the entire community, which in my case is a particularly precarious position to be in, since I’m kind of naturally a smart-ass (kind of is, in this case, not so much an understatement as it is a supreme understatement to end all understatements…).
So anyway – this is me. I’m known as Greebo – which for non Fantasy readers is a quasi-magical cat from Terry Pratchett’s “Discworld” series. “The Evil” comes from my reputation as an “evil overlord” on the various forums I’ve administered over the years. None of the previous paragraph (save my name) has any bearing on DIY projects except to tell you a bit about myself and clue you in to my writing style, which is something akin to rambling prose with a healthy dash of stream of consciousness thrown in.
I hail from the Baltimore, Maryland region which lies on the eastern coast of The United States of America (for our foreign readers) on the continent of North America (for our foreign readers who don’t know where the USA is), on the planet Earth (for our REALLY foreign readers). The climate is humid all the time except when it’s cold. I’m not a fan, but there you are, this is where I live.


If you want any more detail on where I live, you’ll have to buy me dinner. 🙂
So – a bit more about me and why I’m blogging on a DIY site. In addition to my own house, which was built in 1940 and pretty much needs to be gutted inside and out and top to bottom, my wife and I also manage three other properties (1 ours, 2 my mother in laws) which are rental properties. We end up needing to do a LOT of work on these properties at time, and financially its just more economical to do a lot of it ourselves.
To give you a real idea what my own house needs – the plumbing is galvanized, the electrical ISN’T knob and tube but IS the old armored/cable with fabric/cloth insulation that’s now so deteriorated that it’s all black (hot line? what’s a hot line?) and if you touch it, it crumbles, there’s no insulation in the walls (except in our office which we gutted a few years back), and our HVAC is really just HV and there’s no air return on the 2nd floor, so the AC does nothing up there, plus the AC died 2 days before Hurricane Irene came through.
So in fact, for a few months, this blog will be historical in nature, as I look over photos and see what projects were well enough documented to post about, because right now we’re in a major “save money” mode in order to upgrade the electrical panel to 200A and add a new HVAC system in the attic before late spring of 2012.
So to start, I thought I’d show you my basement. Here it is:
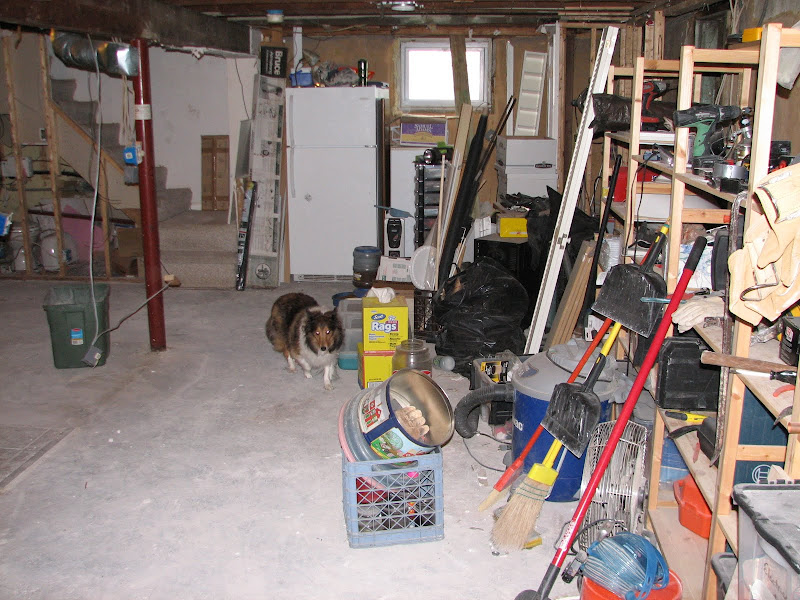
(Dog not included)
Bit of a mess, isn’t it?
Actually, it’s an improvement over what used to be there, but you don’t know me well enough yet to see that.
The goal in this basement is rather involved – because before we finish it, we really want to upgrade ALL the electrical (many non grounded outlets in my house) and the plumbing (galvanized, did I mention?) really needs replacing as well.
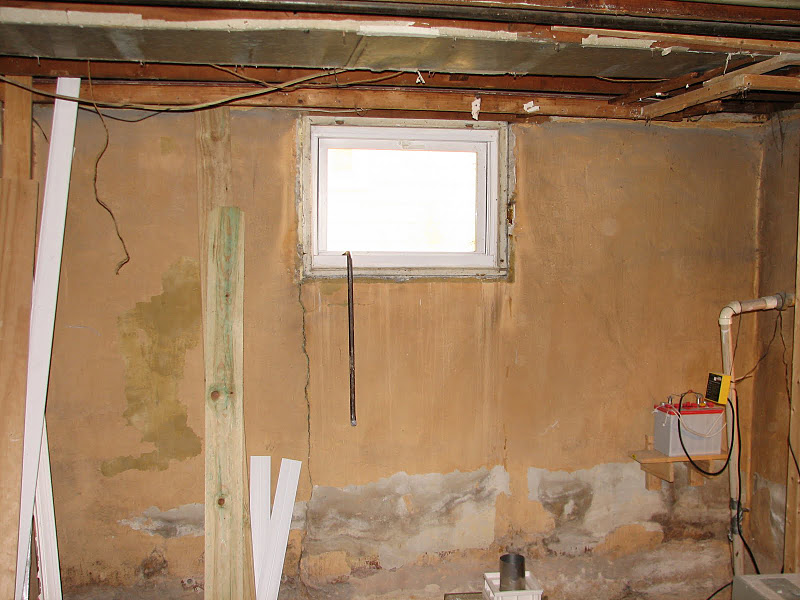
To give you an idea of what I’m facing, have a look at this wall:
The previous owners built that wall (and several others which are now gone). As you can see, there’s a washer fixture there – so you can guess that our washer and dryer are back there. What you probably can’t guess is what it looks like back there.
So here it is:

Yes. That’s a basement door behind the dryer. And no, those aren’t dirty undies, they’re curtains or something…
See, the previous owner was SO smart, they decided to turn this:
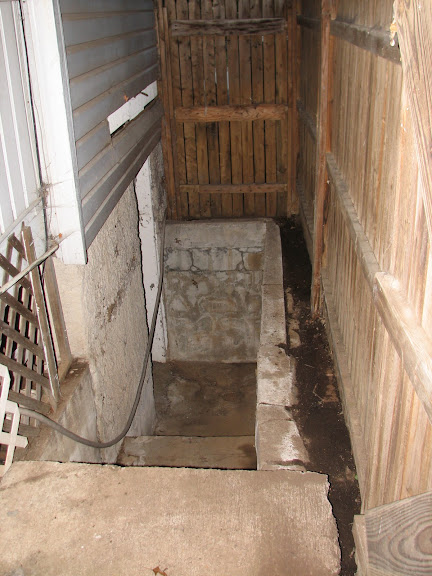
into this:
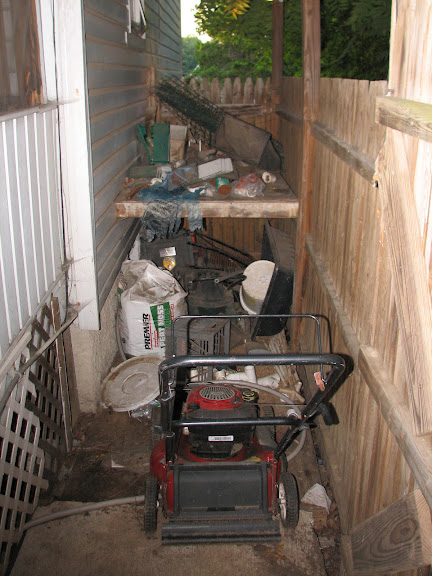
Brilliant – right? And yes, I know, I used it as storage too, but only until I built the new shed (pics not on this computer). Now it looks like this again:
But in addition to putting the w/d where they did, they also walled up the area they were in AFTER putting them in place. How do I know this? Because one day our washer died, and in order to remove it, I had to do this!
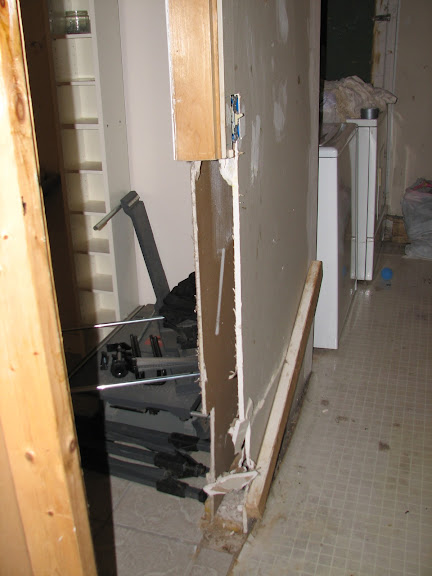
Yep – had to literally cut the door frame out to remove the washer and bring in the new one.
So, eventually we need to get through that door again, which means the w/d need to move, so the plan is to move them over under that window that you saw in the first picture of our basement. But then we have a lot of plans, and we have a lot of nightmares in this house – and this? This is just the teaser to get you interested. 😉
(Did I mention… evil?)
So – hopefully you’ll enjoy walking with me, through the past first, but eventually (once we have $$ for it) in the future as well, as we continue to explore and discover the hell that is our (my wife’s and I, not yours and my, obviously) home , and the steps we (my wife and I… ok you got it, good…) take to turn Hell into Heaven.
Hammer safely!
G
Home Improvement Blog on Google+
Home Improvement Blog on FaceBook
Bloggers Wanted
Latest Articles
Topics
- Electrical (8)
- Introductions (7)
- Plumbing (3)
- Projects (13)
- Repair (4)
- Safety (5)
- Tips and Tricks (5)
- Tool Review (5)
- Tools (6)
- Uncategorized (5)