Author Archive
Secrets of the Tape Measure
We’ve all seen it, and hopefully everyone has used one, but there are a few tricks up the sleeve of your ordinary tape measure. And since they usually don’t come with an instruction manual, here are a few pointers that I’ve picked up over the years.
Disclaimer: I’m American, so for all the normal people with metric tape measures, this will be of limited use.
Size Matters
To start, when you buy a tape measure, wider is better. Cheap tape measures will be narrow and will lose their shape after a few feet or so when extended. If you do a lot of measuring on your own, or need to be able to reach the ceiling without a ladder, then get at least a 1″ wide, if not a 1 1/4″ wide tape measure.
Don’t Trust the End
The end of the tape measure will have a metal hook to grab onto a board or butt into a wall. These ends can get bent over time, and it’s easy to fix that by using a pair of pliers. They are designed to be adjusted, but should you break off the tip, it’s probably time to get a new tape measure. This time, get the extra wide model. To avoid having to recalibrate all the time, don’t allow your tape measure to retract at full speed and smack the hook against the case. I’m in the habit of stopping the end against my finger instead of the case itself, which is a good incentive to slow down before you take your finger off.
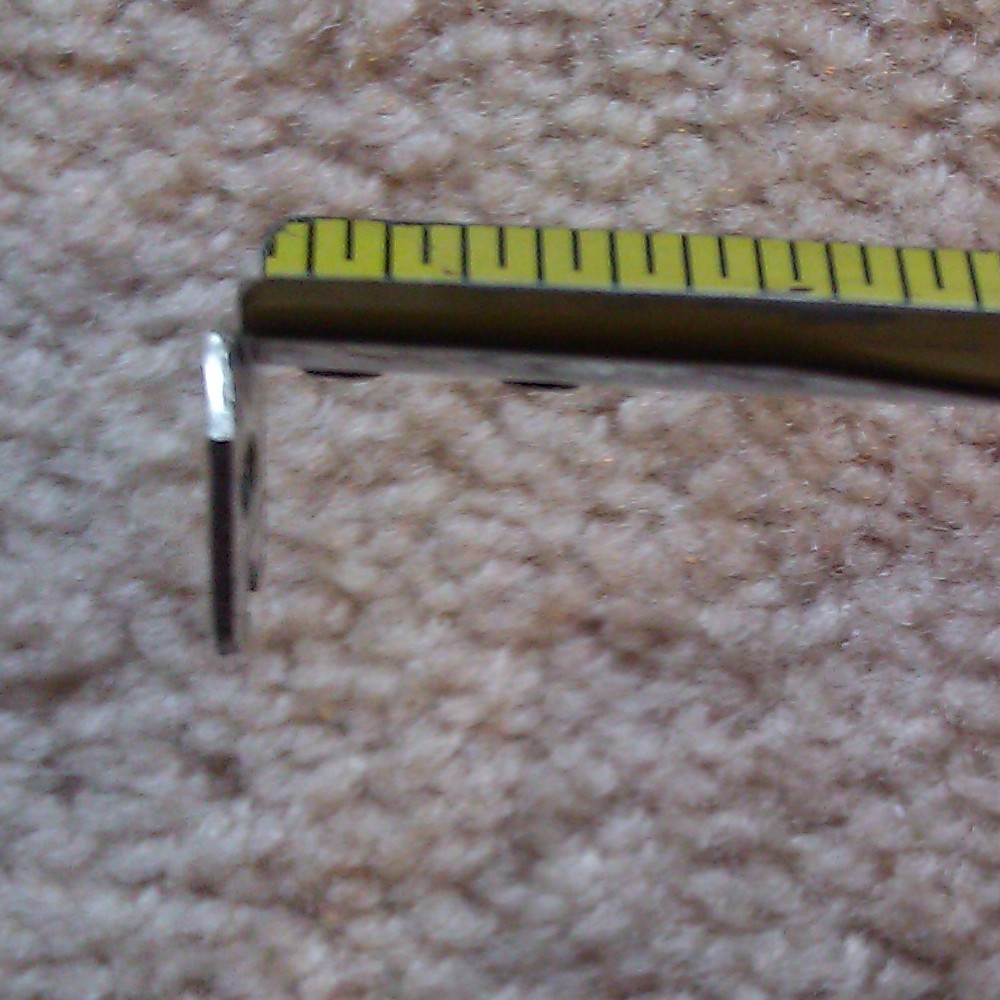
You can bend this to calibrate
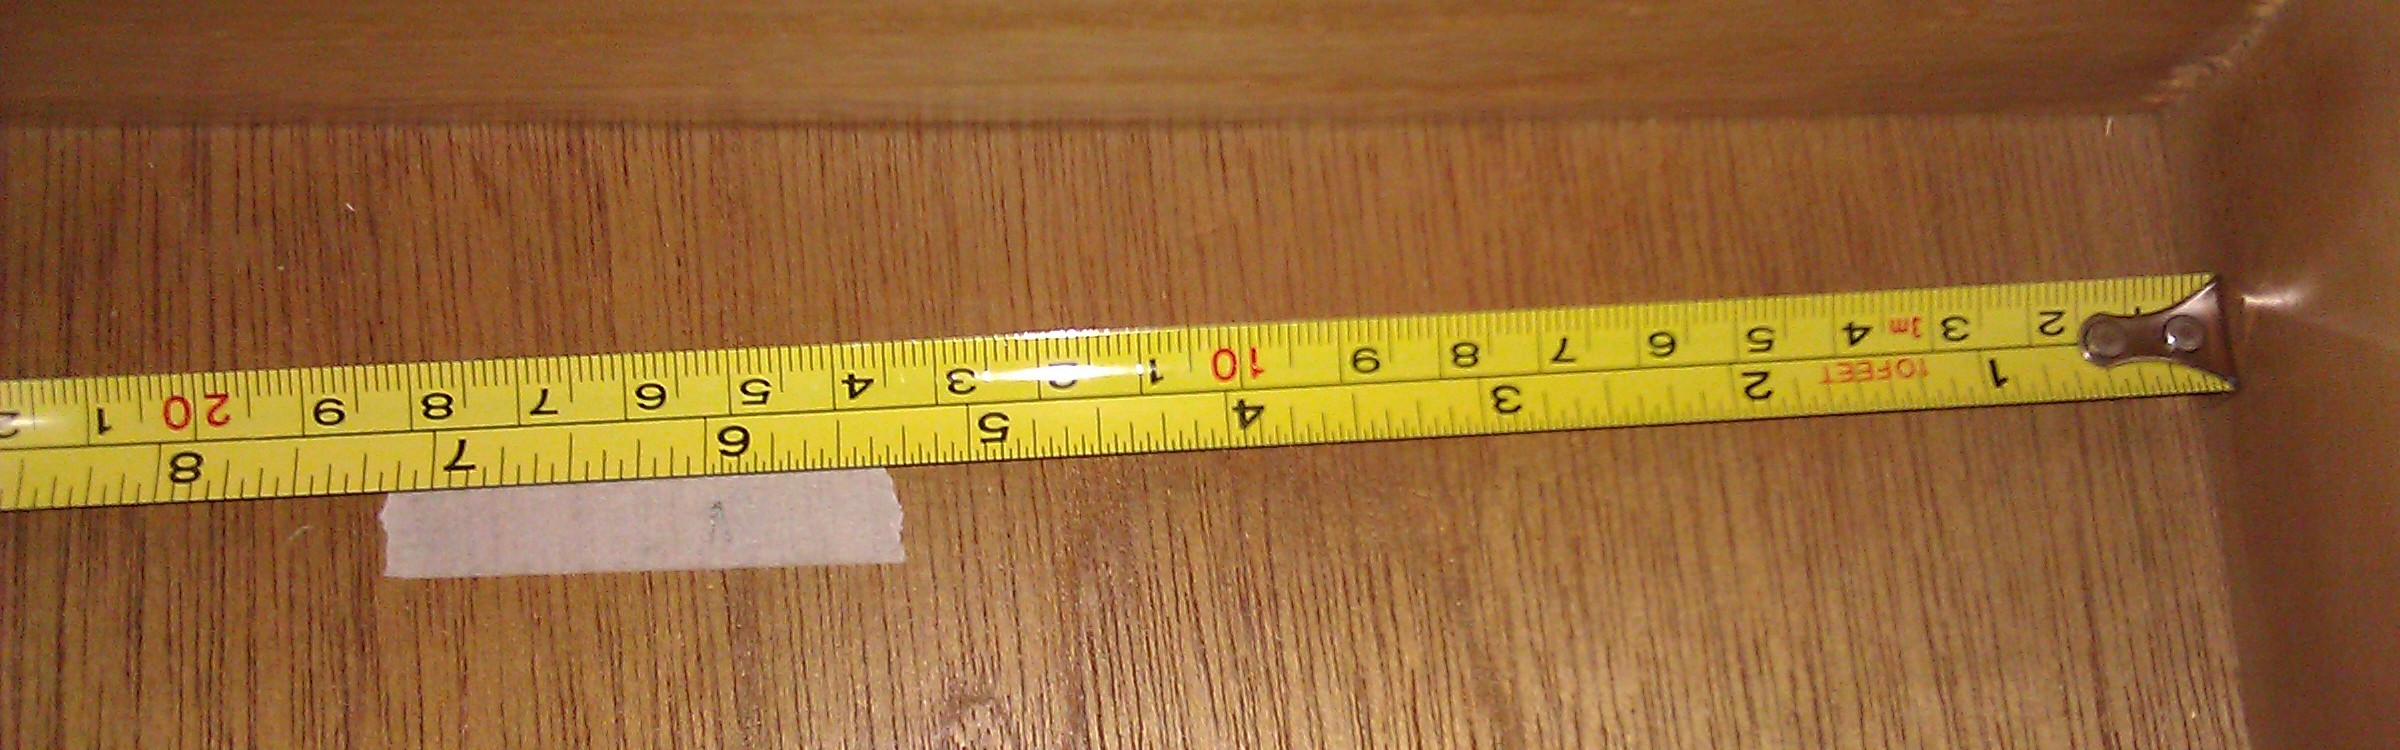
Burn an Inch
If you are transferring measurements between people using different tape measures for precision work, and you haven’t had time to calibrate each of the tapes, you should burn an inch, or more. This is also useful when you need to measure something that you can’t hook the tape measure onto. To burn an inch, you just line up one end on the 1″ mark (or 10″ or 1′ depending on your preference) and then measure the span from that point. Then be sure to subtract the extra from your measurement or be consistent and burn the same amount everywhere.
The Hook is Supposed to be Loose
I’ve seen many people that want to fix a bad tape measure because the end of it is loose. Well, it’s like that for a reason. When you butt the end of the tape against a wall for an inside measurement, that hook is compressing by the width of the hook itself. Or, conversely, when you hook it onto something for an outside measurement, it’s expanding by the width of the hook. So don’t get fancy and try to fix it, since then your tape would only work for one kind of measurement, at best.

Tab extended
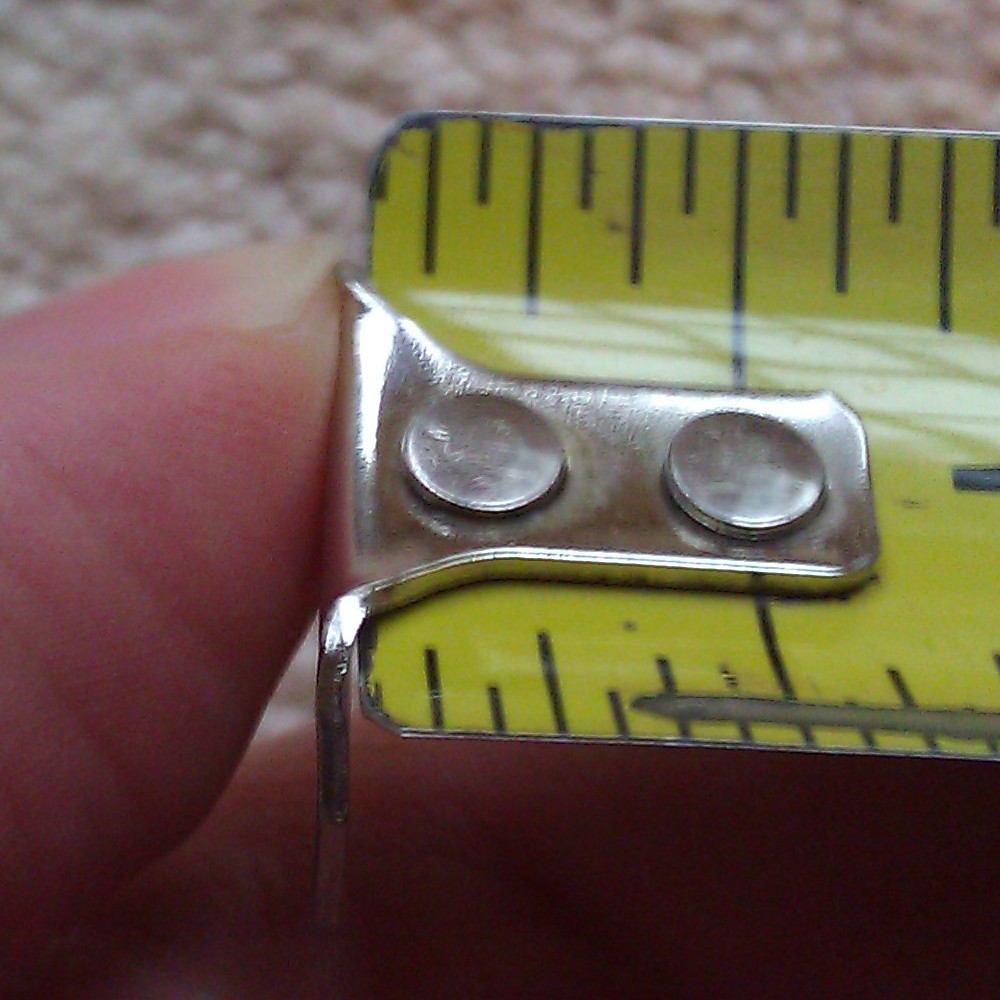
Tab compressed
What’s Up with the Studs and Diamonds
Ok ladies, get your minds out of the jewelry store. A lot of tape measures will have marks for measuring studs at 16″ and joists at 19.2″. Studs are typically spaced 16″ OC (that’s “on center” or from the center of one stud to the center of the next stud, not the gap between the studs). Note that the second stud in the wall is installed 16″ from the end of the wall, not from the center of the first stud. Also note that you may have additional studs at other points, like the opposite end of the wall, doors and windows, and where other walls intersect.

Studs are 16" OC
Lesser known than the studs is the 19.2″ joist measurement. Like studs, they are spaced with OC measurements. The reason for this odd 19.2″ measurement is similar to the reason for the 16″ stud measurement; it divides evenly into an 8′ span, which is typical for American building materials. A 4’x8′ piece of plywood or OSB will span 6 joists, and a 4’x8′ piece of drywall will span 7 studs (or 4 studs if you’re hanging vertically). If the math looks funny to you, make sure you remembered to count the first stud/joist at the 0″ mark.
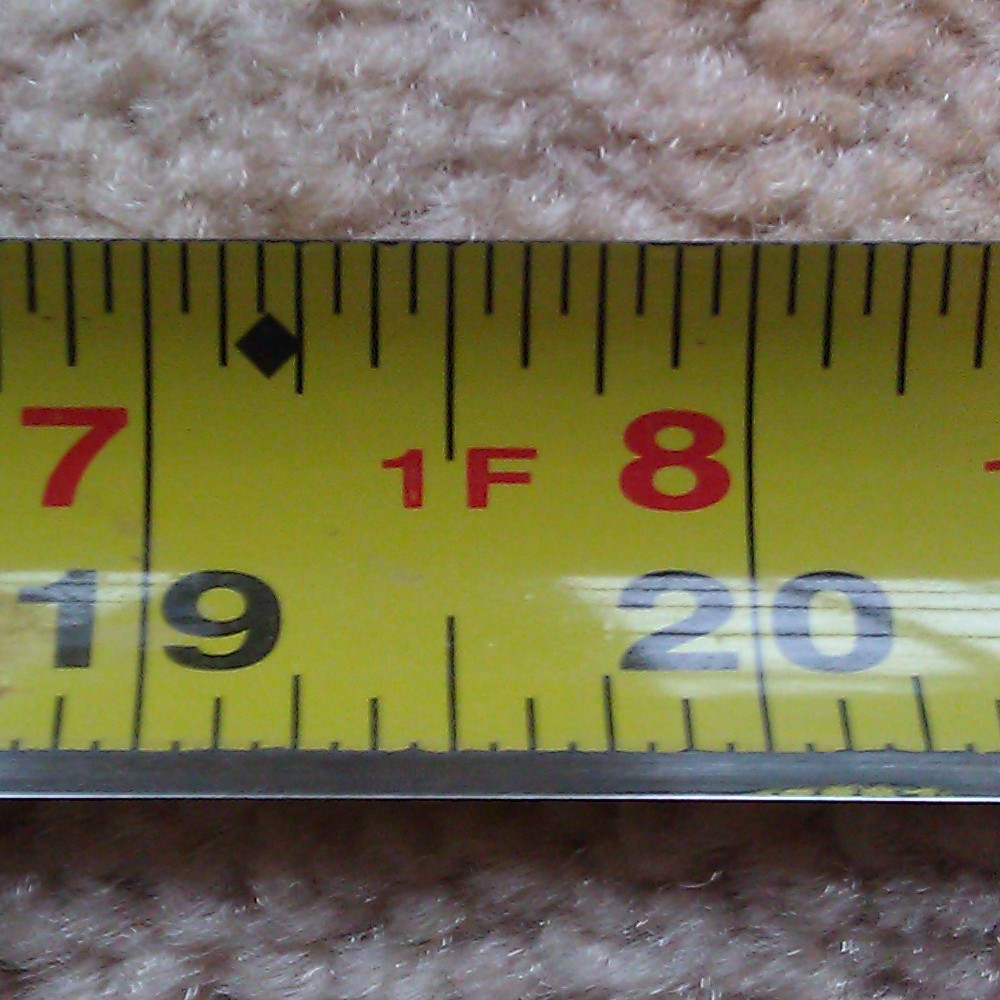
Joists are 19.2" OC (see the black diamond)
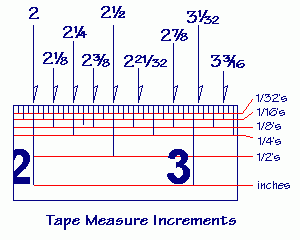
Half, Quarter, Oh Just Switch to Metric
Ok, I won’t get into why Americans don’t just switch to metric, it really would make things easier. But until we do, all those lines between the inch mark are measuring fractions of an inch. That longest line in the middle, that’s a half inch. The next longest line, between the half mark and the ends of the inch are the 1/4″ and 3/4″ marks. Between the 1/4″ and 1/2″ mark, the next longest would be the 3/8″ mark, since the 2/8″ is 1/4″ and the 4/8″ is 1/2″. And while we are imperial measurements, I tend to give out all my measurements in inches and fractions, but some people read off feet. Most measuring tapes will have the inches within a foot marked in red.
Marking Your Measurements
When you make a measurement, and especially when you mark it, make sure the side of the tape is flat against the surface where you mark it. The tape is naturally cupped out from the surface, so just give it a twist to get one edge flag against the surface. Unless you’re using a square, I’d suggest marking your measurement on a board with a V point since you can be sure that this point is correct. Without the second line and the point, someone could use the wrong end of your mark and cut the wrong length. Also, since carpenter pencils are not designed for accuracy, my rule is “If I mark it, I cut it” since I’m the one that knows where in the mark is the spot that needs to be cut. Some people can be accurate with their pencil marks and will draw their line to have the line itself cut off. See this answer for more details on how to mark your measurement for accurate cuts.
Reading Upside Down
When possible, try to keep your tape measure right side up. When that’s not possible, realize that the 59″ you just measured may have actually been 65″, so double check. This goes double when you are adding on fractions of an inch, if you’re upside down, maybe you should be subtracting them?
Accurate Inside Measurements
When you are measuring between two inside corners, you can’t get the tape all the way into the corner for a good measurement. Many people will bend the tape into the corner as tight as they can and then guess what’s left. The easier way is to take two inside measurements. On one side, measure out a few inches and make a mark. Then measure from your mark to the other side and add the two measurements together.
Measure 6" from the right side and make a mark (yes, the tape is upside down)

And then measure from the left side to your mark
So the result is adding 6″ to 7 9/16″ which would be 13 9/16″ wide.
That’s All I Got
Do you have your own tape measure tips? Leave a comment below.

Learning from Habitat
Back in 2001, I entered the life of home ownership (wow, has it really been that long). While I had helped around the house while growing up, my entire tool set consisted of a small power drill, flashlight, and a tool box with a hammer, some screw drivers, and a few other odds and ends.
Knowing that I was over my head, and that every contractor around would try to overcharge for the simplest things, I figured I’d learn by doing. And rather than doing things to my own place, it seemed a lot easier to learn on someone else’s place, which is how I came to work with my local Habitat for Humanity chapter. I figured I’d learn a bit from them while giving back to the community and then I’d tackle all the projects around my own home, but Habitat quickly turned into a habit.
Since starting with them, I’ve been involved with 45 new homes and one renovation. Of the new homes, 9 were town houses that were almost done when I started, 3 single family, and thee condominium projects resulted in the bulk of the homes. I’ve seen the projects from top to bottom. Planting sod, drilling for earthquake bolts into the foundation, and painting the yellow lines for the fire lanes (apparently the big box stores sell fire lane yellow) would round out the bottom. Installing insulation in the attic and standing on a step ladder that’s on top of 3 stories of scaffolding to put the last piece of siding on the top of the gable would be the highlights of the highs. From beginning to end, I’ve seen the first walls raised to the last bit of touch up paint applied.
The experience has been unbelievably helpful for understanding what I can and can’t do on my own home. It changes how I see the walls from “that’s a nice shade of paint” to “it looks like they bumped this out to run an air return here.” In other words, it’s trained me to see the structure, to understand where the utilities are run, to know what walls are load bearing, and to understand all the layers of an outside wall. And since I’ve been there so many years, it’s also taught me how to pass this knowledge on to others quickly so we can get a fresh set of volunteers productive when they may have never swung a hammer before in their life.
There are, however, some things that this experience hasn’t taught me. We outsource the pouring of the foundation, all of the utility work (electrical, plumbing, hvac, and wiring), and we bring in the pros for the entire roof. A few detail steps are also outsourced, like mudding the drywall and installing carpeting, since they are easy to get wrong and the mistakes are very visible. For safety, we’ve also cut back on having volunteers high up on ladders. We have a professional handling the permits and dealing with the contractors. And finally, there’s a big difference from building a home vs maintaining a home. So despite how much I’ve learned from Habitat, there’s a significant amount that I’ve had to learn elsewhere, especially from Stack Exchange.
For now, I’ll leave you with a quick progression of one of our builds:


Home Improvement Blog on Google+
Home Improvement Blog on FaceBook
Bloggers Wanted
Latest Articles
Topics
- Electrical (8)
- Introductions (7)
- Plumbing (3)
- Projects (13)
- Repair (4)
- Safety (5)
- Tips and Tricks (5)
- Tool Review (5)
- Tools (6)
- Uncategorized (5)