Archive for September, 2012
Installing Laminate/Engineered wood Floating Floors
Recently my wife and I, being sick of Lego all over our living room, decided that it was time to finish our basement. I considered doing it myself, but really didn’t have the time, or the vehicle to haul materials in. We decided to hire a contractor (and got very lucky with a personal recommendation) to provide us with ready-to-paint drywall, and to come back later for trim and drop ceiling.
After installing the drywall and rough-ins, the contractor went off to Bahamas for a week’s pre-arranged vacation (with my deposit I presume), leaving me to install the flooring. I was left with a painted concrete floor (22′ x 15′), and lots of mopping to get the drywall mud and dust off of it.
Before he left, She Who Makes the Design Decisions and I went shopping for the flooring materials.
Our options:
Hardwood
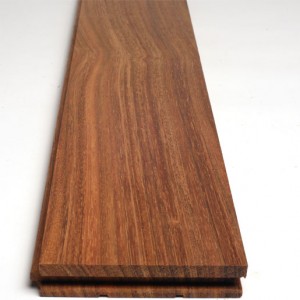
Hardwood Flooring is a very attractive and durable solution. Typically, a board is 3/4″ thick, and comes in random lengths from 18″ to 6 or 7′. It’s a tongue and groove board, which needs to be nailed down to the sub-floor at an angle through the tongue. A special nailing tool is used to do this. However, we’re over concrete in this installation, and don’t want to go through the cost and effort of laying a 3/4″ plywood sub-floor or, more properly, dricore. So hardwood is out of the picture.
Engineered Wood
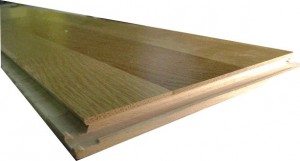
There are two basic types of engineered wood. Nail/Glue down, which is simply three plies of wood, staggered to make a tongue and groove shape like hardwood, and a final finish layer of actual hardwood. This is installed like hardwood, or it can be glued along the tongues to make a floating floor.
Alternatively, there is click-lock flooring, (pictured above) which requires no glue or nails. Typically, the base layers will be plywood or HDF (High Density Fibreboard – Think sawdust and glue pressed into a board), with a 3/16 layer of hardwood on top. This stuff is relatively easy to install, and slightly cheaper than hardwood. This is the product we were originally looking at. Engineered wood typically comes in random lengths.
Laminate
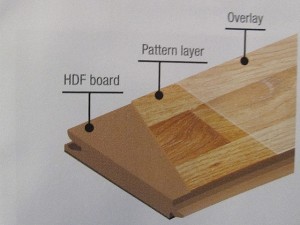
Laminate is essentially the same as Engineered, except instead of glued hardwood top layer, there is a printed surface covered in melamine. This means that a good quality laminate can be more durable than any natural wood product. Laminates that have a melamine bottom layer are also less susceptible to moisture, which makes them perfect for a basement. Furthermore, they tend to be significantly cheaper than both engineered wood and hardwood — Which is a major consideration in a basement, where there is the remote, but real, possibility of flooding resulting in a complete replacement of the flooring.
diy.stackexchange.com user Shirlock Homes makes a case against laminate here. There is a lot of merit to what he says. Laminate cannot be re-finished, and cheap laminate tends to wear our quickly, leaving you with bare HDF. Notwithstanding his expert advice, I do believe it is the correct, economical choice for a basement. Just make sure the Skil-Saw blade has stopped spinning before you put it down.
Laminates come rated AC-1 to AC-5, with 5 being the highest quality.
| Rating | Usage | |
| AC-1 | Bedrooms | |
| AC-2 | Living/Dining Rooms, Kid’s Rooms | |
| AC-3 | Hallway, Living Room, Office (rolling chairs!) | |
| AC-4 | Office, Cafe, low-traffic retail | |
| AC-5 | High traffic public areas – Retail, Banks, large offices |
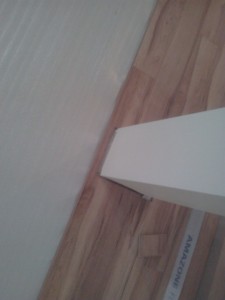
The product we ended up purchasing was AMAZONE Canadian Maple, by KRONOTEX. This is an AC-4 rated product, which means it should be more than sufficient for our basement. This product comes in fixed lengths.
Preparation
Now that we’ve selected our product, and loaded it into the job site it’s time get the prep work done.
- Ensure the floor is level, and flat. If it isn’t, you have to decide whether you want to grind down any lumps, level the floor with Self Leveling Compound, or live with some imperfection. Our floor had some variation, and we probably should have leveled it, but the cost was prohibitive. We decided to accept the imperfection.
- Remove baseboards, and undercut door trim. (Not required in this installation, as it hadn’t been installed).
- Clean the floor – This is critical. You don’t want any lumps of mud or any organic material on the concrete – this is food for mold!
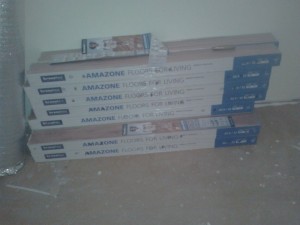
- Stack your material on the wall you are going to finish LAST. Leave it there for a few days to acclimatize to the moisture level of your room.
- Lay the underlay. Some say that the underlay should run perpendicular to the flooring. However, this means that you have to do all the underlay in one go, and keep it clean while you work (an impossible task!). Since it comes in 3′ widths, I prefer to run it the length of the room, lay the flooring on top, and lay the next section when I get near the edge.
The Installation
Tools
- Mitre Saw -for cutting boards to length
- Table Saw – for ripping your final boards to the appropriate width.
- 4 x diy.stackexchange.com Carpenter’s Pencils. You’ll need one at each saw, one behind your ear, and one left on the floor near the end of the run. Beware of inferior pencils. Only the official diy pencil will work.
- 2 x Measuring tape – one in the work area, and one by the table saw.
- Undercut saw – for cutting under door trim (if necessary)
- Broom and Dustpan
- Shop Vac
- Jigsaw
Since the end of each run will require a cut, I prefer to chop my boards in the work space. This necessitates lots of cleaning and vacuuming, but saves many trips up and down the stairs. The table saw can be set up in any convenient location out of the work area, such as a nearby garage.
STOP! There’s one last bit of thinking!
One thing we need to avoid is a skinny little space left over after our final run. Since my boards were nominally 3 inches wide, I need to know how much space will be left over for my final course. Ideally, I’d love it if the final board just clicked into place leaving me a 1/4 inch of space to be covered by the skirting. THIS WILL NOT HAPPEN! The reality is that you need to rip (length cut) the final course to make it fit. We could just blindly plunge ahead and deal with that issue at the end. But, we could end up with a 3/4″ space, which will just look awful. We need to estimate this gap before we begin.
- Measure the room width as accurately as possible. You want to find a maximum and minimum width, to the 16th of an inch. See http://diy.blogoverflow.com/2011/12/secrets-of-the-tape-measure/, BMitch’s excellent post on measuring. Subtract 1/2 an inch (you need 1/4 inch gap on either side)(I ended up with 15 ft, 2 12/16 inches)
- Snap 3 or 4 boards together, and measure the width to the nearest 16th of an inch. Divide by 3 (or 4) to get the board width (3 1/16).
- Convert everything to 16ths of an inch. Room =(15 x12 + 2) x 16 + 12 = 2924 16ths. Board = 3×16 + 1 = 49 16ths.
- Divide the Room width by the board width 2924/49 = 59.67346939 (keep all significant figures)
- Subtract the integer part, and multiply by the board width (.67346939 x 49 = 33 16ths) This is more than half a board, so I’m good.
- In the event that you end up with less than a half board (lets say 15 16ths) the solution is to rip 1 inch off the tongue side of the starting boards, so that you’ll end up with an approximately 2 inch board at either side of the job.
Before we get started, lets define some terminology. Unlike hardwood, you lead with the groove, and snap the tongue of the next board into it. This picture explains what I mean: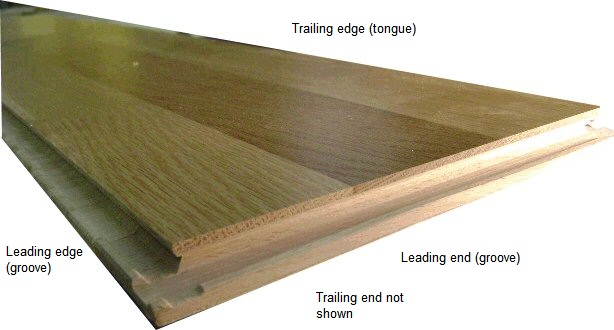
Let’s go!
Take a piece of flooring (ripped if necessary), and lay it in a corner, over your underlay, parallel to the longest wall. Remember to leave a 1/4 gap around the walls. The trailing edge, and the trailing end go up against the walls. It will move, so don’t worry.
Continue down the wall, butting the next board to the one before, and the trailing edge should click into the leading edge of the previous board. This is going to move, so again don’t worry.
When you get to the end, your piece of wood will be too long. (If you have random lengths, pick one that is significantly longer), it’s time to make our first chop.
Interlude: Cutting Boards to Length
We need to cut a board to fit the remaining space AND leave a quarter inch gap. We could mess around with measuring and calculating, but I’ve figured out a better way.
- Lay the board upside down trailing edge (the edge you want to keep!) butted tight to the wall over the last board you installed.:
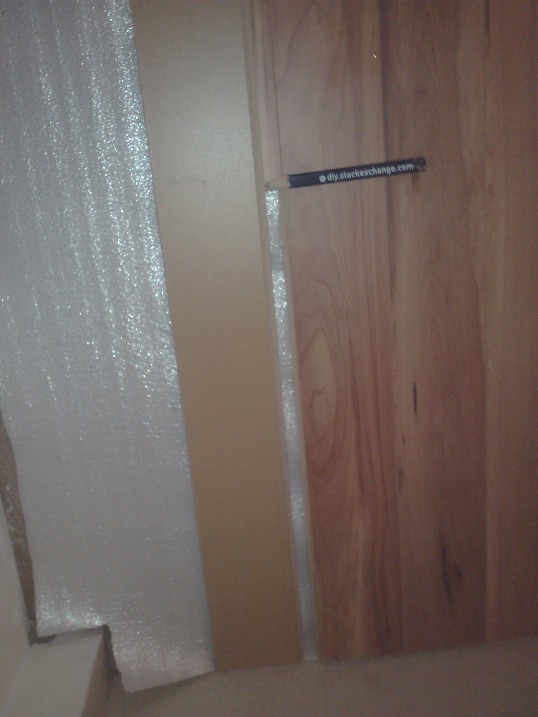
- Using your diy.stackexchange.com carpenter’s pencil (as seen in the image above!), mark the tongue exactly even with the previous board. (This gives us the full length – we still need to remove 1/4 inch)
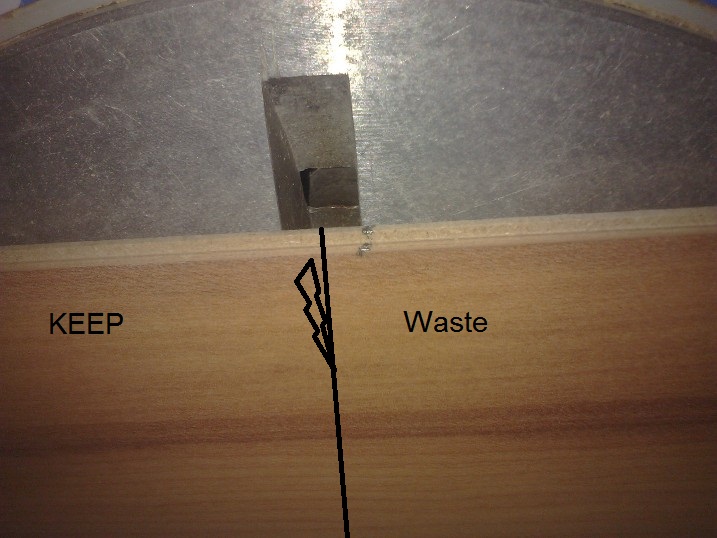
- Lay the mark on the board right on the edge of the slot of your mitre saw and cut. This should be close enough to 1/4 short of what we marked. As long as the skirting/quarter round covers the gap, we’re good.)
Carrying on…
Slip the piece marked KEEP into the end of the row. The piece marked waste, if really short can be thrown out. But! hopefully it’s pretty long, and we can use it to start the next row. If you have random lengths, pick your end piece to leave enough for the next row.
The next row is probably the most difficult. You need to slip the trailing edge of the current row into the leading edge of the previous while making sure the butt joins of the first row are perfectly aligned. If the board doesn’t slip in easily and click into place, your butt joins are misaligned OR there’s crud in the groove. I find that the corner of the trailing edge and end grooves often gets a bit munged up. It’s easy enough to remove any imperfections with your fingers, or a utility knife.
Carry on with the second row, making an end cut when necessary.
Now that everything is locked together, the third row is much easier. Notice however, that the floor is still moving. Don’t worry about it until you have 4 or 5 rows down. Then the floor should be heavy enough to hold itself in place. Just remember to check the 1/4 inch gap against the starting wall every once and a while, and slide the laid flooring around to correct it. Once you’ve got halfway, move your material from the finishing wall to a convenient location on the completed portion of the floor. This will help hold it down, and get the material out of your way.
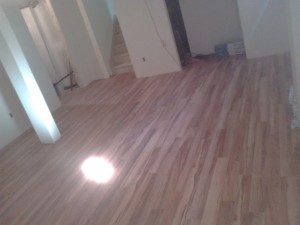
Hopefully, you can continue on until the last course, laying a new row of underlay as required, rip a few boards at the end, and slip out for a beer. (Not Bloody Likely!) What’s likely to happen is you run into something like this:
or into a closet door, a run-out to a stairwell or some other obstacle. You’re going to have to cut.
Dealing with obstructions
You have two choices here. You can measure the distance, and cut the first board of the row so that your seam ends up in the middle of the obstruction, and make a join like this:
or you can cut out the middle of the board with the jigsaw. The trick with the second option is getting the width of the cut. Here’s how you do it:
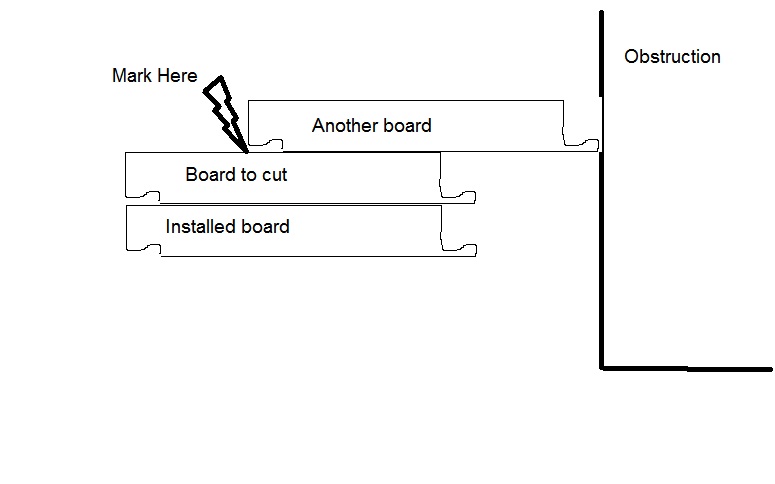
If you do it right, your end result should look like:
Note, that this measuring technique is extremely useful for measuring the rips for your final row. Remember your 1/4 inch gap!
Another obstruction you might run into is a closet. This takes a bit of doing, but it isn’t that hard.
The problem here is that I was working left to right, and had to then work right to left in the closet, which is difficult as the material is designed to be worked in one direction. However, it is possible to clip in a piece from the rear.
When I got to the opening of the door, I cut the board out in the middle as above, and ran it to the back of the closet. I then removed this board, and put it aside for later.
I laid the floor in the closet just as if I was starting fresh, making the first board a whole board. until I got past the opening. I then removed the FIRST board, and laid the piece that I had cut out, connecting it to my closet boards. Now I’ve got something I can measure! Rip the first piece, and try to slip it in from the back. Alternatively, I could have undone the last few feet of work in the closet, and relaid it fresh, starting with the ripped piece.
The Last Row
If you’re still with me, you can probably figure it out for your self. We’ve got a gap at the end, which is too narrow for a course of boards. In an ideal world, we should be able to measure, set up our saw and rip 4 or five boards at once. This might work for you, if you can verify that the gap is a consistent width the entire length. It probably isn’t. Remember that nothing in your house is parallel or perpendicular to anything else in your house. There is error in everything constructed. You’ve got to measure each board by itself. Use the stacking technique in the dealing with obstructions section to figure out the widths.
Once you’ve ripped and installed the boards, you can reinstall the skirting boards and quarter round, or decide to leave that for another day.
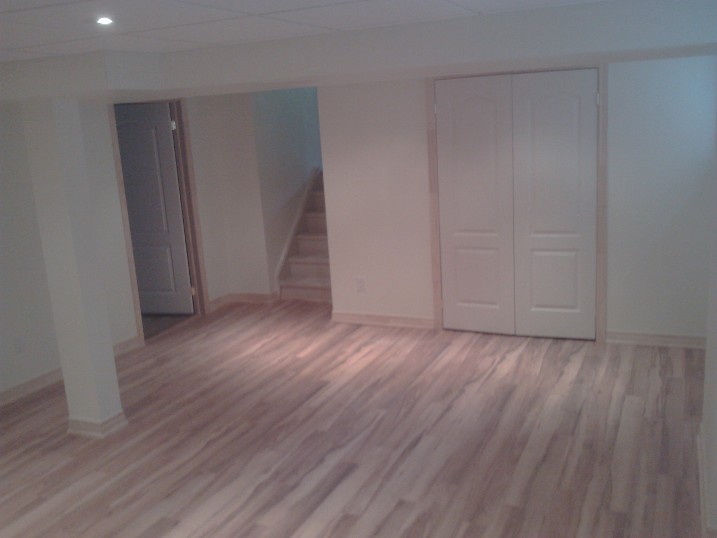
Hopefully your final product will look as good as this:
Total Time: 7 hours for 330 sq. ft.
Summary:
- Do your prep work. In particular, measure accurately to avoid a 1 inch rip at the end.
- Keep your work area clean. Dust and bits of cardboard packaging in the grooves make the job tough.
- Slow and steady wins the race. You can’t rush this.
- Deal with obstructions properly. Measure twice cut once.
- This really is a one person job. Helpers get in the way. Although an extra hand on the broom or clearing packaging is appreciated if someone pops in for a few minutes.
- This job is hell on the knees and back. You will need a liberal application of “muscle relaxants” after completion. Don’t make any plans for the evening.
- Only @aarthi approved diy.stackexchange.com Carpenters Pencils will do. To get some, write a blog post on a project, or a tool review, and @aarthi will send you some! Talk to @tester101 about your blog account.


