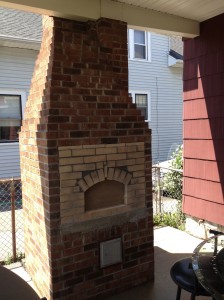
When we purchased our house about 3 years ago, a nice feature was a lovely brick grill area on the back patio. Inside of it was a natural gas grill insert. Unannounced to us, this grill was severely weathered; rusted through and generally not very appealing to look at.
I disconnected the natural gas line, scraped the grill and thought for a few years on what to do with the space. Do I tear down the brick and turn this covered patio into a room? Turn the brick enclosure into an oven? We both had our own ideas – the wife said do nothing; I wanted to gut it and make it an office.
We have increasingly been making our own pizzas and breads and the gas oven in the house just isn’t cutting it anymore. We use a pizza stone and already broke one because we tried cooking at too high of a temperature.
“Let’s build a pizza oven!”, I proclaimed. You can make bread in there as well and maybe we’ll cook some vegetables to go on the pizza.
3 days and $600 (ish) later, I’m finished, and this is my story.
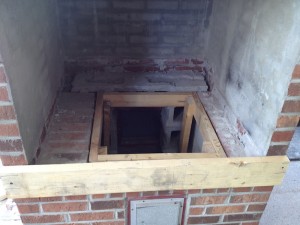
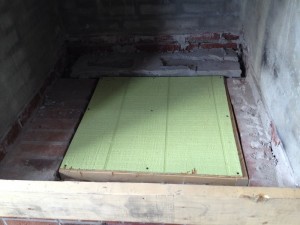
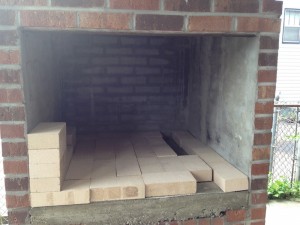
After removing the grill, I had this big, gaping 36inch x 36inch hole. First, I built a frame from 2x4s, added a center support, and covered it with plywood. This would fill in the hole without spending a ton of money on cinder block or other brick material.
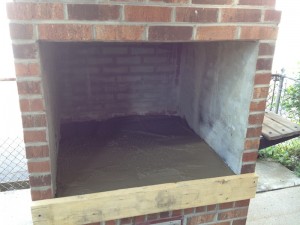
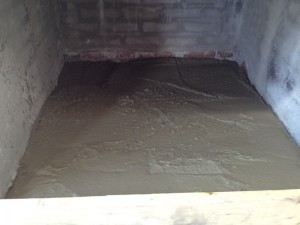
I cut and screwed in a 2×6 onto the front of the brick enclosure to act as a mold for the concrete base. To prevent cracking, I placed 8 24inch 1/2 inch rebar rods into the middle of the 3-4inch thick concrete base.
I mixed the concrete per the directions and let it set up and dry. While it was drying, we took a trip to the brick yard. We initially purchased 120 fire bricks, or, refractory bricks, 2 bags of Heat Stop 50 mortar, a trowel and a 2 foot level. I also needed a 4 inch masonry chisel and later I would purchase two 4 1/2 inch masonry cutoff wheels for my grinder (more on this later).
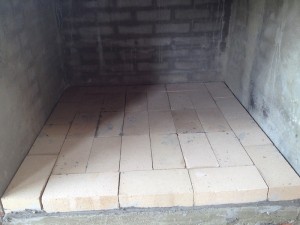
After 2 days of the concrete curing, I was ready to lay some brick. I watched numerous youtube videos on different methods and read websites from others that have built brick ovens.
One website said to use a 1/4 inch trowel and lay a base of mortar for the floor fire bricks to lay on. As I had no experience in doing this, I tried that, only to find out the mortar was drying too fast for me to work with it and my concrete base was not as level as I had liked it to be. I began to apply the mortar only to the bricks I was laying (as I would with tile) and level everything as I moved along. This worked well and soon I was done with the base.
Next were the walls. There are primarily 2 types of ovens you can build. The first is a Pompeii oven. This is a traditional dome oven, sometimes with a flu, sometimes without. I shied away from this type only in that it would require many cuts to build the dome and I wasn’t that experienced.
The 2nd common type is an arch style- this is just a simple arch from left to right with a straight brick wall in the back. This is easier to build as it requires less cuts, can be done in stages and is generally easier to construct. This is the option I went with.
I knew I had a limited amount of vertical space to work with as I was building this oven in an already enclosed space. I needed to consider how high I would make the walls, If I’d be able to get my hand inside to lay the top bricks of the arch and how tall the arch would be.
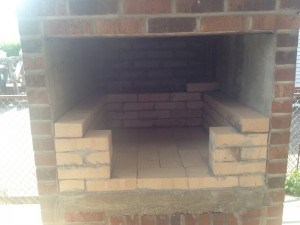
I decided to go with 4 rows of bricks for the oven side walls. This would leave me with roughly 16-18 inches for the oven arch.
**** You want to keep the oven as small as possible while still being functional. The bigger the oven is, the more energy required to heat and keep it heated.
On the front of the oven, I left the top brick out on each side as I knew I would do a 2nd arch for the opening of the oven. Again, the bigger the opening is, the more heat can escape. I had a pizza peel already in my kitchen, so I took a measurement of it. It measured 14 inches across the width. Using just 1 brick on each side of the front left me with an 18 inch opening. Perfect! Plenty of room to get the peel in and out with the pizza on it.
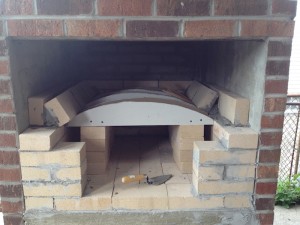
With the walls built, I needed to build a form to support the arch as it dried. This form can be made out of any rigid material and is just a temporary support until the arch dries. Having run out of plywood (and not particularly enjoying working with a circular saw) I opted to use scrap drywall. I was remodeling a bedroom this week anyway and had scrap left over.
I took the interior measurement between the side walls, and cut a piece of drywall to width.
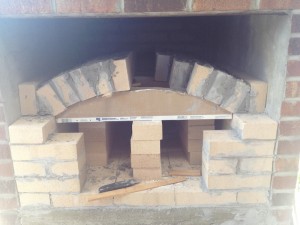
I used 11 bricks on the floor of the oven side to side, so I took 13 bricks and began laying them on the drywall in an arch pattern. I used a small piece of drywall to space the back of the bricks for the mortar gap and worked to make both sides of the arch consistent.
Once I was happy with the arch shape and having researched different arch types online, I traced the outline of the bricks onto the drywall and cut it out. I left a 1 inch gap at the bottom to fit in between the walls to give it left to right rigidity. This 1 inch gap, sitting on top of 4 stacked bricks made up the mortar gap in the wall and put the arch where it needed to begin at the top of the wall.
I traced this initial arch onto 5 other pieces of drywall. I then cut 4 inch blocks from 2x4s as spacers and screwed 2 arch supports on either side. This would give the templates a means of standing up right. I decided on 4 inches for the 2×4 because a fire brick is 9 inches long. 4 inches would allow a 2 piece template to span 2 bricks lengthwise (giving the dome more stability as it built it).
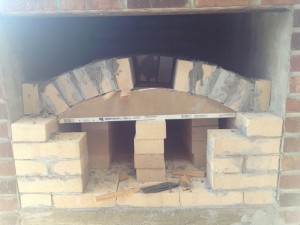
I placed the arch templates into the oven, propped up on 2 stacks of 4 bricks and spaced the arch supported front to back to cover the depth of the arch.
Once I was happy with placement, I began to dry fit some bricks for the arch to make sure everything would work out the next day. I knew the first brick of the arch would need to lean back against something. I decided to place a brick on its short end on top of the wall. This would leave me with half the space of a brick left; leaning the first arch brick against it put the brick at a 45 degree angle. Perfect!
I would fill in the void of the 45 degree angle with mortar. Some people that had built brick ovens online put 1 brick right after the other. This is not the correct way to do it. You want to stagger your joints on the arch just like you would on the walls. This of course, takes more time as you need to cut a few bricks in half (re: masonry cut off wheel) but ultimately leads to a stronger arch.
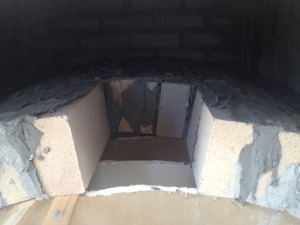
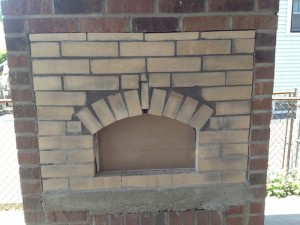
So, the arch is done. I left the front 2 bricks of the center of the arch out to provide ventilation into the existing chimney stack. 2 keystone bricks were cut to match the angle of the arch and maintain the structural integrity of the arch. I was left with an opening of roughly 1 half brick which will eventually have a steel door installed into it to allow the oven to retain more heat.
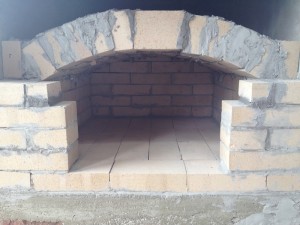
The main arch was allowed to dry over night and I began work on the front fascia. Another form was made from drywall; this time using 7 half bricks cut with the grinder. The rest of the front fascia was built as a normal wall would be. When I could I tried cutting bricks to fit gaps around the arch. 2 gaps exist on either side of the arch which were filled in with mortar. I’m not sure a pro could cut bricks to fit those gaps but I think it gives the oven a bit of character.
The very top, last row was a tight fit. To small for a full brick by all means; to small for a split brick as a lintel supports the rest of the original structure. We had originally thought to take scrap broken pieces and do a mosaic but the wife came up with the idea to cut 1/2 inch strips from the splits and mortar them in place. This was a fantastic idea and was how we finished the build.
Snags and things to keep in mind along the way:
- Had this not been built into a pre-existing space, I believe it would have been much easier to complete. I could have worked on any part of it from any direction. As it was, I could only work on it from the front, having to contort my body to reach some spots of the arches along the way.
- I bought a brand new 4 in brick chisel for $10 at Home Depot. Great tool, but what saved the day in the end was the $3 masonry cut off wheel for the grinder. Mark a line on the brick, cut into the brick with the grinder as deep as I could. Put the chisel in the cut and tap twice with a hammer. Perfect, clean cut. This was done on all of the front arch pieces for a nice clean cut.
- Don’t even think of trying to cut a brick length wise; go buy some splits from the brick yard and use them. I shattered 3 bricks thinking I could slice down the middle with the chisel.
- At 8am when I started, it was about 70 degrees outside and my mortar just slightly loose. At 10am it was 82 degree’s out and my mortar was getting firm and I had to add water. No big deal, but realize the mortar is not on your side. It will wait for no one and will dry without notification. Keep your tools clean; clean tools work better and last longer.
- Take your brick count and add .5 to it. Double your mortar amount also. The Heat Stop 50 bag said I should be able to lay 100 bricks with one 50lb bag. Yeah, not a chance.
- If you’re trying to split a brick with a hammer and chisel, make sure the brick is on firm, flat ground. Once or twice I split the brick with a small pebble under it and the brick split in the wrong place. They can be that sensitive.
- Mix only the mortar you need. Do not mix the entire 50lb bag. I made about 4 batches per bag. I chose to mix the batches by hand with a gardening trowel instead of a drill and paddle mixer so I could control the water amount and consistency better. On the walls I wanted the mortar a little looser so I could get my joints as close to 1/16th as possible like the instructions said. On the arches, I wanted it a little firmer so it would hold the brick better.
- Double check your forms. I placed 1 backwards and my arch was a touch off. I had to shim those bricks with wooden shims. No big deal and I had the shims on hand, but a pain in the butt that could have been avoided.
- Dry fit everything that you can. It’ll give you a nice visual on how things will fit. In my case where my space was confined, it let me see beforehand if something had to be cut, how thick my mortar lines had to be to account for any unlevelness, etc…
- Put the level on everything. 1 brick being off by 1/16th isn’t a big deal. 10 of them is. I used a 1 foot level and a 2 foot level side by side on all bricks where I could.
- Take your time and do not rush.
- A brick is not terribly heavy. Picking up bricks one at a time, holding it with one hand while applying mortar and then trying to put the brick into a confined space and a brick weights a ton. Take your time, drink lots of water (or Gatorade and coffee) if its hot out and you’ll be fine.
- Wear gloves if you value your skin.
- Keep your eyes on the chisel. I hit my hand thumb once (fortunately) with the hammer. At the force you need to hit the chisel with the hammer to crack a brick, It’s not a pleasant experience.
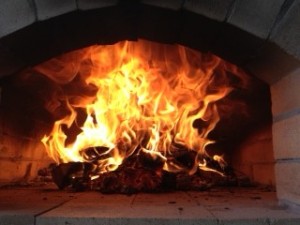
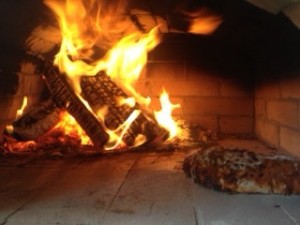
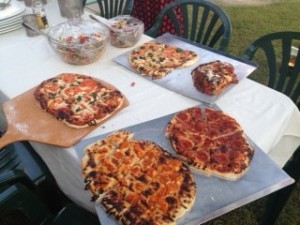
All in all, 150 full bricks were used. 5 split bricks, 3.5 bags of mortar and 5 bags of concrete were used. I plan to do a test burn the day before the 4th of July and if everything goes well and nothing comes crashing down on me, to make some pizza on the 4th of July. Articles I have read online say the oven should get up to 700-900 degrees and can spit out a thin crust / New York style pizza in just under 2 minutes. We’ll just have to capture this on video.
Filed under Projects



Fantastic blog article! well done. Too bad I do not have that kind of space outside any more, can we come round yours to bake a few? 🙂
This is a really great blog post, and a great project too.
the steps you used gave me a great help in making one for myself at home!!!!!thanks
legend!